In this blog post, we will explore the deployment options for the Windows App, which securely connects to Azure Virtual Desktop, Windows 365, Microsoft Dev Box, Remote Desktop Services, and Remote PCs.
The Windows App can be used on various platforms and form factors, including desktops, laptops, tablets, and smartphones. Additionally, it is accessible through a web browser. When utilizing a web browser on a desktop or laptop, you can establish connections without downloading and installing any software.
Windows App is available on Windows, macOS, iOS and iPadOS, and web browsers. Windows App allows you to connect to your Windows devices hosted on the below platforms:
- Azure Virtual Desktop
- Windows 365
- Microsoft Dev Box
- Remote Desktop Services
- Remote PC
Please note that this app is currently in preview mode. It should be deployed on test devices to assess its features and prepare for production deployment when the app becomes generally available (GA).
You can connect to Remote Desktop Services and a Remote PC using “Windows App” installed on macOS or iOS/iPadOS but Microsoft doesn’t support these connections.
Note
Table of Contents
Features of Windows App
The Windows App is designed to access various services and remote PCs from a single place. Additionally, you can easily switch between multiple accounts while using this app. Let’s explore some of its features.
- Multiple monitor support.
- Custom display resolutions.
- Dynamic display resolutions and scaling.
- Device redirection includes webcams, audio, storage devices, and printers.
- Microsoft Teams optimizations.
- Switching between multiple accounts.
- Pin favorites remote access connections.
To know more about Windows App, please refer to the Microsoft Documentation link: What is Windows App?
Download Windows App
The Windows App can be installed on Windows, macOS, iOS, and iPadOS devices. Use the links below to download and install the app on each platform.
| Platform | Windows App Download Link |
|---|---|
| Windows | Download Windows App from Microsoft Store |
| macOS | Download Windows App from TestFlight |
| iOS/iPad | Download Windows App from TestFlight |
| Web Browser | https://windows.cloud.microsoft/ |
However, for the mass deployment of the Windows App on organization devices managed by Intune, the easiest option is to use the Microsoft Store App (new) method. Let’s review the steps:
Install Windows App using Intune
To Install Windows App using Intune, follow the below steps:
- Sign in to the Intune admin center.
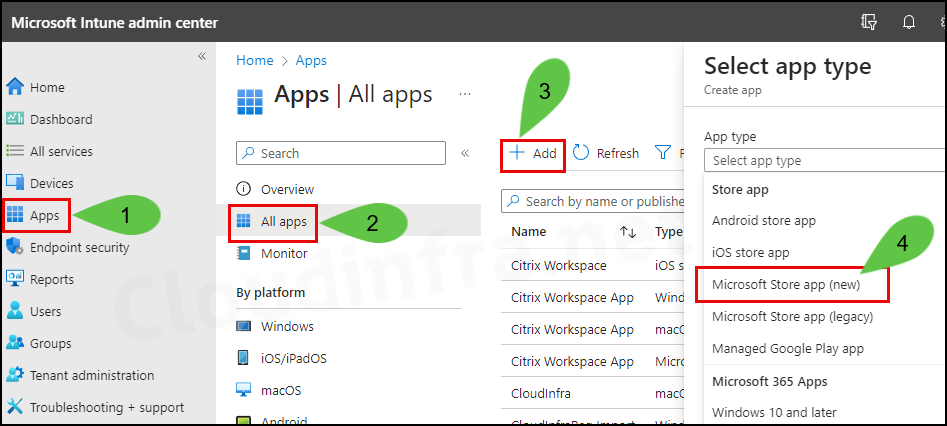
- Go to Apps > All apps > Click on + Add, select the App type as Microsoft Store app (new), and Click the Select button to proceed.
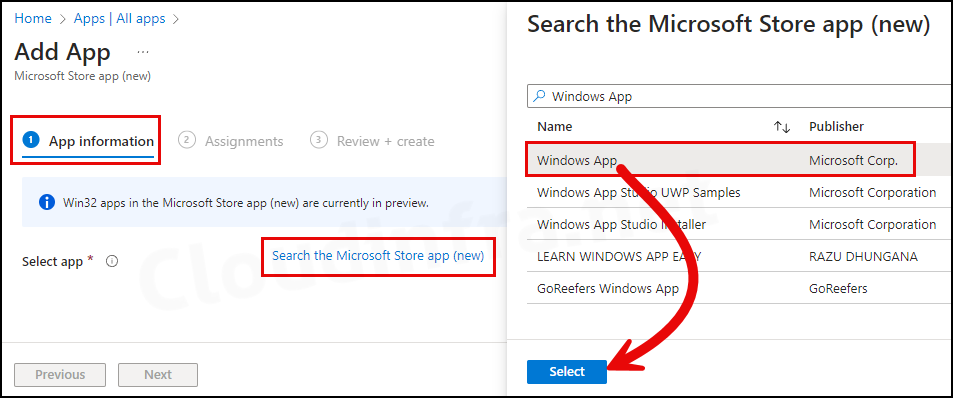
- Click the Search the Microsoft Store app (new) link and search for the Windows App. You will find multiple options to choose from. Select the one named Windows App and click the Select button to proceed.
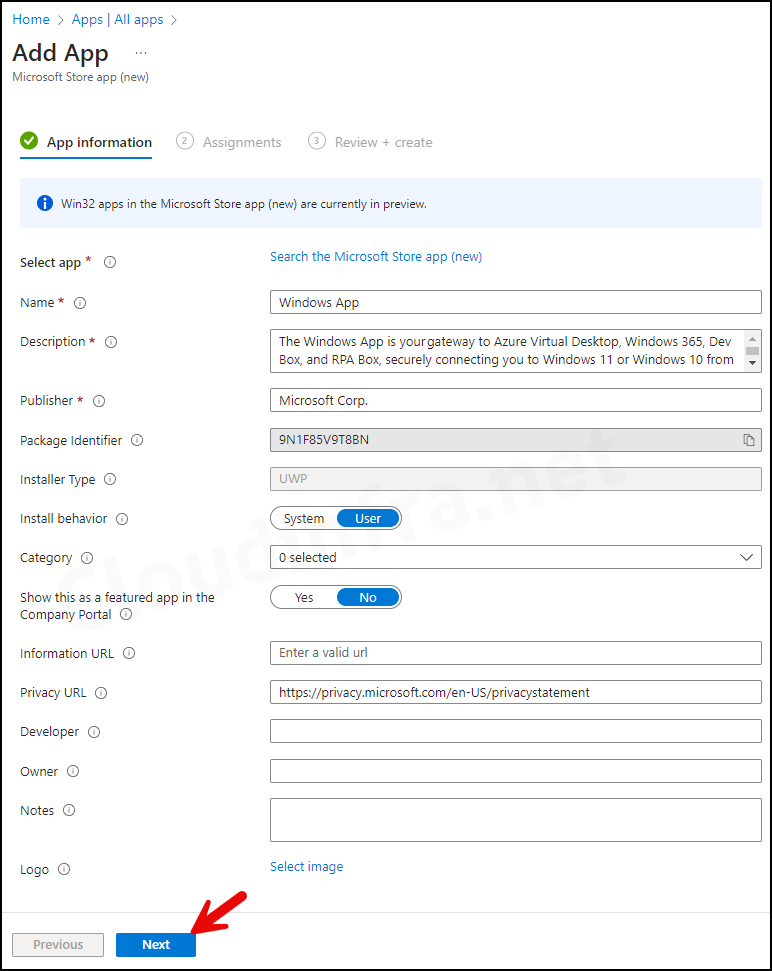
App Information Tab
Most of the information will be fetched automatically from this UWP App. Please note that only Name, Description, and Publisher Information are mandatory; the rest is optional. You can leave it as is or add/change some of the information. For example:
- Install behavior – We will leave this as User to deploy it in the User Context. However, if you want to deploy this app in a System Context, you can change the option to System. Changing it to System will install the app for all users on the target devices.
- Logo – You can download the Windows App logo and upload it so that the app displays on the Company Portal with the logo you provided here.
Assignments Tab
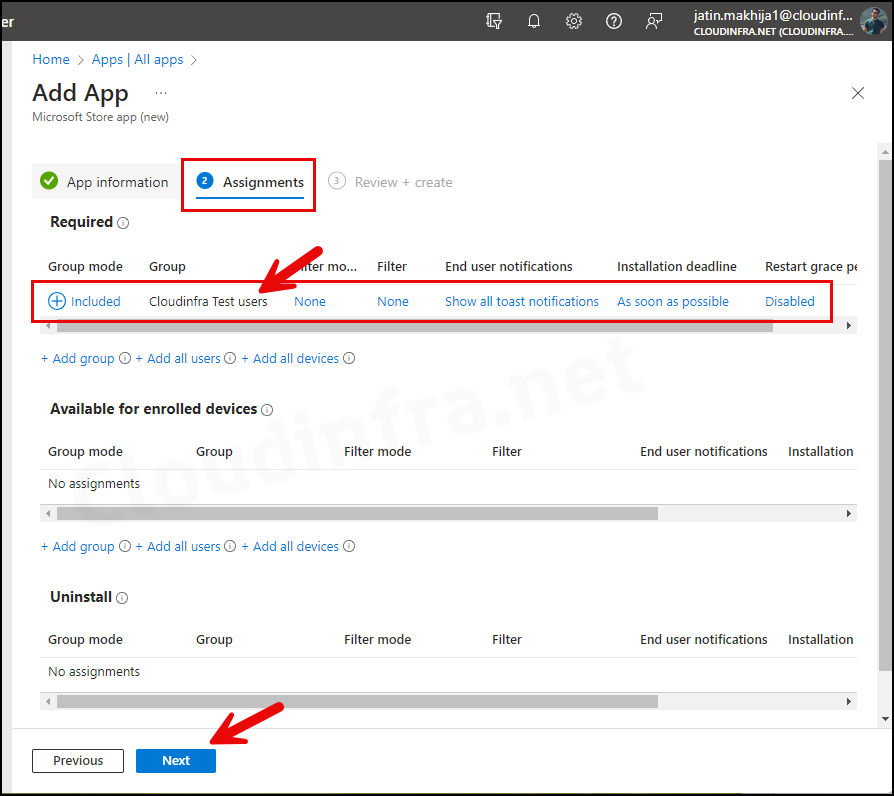
In the Assignments tab, you can assign this app to an Entra security group that includes your organization’s users or devices. Begin with a Test Group, and once the testing is successful, you can return to the App Assignments section and add a Production Entra security group containing business users or devices.
Alternatively, you can click on the + Add all users or + Add all devices link to Add all users or Add all devices registered in Entra ID.
We have added the group under the Required section as we want this app to be installed automatically and as soon as possible. There are other assignment options available; please find them below:
- Required: Required apps are installed automatically on enrolled devices.
- Available for enrolled devices: Apps are displayed in the Company Portal app and website for users to install optionally.
- Uninstall: Apps with this assignment are uninstalled from managed devices in the selected groups if Intune has previously installed the application onto the device via an Available for enrolled devices or Required assignment on the same deployment.
Review + create
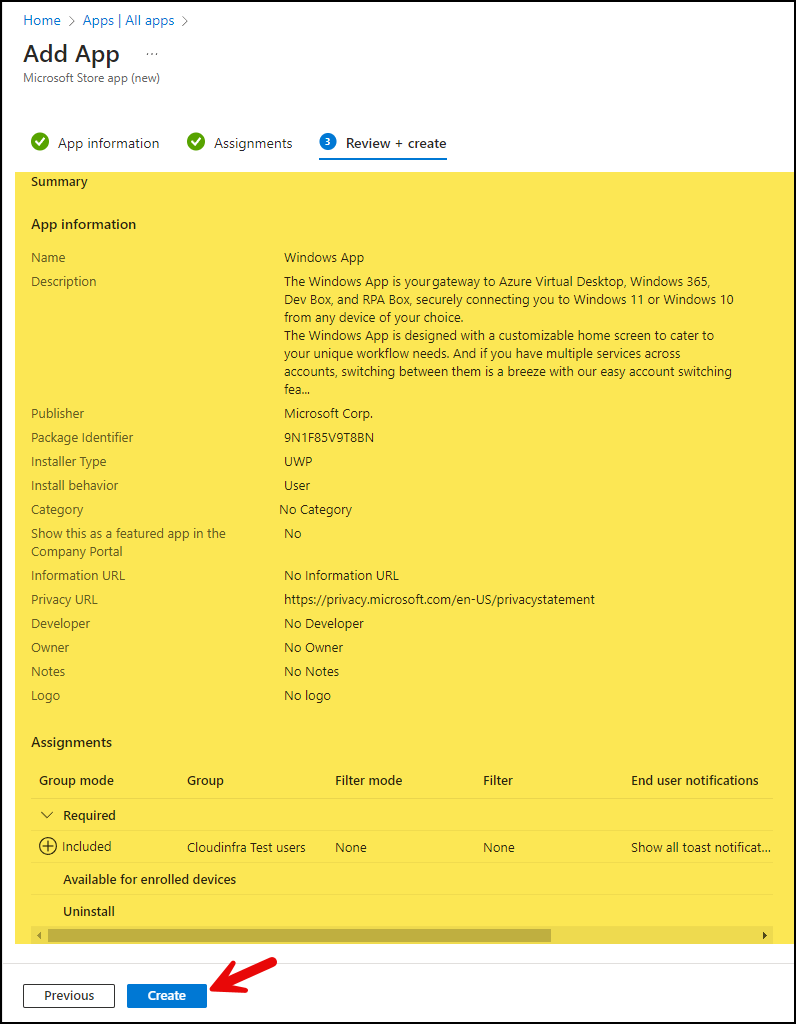
Review the deployment summary and click on Create to create the deployment.
Sync Intune Policies
The device check-in process might not begin immediately. If you’re testing this policy on a test device, you can manually kickstart Intune sync from the device itself or remotely through the Intune admin center.
Alternatively, you can use PowerShell to force the Intune sync on Windows devices. Restarting the device is another way to trigger the Intune device check-in process.
Monitoring Deployment Progress
To monitor the deployment progress of a Device configuration profile, follow the below steps:
- Sign in to the Intune admin center.
- Click on Devices and then select Apps > All apps.
- Click on the app deployment and check the Overview page for the app deployment status.
End-user Experience
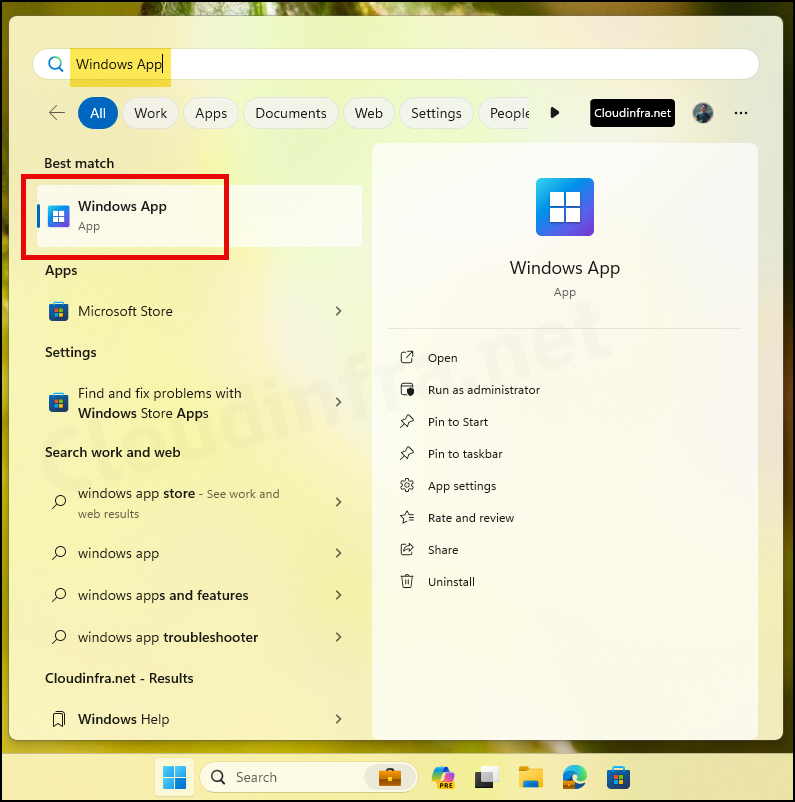
After the deployment has been completed successfully, you can search for the Microsoft Windows App in the Start Menu and launch to start using the app.
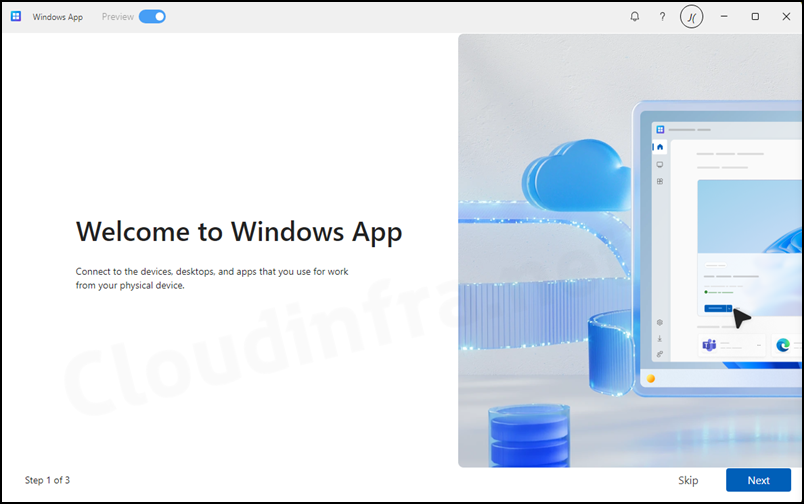
- After launching the app, you will see the Welcome to Windows App page. Click Next to proceed with configuring and adding remote connections.
