An Entra security group lets you organize users and devices, making it easy to apply policies and deploy apps to those devices. You can manually add members to the group or use dynamic rules for automation.
Background
My scenario for using bulk import devices is to re-group Entra-joined devices so that I can apply policies on those devices in batches. I first exported a list of all devices from Entra ID and now want to separate the list of devices into 5 different Entra security groups.
There are three main ways to add members to an Entra security group. This blog post will demonstrate the bulk operations method for importing devices.
- Manually importing devices into the Entra security group.
- Using Powershell Script.
- Using Bulk Operations.
To perform a bulk device import, we’ll need the ObjectID of the devices and a CSV file template, which can be downloaded from Intune or Entra ID. Let’s go through the steps:
Table of Contents
Step 1 – Download CSV Template
You can get this CSV template from Entra ID or the Intune Admin Center. You can use any of the below options to download the CSV template file, which will be used for the import process.
Option 1 – Download a CSV Template from the Intune admin center
- Sign in to the Intune admin center.
- Go to Groups > Click on the group where you want to add devices.
- Click on Members on the left-hand side
- Click on drop-down Bulk operations > Import Members.
- A Bulk Import group pane will open on the right-hand side.
- Click on the Download button to download.
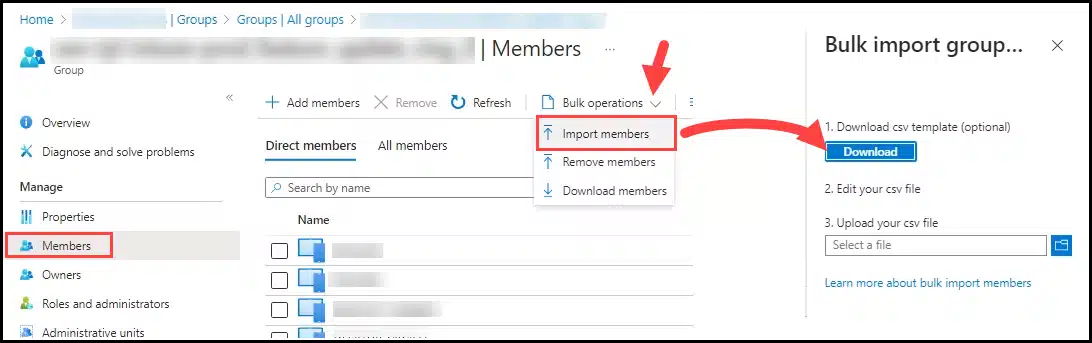
Option 2 – Download a CSV Template from the Entra admin center
- Sign in to the Entra admin center.
- Click on Groups > All groups.
- Click on the group in which you want to add devices.
- Click on Members on the left-hand side
- Click on drop-down Bulk operations > Import Members.
- A Bulk Import group pane will open on the right-hand side.
- Click on the Download button to download.
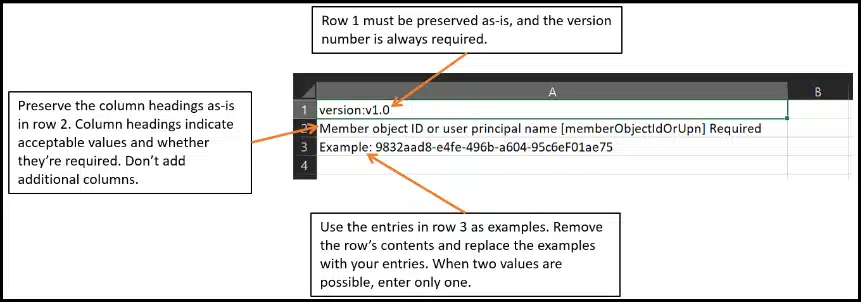
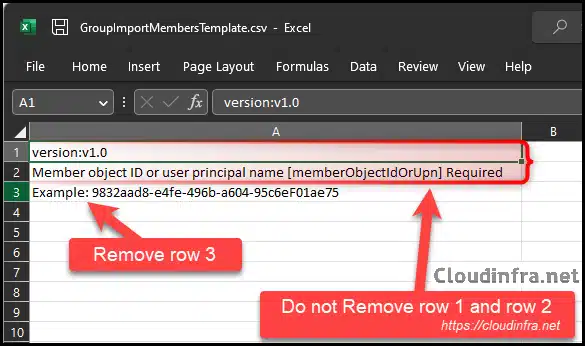
- Open the CSV template file and ensure that the version number is retained. You can remove the Example row 3. We will explore this further and learn how to find the Object ID and add it to the file with the correct formatting in the next steps.
Step 2 – Gather Device ObjectIDs
You can get Device Object IDs by downloading a Device Inventory report from the Entra admin center. Let’s check the steps:
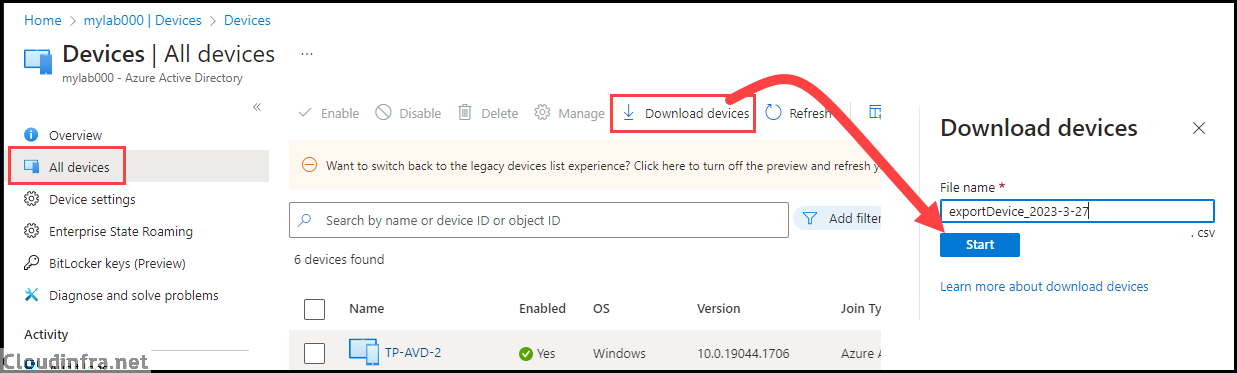
- Sign in to the Entra admin center > Devices > All devices.
- Click on Download Devices to download a report of all devices.
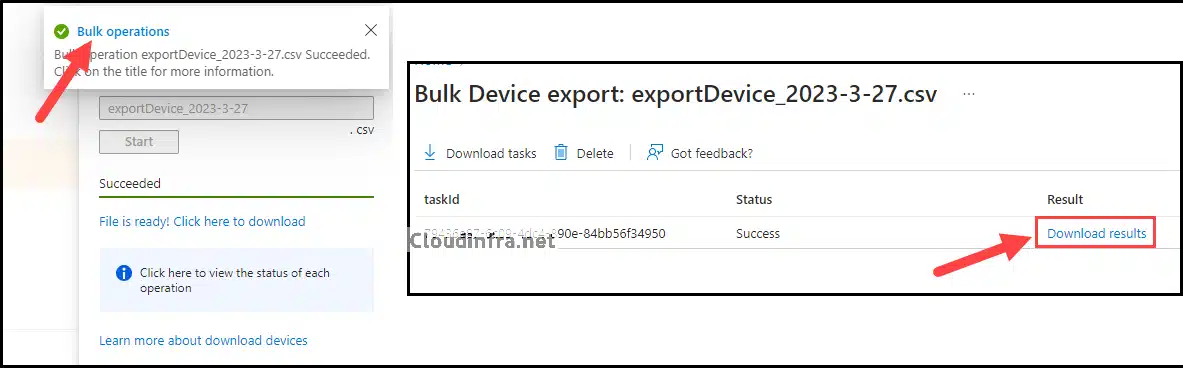
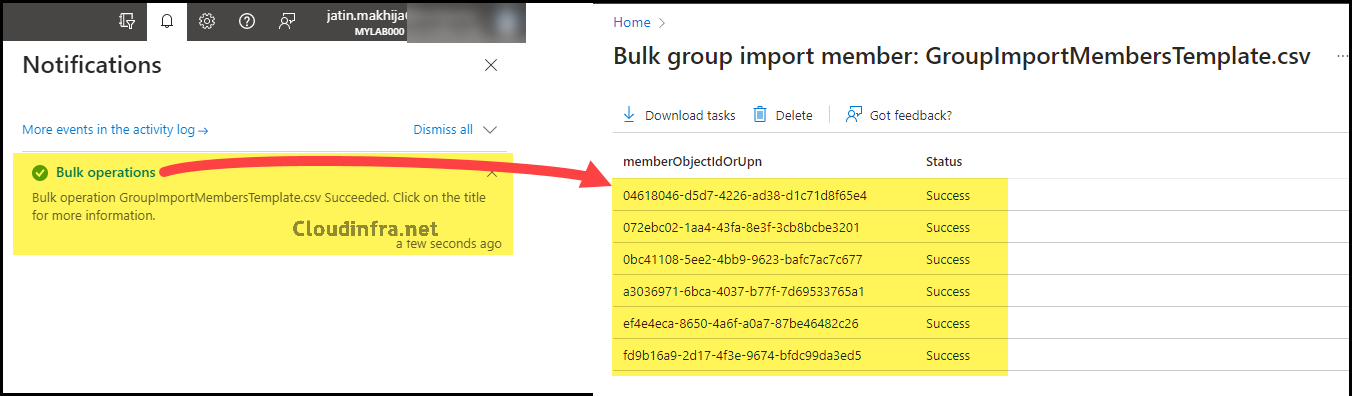
- Once the export process is finished, you’ll receive a notification confirming the successful completion of the operation. To access the Bulk operations, click on the link in the notification. Alternatively, if you missed the notification, you can find it in the Bell icon or notification icon at the top. Click on the Bulk Operations link from there.
- After clicking on Bulk operations, you’ll see that the Bulk device export job has been completed, and the results are available for download. Click on the Download result link to retrieve a device inventory report in CSV format.
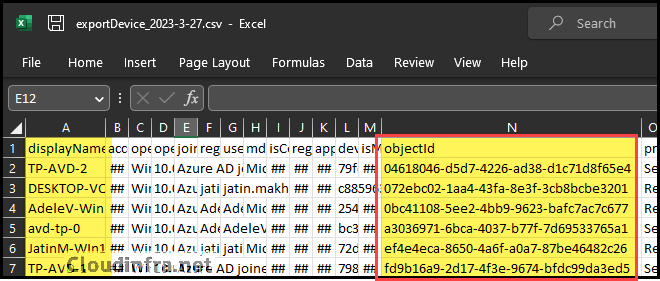
- When you open the CSV file, you’ll discover information about the devices in your organization. Among the columns, you’ll find the ObjectID. This information is needed for the CSV template file you downloaded earlier.
Step 3 – Add ObjectIDs to CSV Template
- We’ll insert the Object IDs into the CSV Template, ensuring that rows 1 and 2 remain intact. You can remove row 3 as it’s simply an example to illustrate what the Object ID value should look like.
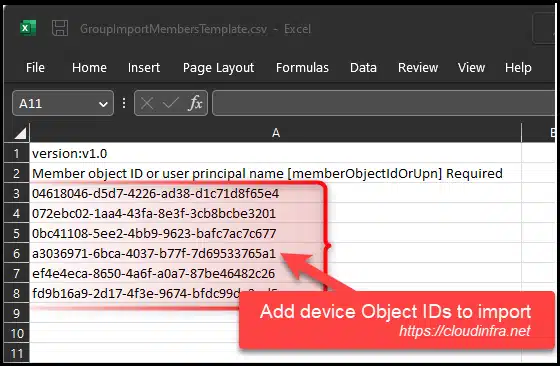
- Let’s proceed by including the Object IDs of the devices we intend to import in the CSV template.
Step 4 – Bulk Import devices into an Entra Security Group
We’ve completed the preparation of our CSV template file and populated it with the Object IDs of the devices we want to import into the Entra security group Production Ring 1.
You can initiate the bulk import process from the Entra or Intune admin center. The steps for the bulk operation process will remain the same. In our case, we will utilize the Intune admin center.
- Sign in to the Intune admin center.
- Go to Groups > Click on the group where you want to add devices.
- Click on Members on the left-hand side
- Click on drop-down Bulk operations > Import Members.
- A Bulk Import group pane will open on the right-hand side.
- Upload the CSV file by clicking on the browse folder button.
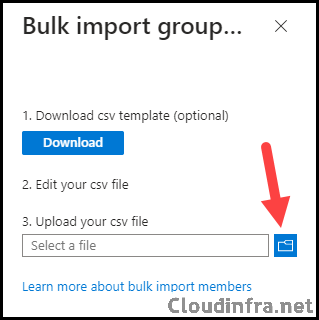
- Browse the CSV template file we prepared and click the Submit button.
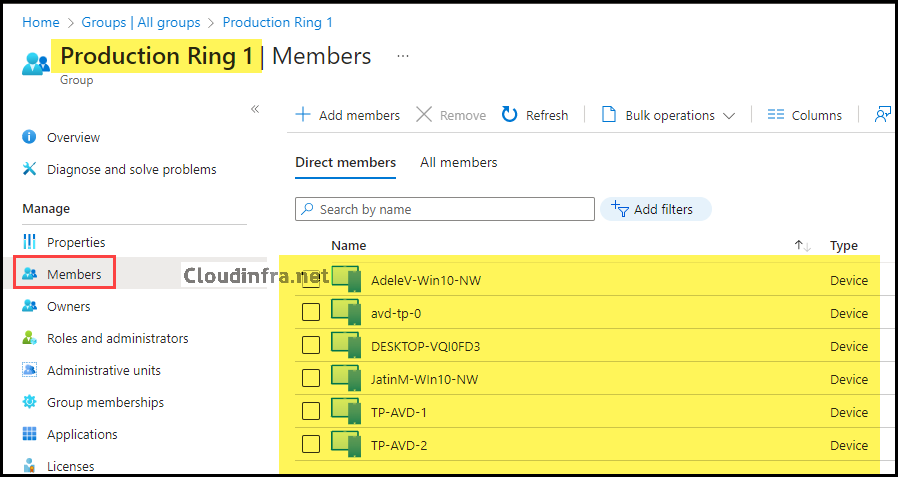
- As you can see from the screenshot below, Devices from the CSV template are imported into the Production Ring 1 group successfully.
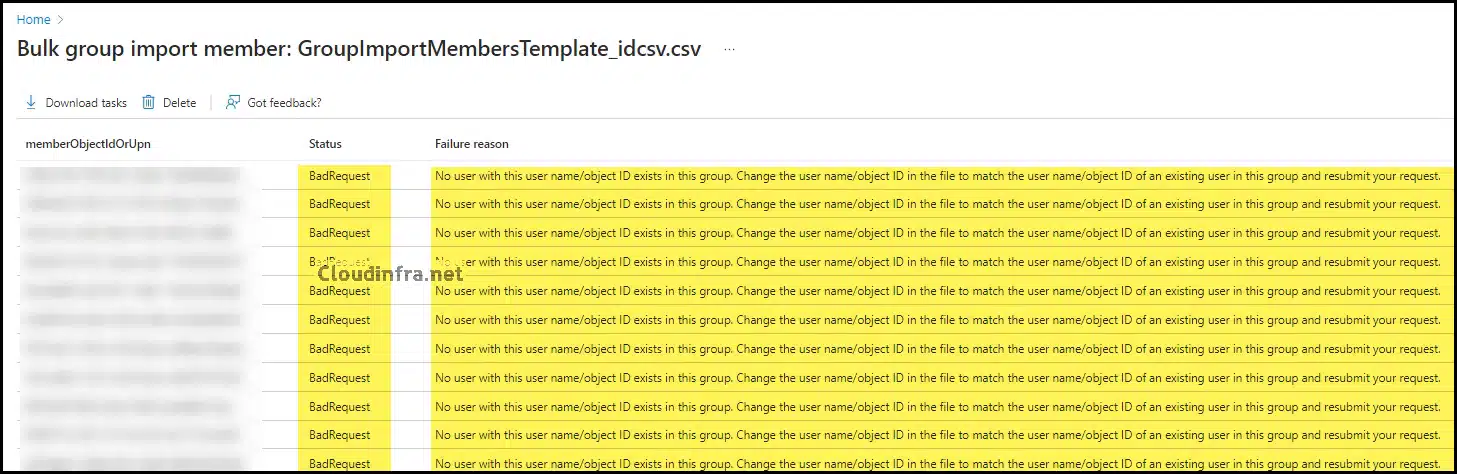
Troubleshooting – Bad Request Error
If you encounter an error, such as a Bad Request error, while importing devices via the Bulk operation method, you may see the following error message: No user with this user name/object ID exists in this group. Change the user name/object ID in the file to match the user name/object ID of an existing user in this group and resubmit your request.
I’ve encountered this issue a few times when importing devices into an Entra Security group using the Bulk operations method. It happened because I used the Device ID or Entra Device ID instead of the required Object ID in the CSV file. To avoid this error, use the ObjectID in the CSV file, as per the template’s requirements.
After populating the device Object IDs in the CSV file, you can upload the template and successfully import the devices into an Entra security group.
Conclusion
In this blog post, we have learnt the steps to Import devices into an Entra security group using the Bulk operations method. Once you have the CSV template file sorted, it’s a very easy process. Use Object IDs in the CSV file; otherwise, it will throw an error. There are other alternative ways to import devices into an Entra security group, like Powershell or Graph API, but that has not been explored in this blog post.