Windows Settings app includes a Gaming category that exposes features like Xbox Game Bar, captures (Game DVR), Game Mode, and Xbox networking. Many organizations prefer to hide these pages on corporate endpoints to reduce distractions and avoid end users enabling consumer gaming features. This can be done in Intune by either blocking the Gaming category using Settings catalog or OMA-URI (PageVisibilityList) or by using a device restrictions template.
If you want to just block Game Mode using Intune instead of hiding the Gaming category entirely, refer to the post Disable Game Mode on Windows Using Intune.
In this post, I will walk you through three ways to hide the Gaming category in the Windows Settings app. While the Device restrictions method is the quickest, it can also hide Settings > System > Notifications on Windows 11 because the policy adds ms-settings:quietmomentsgame into the Settings page visibility list. For enterprise deployments, Settings catalog and OMA-URI are preferred because these methods precisely hide just the Gaming category without affecting Notifications.
- Settings catalog: Hide Gaming using the PageVisibilityList setting with centrally managed, granular control.
- OMA-URI (Custom): Hide specific Gaming pages via Policy CSP PageVisibilityList for maximum flexibility.
- Device restrictions: Block the Gaming category quickly, but may also hide notifications on Windows 11.
When you use device restrictions to block Gaming, it also blocks or hides Focus Assist on Windows 10 devices. Starting with Windows 11 version 22H2, Microsoft split and renamed this experience. Focus Assist effectively became Do not disturb (notification silencing) and Focus (focus sessions). On Windows 11 devices, this restriction affects the Do not disturb setting by hiding notifications entirely, as Do not disturb is managed under Notifications. When you use Settings Catalog or OMA-URI method to hide the Gaming category in the Settings app, it does not hide Settings > System > Notifications.
Contents
Method 1: Hide Gaming Under Settings Using Settings Catalog
This is the preferred approach to hide gaming category under the Settings app on Windows 11 devices. Follow the steps below to create an Intune policy:
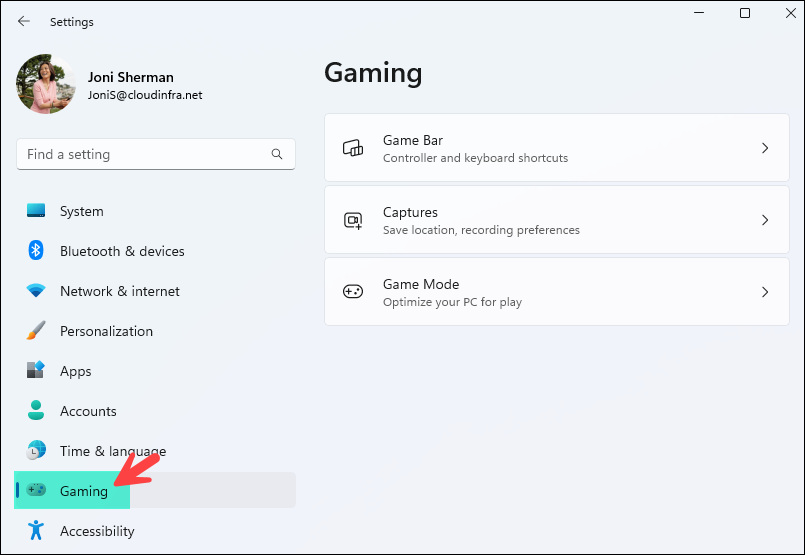
- Sign in to the Intune Admin Center > Devices > Configuration > + Create > New Policy.
- Select Platform type as Windows 10 and later. Select Profile type as Settings Catalog.
- Click on Create.
- On the Basics tab, provide a name and description of the policy. Click Next.
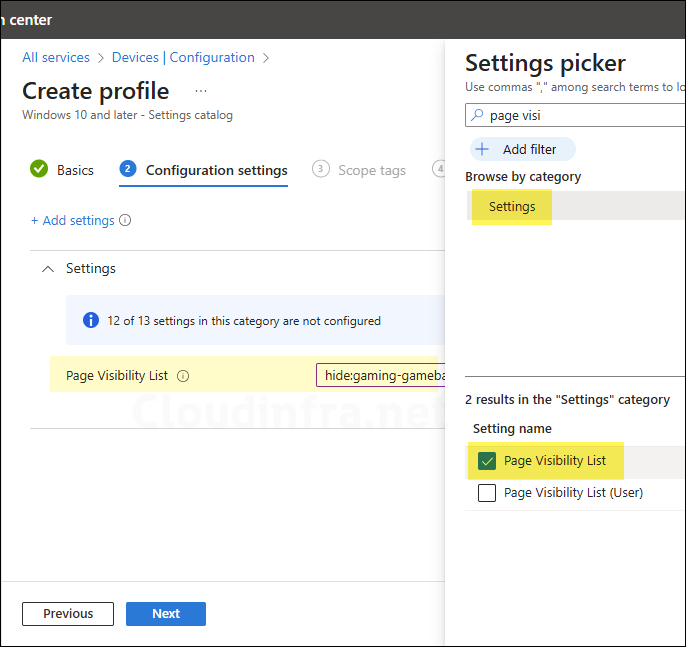
- On the Configuration settings tab, click + Add settings. In the Settings picker, search for page visibility. Click on Page Visibility List category and enter below text to hide gaming. Click Next.
hide:gaming-gamebar;gaming-gamedvr;gaming-broadcasting;gaming-gamemode;gaming-trueplay;gaming-xboxnetworking
- Scope tags (optional): A scope tag in Intune is an RBAC label that you assign to resources such as policies, apps, and devices to control which administrators can view and manage them. For more information, see How to use scope tags in Intune.
- Assignments: Assign the policy to Microsoft Entra security groups that include the target users or devices. As a best practice, start with a small pilot group, and once validated, expand the assignment more broadly. For guidance on assignment strategy, see Intune assignments: User groups vs. Device groups.
- Review + create: Review the deployment summary and click Create.
Method 2: Hide Gaming Under Settings App Using OMA-URI
This method hides only the pages you choose using the Settings policy CSP PageVisibilityList. You can use hide: and showonly: modes and semicolon-separated page identifiers.
- Sign in to the Intune admin center > Devices > Configuration > + Create > New Policy.
- Select Platform: Windows 10 and later. Profile type: Templates
- Template Name: Custom
- Click Create
- Basics tab: Provide a name and description of the policy.
- Configuration Tab: Click on Add to add OMA-URI Settings
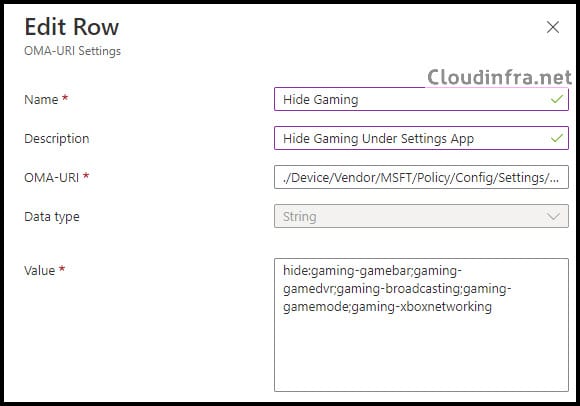
- Name: Hide Gaming
- Description: Hide Gaming Under Settings App
- OMA-URI: ./Device/Vendor/MSFT/Policy/Config/Settings/PageVisibilityList
- Data type: String
- Value: hide:gaming-gamebar;gaming-gamedvr;gaming-broadcasting;gaming-gamemode;gaming-trueplay;gaming-xboxnetworking
- Assignments: Assign the policy to Microsoft Entra security groups that include the target users or devices. As a best practice, start with a small pilot group, and once validated, expand the assignment more broadly. For guidance on assignment strategy, see Intune assignments: User groups vs. Device groups.
- Review + Create: Review the deployment and click on Create.
Method 3: Hide Gaming Under Settings Using Device Restrictions Template
You can hide Gaming under the settings app using a Device restrictions profile. Let’s check the steps:
- Sign in to the Intune admin center > Devices > Configuration > + Create > New Policy.
- Select Platform: Windows 10 and later. Profile type: Templates.
- Template Name: Device restrictions
- Basics tab: Provide a name and description of the profile.
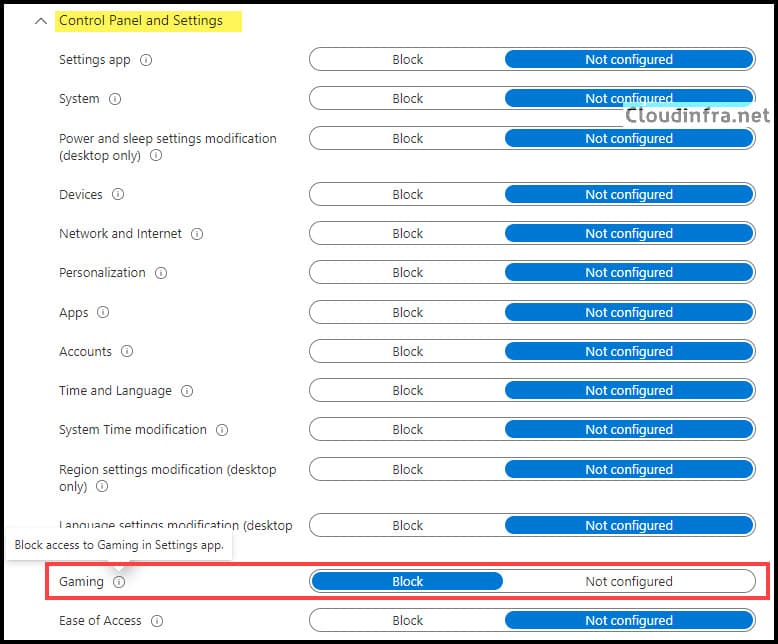
- Configuration Settings: Search for Control Panel and Settings; at the bottom of the list, you will find Gaming. Toggle it to Block, which will hide the Gaming option in Settings. As already explained earlier, blocking gaming using the device restrictions template will also affect notifications. It hides notifications as well (refer to the end-user experience section where I have captured the screenshots after I tested this policy).
Sync Intune Policies
The device check-in process might not begin immediately. If you’re testing this policy on a test device, you can manually kickstart Intune sync from the device itself or remotely through the Intune admin center.
Alternatively, you can use PowerShell to force the Intune sync on Windows devices. Restarting the device is another way to trigger the Intune device check-in process.
End User Experience
Let’s take a look at the user experience on Windows 10 and Windows 11 devices. I will show the results after applying a Settings Catalog policy and after applying a device restrictions policy.
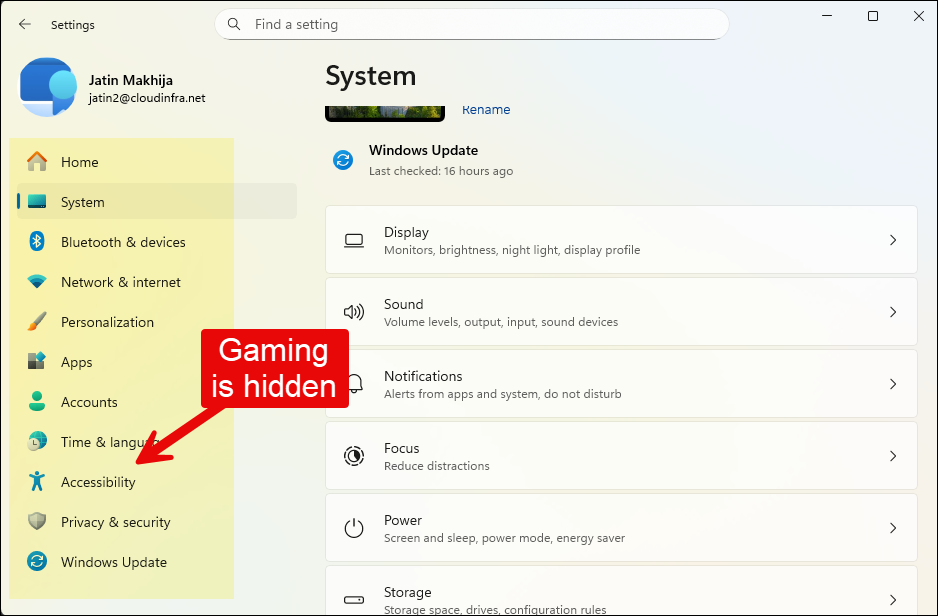
User Experience on a Windows 11 Device
When you use a Settings Catalog policy or a custom policy via OMA-URI, the Gaming section is hidden in the Settings app. However, if you check the right-hand side in the screenshot, Notifications are still visible and remain unaffected.
The screenshot below was captured after applying a device restrictions policy to block Gaming. Notice that the Gaming category is hidden, which is what we wanted; however, it also hides Notifications under Settings > System.

User Experience on a Windows 10 Device
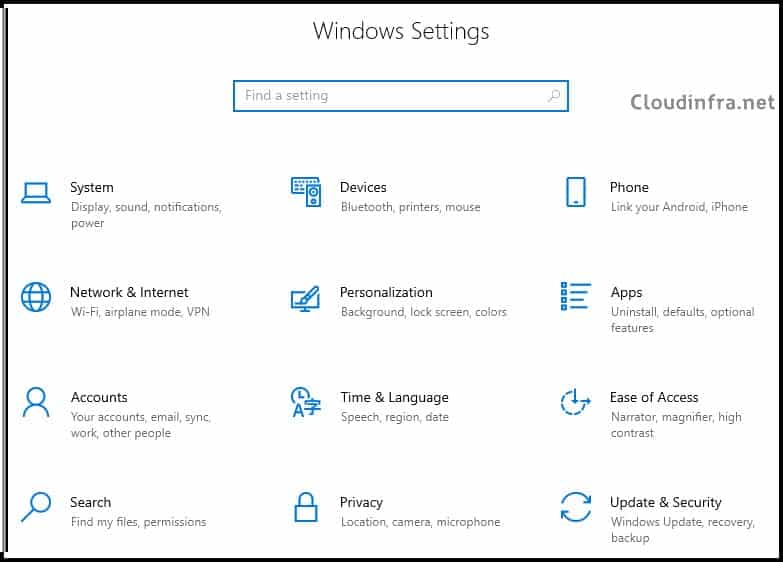
Let’s take a look at the user experience on a Windows 10 device after applying the Settings catalog or OMA-URI policy. Open the Settings app. Under the Settings app, you’ll notice that the Gaming option is no longer visible.
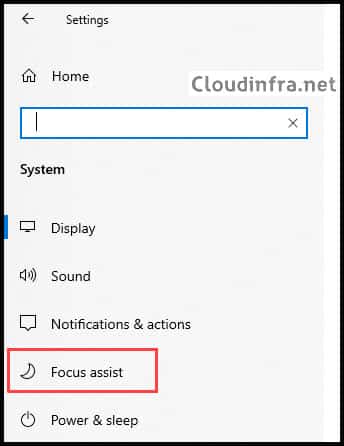
- If you use the Settings Catalog or OMA-URI method, Focus Assist is not affected and continues to appear in the Settings app. As shown in the screenshot below, even after disabling Gaming options, Focus Assist remains available and works as expected. However, when you use the device restrictions template to block Gaming, the Focus Assist setting is also hidden.
On Windows 11 better use the OMA-URI, because Gaming:block disables the complete notification page in settings. That is because it also sets quietmomentsgame:
I guess this can only be a bug again.
https://learn.microsoft.com/en-us/windows/client-management/mdm/policy-csp-settings#pagevisibilitylist
Warning
In Windows 11, version 22H2 and later, when you configure this policy to hide any pages that contain quietmoments in the URI (for example, ms-settings:quietmomentsgame), the Notifications page under System category is hidden.