In this guide, I will show you the steps on how to implement AppLocker using Intune. AppLocker is a Windows application control technology that allows you to define rules to allow or deny apps (EXE/COM), scripts, DLLs, Windows Installer files (MSI/MSP/MST), and packaged apps. AppLocker can be deployed through Intune using the AppLocker CSP by sending XML rule collections via a custom configuration profile.
Microsoft’s current guidance is that organizations should generally prefer App Control for Business (WDAC) for modern, device-wide application control. This is because it continues to receive platform enhancements and broader management integration, while AppLocker receives security fixes but no longer gets new feature improvements. AppLocker still has a place when you need simpler allow/deny logic or when you need per-user or per-group scoping.
For macOS, you can use a third-party solution called Santa to block apps. Refer to the guide How to Block Apps on macOS with Intune for more details.
Contents
Applocker vs. App Control for Business
While AppLocker and App Control for Business both provide application control, there are several key differences between them. To learn more about the differences, refer to the link Applocker vs. App Control for Business.
Requirements For Applocker
- Supported Windows versions: AppLocker policies can be configured and enforced on Windows 10 and Windows 11, and as of KB5024351, Windows 10 version 2004+ and all Windows 11 versions no longer require a specific edition to enforce AppLocker policies. For more information, refer to the post: supported operating systems for applocker.
- AppLocker enforcement relies on the Application Identity (AppIDSvc) service. Ensure it is configured to start automatically (or at minimum is running) on target devices before enforcing rules.
Supported File Extensions in Applocker
| Category | File Types |
|---|---|
| Executable files | .exe, .com |
| Windows Installer files | .msi, .mst, .msp |
| Scripts | .ps1, .bat, .cmd, .vbs, .js |
| DLLs | .dll, .ocx |
| Packaged apps and packaged app installers | .appx, .msix |
Step 1: Set Applocker in Audit or Enforced Mode
You can create AppLocker rules and set them in either Audit or Enforced mode. In Audit mode, AppLocker does not block applications; it only logs events that show which apps would have been allowed or denied based on your rules, which helps you identify gaps in your allow list without disrupting users.
In Enforced mode, AppLocker actively applies the rules and blocks anything not permitted (or explicitly denied), and it logs the enforcement events for monitoring and troubleshooting. I will recommend you start in Audit Only mode first, validate the AppLocker event logs and business impact, and then move to Enforced once your allow rules are complete.
To set applocker in audit or enforced mode, follow the steps below:
- Press Windows + R to open the Run Dialog box.
- Type secpol.msc and press Enter.
- Expand Application Control Policies.
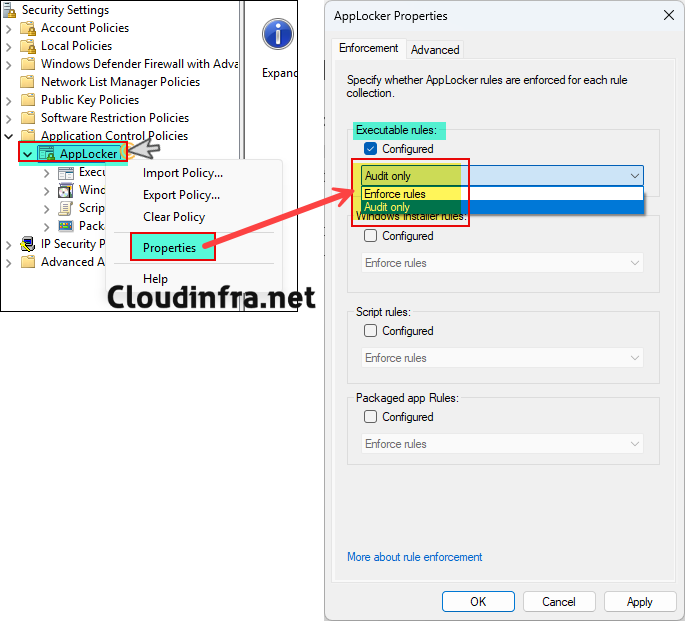
- Right-click AppLocker and select Properties.
- For each rule collection you plan to manage (EXE, MSI, Script, DLL, Store Apps), set the collection to Audit only for your pilot devices. To enforce the rules, select Enforce rules.
- Click on OK.
Step 2: Create Default Rules
Creating default rules is a mandatory and critical step when configuring application control or execution policies. Default rules ensure that the operating system, built-in components, and core management tooling continue to function correctly. Skipping this step can result in application failures, broken user experiences, or even system lockouts.
To create the default rules, follow the steps below:
- Press Windows key + R to open the Run Dialog box.
- Type secpol.msc and press Enter to open the local security policy console.
- Expand Application Control Policies and then expand AppLocker.
- Right-click on each rule collection you are configuring, such as Executable Rules, and select Create Default Rules. Repeat this step for all applicable rule collections, including Windows Installer Rules, Script Rules, and Packaged app Rules.
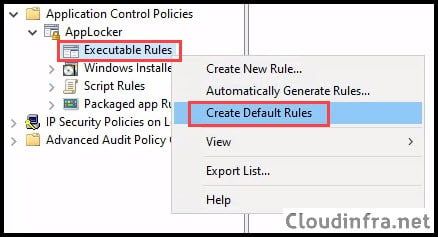
- The default rules will allow core operating system components (anything inside %WINDIR%\*), anything in the program files (%PROGRAMFILES%\*), and also allow BUILTIN\Administrators to execute all files.

Step 3: Create Custom Allow/Deny Rules
We can now create custom allow or deny rules in applocker. As an example, I will use the Google Chrome app and create a rule to prevent users from launching it on target devices. On the device where you are creating the rules, ensure that the application is already installed. If it is not installed, install it first and then proceed with the next steps.
- Press Windows key + R to open the Run Dialog box.
- Type secpol.msc and press Enter to open the local security policy console.
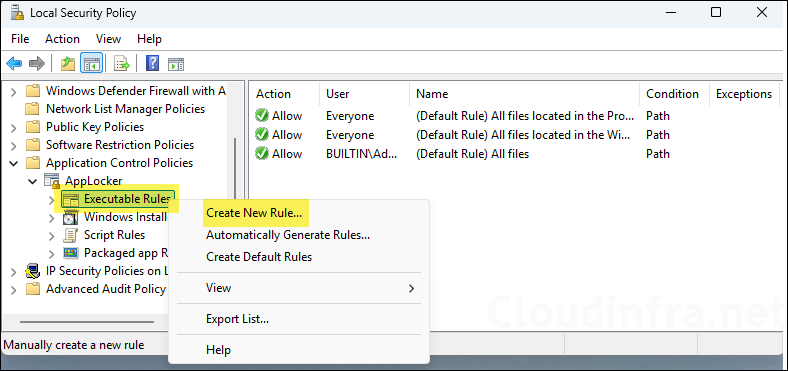
- Expand Application Control Policies and then expand AppLocker.
- Right-click on Executable Rules > Create New Rule.
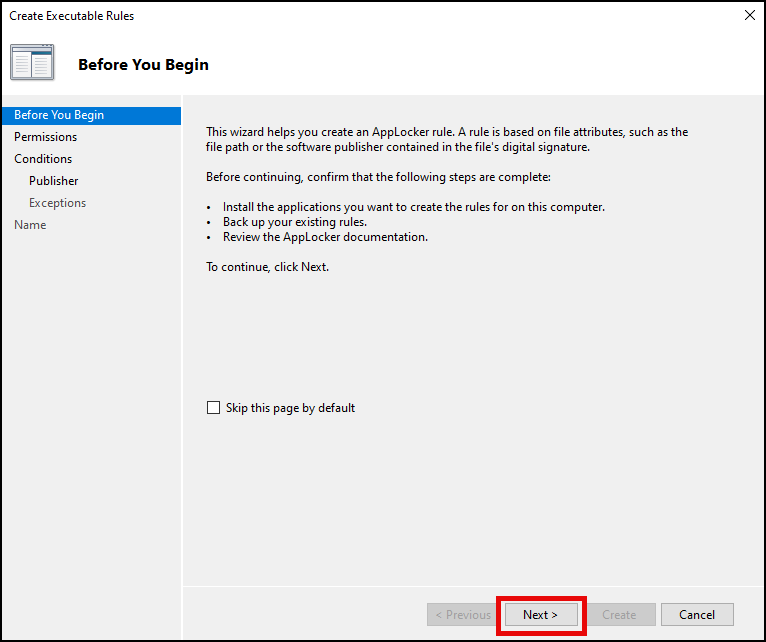
- Click Next.
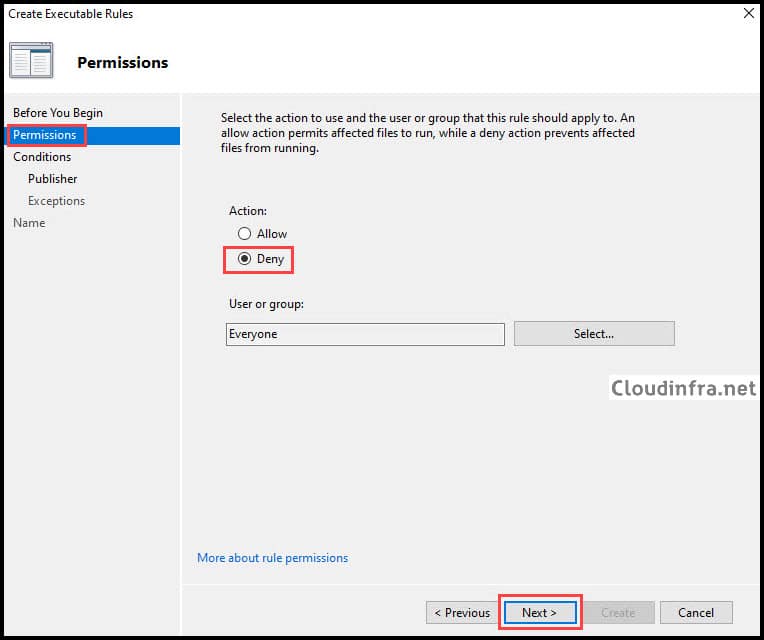
- Since the goal is to block the execution of the Google Chrome app on the target devices, select Deny and click Next.
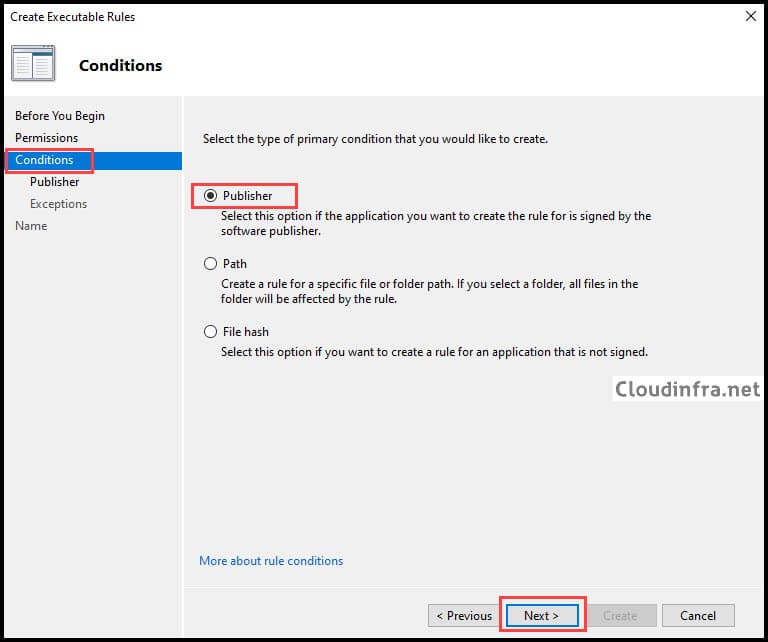
- Publisher rules: This type of rule uses the app’s digital signature (publisher/certificate details), so the rule usually keeps working even when the vendor updates the app to a newer version.
- Hash rules: This type of rule uses a fingerprint of the exact file, so the rule stops working as soon as the file changes (for example, after an app update or patch).
- Path rules: Allow or block based on where the file is located (for example, a folder path), which is easier to bypass by copying/renaming the file into an allowed location, so use these only when you have no other option.
I will select Publisher and click Next.
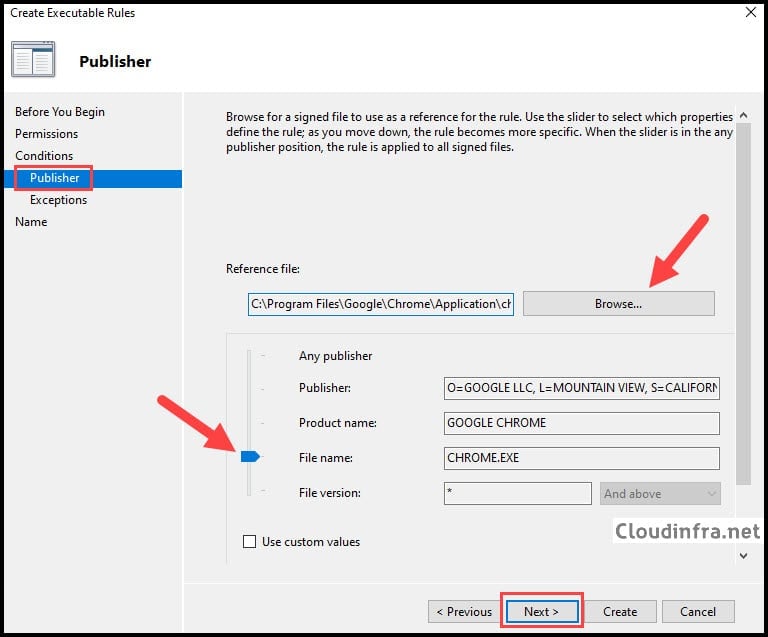
- Click Browse and select the application. For example, Google Chrome is typically installed at C:\Program Files\Google\Chrome\Application. Select the chrome.exe file. Move the slider to File name to generalize the file version. This ensures the rule applies to all versions of the Google Chrome application.
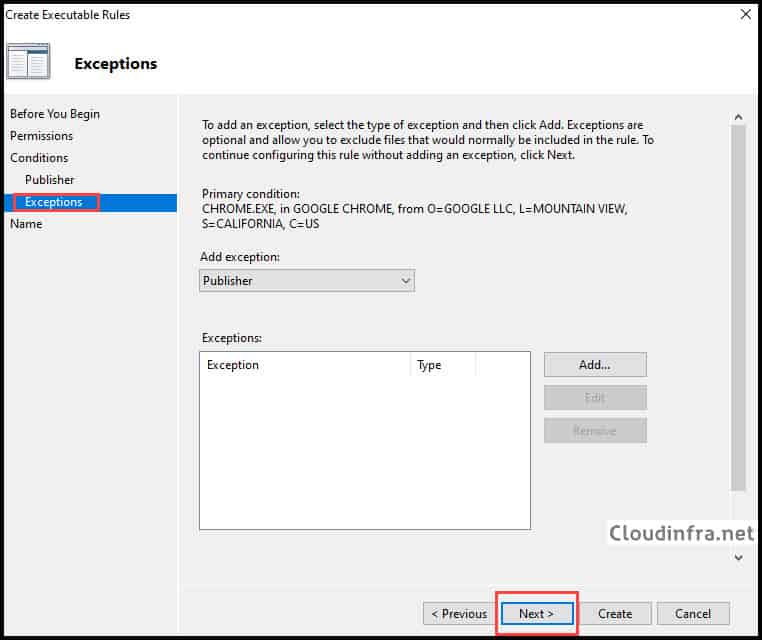
- On the Exceptions window, select Next.
- Provide a name and description to identify this rule on the AppLocker rules page.
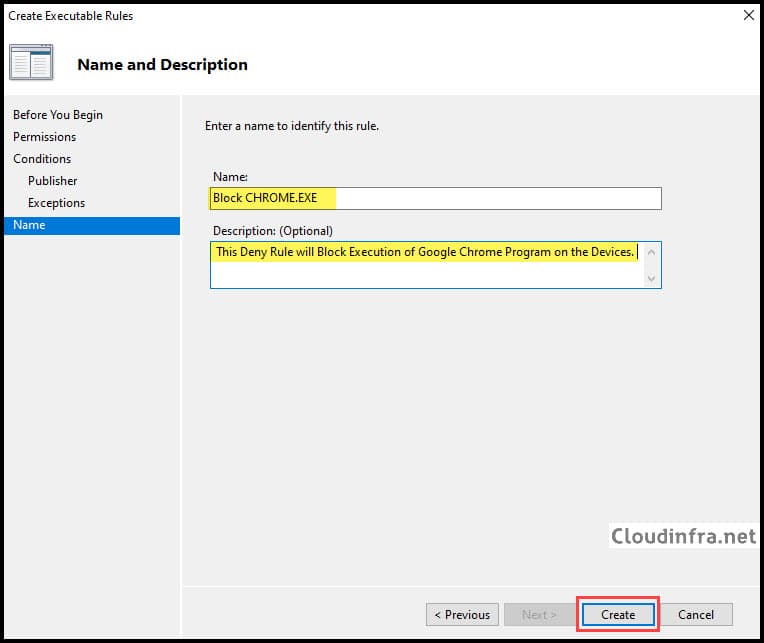
- The AppLocker rule has been created to deny the Google Chrome application.

Step 4: Export Applocker Policy to XML
In this step, we will export the AppLocker rules to an XML file. We will then copy the configured rule collection from this file, which will be used for Intune deployment.
- Press Windows key + R to open the Run Dialog box.
- Type secpol.msc and press Enter to open the local security policy console.
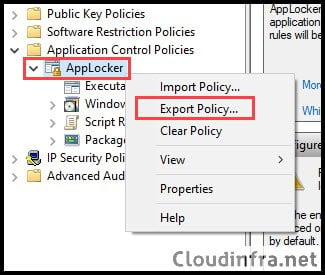
- Expand Application Control Policies and then right-click on AppLocker and select Export Policy.
Step 5: Deploy Applocker Policy via Intune
Now that you have exported the AppLocker rules to an XML file, the next steps will focus on deploying only the configured rules using an Intune custom device configuration profile.
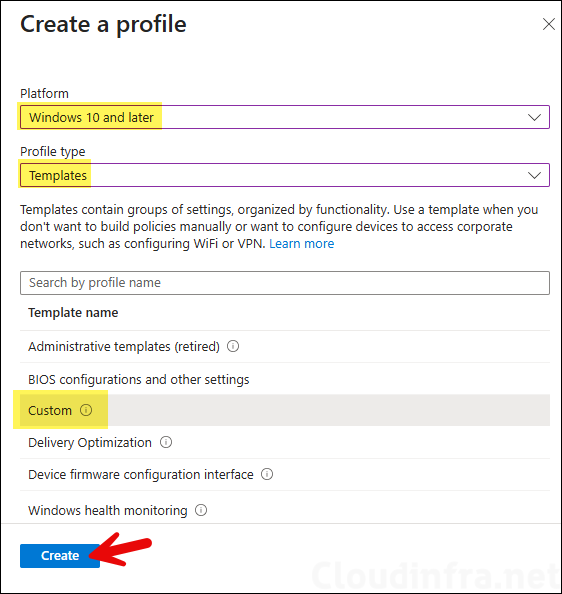
- Sign in to the Intune admin center and go to Devices > Windows > Configuration > + Create > New Policy. Platform: Select Windows 10 and later, Profile type: Select Templates.
- Template name: Select Custom.
- On the Basics tab, provide a name and description of the profile.
Configuration settings
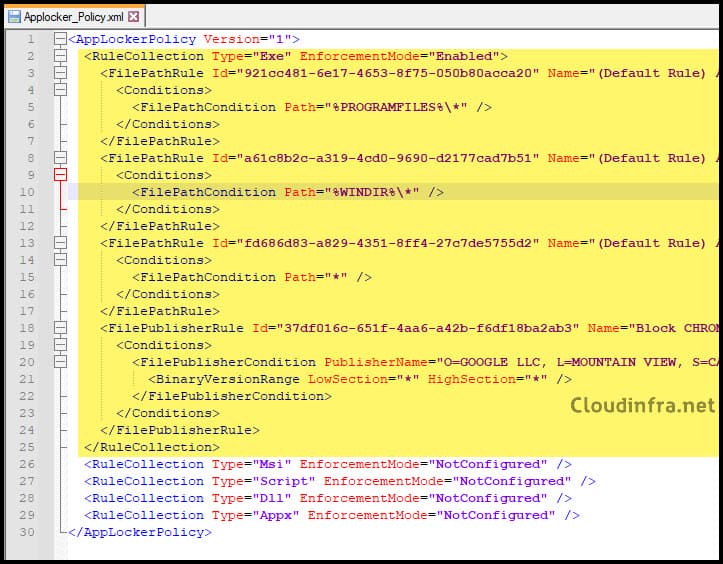
Before adding the OMA-URI settings in the Configuration settings tab, you need to understand which rules to copy from the exported AppLocker policy XML file. The XML file contains a separate RuleCollection block for each rule type: EXE, MSI, Script, DLL, and Appx. You only need to copy the RuleCollection block for the rule type you have configured.
In this example, only Executable rules are enabled and enforced to block the Google Chrome app. Therefore, copy only the RuleCollection block for the EXE rule type. If you have configured rules for other rule collections, copy the corresponding RuleCollection block and add a separate OMA-URI setting for each one in the configuration profile.
Below screenshot shows the AppLocker policy XML file, with the RuleCollection block for executable rules (EXE) highlighted. This block includes our custom deny rule for Google Chrome. Copy the block from <RuleCollection Type> to </RuleConnection>.
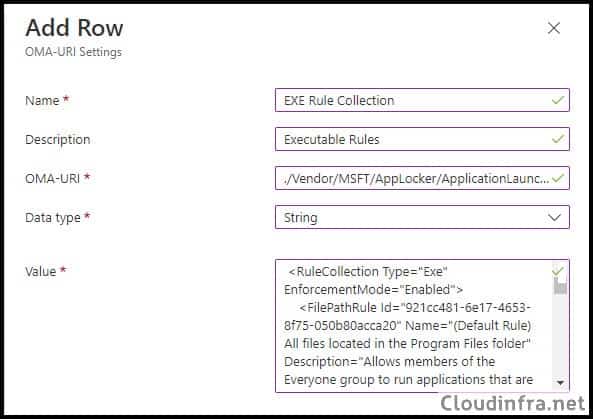
- On the Configuration settings page, click Add and add below OMA-URI settings:
- Name: EXE Rule Collection
- Description: Executable Rules
- OMA-URI: ./Vendor/MSFT/AppLocker/ApplicationLaunchRestrictions/apps/EXE/Policy
- Data type: String
- Value: Paste the rule collection block for EXE (from <RuleCollection Type> to </RuleConnection>).
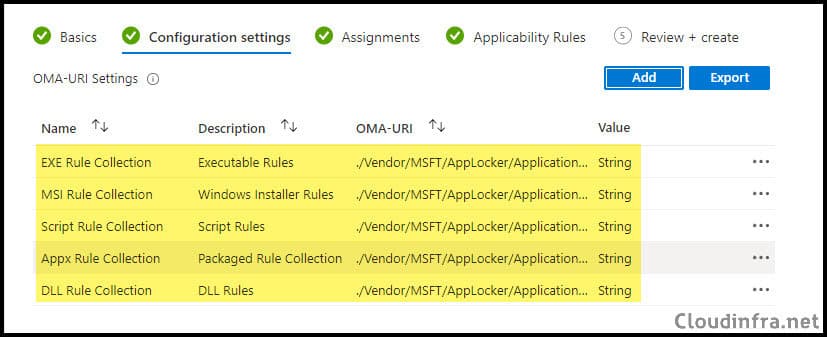
- Add OMA-URI configuration for each rule collection you have configured and paste the respective rule collection block in the Value box. For grouping, I will be using apps as group identifier.
| Rule Type | OMA-URI | Value |
|---|---|---|
| Exe | ./Vendor/MSFT/AppLocker/ApplicationLaunchRestrictions/{Grouping}/EXE/Policy | String |
| Msi | ./Vendor/MSFT/AppLocker/ApplicationLaunchRestrictions/{Grouping}/MSI/Policy | String |
| Scripts | ./Vendor/MSFT/AppLocker/ApplicationLaunchRestrictions/{Grouping}/Script/Policy | String |
| Dll | ./Vendor/MSFT/AppLocker/ApplicationLaunchRestrictions/{Grouping}/DLL/Policy | String |
| Appx | ./Vendor/MSFT/AppLocker/ApplicationLaunchRestrictions/{Grouping}/StoreApps/Policy | String |
{Grouping}is the AppLocker rule group name (an administrator-defined container) used by the AppLocker CSP to separate and manage different policy sets, for exampleapps(commonly used) or another custom grouping string you choose, and it becomes part of the OMA-URI path for that specific rule collection.Note
| Rule Type | OMA-URI | Value |
|---|---|---|
| Exe | ./Vendor/MSFT/AppLocker/ApplicationLaunchRestrictions/apps/EXE/Policy | String |
| Msi | ./Vendor/MSFT/AppLocker/ApplicationLaunchRestrictions/apps/MSI/Policy | String |
| Scripts | ./Vendor/MSFT/AppLocker/ApplicationLaunchRestrictions/apps/Script/Policy | String |
| Dll | ./Vendor/MSFT/AppLocker/ApplicationLaunchRestrictions/apps/DLL/Policy | String |
| Appx | ./Vendor/MSFT/AppLocker/ApplicationLaunchRestrictions/apps/StoreApps/Policy | String |
- Click on Save and Next.
- Scope tags (optional): A scope tag in Intune is an RBAC label you add to resources (policies, apps, devices) to limit which admins can see and manage them. For more information, refer to the post: How to use Scope tags in Intune.
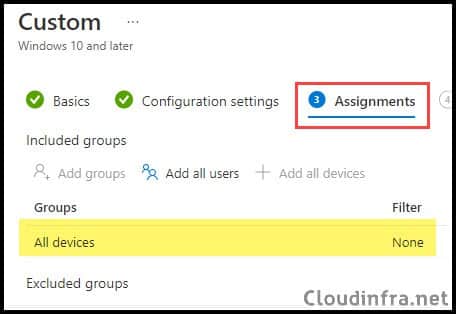
- Assignments: Assign the policy to Entra security groups that contain the target users or devices. As a best practice, pilot with a small set first; once validated, roll it out more broadly. For guidance on assignment strategy, see Intune assignments: User groups vs. Device groups. For the demo, I will go with All devices.
- Applicability Rules: Specify how to apply this profile within an assigned group. Intune will only apply the profile to devices that meet the combined criteria of these rules.
- On the Review + create tab, click Create.
End User Experience
After the Intune device configuration profile is applied to the target devices successfully. The rules will allow core operating system components (anything inside %WINDIR%\*), anything in the program files (%PROGRAMFILES%\*) as per the default rule.
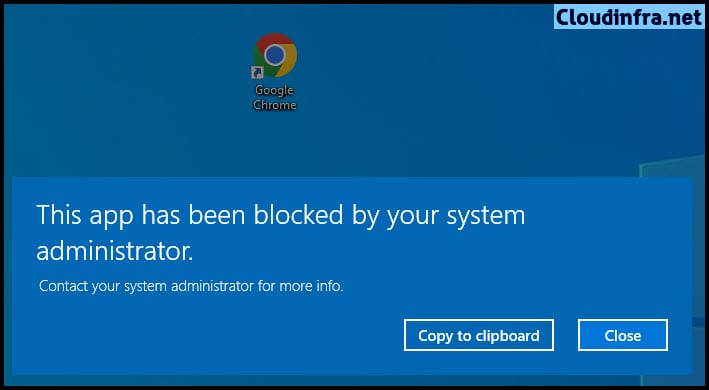
We have also created a custom block rule for the Google Chrome application. Based on this rule, Google Chrome execution will be blocked for all users on the target devices. Below screenshot shows the behavior when a user attempts to launch Google Chrome. Since it is blocked, a pop-up message appears stating, This app has been blocked by your system administrator.
Troubleshooting
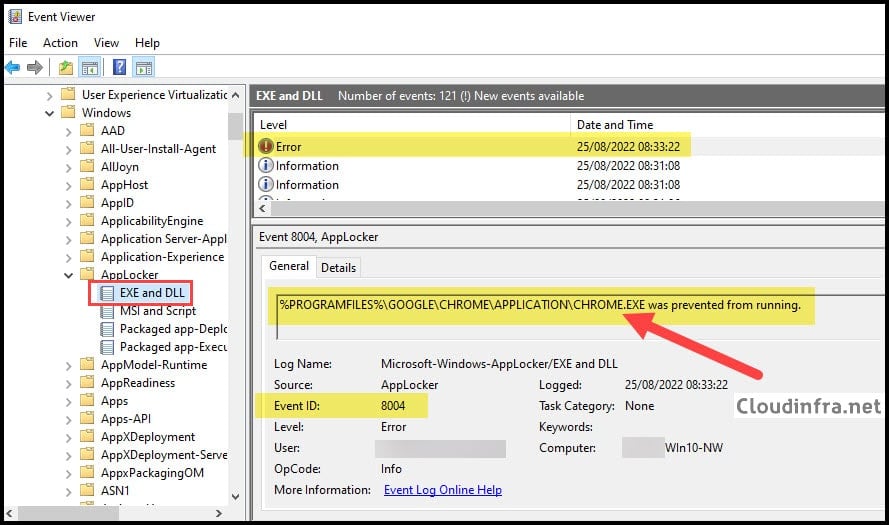
In both audit and enforced modes, AppLocker events are logged in Event Viewer under Applications and Services Logs > Microsoft > Windows > AppLocker. Select the relevant rule collection, such as EXE or DLL, and review the events on the right-hand side.
When an application is blocked by AppLocker, an event with Event ID 8004 is logged. Below screenshot shows that when the Google Chrome application was launched, it was blocked by AppLocker, and the corresponding Event ID 8004 entry was recorded in Event Viewer.
Deleting an Applocker Policy
Once you have exported the AppLocker rules to an XML file, it is not necessary to keep those rules on the test device from which the file was exported. You can delete the rules if they are no longer required.
- Press Windows key + R to open the Run Dialog box.
- Type secpol.msc and press Enter to open the local security policy console.
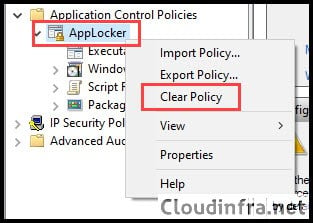
- Expand Application Control Policies and then right-click on AppLocker > Clear Policy.
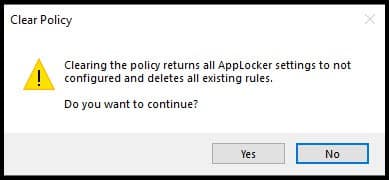
- Click Yes to confirm the deletion of all applocker rules.
AppLocker Rules Registry Location
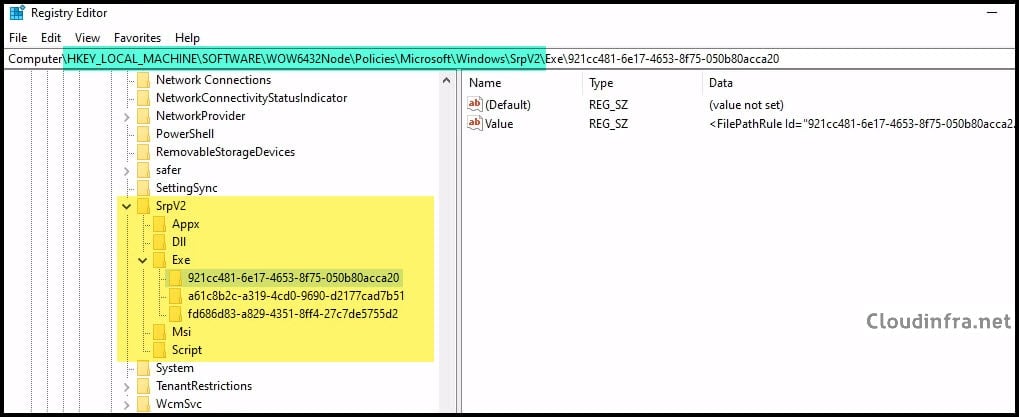
AppLocker rules are stored in the registry under HKLM\SOFTWARE\Policies\Microsoft\Windows\SrpV2 (with rule collections in subkeys such as Exe, Msi, Script, Dll, and Appx).
HKEY_LOCAL_MACHINE\Software\Policies\Microsoft\Windows\SrpV2
HKEY_LOCAL_MACHINE\SOFTWARE\WOW6432Node\Policies\Microsoft\Windows\SrpV2
Applocker Rules Storage Location (Deployed via Intune)
After you deploy AppLocker rules via Intune (AppLocker CSP/OMA-URI), Windows stores the MDM-delivered policy files under C:\Windows\System32\AppLocker\MDM (and in some cases you may also see related .policy files under C:\Windows\System32\AppLocker).
hi, does it work even if the file name is changed?
No, it won’t. If you want the rule to remain effective even if the file name is changed, you’ll need to adjust the slider to generalize at the Product Name level rather than the File name level. Hope that clarifies things.
I have tried to change file name from FortiClient.exe to FortiClientxxx.exe and it still works. FortiClient application is blocked. any idea?
You must include the FortiTray.exe executable.
Thank you for you article. It is very helpful
quick question.
I need to block 3 applications for all users, except one application for a specific group.
Applications 1 and 2 are blocked for the “All Users” group.
Application 3 is blocked for All Users but excluded for a specific group.
If I now create two configurations in Intune.
One configuration where the Applocker block application 1 and 2 -> All Users
Second configuration in which Applocker block application 3 ->All Users / exclude one group
but now I get an policy conflict with this two configurations, because both are leading to the same OMA URL: ./Vendor/MSFT/AppLocker/ApplicationLaunchRestrictions/apps/EXE/Policy
Hey fabs, Could you group these into one single configuration. Block Application 3 for a specific group + Application 1 and 2 in the same configuration? Why do you need two EXE Policies?
Hello, how can I enable APPLocker if I have 1000 users? (There is no on-premise AD.)
Add users to Entra security group and target Applocker policies to the group. Test the policy on few users first, once its working fine. Deploy it on 1000 users.
Great post! The step-by-step approach made it easy to follow along. I especially appreciated the tips on troubleshooting common issues. Looking forward to implementing Applocker in our organization using these guidelines!
Great doc.
Question: i need to block mshta.exe via intune, the steps are the same as you done with chrome?
Hi @Jatin
Thanks for the post is a great one.
I wanted to block chrome also. It worked, but what I have found is that on applying the policy in Intune via OMA-URI and the policy is applied there are other apps that are being blocked there.
Like all shortcouts on taskbar or a Remote Desktop App from Windows itself.