In this blog post, we will see the steps to deploy WhatsApp on macOS using Intune. WhatsApp is a messaging application that allows users to send text messages, make voice and video calls, share multimedia content (such as photos, videos, and documents), and engage in group chats.
Contents
1. Download WhatsApp DMG Installer
- On your Mac device, Open any web browser and go to https://whatsapp.com/download.
- Click the Download button under the Mac section to download the WhatsApp desktop DMG file.
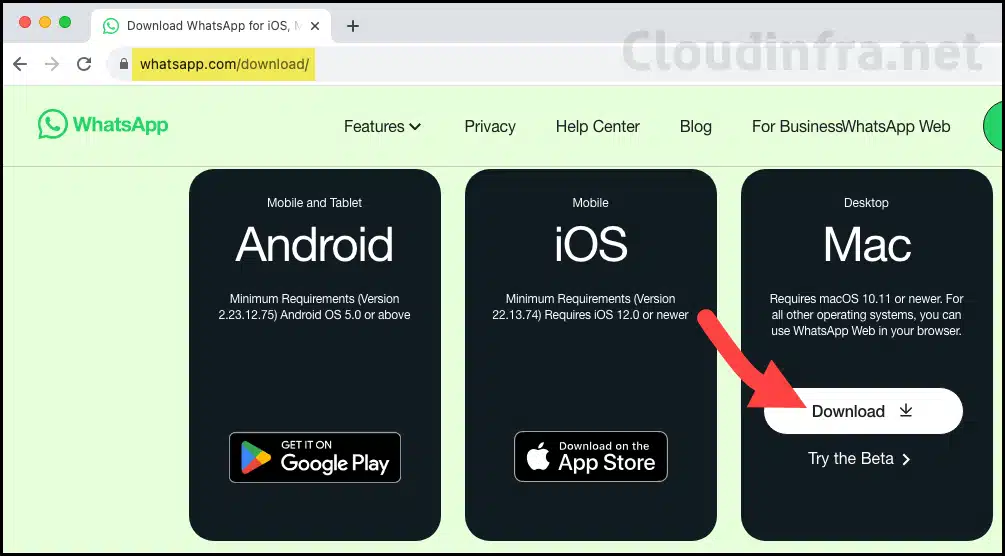
- You’ll find a file named files-WhatsApp.dmg in your Downloads folder.

2. Create an App Deployment for WhatsApp
To create an App deployment for WhatsApp on the Intune admin center, follow the below steps:
- Sign in to the Intune admin center > Apps > macOS > macOS apps.
- Click on + Add to start the deployment creation.
- App type: macOS app (DMG).
- Click on the Select button to proceed.
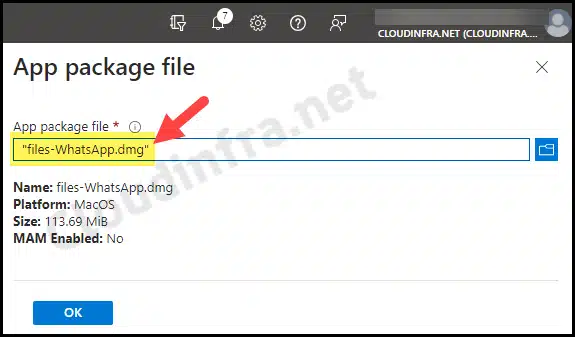
- App Information: Click Select app package file to choose the .dmg application installer. Locate the app package file, then click the OK button to proceed.
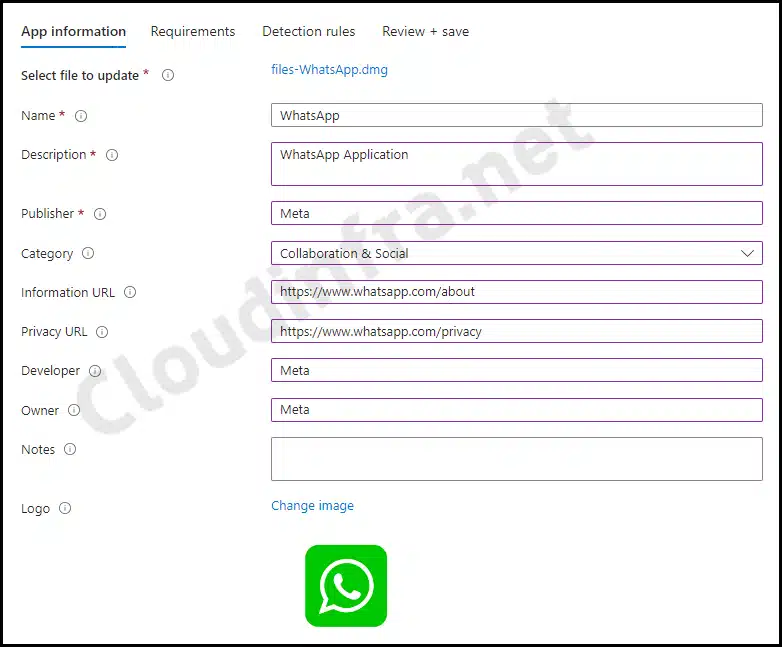
- Name: Provide a unique name of the application.
- Description: Describe the application.
- Publisher: Provide the publisher’s name.
- Requirements: In the requirements tab, select Minimum operating system as a condition for application installation. Click on Next to proceed.
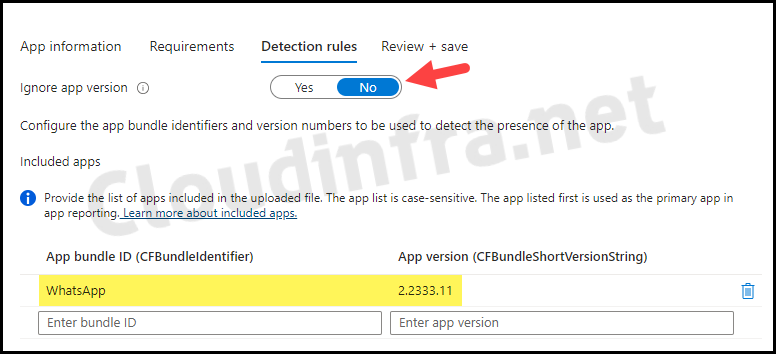
- Detection rules: In the Detection rules tab, Select Ignore app version to No. Provide CFBundleIdentifier and CFBundleShortVersionString values for WhatsApp.
To learn about how to retrieve CFBundleIdentifier and CFBundleShortVersionString values, you can refer More Information section at the end of the blog post. You can also read more about Ignore app version in that section.
For more detailed information on how to find CFBundleIdentifier and CFBundleShortVersionString values, please refer to the post titled Deploy DMG Apps on macOS Using Intune.
CFBundleIdentifier and CFBundleShortVersionString
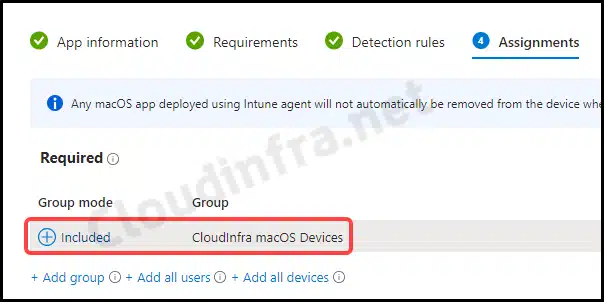
- Assignments: Assign the policy to Entra security groups that contain the target users or devices. As a best practice, pilot with a small set first; once validated, roll it out more broadly. For guidance on assignment strategy, see Intune assignments: User groups vs. Device groups.
- Review + create: Review the deployment and click on Create.
Sync Intune Policies
The device check-in process might not begin immediately. If you’re testing this policy on a test device, you can manually kickstart Intune sync from the device itself or remotely through the Intune admin center.
Alternatively, you can use PowerShell to force the Intune sync on Windows devices. Restarting the device is another way to trigger the Intune device check-in process.
Monitor Deployment Progress
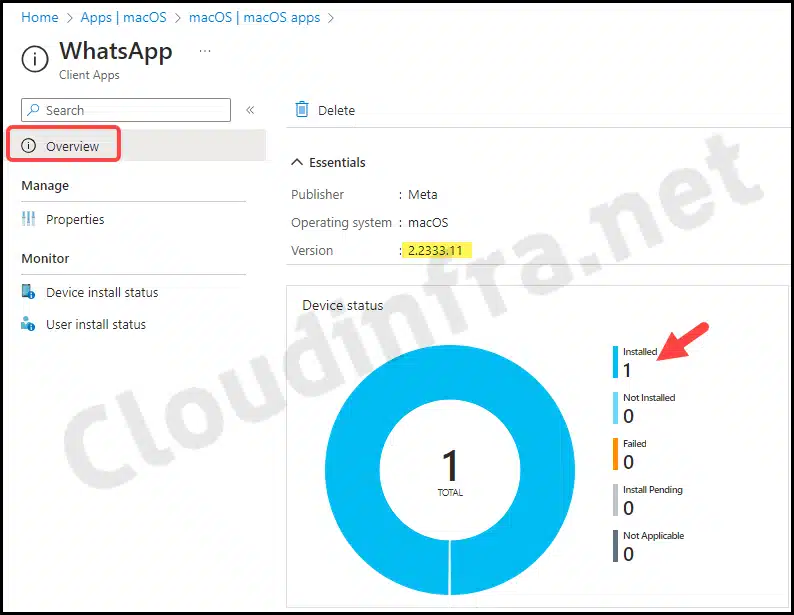
You can monitor the application deployment from the Intune admin center by navigating to Apps > macOS > selecting the specific application. The Overview page will display the installation status, similar to what is shown in the screenshot below.
If you face any issues or experience deployment failures, you can click on Device install status” or User install status to access more detailed information about the error description and error code, helping you troubleshoot and resolve the problem.
End User Experience
To check if the deployment is completed successfully, follow the below steps:
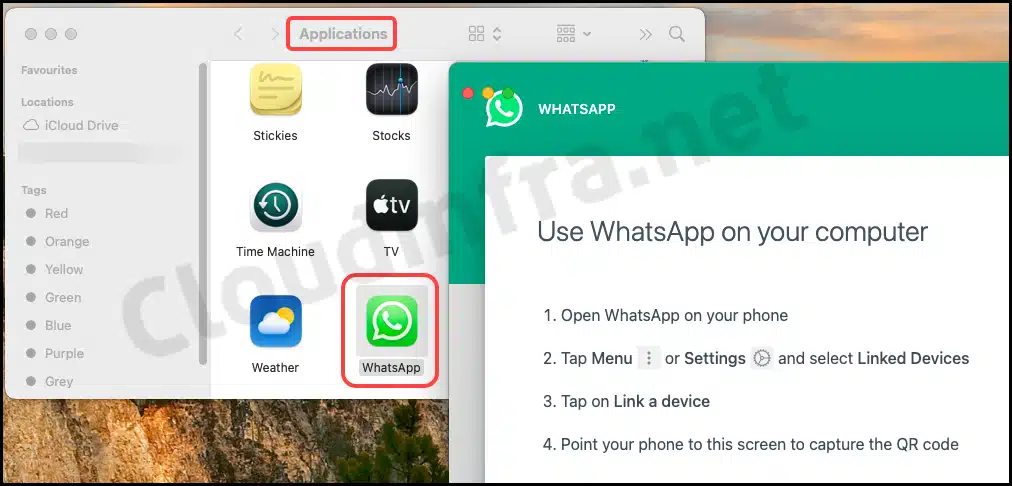
- Go to Finder > Go > Applications.
- Look for the WhatsApp Application icon to confirm the deployment.
macOS Intune deployment troubleshooting
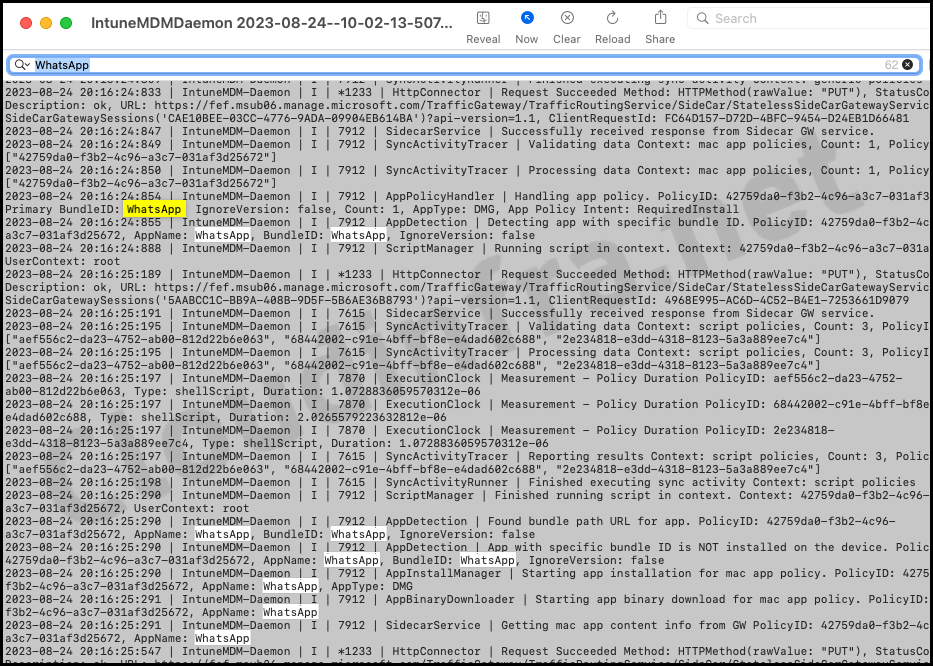
If you encounter problems deploying the application, check the IntuneMDMDaemon*.log and IntuneMDMAgent*.log files for more information. For guidance on locating these files on a macOS device, refer to my previous blog post titled Collect Intune Logs From a MacOS Device.
Uninstall WhatsApp from macOS using Intune
To uninstall WhatsApp from macOS using Intune, follow below steps:
- Sign in to the Intune admin center > Apps > macOS > macOS apps.
- Click on the Application deployment for WhatsApp.
- Click on Properties under Manage.
- Click on Edit next to Assignments.
In the Assignments tab, you can include an Entra security group that contains users or devices in the Uninstall assignment section. However, ensure that the same user or device is not included in the Required section.

More Information
1. About Ignore App version setting
- Select Ignore app version = Yes if you want the app installed when it’s not found on the target device. If the app is already there, but the version number is different, it will be ignored, and the app will not be deployed.
- Select Ignore app version = No if you want the app to be installed when it is not found on the target device or the app version you are deploying differs from the one already installed on the target device.

In general, when deploying a self-updating application such as Google Chrome or Zoom, you should set Ignore the app version to Yes.
In some cases, you may choose to disable the autoupdating setting for an app. In that case, you can select Ignore app version to No. This allows you to control the app updates by only managing the deployments of new versions using Intune.
Note
2. Steps to Retrieve CFBundleIdentifier and CFBundleShortVersionString
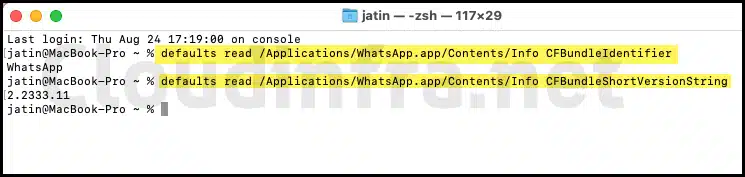
To retrieve these details, you can install WhatsApp (the same one you intend to deploy through Intune) on a test Mac device and then use the following commands in the macOS terminal to obtain this information:
CFBundleIdentifier
defaults read /Applications/WhatsApp.app/Contents/Info CFBundleIdentifier
CFBundleShortVersionString
defaults read /Applications/WhatsApp.app/Contents/Info CFBundleShortVersionString
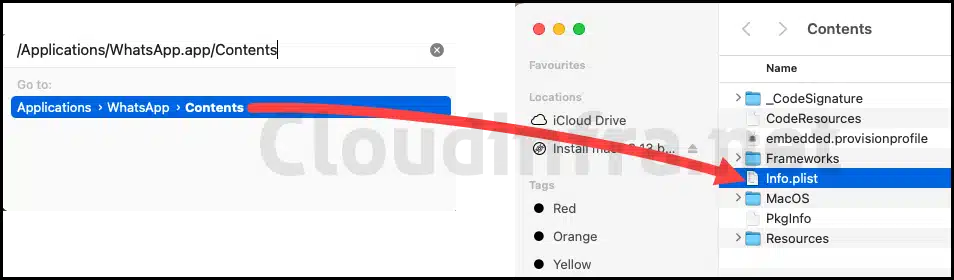
You can also find CFBundleIdentifier and CFBundleShortVersionString values in Info.plist file. Let’s take a look:
- Go to Finder > Go > Go to Folder…
- Search for /Applications/WhatsApp.app/Contents/ path.
- Double-click on the searched path to find Info.plist file in Contents folder.
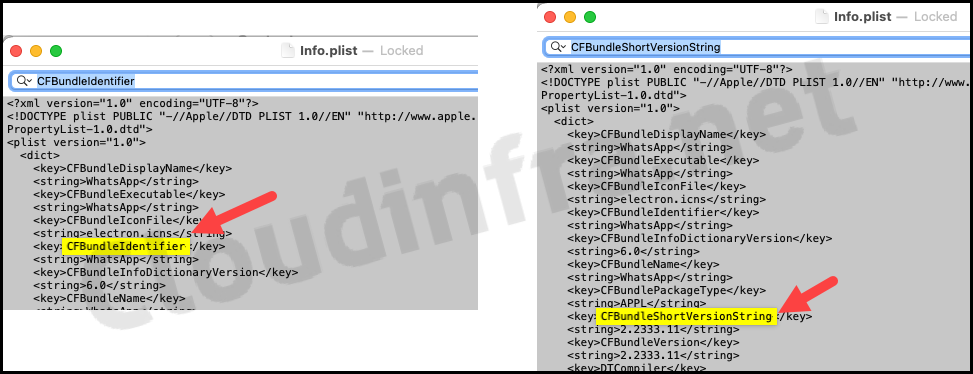
- Double-click on the file and search for
CFBundleIdentifierandCFBundleShortVersionStringvalues in the file.
- Search for
CFBundleIdentifierandCFBundleShortVersionStringand Find their values. For the WhatsApp application, CFBundleIdentifier is WhatsApp, and CFBundleShortVersionString is 2.2333.11. - Please note that these values could differ depending on the WhatsApp version you are deploying. Please check these values (CFBundleIdentifier and CFBundleShortVersionString) and provide them in the detection rules.
Conclusion
In this blog post, we’ve covered deploying the WhatsApp application on macOS devices using Intune. If your organization decides to discontinue using this application, you can efficiently uninstall it by targeting the devices through the Uninstall assignment section of the application. Installation of WhatsApp on the target device typically took a couple of minutes after forcing the device check-in from the Company Portal app.