In this post, I will show you the steps to allow or block Edge extensions using Intune. Allowing end users to install arbitrary browser extensions increases risk, as extensions can request broad permissions and create data exposure pathways. A standard enterprise approach is to deny by default (block all extensions), then allow only approved extensions, and optionally force-install business-critical ones.
I will use Microsoft-recommended approach, which is to configure a Settings Catalog policy and assign it to the target users. You will need the IDs of all the extensions you want to allow or block.
Contents
Step 1: Find the Extension’s ID
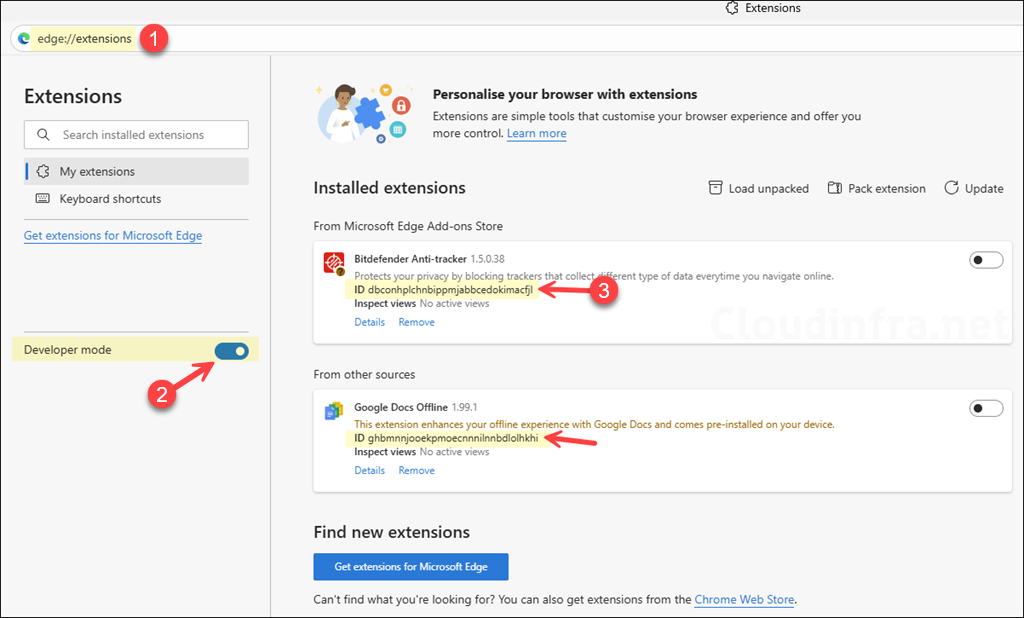
You must use the extension’s 32-character ID for allow/block/force rules. If the extension is already installed in Edge, then type edge://extensions in the browser address bar and enable the developer mode toggle to show the ID of the extension. If the extension is not installed, click on the Get extensions for Microsoft Edge link to find the ID (shown next).
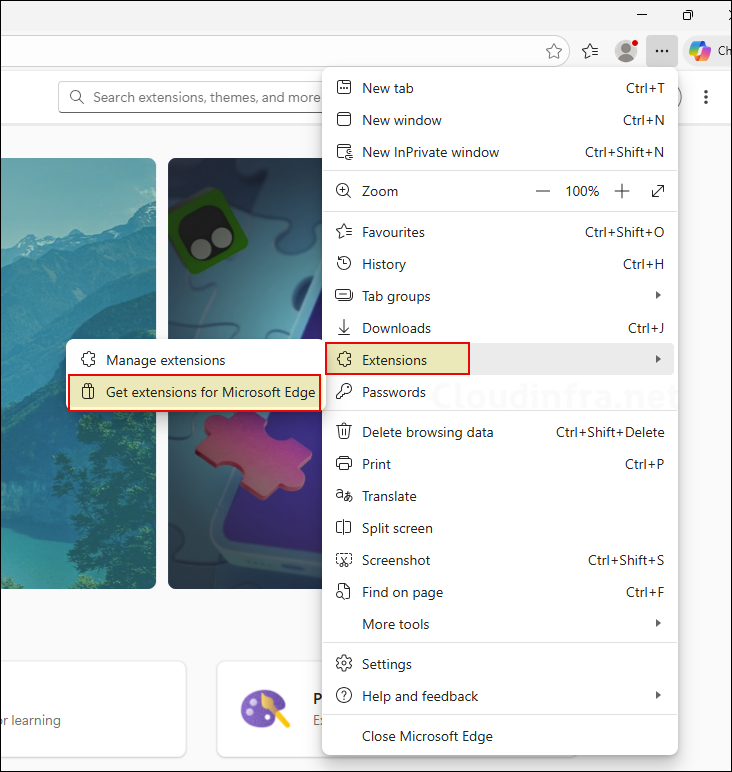
If the extension is not installed in Edge, follow these steps to find the extension ID you want to allow or block. Open the Microsoft Edge browser, click the three dots in the top-right corner, and select Extensions > Get extensions for Microsoft Edge.
Alternatively, you can type edge://extensions in the address bar and then click on the Get extensions for Microsoft Edge link.
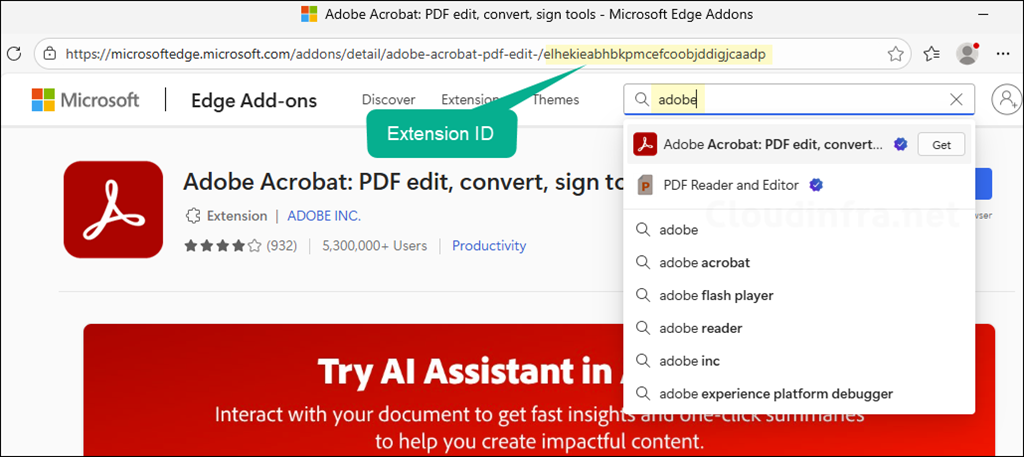
- Search for the extension (e.g., Adobe) and press Enter.
- In the browser address bar, locate the extension ID, which is typically at the end of the URL. Copy the value and save it in a notepad. We will need this value when creating an Intune policy to allow or block the extension.
- Repeat the process to collect all the extension IDs that you want to allow or block.
Step 2: Block All Extensions in Edge and Whitelist Only Approved Ones
This is the strongest and simplest model for most enterprises: block everything, then explicitly allow what is approved. A blocklist value of * blocks all extensions unless they are explicitly allowed. To create an Intune policy for this, follow the steps below:
- Sign in to the Intune Admin Center > Devices > Configuration > + Create > New Policy.
- Select Platform type as Windows 10 and later. Select Profile type as Settings Catalog.
- Click on Create.
- On the Basics tab, provide a name and description of the policy. Click Next.
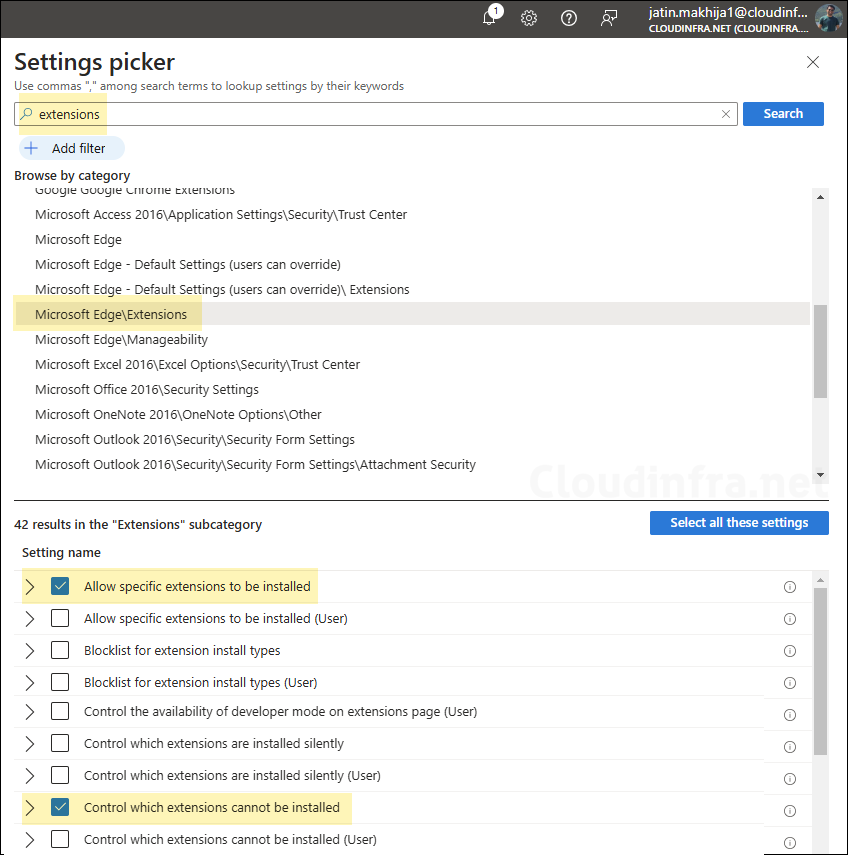
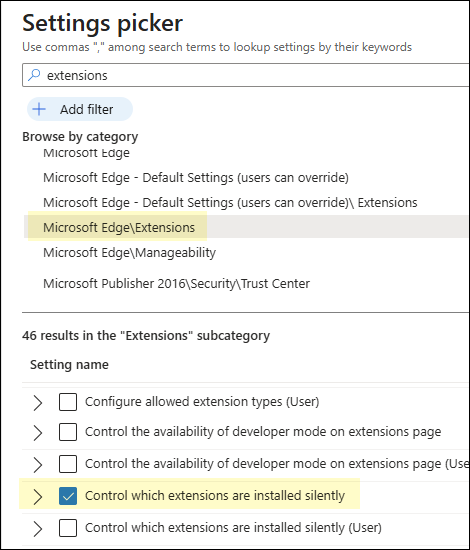
- On the Configuration settings tab, click + Add settings. In the Settings picker, search for
extensions, click on the Microsoft Edge\Extensions category. Then select Control which extensions cannot be installed and Allow specific extensions to be installed.
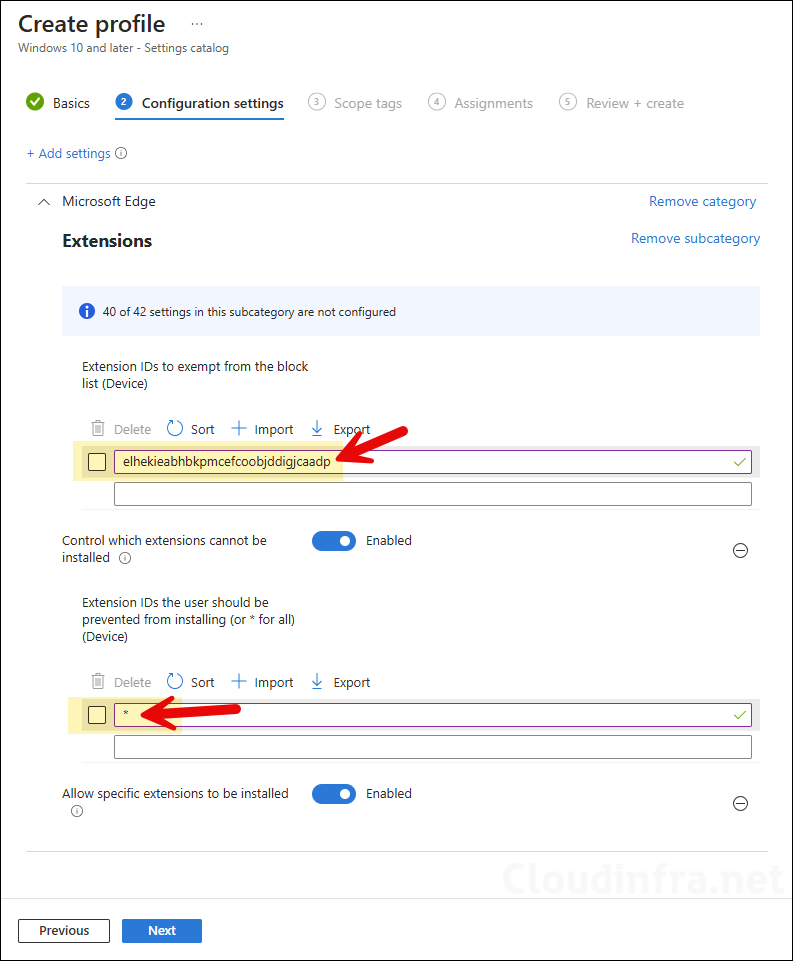
- Control which extensions cannot be installed: This configures ExtensionInstallBlocklist. Enable this setting and add * in the Extension IDs the user should be prevented from installing (or * for all) (Device) text box, and click OK to save. This will block all extensions in Edge.
Instead of blocking all extensions by using a wildcard character (*), you can specify extension IDs to block only specific extensions in Microsoft Edge.
Note
- Allow specific extensions to be installed: Enable this setting and provide the extension IDs to whitelist in the Extension IDs to exempt from the block list (Device) text box. For example, for the Adobe Acrobat extension, add elhekieabhbkpmcefcoobjddigjcaadp value.
- Scope tags (optional): A scope tag in Intune is an RBAC label that you assign to resources such as policies, apps, and devices to control which administrators can view and manage them. For more information, see How to use scope tags in Intune.
- Assignments: Assign the policy to Microsoft Entra security groups that include the target users or devices. As a best practice, start with a small pilot group, and once validated, expand the assignment more broadly. For guidance on assignment strategy, see Intune assignments: User groups vs. Device groups.
- Review + create: Review the deployment summary and click Create.
Step 3: Force-install required extensions (optional)
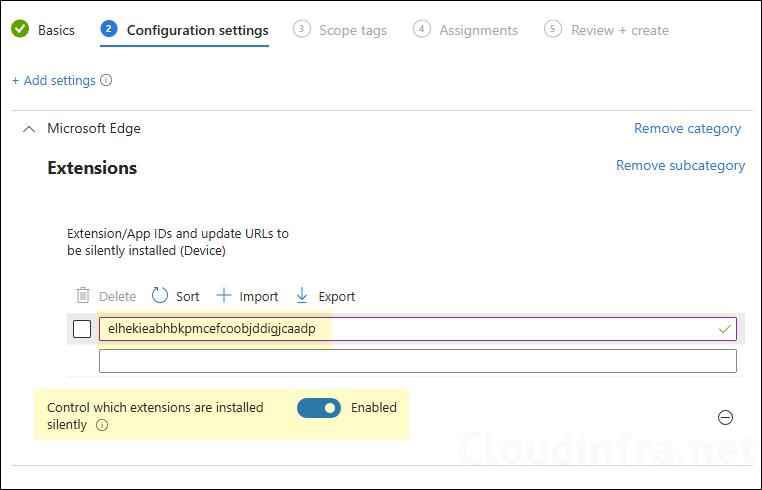
If you have extensions that must always be present (security tooling, password manager), use ExtensionInstallForcelist. Users cannot uninstall or turn off force-installed extensions. In the same policy (or a separate policy), add the setting Control which extensions are installed silently and provide the ID of the extension you want to force install; for example, jbkfoedolllekgbhcbcoahefnbanhhlh is the extension ID of Bitwarden. I will use this ID to force install bitwarden extension in edge.
Add each extension ID you want to force install. Optionally append an update URL using a semicolon format: extension_id;update_url.
Sync Intune Policies
The device check-in process might not begin immediately. If you’re testing this policy on a test device, you can manually kickstart the Intune sync from the device itself or remotely through the Intune admin center.
Alternatively, you can use PowerShell to force the Intune sync on Windows devices. Restarting the device is another way to trigger the Intune device check-in process.
Validate and confirm if the policy is working
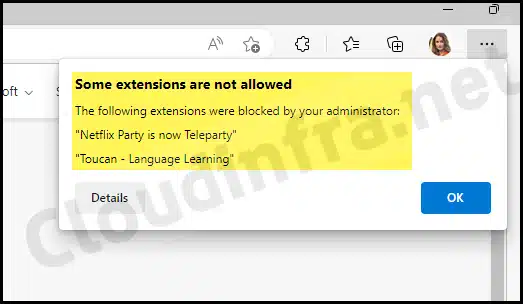
Let’s validate and confirm that the Intune policy to block all extensions in Edge while whitelisting the Adobe extension is working as expected. If any extensions were already installed when this policy was applied, they will also be blocked. In Microsoft Edge, an error message such as “Some extensions are not allowed” may appear. Only the extensions that you whitelist through Intune will be allowed.
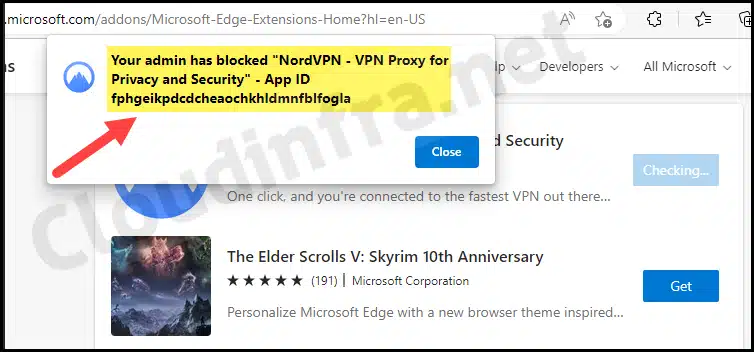
Now, let’s check whether we can install any other extension in Edge. When attempting to install the NordVPN browser extension, the following error message is displayed: “Your admin has blocked <extension name> for Privacy and Security – App ID <AppID>.”
Remove already installed Edge extensions via Intune
Blocking disables extensions, but it does not always satisfy “remove from device” requirements. Microsoft supports removal using ExtensionSettings, which can apply rules per extension and also define a default rule for *.
Configure removal with ExtensionSettings (JSON)
- Sign in to the Intune Admin Center > Devices > Configuration > + Create > New Policy.
- Select Platform type as Windows 10 and later. Select Profile type as Settings Catalog.
- Click on Create.
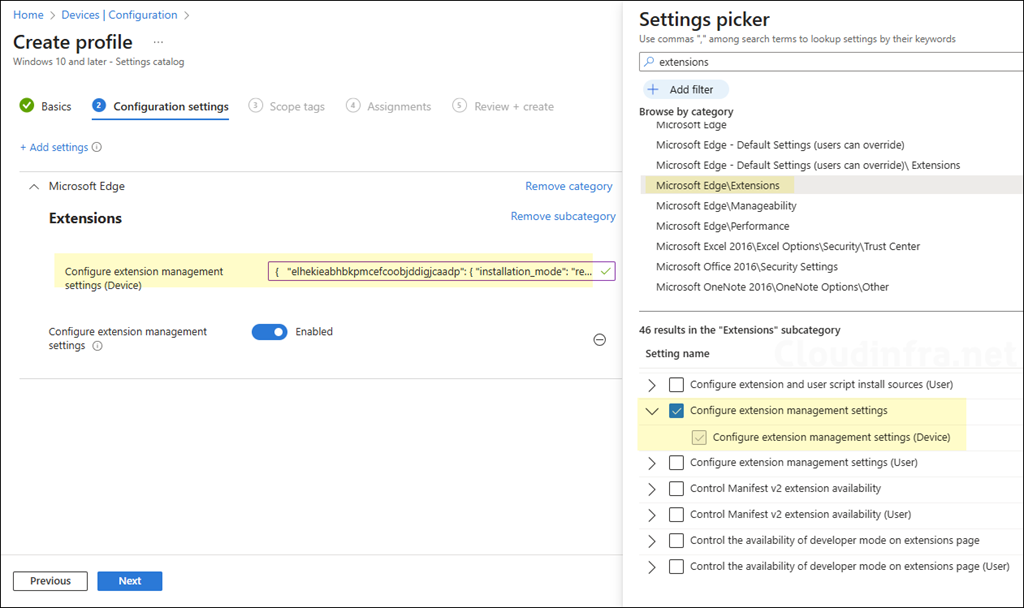
To remove an extension, use the JSON code below, replacing the extension ID with the one you want to remove. Add a settings catalog policy called configure extension management settings (ExtensionSettings), and paste the JSON value. Then assign the policy to a user or device group. For more information, refer to the link: Microsoft Edge Browser Policy Documentation ExtensionSettings | Microsoft Learn.
{
  "elhekieabhbkpmcefcoobjddigjcaadp": { "installation_mode": "removed" }
}
What is the best way to remove extensions already installed?
Hi Tom, the post has been updated to show you the option for removing already installed extensions from Edge browser via Intune. Refer to the post section: Remove already installed Edge extensions via Intune.