This is a step-by-step Windows Autopilot Setup guide. Windows Autopilot enables IT administrators to automate the necessary steps to prepare Windows 10/11 devices for business use.
I’ve written a detailed guide comparing Windows Autopilot and Windows Autopilot Device Preparation. Read it here: Windows Autopilot Vs. Windows Autopilot Device Preparation.
Contents
What is Windows Autopilot?
Windows Autopilot comprises technologies designed to set up and pre-configure new devices, preparing them for productive use. It can be used for deploying Windows PCs or HoloLens 2 devices.
There are no infrastructure requirements for using Autopilot as it’s a cloud-based service that is part of Microsoft Intune licensing.
Windows Autopilot Setup Process Overview
In the days before Autopilot, IT admins had to maintain various versions of custom Windows Gold images for deploying on organization workstations. However, creating custom Windows images and maintaining drivers for every device model is not required with Windows Autopilot.
Windows Autopilot utilizes an OEM-optimized version of Windows 10/11, usually pre-installed. Instead of reimaging the device, you can leverage the existing Windows installation to make it business-ready.
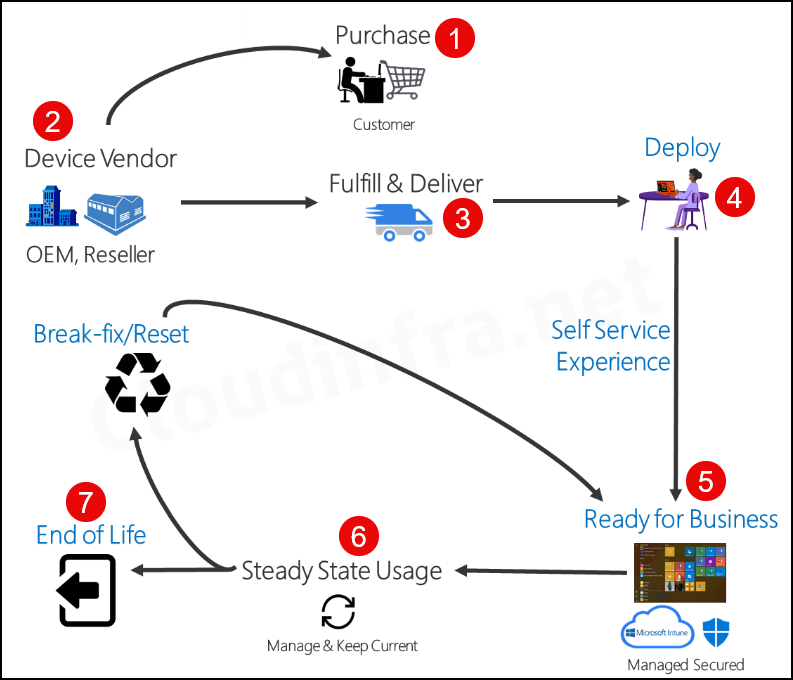
Below is a high-level Autopilot Process diagram illustrating the Windows Deployment Lifecycle using Autopilot.
- Purchase: Customer / Organization Purchases the Laptop.
- Device Vendor, OEM, or Reseller then ships the laptop.
- Fulfill and Deliver: Laptop shipment to the end user
- Deploy: The end User turns on the laptop and logs in using organization credentials.
- Ready for Business: Using Self-Service, Out-of-Box Experience (OOBE) laptops, join Entra ID and enroll in Intune. Additionally, apps, device configuration policies, and targeted applications are installed on the device via Intune.
- Steady State Usage – The laptop is operational and getting updates from Intune.
- End of Life – Laptop is retired and End of Life.
You can Reset the Laptop at any time from the Business ready state, similar to resetting the laptop to its factory default settings. [Break-fix scenario].
Benefits of Using Windows Autopilot
There are many benefits of using Windows Autopilot to provision Windows devices. Let’s check some of them below:
- Automatically join devices to Entra ID or Active Directory (Entra Hybrid join).
- Automatic enrollment of devices in Intune (Requires Microsoft Entra ID P1 or Entra ID P2 License).
- Create and auto-assign devices to configuration groups based on a device’s profile.
- Make the primary user a Standard User or Administrator User on their device using the Autopilot deployment profile.
- Customize Out-of-Box Experience (OOBE) content specific to the organization.
- Utilize the Windows Autopilot Reset feature to quickly reset the laptop to a factory default, business-ready state. Windows Autopilot Reset is commonly used in the below scenarios:
- Address break/fix scenarios.
- Quickly prepare existing devices for new users using the Windows Autopilot reset process.
Windows Autopilot Software Requirements
| Platform | Supported Editions |
|---|---|
| Windows 11 | Windows 11 Pro Windows 11 Pro Education Windows 11 Pro for Workstations Windows 11 Enterprise Windows 11 Education |
| Windows 10 | Windows 10 Pro Windows 10 Pro Education Windows 10 Pro for Workstations Windows 10 Enterprise Windows 10 Education |
Windows Autopilot Licensing Requirements
Autopilot requires one of the following licenses assigned to the users.
- Microsoft 365 Business Premium subscription
- Microsoft 365 F1 or F3 subscription
- Microsoft 365 Academic A1, A3, or A5 subscription
- Microsoft 365 Enterprise E3 or E5 subscription includes all Windows clients, Microsoft 365, and EMS features (Microsoft Entra ID and Intune).
- Enterprise Mobility + Security E3 or E5 subscription includes all needed Microsoft Entra ID and Intune features.
- Intune for Education subscription includes all needed Microsoft Entra ID and Intune features.
- Microsoft Entra ID P1 or P2 and Microsoft Intune subscription (or an alternative MDM service).
Windows Autopilot Networking Requirements
When using the Autopilot service, no networking-related actions are usually necessary. Suppose you send a laptop to a user’s home address, and they set it up using their home broadband. In that case, the Autopilot process will typically function without issues, as most broadband providers do not block connections to Microsoft.
If you are configuring a laptop in the office using Autopilot, and your internet traffic passes through a managed firewall, ensure that your network can communicate with the following Autopilot Deployment service URLs:
- https://ztd.dds.microsoft.com
- https://cs.dds.microsoft.com
- https://login.live.com
For complete details, refer to Microsoft documentation: Autopilot Networking requirements.
Setup Windows Autopilot
You can follow below steps to setup Windows Autopilot
1. Assign License to Users
Ensure that users meet the license criteria for Autopilot, as mentioned above.
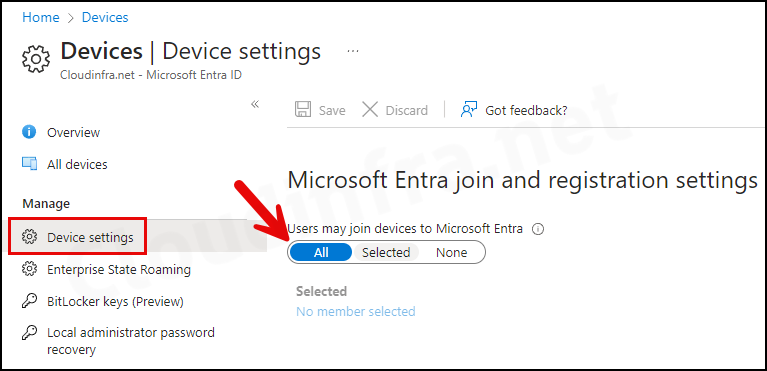
2. Allow Users to Join Devices to Entra ID
- Sign in to the Entra admin center > Devices > All devices > Device settings.
- Set Users may join devices to Microsoft Entra to All.
3. Enable Automatic Enrollment
Automatic enrollment is required if you want an Entra joined device to automatically enroll into Intune. Refer to the link for more information: Configure Automatic enrollment.
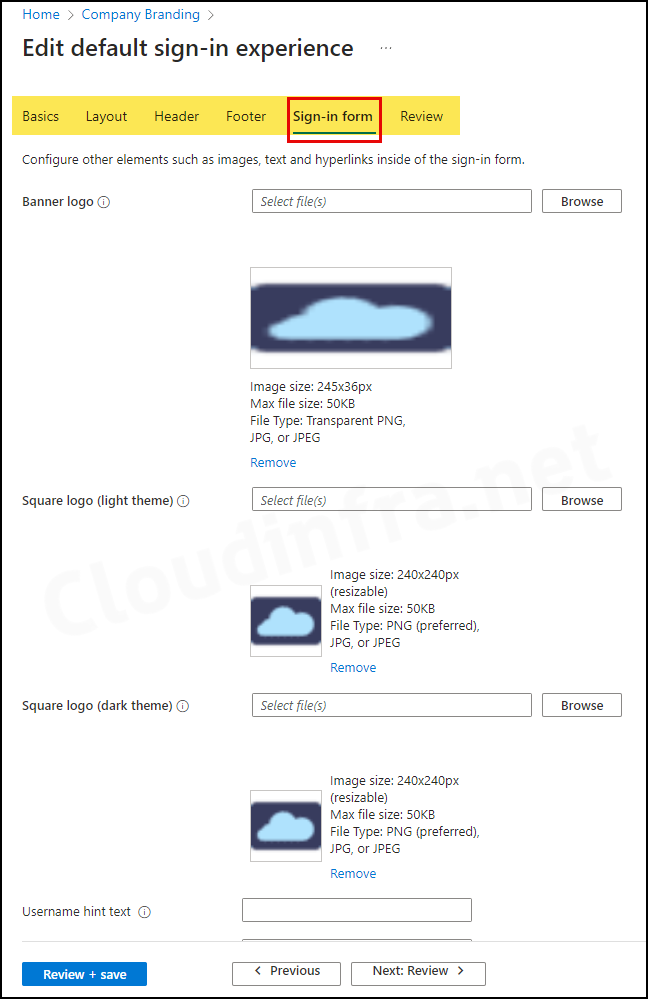
4. Configure Company Branding
Company branding settings enable you to customize the out-of-box experience (OOBE) for users. You can showcase your company logo and adjust colors to match your organization’s theme. This also ensures that the end user enrolling in the device is connected to the correct organization.
- Sign in to the Entra admin center > User experiences > Company branding.
- Edit the Default sign-in configuration and review all the tabs to configure the user experience according to your requirements.
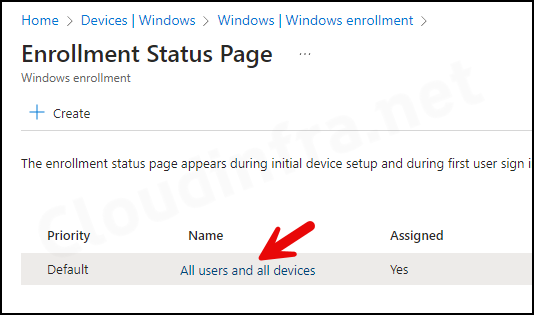
5. Setup Enrollment Status Page (ESP) – Optional
During the device enrollment stage, Enrollment status page (ESP) shows the progress of app deployment or any configuration policies assigned to the device.
- Sign in to the Intune admin center > Devices > Enrollment > Click Enrollment Status Page under Windows Autopilot section.
- Click the All users and all devices link and go to Properties.
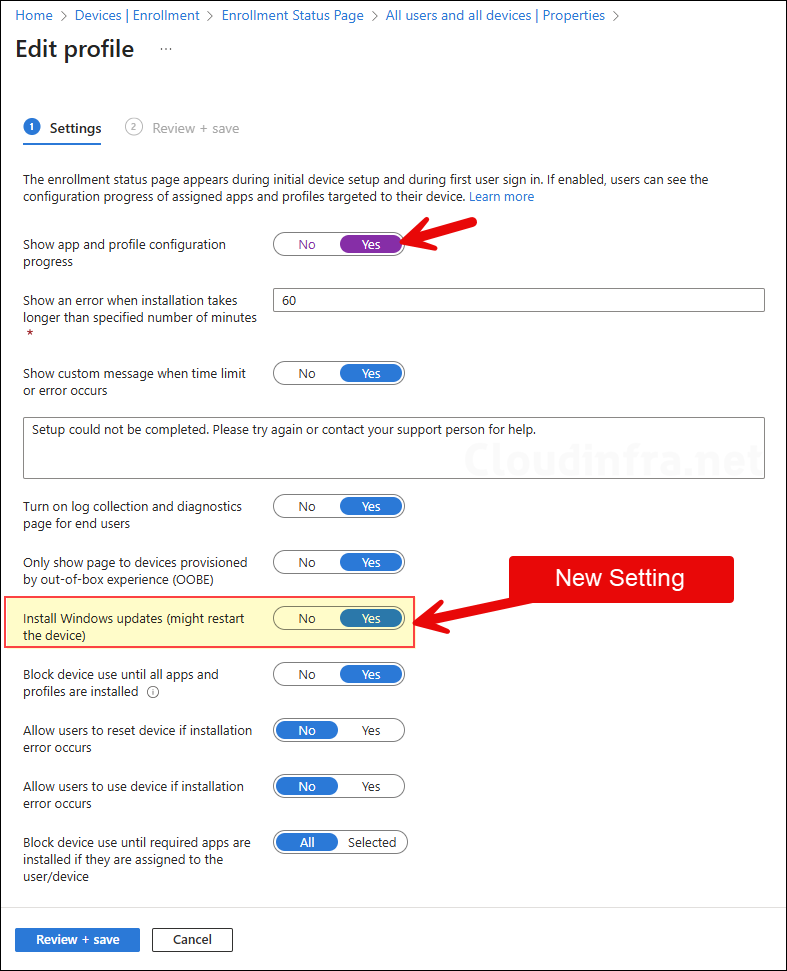
We are going ahead with the default ESP configuration below:
- Show app and profile configuration progress: Yes
- Show an error when installation takes longer than specified number of minutes: 60
- Show custom message when time limit or error occurs: Yes
- Turn on log collection and diagnostics page for end users: Yes
- Only show page to devices provisioned by out-of-box experience (OOBE): Yes
- Install Windows updates (might restart the device): Yes (This is a new setting introduced in August 2025)
- Block device use until all apps and profiles are installed: Yes
- Allow users to reset device if installation error occurs: No
- Allow users to use device if installation error occurs: No
- Block device use until required apps are installed if they are assigned to the user/device: All
6. Create an Autopilot Devices Group
Create an Entra Dynamic Security group for Autopilot devices. This group is necessary to automatically assign an Autopilot deployment profile to devices joined to Entra ID.
- Sign in to the Entra admin center.
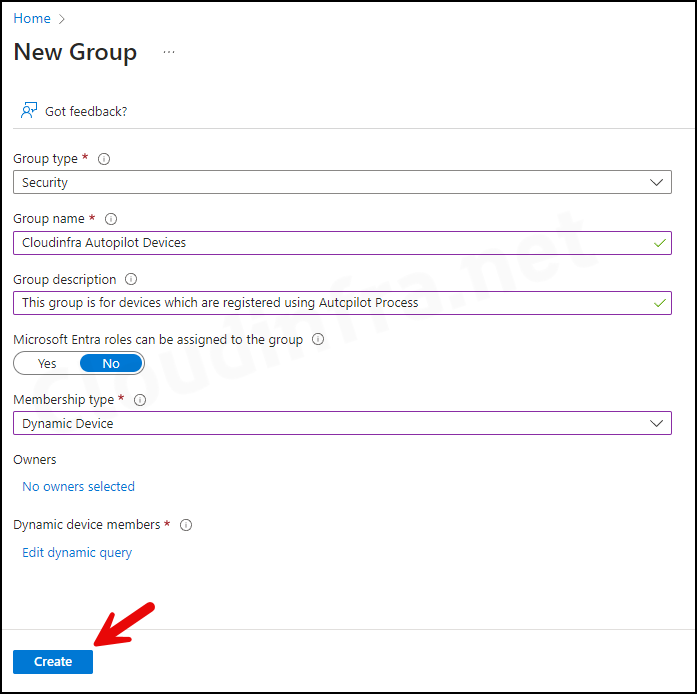
- Click on Groups > All groups > New group.
- Group type: Security
- Group name: Provide a group Name.
- Group Description: Provide a group description.
- Microsoft Entra roles can be assigned to the group: No
- Membership type: Dynamic Device
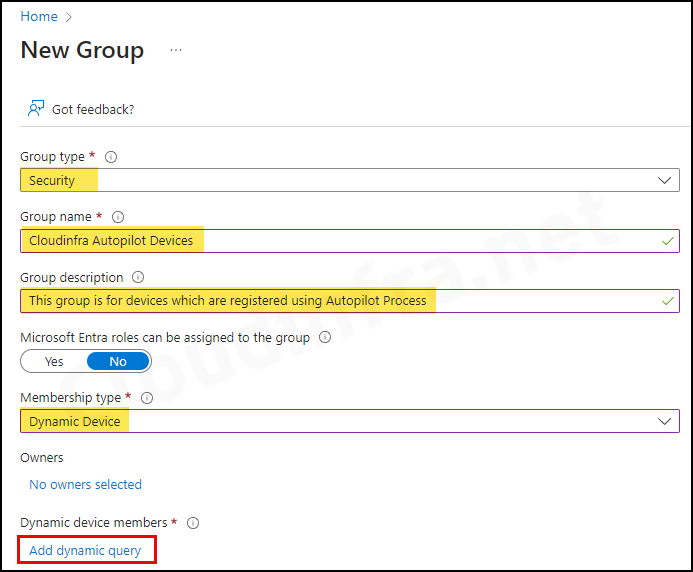
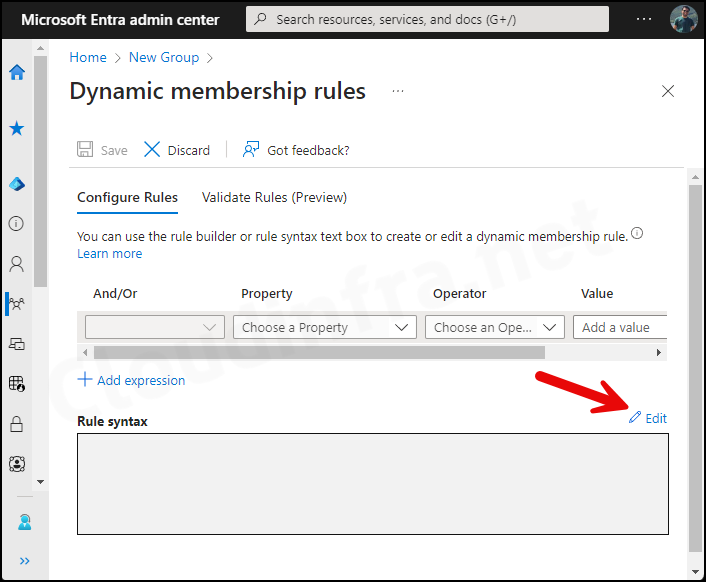
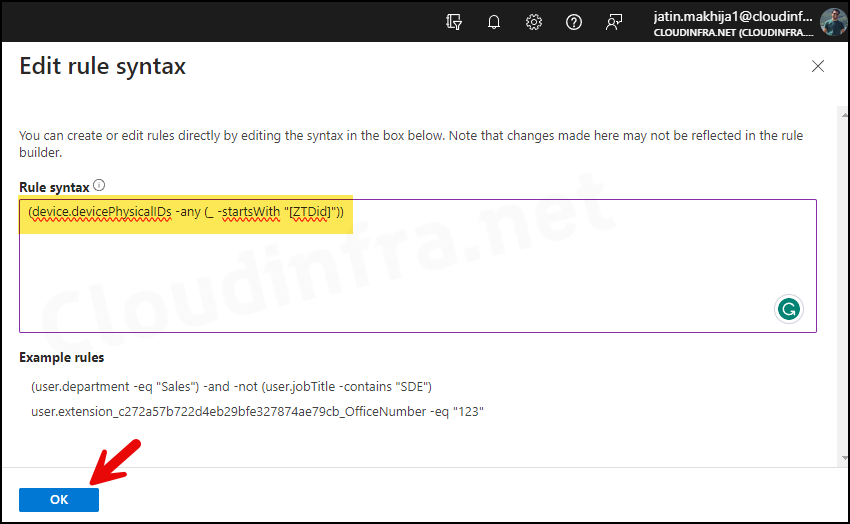
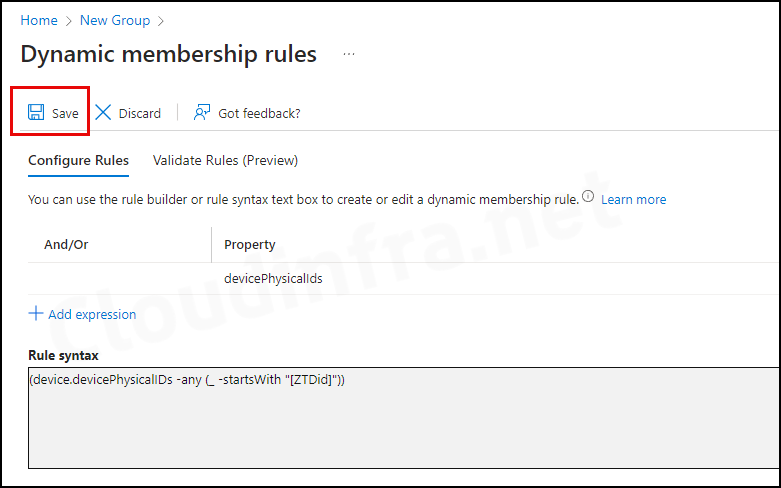
- Under Dynamic device members, click on Add dynamic query. Under the Configure Rules tab, you will find a Rule syntax box. Use the Edit button on the right-hand side and add the below query:
(device.devicePhysicalIDs -any (_ -startsWith "[ZTDid]"))An autopilot device physicalIDs starts with [ZTDid]. Autopilot devices that meet these rules are automatically added to the group. This group will be used when we will create an Autopilot deployment profile.
Note
- Add the Rule and click on the OK button.
- Click on Save to save the rule.
- Finally, click Create to create this Entra dynamic security group for devices.
7. Create an Autopilot Deployment Profile
The next step is to create an Autopilot deployment profile, which will customize the Out-of-Box Experience (OOBE) and deployment mode for end users. You can create up to 350 deployment profiles in a single Intune tenant.
- Sign in to the Intune admin center.
- Navigate to Devices > Enrollment > Deployment Profiles > Create Profile > Windows PC.
- Basics Tab – Provide a Name and Description of the Autopilot deployment profile.
If you want to convert all Corporate owned Entra registered devices in Autopilot then you can select Convert all targeted devices to Autopilot: Yes.
Convert all targeted devices to Autopilot

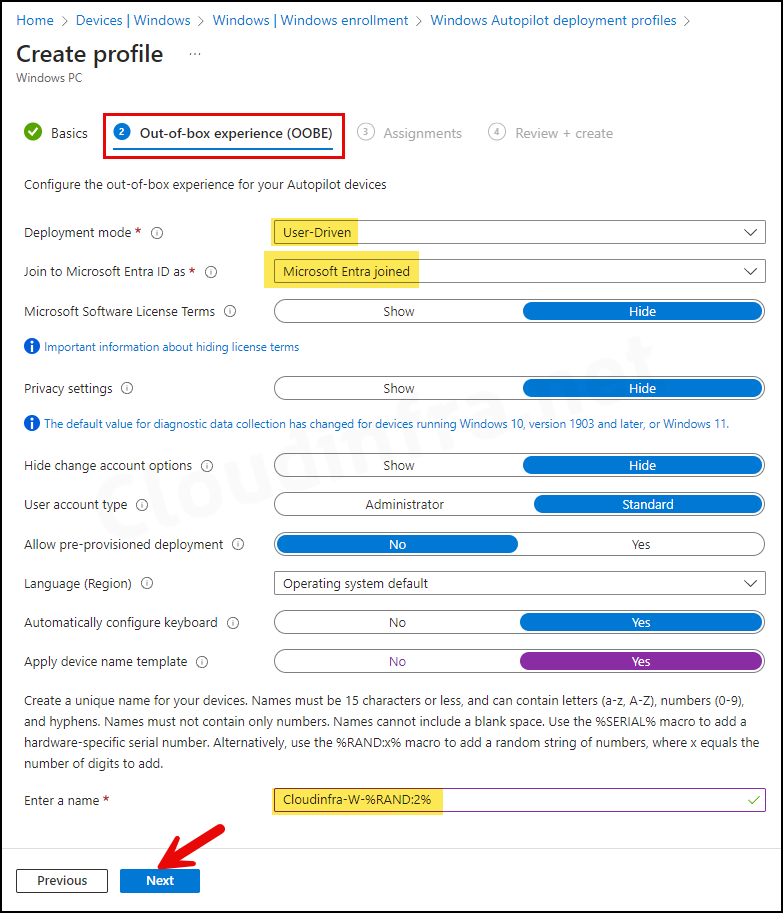
Out-of-box experience (OOBE) Tab
- Deployment Mode: User-Driven
- Devices configured with this mode are associated with the user who enrolls them. User credentials are required to enroll the device.
- Alternatively, there is the self-deploying mode, where user credentials are not required to enroll the device. However, the user-driven mode is the most commonly used deployment method.
- Join to Microsoft Entra ID as: Microsoft Entra joined or Microsoft Entra Hybrid Joined.
- Microsoft Software License Terms: Hide
- Privacy settings: Hide
- Hide change account options: Hide
- This is useful and prevents users from changing account options from corporate to personal accounts, e.g., a Microsoft account. You can configure company branding in Microsoft Entra ID to hide these options.
- User account type: Standard
- You can choose whether to make the user an Administrator or a Standard user. I will select a Standard user account.
- Automatically configure keyboard: If you have configured the Language (Region) setting, then select Yes.
- Apply device name template: This setting requires the device’s Microsoft Entra join type status. You can rename the device during autopilot based on the template you provide. The device name must be 15 characters or less. For example, Cloudinfra-W-%RAND:2%. This will create devices with names like Cloudinfra-W-01, Cloudinfra-W-02, etc.
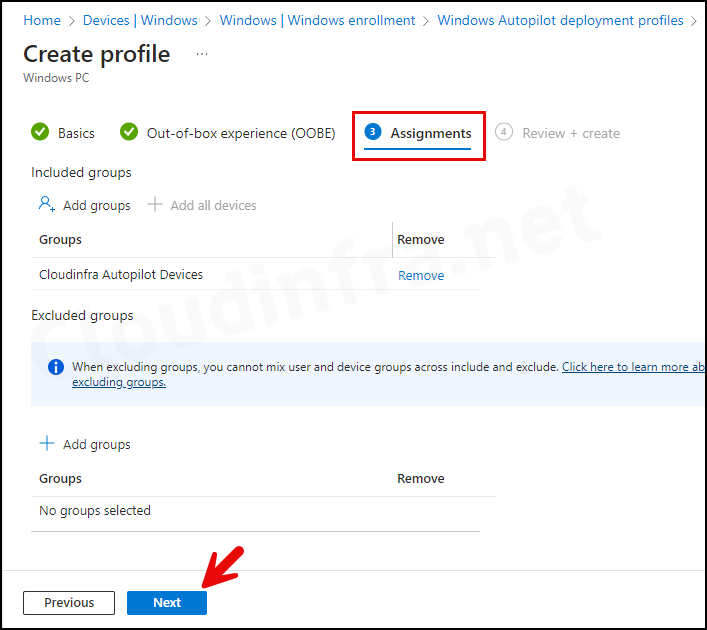
- Assignments: Assign this Autopilot deployment group to the Entra Dynamic Security Group we created previously in Step 6.
- Review + create: Review the Autopilot deployment profile summary and click on Create.
8. Capture Hardware Hash of the Device
The device’s hardware identity, also called the hardware hash, is required to register the device in Windows Autopilot. We will collect this information from the device and upload it to the Intune admin center to complete the registration process.
Normally, this process is handled by the original equipment manufacturer (OEM) reseller from whom you purchased the device. However, you can also register for Autopilot yourself. Let’s review the steps:
- Login to the Windows 10 or Windows 11 device that you want to register with autopilot.
- Open the Powershell console as an administrator and execute the below commands:
Collect Device Hardware Hash in the AutopilotHWID.csv file
[Net.ServicePointManager]::SecurityProtocol = [Net.SecurityProtocolType]::Tls12
New-Item -Type Directory -Path "C:\HWID"
Set-Location -Path "C:\HWID"
$env:Path += ";C:\Program Files\WindowsPowerShell\Scripts"
Set-ExecutionPolicy -Scope Process -ExecutionPolicy RemoteSigned
Install-Script -Name Get-WindowsAutopilotInfo
Get-WindowsAutopilotInfo -OutputFile AutopilotHWID.csv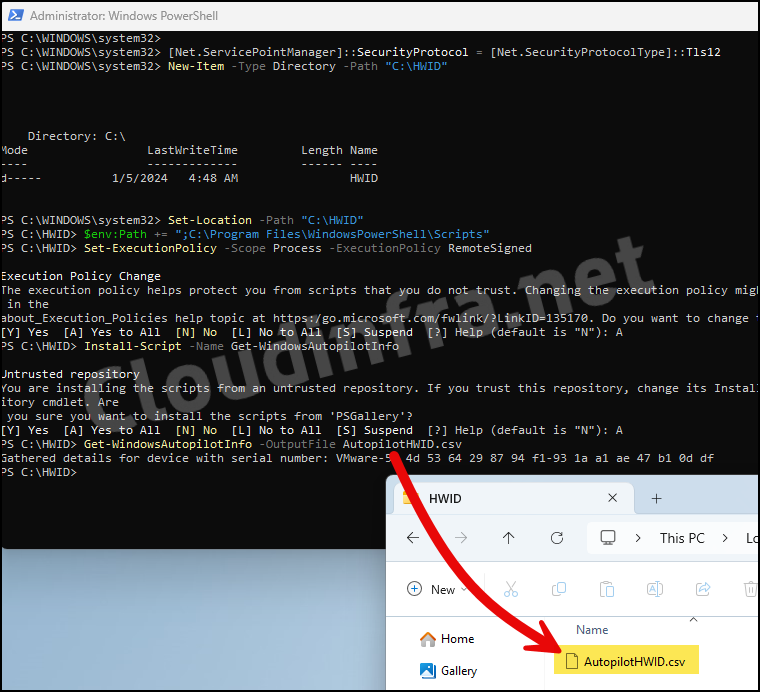
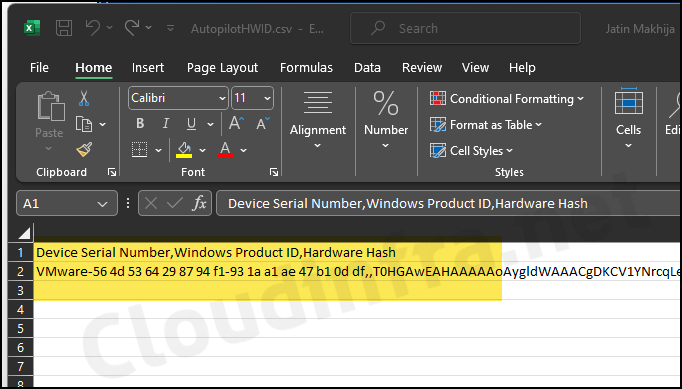
You can directly upload the AutopilotHWID.csv file in Intune. This file contains below Information about the device:
- Device Serial Number
- Windows Product ID
- Hardware Hash
9. Import Device Hardware Hash CSV in Intune
We will now import the AutopilotHWID.csv file to Intune to complete the Windows Autopilot device registration. Let’s review the steps:
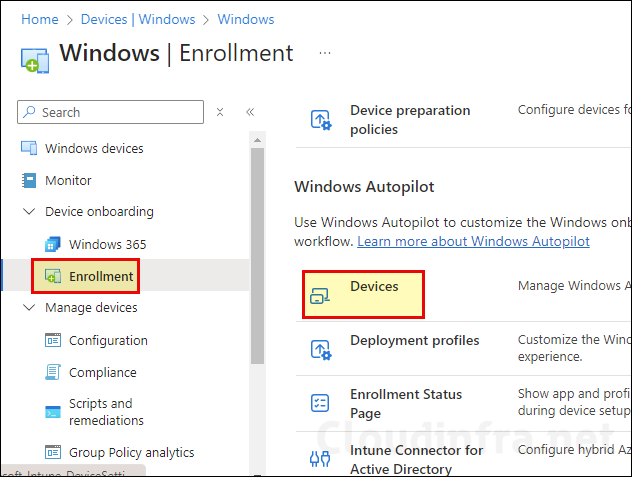
- Sign in to the Intune admin center.
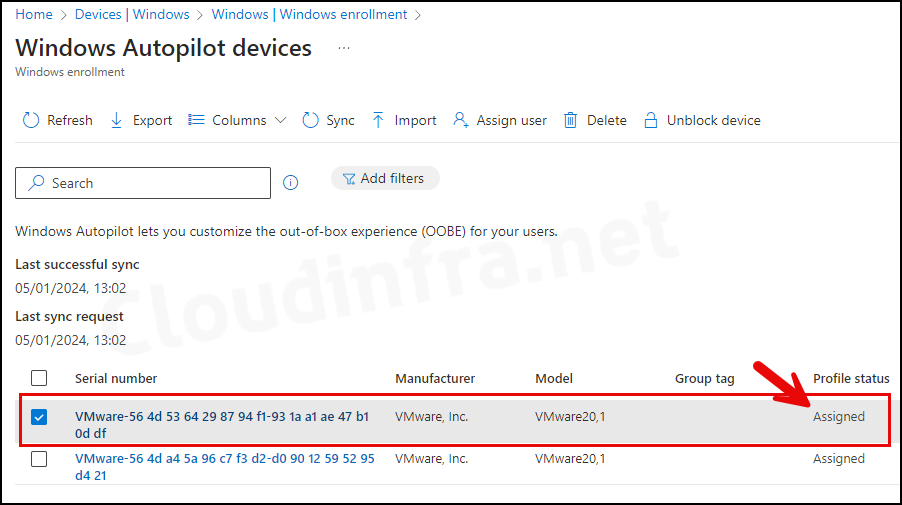
- Navigate to Devices > Windows > Enrollment > Devices.
- Click Import and then browse the AutopilotHWID.csv file containing the device hardware hash. Click on Import to initiate the import process.
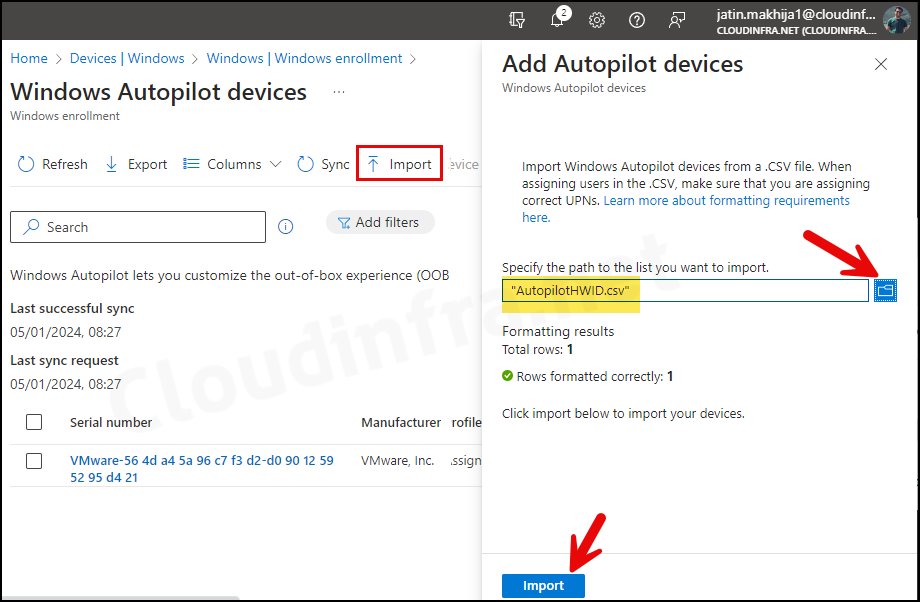
- The device has been imported into Intune, and under the Profile status, it shows as Assigned. This is because we created an Autopilot Entra Dynamic Security Group based on the Autopilot device attribute. Therefore, all Autopilot devices will have the Autopilot Deployment profile assigned automatically.
Reset Windows Device
As the Autopilot setup and configuration have been completed, and the device hardware hash is uploaded in Intune, I will now proceed to reset this device and demonstrate the Autopilot process. For a detailed guide on resetting a Windows PC, refer to my other post: How To Factory Reset A Windows 11 PC.
- Log in to the Windows device for which we uploaded the hardware hash in Intune.
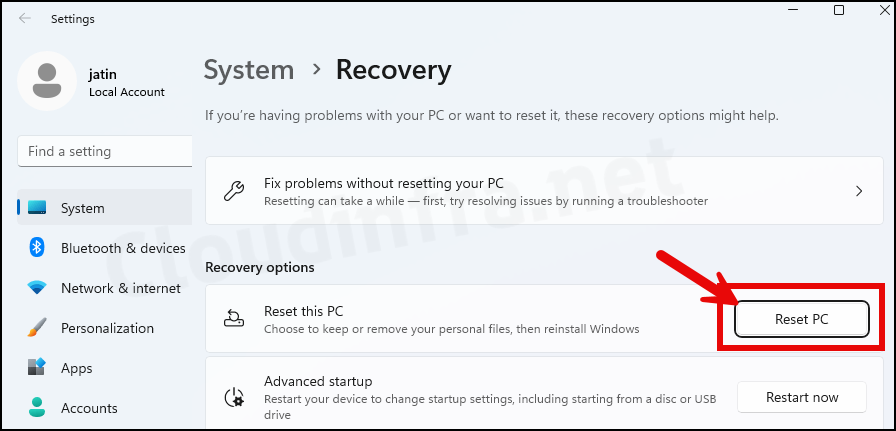
- Press Windows + I to open the Settings App.
- Navigate to System > Recovery.
- Click on the Reset PC button.
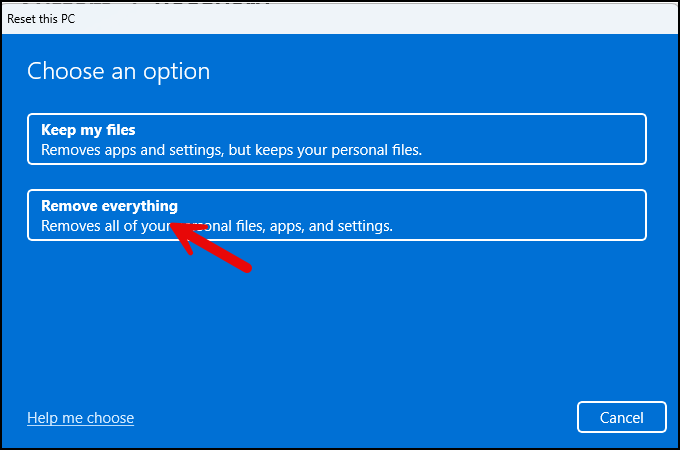
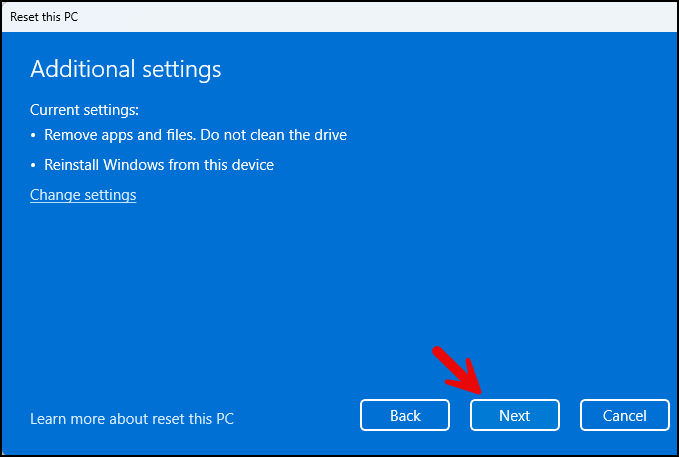
- Select the option Remove everything.
- Select the Local reinstall option, which is faster than the Cloud download option.
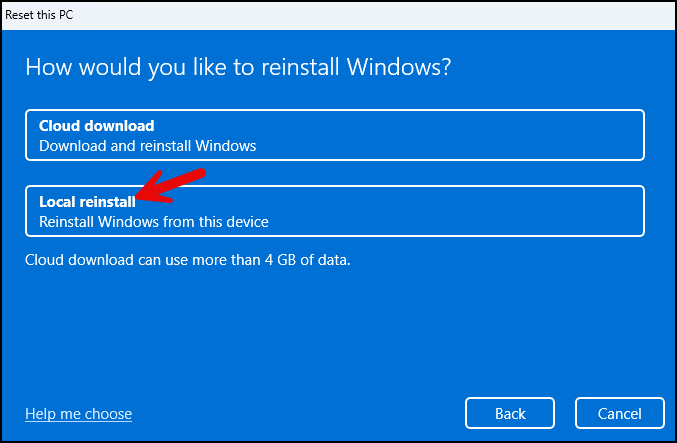
- Click on Next.
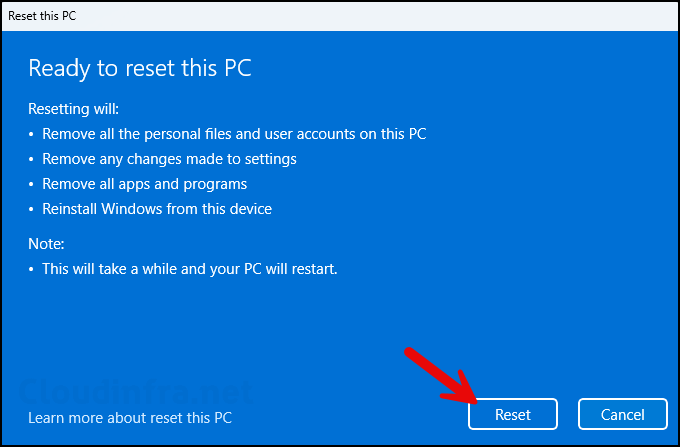
- Click on the Reset button to initiate the reset process for this device. Please note that this process will remove all applications and is equivalent to factory resetting the device to a clean state.
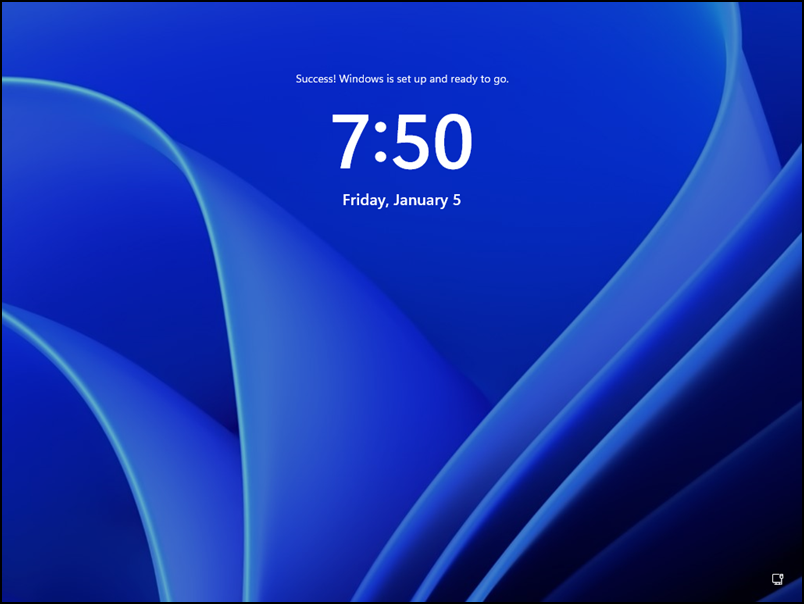
Autopilot in Action after Device Reset
As you initiate a Windows Device Reset, the system restarts and presents you with the Out-of-box experience (OOBE) screens. Depending on the Autopilot deployment profile, you will encounter certain screens, and some may be hidden during the process.
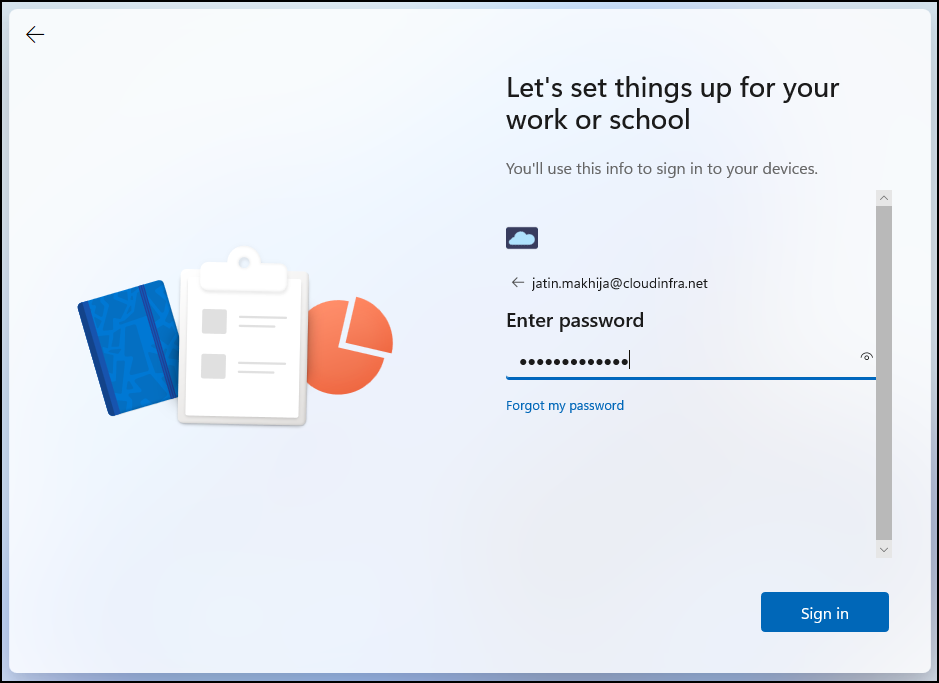
For example, in our Autopilot Deployment profile, we configured not to show the Privacy terms and Microsoft Software License agreement; therefore, those screens will be hidden. You may notice the company branding, such as the logo and color theme, during the setup process.
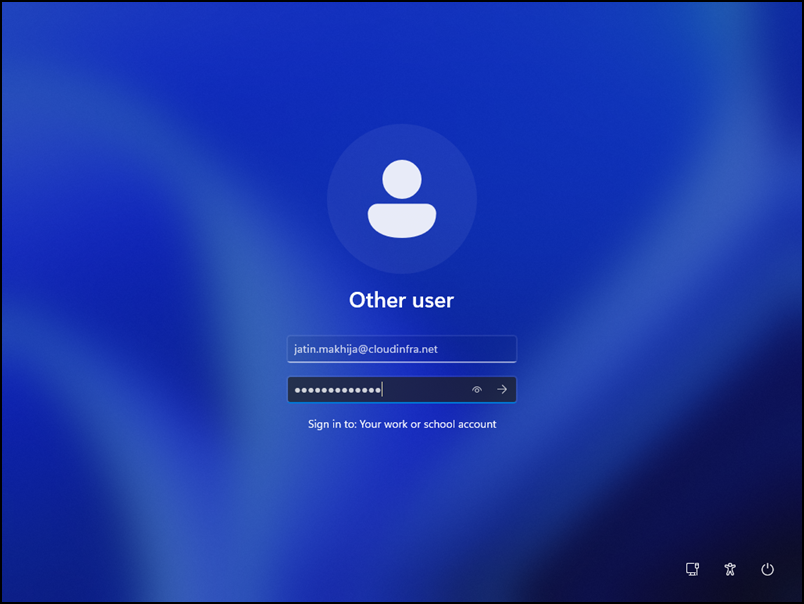
- Enter the organization’s email address and password, then click the Sign In button.
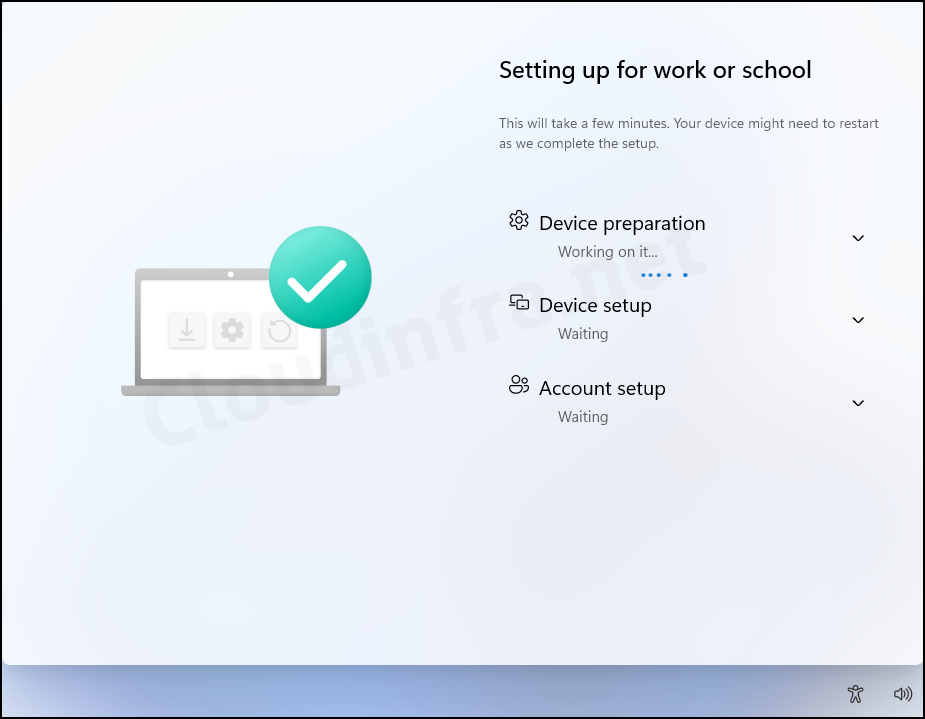
- The Enrollment Status Page (ESP) will be displayed during the Autopilot setup process, showing the device configuration progress. Users won’t be able to access the desktop until all configurations and application deployments are completed. This ensures that the device is business-ready before first use.
- If you don’t configure or enable the Enrollment Status Page (ESP), below screen won’t appear, and all the configurations and app deployments will occur after users sign in. This means that users will gain access to the desktop quickly and before completing these processes.
- If you have configured Windows Hello for Business, you may be prompted to set it up now.
- Provide organization-provided user credentials to log in to the device.
- It may take a few minutes to access the desktop. During this time, the system finalizes configurations and applies settings to ensure a seamless and secure setup.

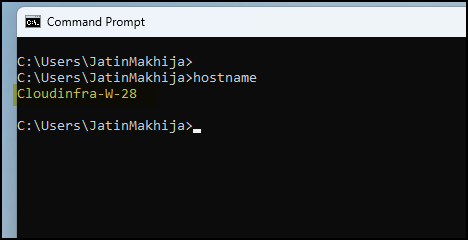
- Open the command prompt and type the command
hostname. This will display the system name configured as per the Autopilot device template configured in the Autopilot deployment profile. In this case, the system name is Cloudinfra-W-28, which adheres to the device naming template Cloudinfra-W-%RAND:2%.
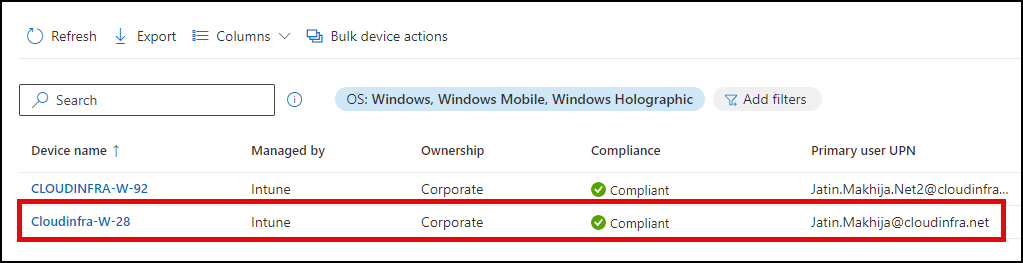
- Sign in to the Intune admin center and navigate to Devices > Windows. You can search for the device in the list. Take note of the compliance status and ownership details of the device. The Primary User UPN will be displayed for the user account used to enroll the device during the Autopilot process.
Further Reading
To read more about Windows Autopilot, you can refer to Autopilot Microsoft documentation, which is available at the link: https://learn.microsoft.com/en-us/autopilot/windows-autopilot.
This is a super super helpful guide! I just acquired 4 laptops for a small business and I’m a newbie when it comes to Business Premium, Intune, Entra, and Autopilot.
This guide helped me make it past the Enrollment Status Page all the way to user login (I’m waiting until I can deliver the laptop to the end user before I take next steps).
However, when I look at Intune Devices->Windows Devices I see the newly registered laptop with a big red X Noncompliant. When I navigate to Devices Compliance for that laptop, I see 2 compliance policies:
1. Default Device Compliance Policy, Logged in user: System Account, State: Compliant
2. Company Compliance Policy, Logged in user: System Account, State: Not compliant
Back in Devices->Compliance, I have Bitlocker required and antivirus required. The policy is applies to the dynamic security group. I wonder if the policy settings are too restrictive given that we haven’t completed first time login?
(by the way, I was able to directly upload the hardware hash using these instructions…workable for a small number of laptops I suppose https://learn.microsoft.com/en-us/autopilot/add-devices#directly-upload-the-hardware-hash-to-an-mdm-service)
Hey Cliff, thanks for the comment. For the device to be in a fully compliant state, you have set both BitLocker and Antivirus to Require. In my experience, compliance with BitLocker can take some time.
Before that, check which specific compliance setting is making the device non-compliant. Go to Device > Device compliance and review the exact setting showing an error. Is it BitLocker, or another compliance setting?
Also, is the device fully encrypted? Do you already have a disk encryption policy configured for BitLocker under Devices > Endpoint Security > Disk encryption? Check the encryption status.
Thanks Jatin, It is bitlocker. I’ll give it some time and see how it goes. I did a full PC reset which might have thrown things off.
I have not set the policy for disk encryption yet. I’m a little leery about the extra complexity? I’ll research some more on that, thank you again 🙂
Sure, let’s wait for some time and then check again. Let me know how it goes. Understand that setting up BitLocker could be a bit complex. I have a detailed step-by-step covering the steps to enable and configure BitLocker if that helps: https://cloudinfra.net/enable-and-configure-bitlocker-using-intune/
Thank you for this post super helpfull!