In this post, I will demonstrate the steps to show desktop icons on multi-app kiosk devices using Intune. By default, when a device is configured in multi-app kiosk mode, desktop icons are hidden, and users see a minimal, restricted Start menu showing only the pinned apps. You can also configure the XML file to pin apps to the taskbar.
This is the default kiosk setup, designed to provide a clean interface without desktop shortcuts. However, if you prefer to make it easier for users to access allowed apps through desktop icons, note that this cannot currently be configured through the kiosk XML configuration file. To achieve this, you need to use either a standalone PowerShell script, Intune device remediations or some other solution.
A PowerShell script offers a quick way to fix this issue by modifying the Windows registry to display desktop icons in the user profile. There is a limitation with using a standalone script deployed via Intune, it runs only once, so the registry setting may revert to its original value next time the sync occurs, which can hide the desktop shortcuts again.
To address this, you can run the PowerShell script through a scheduled task that executes periodically to correct any configuration drift. Alternatively, if you have an Enterprise or Education license, you can use Intune device remediations, which involves creating separate detection and remediation scripts. With Intune device remediations, there’s no need to create a scheduled task, as you can define the script frequency directly from the Intune portal to maintain consistent configuration.
In this post, I’ll first demonstrate Intune device remediation method, where I’ve already created and tested both detection and remediation PowerShell scripts. Simply deploy these scripts to your kiosk devices, and the desktop icons located in the Public Desktop and user profile will appear for the kiosk user. Then I will show you a standalone PowerShell script to implement this solution.
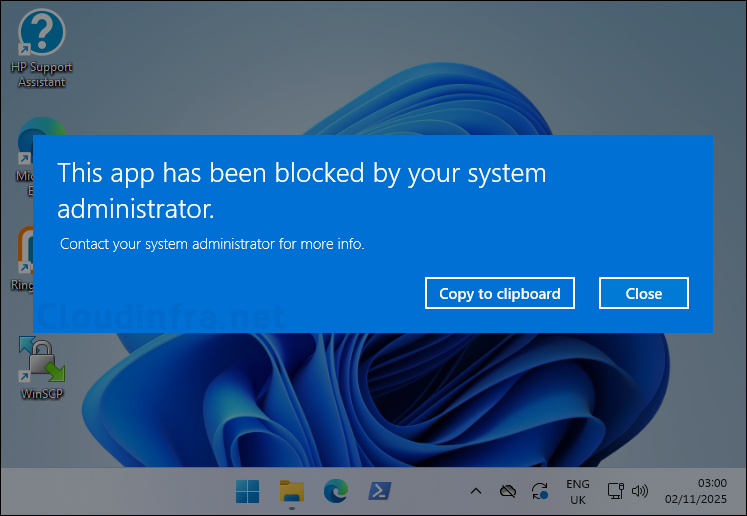
Make sure that the apps for which you’re displaying desktop shortcuts are installed on the kiosk device and included in the <AllowedApps> section of the XML configuration file. Otherwise, when users click a shortcut, they’ll see an AppLocker app deny message: The app has been blocked by your system administrator. Intune device remediation requires Enterprise licensing (see below). If you don’t have Enterprise licenses, you can still apply the fix on kiosk devices by using a standalone PowerShell script with a scheduled task, this method will work on both Windows 11 Pro and Enterprise editions.
Remediations requires users of the devices to have one of the following licenses. If you are not meeting the license criteria, then you can simply deploy a standalone PowerShell script via Intune admin center > Devices > Scripts and Remediations > Platform scripts option. For more information, refer to the blog post: How to deploy a Powershell script using Intune.
- Windows 10/11 Enterprise E3 or E5 (included in Microsoft 365 F3, E3, or E5)
- Windows 10/11 Education A3 or A5 (included in Microsoft 365 A3 or A5)
- Windows 10/11 Virtual Desktop Access (VDA) per user
For showing desktop shortcuts on Kiosk devices, I have created a standalone PowerShell script and also listed the steps to create a scheduled task which runs the PowerShell script periodically. Refer to the end of the post for more details.
Contents
Download PowerShell Scripts
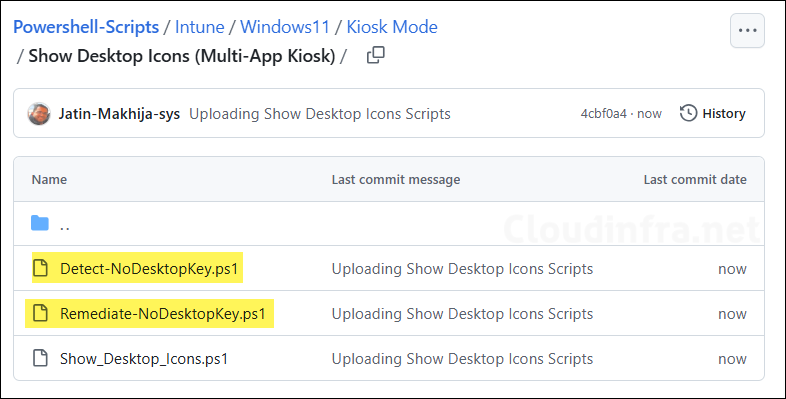
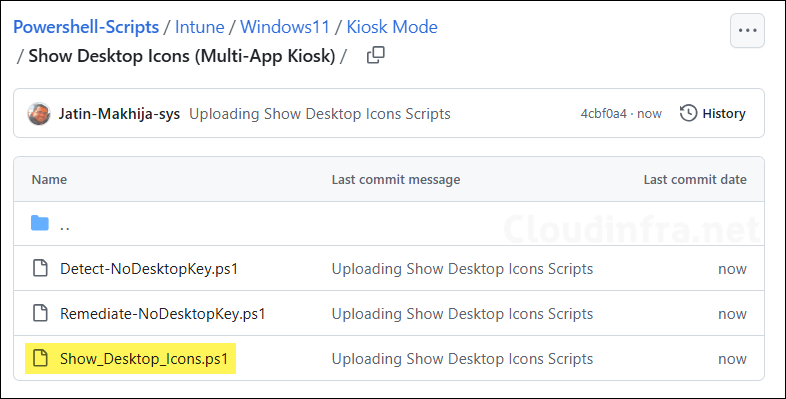
For Intune device remediation method, you will need a detection script and a remediation script. I have created these scripts and placed it in my GitHub repo, you can download the scripts using the link: Show Desktop Icons (Multi-App Kiosk).
Create Intune Remediation
Now that we have downloaded the PowerShell scripts, create a device remediation on Intune admin center to deploy the scripts on kiosk devices.
- Sign in to the Intune admin center > Devices > Scripts and remediations > Click on + Create under the Remediations tab.
- Basics Tab: Provide the Name and Description of the remediation.
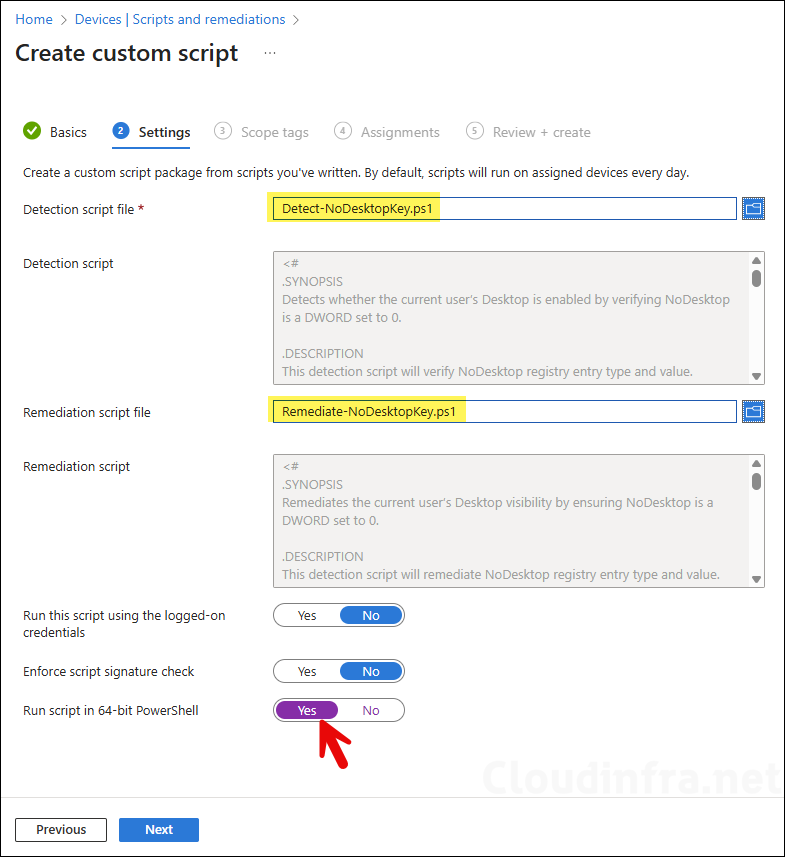
- Settings Tab: Browse to detection and remediation scripts and configure below settings.
- Detection script file: Browse to the detection script Detect-NoDesktopKey.ps1.
- Remediation script file: Browse to remediation script Remediate-NoDesktopKey.ps1.
- Run this script using the logged-on credentials: No.
- Enforce script signature check: No.
- Run script in 64-bit Powershell: Yes.
- Scope tags (optional): A scope tag in Intune is an RBAC label you add to resources (policies, apps, devices) to limit which admins can see and manage them. For more Information, read: How to use Scope tags in Intune.
- Assignments: Click on + select groups to include to add an Entra security group containing kiosk devices. You can also select the Schedule to run this script package. You have three options: Once, hourly, or Daily. For information on assignments to users or devices, see: Intune assignments: User groups vs. Device groups.
- Review + create: Review the deployment summary and click Create.
Sync Intune Policies
The device check-in process might not begin immediately. If you’re testing this policy on a test device, you can manually kickstart Intune sync from the device itself or remotely through the Intune admin center.
Alternatively, you can use PowerShell to force the Intune sync on Windows devices. Restarting the device is another way to trigger the Intune device check-in process.
Monitor Device Remediation Scripts
To monitor the progress of a device remediation scripts, follow below steps:
- Sign in to the Intune admin center > Devices > Scripts and remediations.
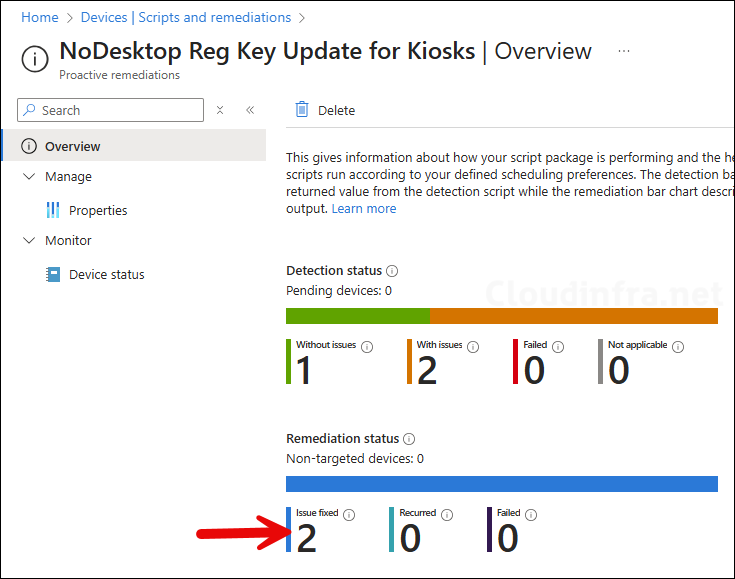
- Click on the Remediation script package you want to monitor: for example, NoDesktop Reg Key Update for Kiosks. On the Overview page, find the deployment status of the scripts.
Using a Standalone PowerShell Script (Windows 11 Pro)
If you can’t use Intune remediations due to licensing limitations, you can use a standalone PowerShell script that sets the NoDesktop registry value to 0. As mentioned earlier in this post, you’ll also need to create a scheduled task that runs the script periodically to ensure the registry value remains set to 0.
You can download the PowerShell script from my GitHub repository link: Show Desktop Icons (Multi-App Kiosk), which will make sure that the NoDesktop DWORD registry value is set to 0. To schedule the execution of this script, create a scheduled task. I’ve written a detailed step-by-step guide explaining how to schedule PowerShell scripts using Intune: Schedule PowerShell Scripts with Intune. Use this combined solution (PowerShell script + scheduled task) to display desktop shortcuts on kiosk devices. This method works on both Windows 11 Pro and Enterprise editions.
End User Experience
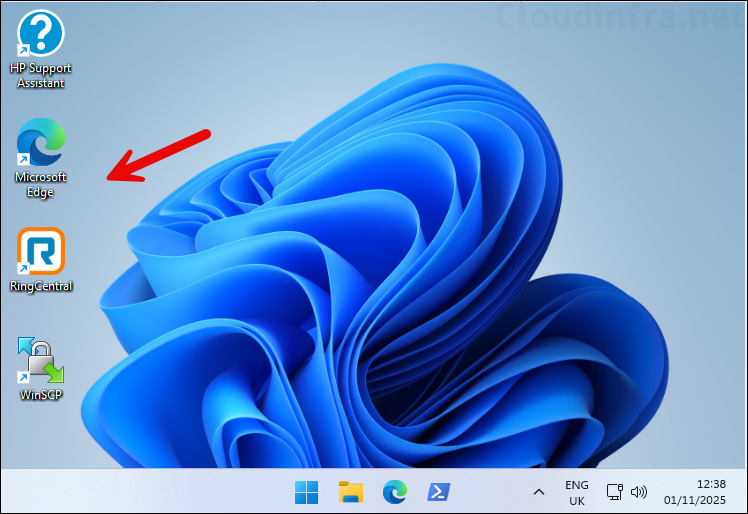
Once the deployment has been completed successfully, desktop shortcuts will be displayed on the target Kiosk devices. Ensure that these apps are included in the <AllowedApps> tag of the XML configuration file. Below screenshot is from one of my Kiosk device, where this solution has been implemented, and desktop shortcuts are visible.
If you haven’t allowed apps under the tag <AllowedApps>, users will see an appLocker deny message when they click the desktop shortcut: This app has been blocked by your system administrator. Contact your system administrator for more info.
To avoid this issue, review which apps are deployed on the kiosk devices that create shortcuts under C:\Users\Public\Desktop. If you want users to access all of these apps, add them in your XML configuration file. If you only want users to access specific apps, delete the unwanted shortcuts from the Public Desktop folder so they won’t see or attempt to open apps that are not allowed.
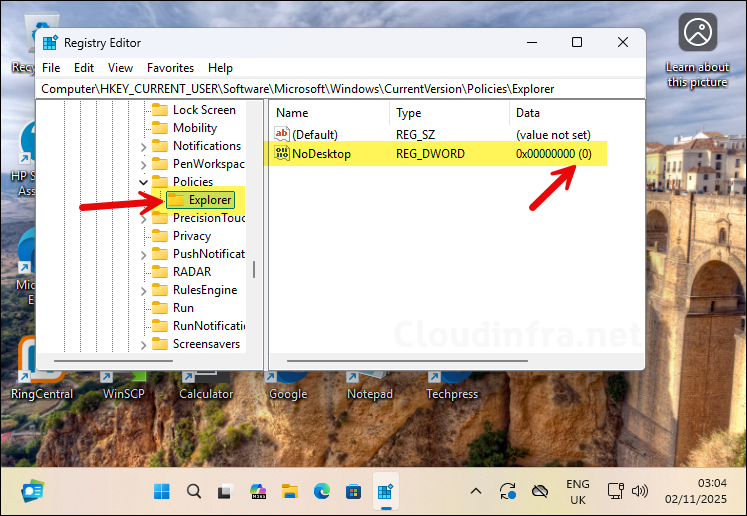
To verify that the remediation or standalone PowerShell script is working correctly, open the Registry Editor and navigate to: HKEY_CURRENT_USER\Software\Microsoft\Windows\CurrentVersion\Policies\Explorer. Confirm that the NoDesktop (DWORD) registry entry is set to 0. This shows that the desktop icons are enabled, and the fix is applied successfully.
