In this blog post, we will learn how to resolve Error code 0x80072ee7 that you may get while activating Windows. This error code may appear on both Windows 10 and Windows 11 devices.
If you don’t activate Windows, you may encounter periodic reminders to activate, experience limitations in personalization options, miss out on security updates, lose access to Microsoft support, and face restrictions on some features.
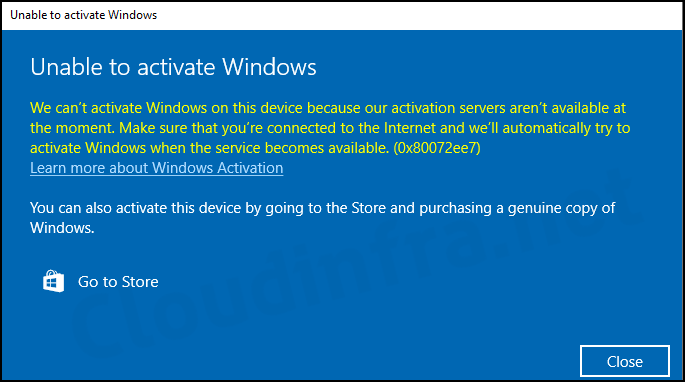
Below is the exact error message you will see on the screen. There are multiple methods to fix this issue; however, the most common solution is to ensure that your internet connection is working properly.
| Unable to activate Windows [Error Message] |
|---|
| We can’t activate Windows on this device because our activation servers aren’t available at the moment. Make sure that you’re connected to the Internet, and we’ll automatically try to activate Windows when the service becomes available. (0x80072ee7). |
Method 1 – Ensure your Computer is Connected to the Internet
The error message also advises ensuring you’re connected to the Internet. This is the first troubleshooting step we’ll take. To check Internet connectivity, open any web browser and visit a website to confirm your Internet works.
There are alternative methods to check and confirm internet connectivity, which involve using a command prompt. Let’s go through the steps:
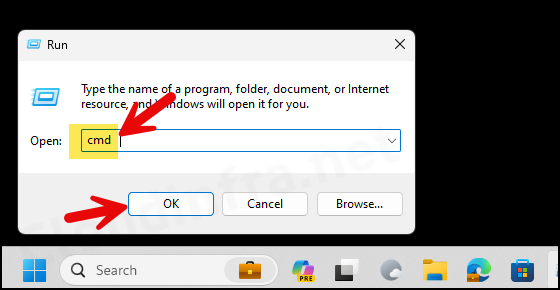
- Press the Windows key + R to open the Run dialog box.
- Type cmd and press Enter.
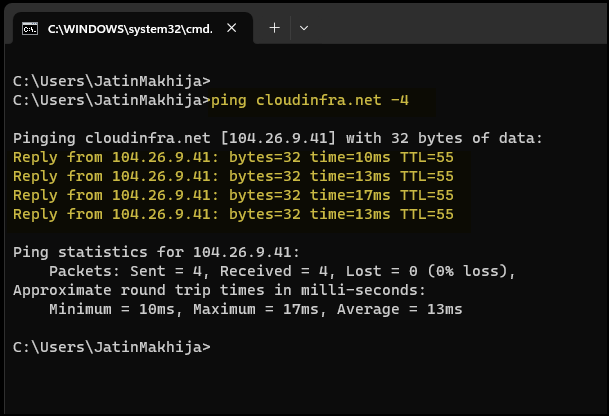
- To check if the internet is working, you can ping any website. If you receive a response, it confirms that the internet connectivity is fine. [Example command:
Ping cloudinfra.net -4. I have added -4 at the end of the command to get the IPv4 address in the response].
Method 2 – Ensure the Product key is Valid
If you use an invalid product key for Windows 10/11 activation, you may encounter the error code 0x80072ee7. Ensure that the product key is genuine and still valid.
If you don’t know the product key applied to your computer, refer to the blog post 4 Easy Ways to Get Windows 10/11 Product Key to retrieve your Windows 10/11 product key.
After obtaining the product key, verify its validity with the vendor. If it’s invalid or expired, request a new key. Once you have the new key, update it using the steps below:
To update the product key on your device, follow the below steps:
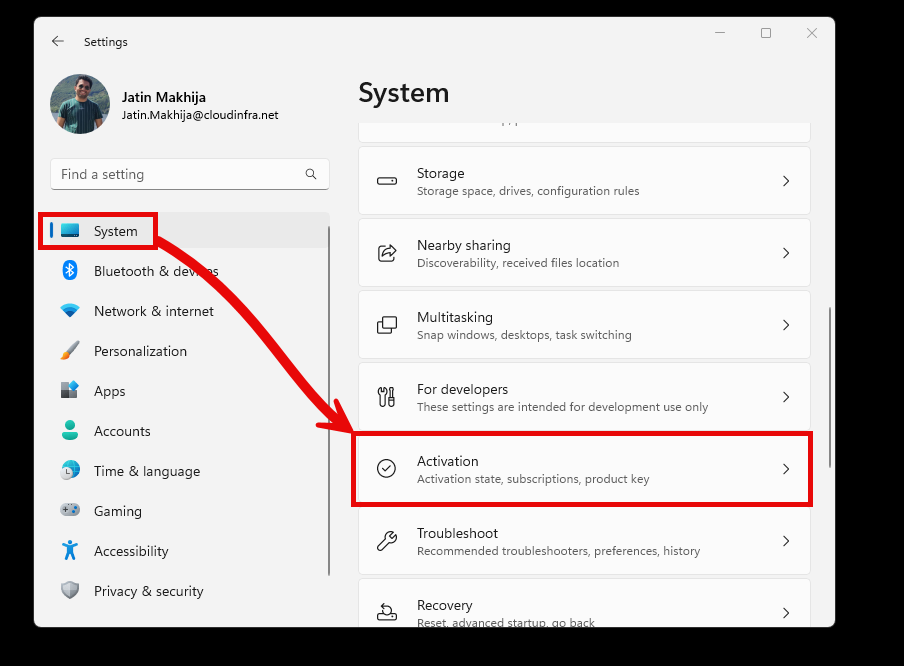
- Press Windows + I to open the Settings App.
- Click on System > Activation.
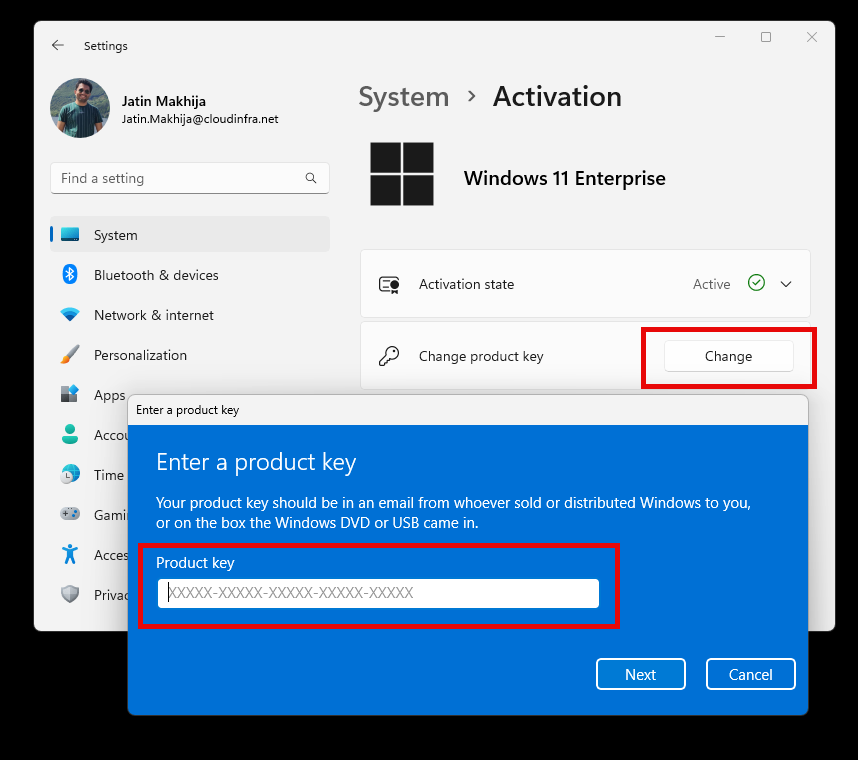
- Click on the Change button and Enter the valid Product key in the Product Key box. Click on Next to proceed. That’s it—you have applied the new and valid product Key to your device.
- The next step is to try and activate your Windows 10/11 device again and this time it should not have any issues.
Method 3 – Review DNS Settings
An invalid DNS configuration on your Windows 10/11 computer can result in activation error 0x80072ee7. You might encounter a WINHTTP error on your device, indicating that “The server name or address could not be resolved“.
Generally, when using a broadband connection provided by your Internet Service Provider (ISP), you don’t need to make any changes to the DNS settings and should keep them at their default state. However, as we are encountering this error code, it is advisable to review the settings once to ensure that DNS is not the cause of this issue.
Please follow the steps below to check and confirm your DNS settings:
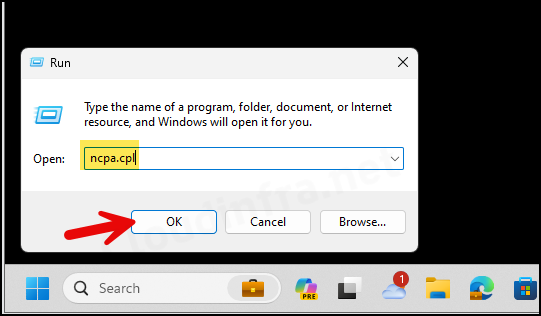
- Press Windows + R to open the Run dialog box
- Type ncpa.cpl and press Enter.
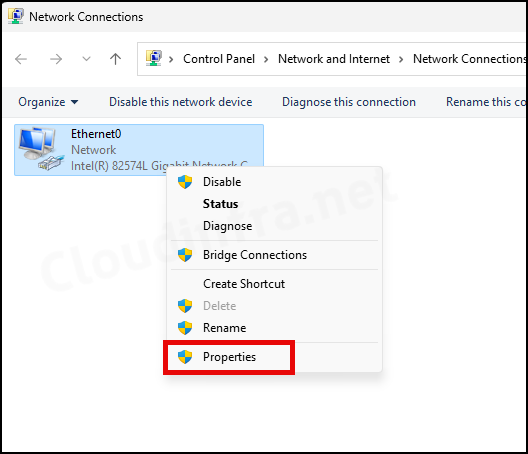
- Right-click on the Network Adaptor and click on Properties.
Please note that on my device, the network adapter’s name is “Ethernet0,” but it could be different on your device. For example, if you are using a laptop with Wi-Fi, then it could be named WiFi.
Ensure to right-click on Active network adaptor
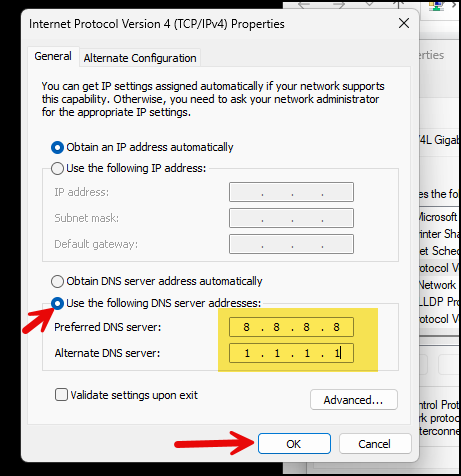
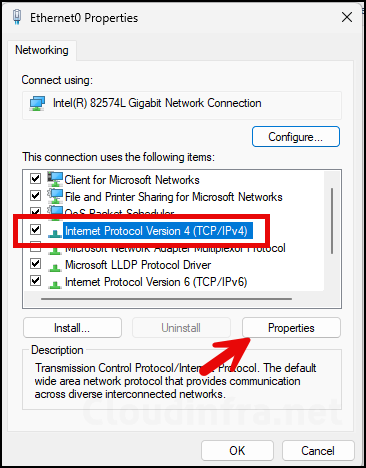
- Select Internet Protocol Version 4 (TCP/IPv4) and click on Properties.
- Select the following DNS server address and provide the primary DNS server with 8.8.8.8 and the alternative DNS server with 1.1.1.1. Press OK and restart the device. Try to Activate your Windows device again to check if it’s getting activated this time.
- Please note that this is a temporary change. This adjustment will help confirm if there are any issues with the DNS.
- If the internet starts working fine after this change, you should contact your ISP to log a ticket and Inform them about this, as DNS settings are typically meant to be kept at the default state for your broadband connection and are generally not manually specified.