In this post, I will show you how to install AutoPatch client broker using Intune. AutoPatch client broker is a new feature of AutoPatch service which was released in September 2025. Client broker is an optional, on-demand client that you can install on users devices. Once installed, it performs device readiness checks and simplifies log collection, making troubleshooting and support much easier. Overall, it does two things:
- Device readiness checks: A component of the client broker which performs device readiness checks and reports the results back to Autopatch service.
- Log Collection service: Client broker can automatically collect logs to help diagnose and resolve issues more quickly. Without the broker, logs must be collected manually and shared with the support team. When the client broker is installed, the support team can access the logs more easily for troubleshooting issues.
Even though Autopatch Client Broker is an optional component of the Windows Autopatch service, I recommend deploying or installing it on all devices. It provides several useful benefits, such as easier log collection and device readiness checks.
Contents
Installing AutoPatch Client Broker using Intune
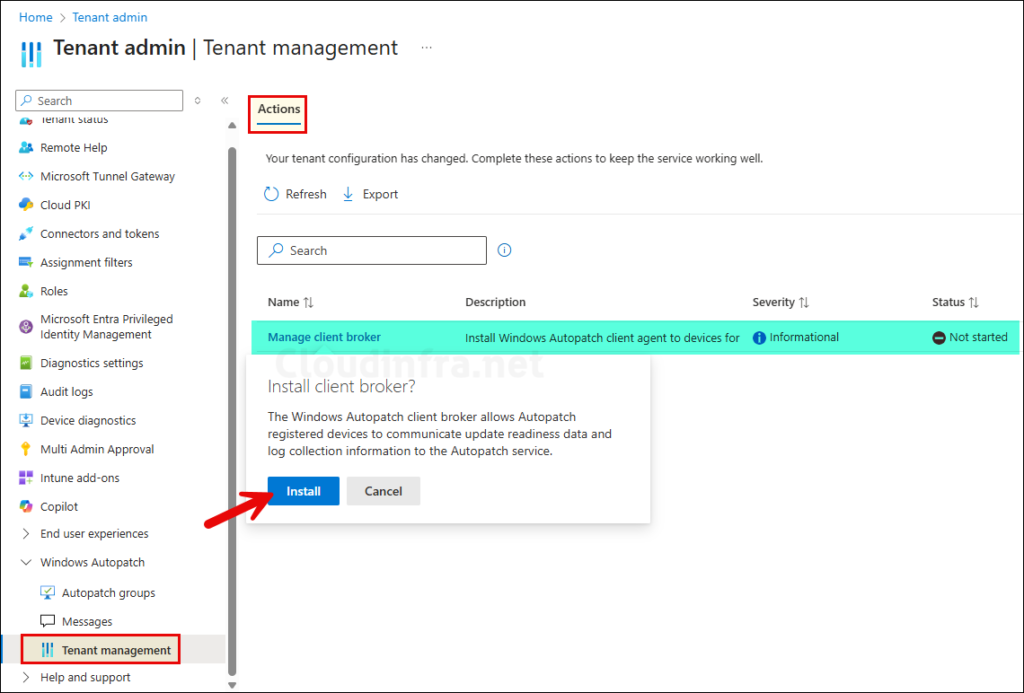
To deploy/install AutoPatch Client broker, Sign in to the Intune admin center > Tenant administration > click on Tenant management under Windows Autopatch. Under the Actions tab, you will find Manage client broker listed, click on it and then click on Install.
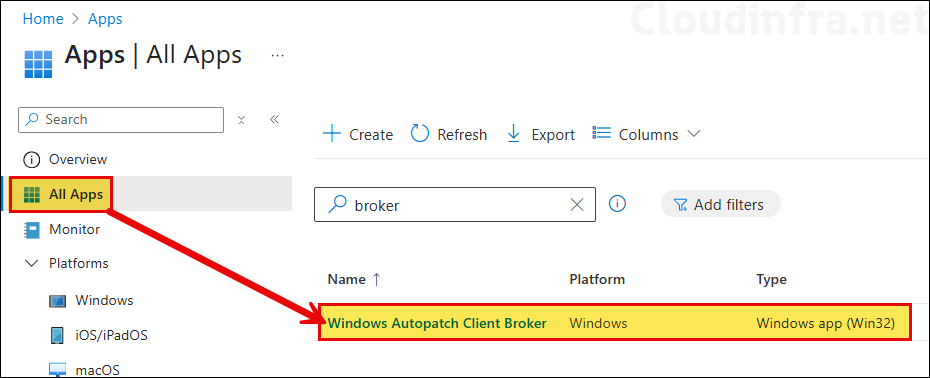
After you click on Install, Autopatch will automatically create a Windows app (Win32) app deployment for deploying Autopatch client broker application and target it to Windows Autopatch – Devices All which contains all Autopatch registered devices. To locate the app, Go to Intune admin center > Apps > All Apps and search for AutoPatch Client broker app.
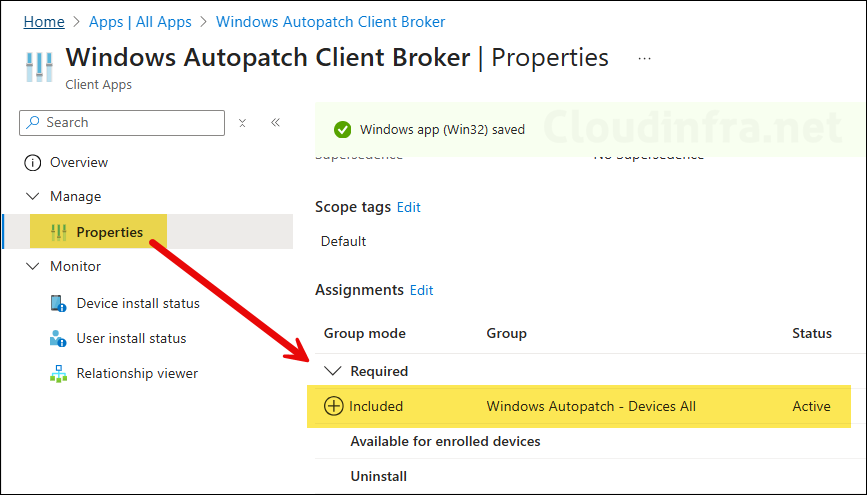
You can click on the Win32 app, go to Properties, and review the Assignments section. By default, this app is automatically assigned to the Windows Autopatch – Devices All Entra group.
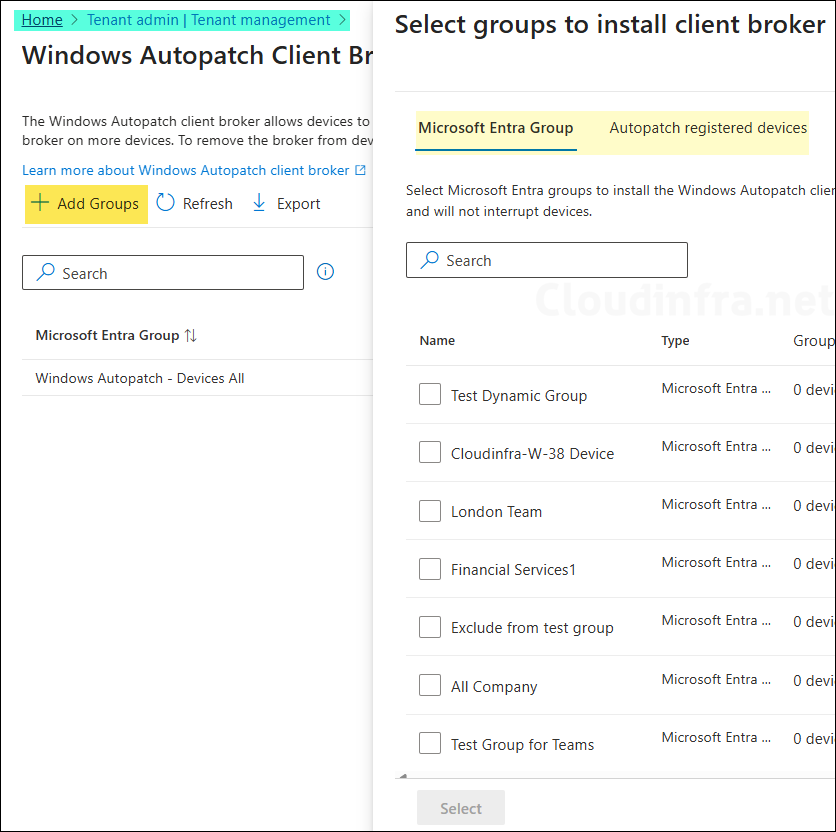
You can also manage AutoPatch client broker application from Intune admin center > Tenant administration > click Tenant management under Windows Autopatch. Then click on + Add Groups to add the entra groups for app deployment.
As a best practice, use this method to manage the app rather than directly modifying the app group membership. Autopatch automatically handles app assignments based on the groups you add or remove on this page. To remove a group, click the ellipsis (…) next to the group name and select Remove group. The group will then be unassigned from the Win32 app by Autopatch.
Installing AutoPatch Client Broker App Manually
If you are facing any issues installing the Autopatch client broker on a particular device, you can also install it manually using Microsoft provided Powershell script: Install Client broker using PowerShell script.
- Copy the script contents and save it in a file with extension .ps1.
- Open PowerShell console as administrator and execute the script.
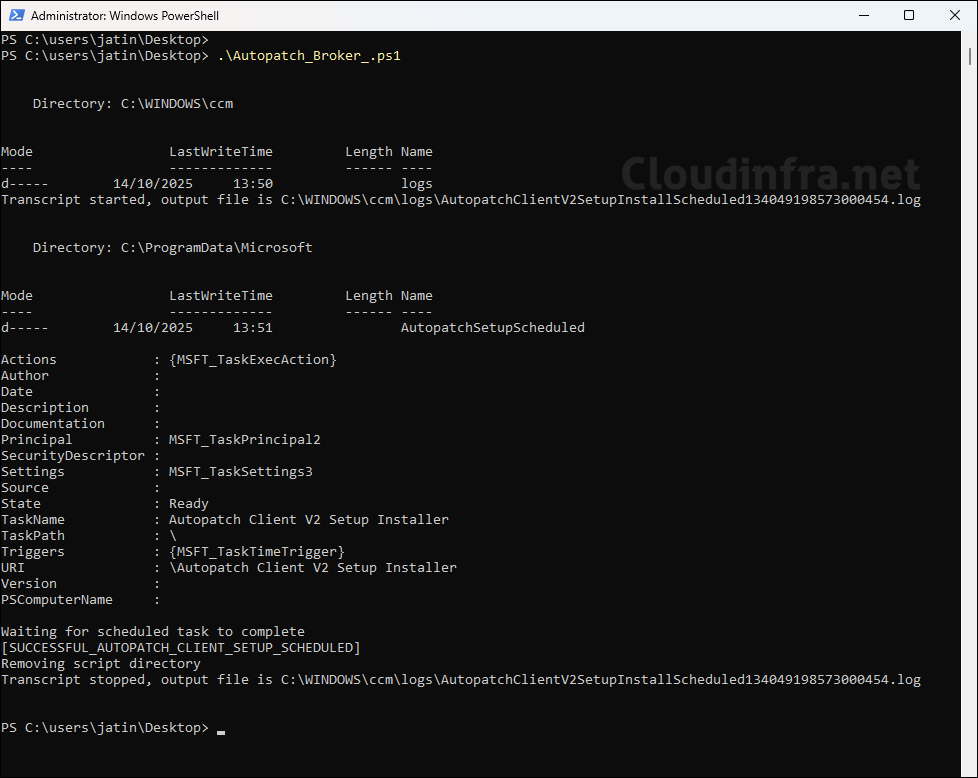
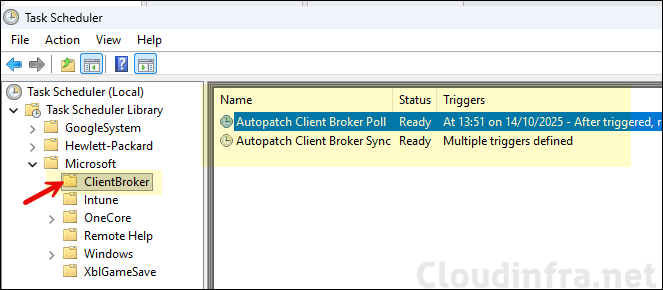
After you execute the PowerShell script, it will create scheduled tasks in Task scheduler. To locate the scheduled task, open the Task scheduler on your device > Task scheduler library > Microsoft > ClientBroker folder. Here, you will find two AutoPatch tasks: Autopatch Client Broker Poll and AutoPatch Client Broker Sync.
- Autopatch Client Broker Poll: This task will trigger C:\Program Files\Windows Autopatch Client Broker\ClientBroker\ClientBroker.exe with poll switch.
- AutoPatch Client Broker Sync: This task will trigger C:\Program Files\Windows Autopatch Client Broker\ClientBroker\ClientBroker.exe with sync switch.
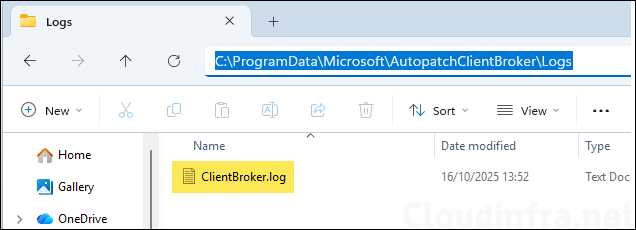
You can review the logs related to AutoPatch client broker by navigating to C:\ProgramData\Microsoft\AutopatchClientBroker\Logs and open the ClientBroker.log file.
Conclusion
Autopatch client broker is an optional component of Autopatch cloud service. Creating a deployment and managing its assignments is easy with few-clicks. You can deploy this to all devices as it has benefits of making the troubleshooting easy for support team and also helps with the device readiness checks.