In this blog post, I will show the steps to set PowerShell execution policy using Intune. PowerShell execution policy helps prevent execution of malicious scripts from running on your computer. Default execution policy on Windows is set to restricted. In this mode, users can run commands on PowerShell console but cannot execute any PowerShell script files (.ps1. .psm1, .ps1xml). On non-windows devices, execution policy, which is by default set to unrestricted, cannot be changed.
You can easily set execution policy locally on the device by using Set-ExecutionPolicy cmdlet and set it to one of the below values. To learn more about the policies, refer to this link: about execution policies.
- AllSigned
- Bypass
- Default
- RemoteSigned
- Restricted
- Undefined
- Unrestricted
When configuring PowerShell execution policy via Intune, you can set it to any of the below modes:
- Allow only signed scripts:
- This is equivalent to the AllSigned mode, in which only scripts signed by a trusted publisher are permitted to run.
- Allow local scripts and remote-signed scripts:
- This setting allows any execution of locally created scripts. However, scripts originating from the internet must be signed by a trusted publisher to run. This configuration is equivalent to the RemoteSigned mode.
- Allow all scripts:
- This setting allows all scripts to be run. This is equivalent to Unrestricted mode.
Contents
Configure PowerShell Execution Policy using Intune
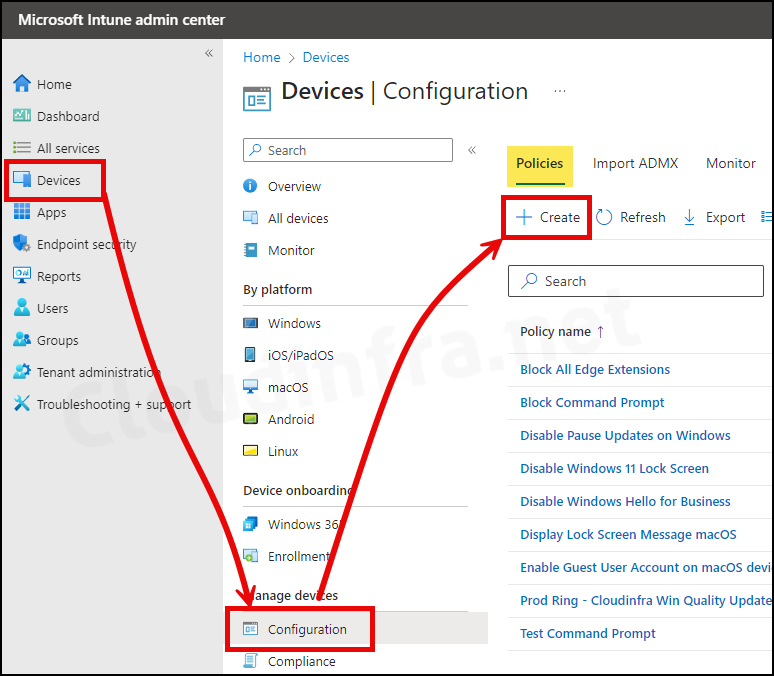
- Sign in to the Intune admin center > Devices > Configuration > Create > New Policy.
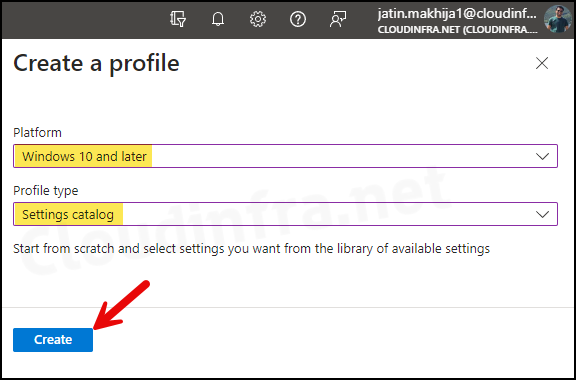
- Select Platform as Windows 10 and later
- Profile type as Settings Catalog
- Click on the Create button.
- Basics Tab: Enter the Name and Description of the profile.
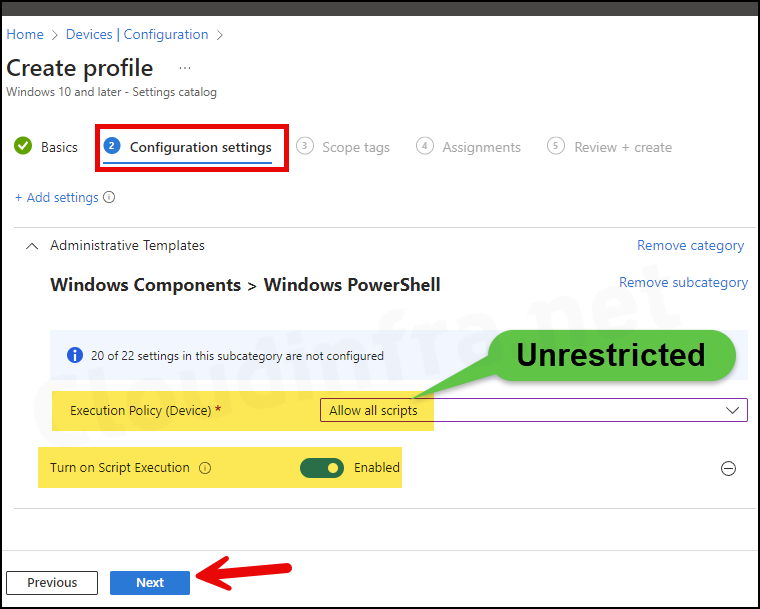
- Configuration Settings:
- Click on + Add settings.
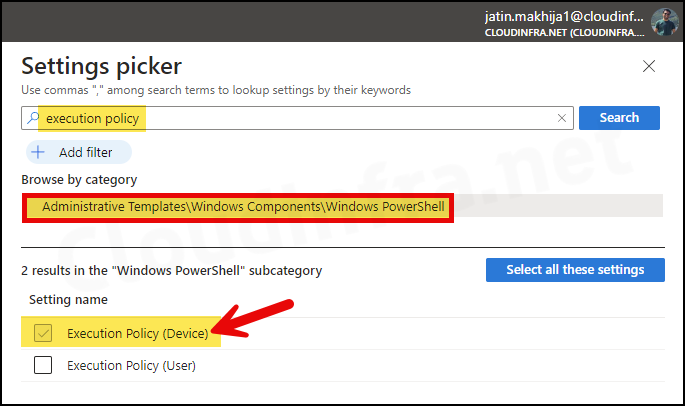
- In the Settings picker, search for execution policy.
- Click on Administrative Templates\Windows Components\Windows PowerShell category.
- Check the box for Execution Policy (Device) and exit the settings picker.
- Execution Policy (Device): Allow all scripts.
- Turn on Script Execution: Enabled.
- Scope tags (optional): A scope tag in Intune is an RBAC label you add to resources (policies, apps, devices) to limit which admins can see and manage them. For more Information, read: How to use Scope tags in Intune.
- Assignments: Assign the policy to Entra security groups that contain the target users or devices. As a best practice, pilot with a small set first; once validated, roll it out more broadly. For guidance on assignment strategy, see Intune assignments: User groups vs. Device groups.
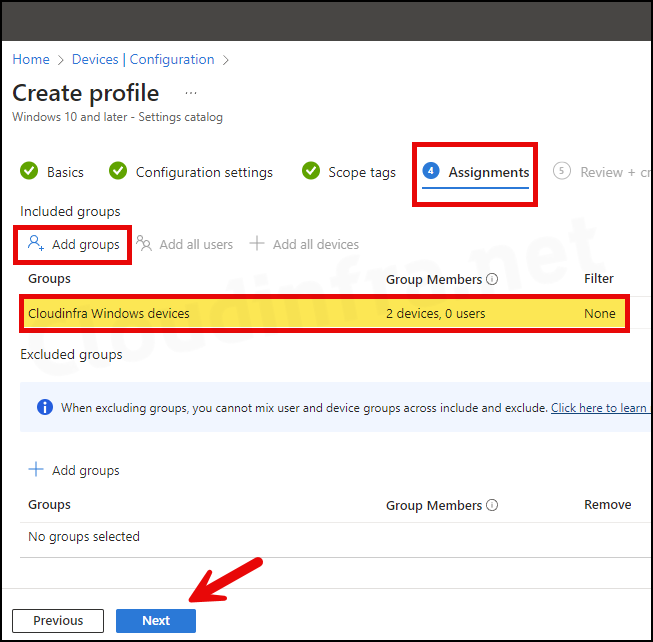
- Review + create: Review the policy summary and click Create.
Sync Intune Policies
The device check-in process might not begin immediately. If you’re testing this policy on a test device, you can manually kickstart Intune sync from the device itself or remotely through the Intune admin center.
Alternatively, you can use PowerShell to force the Intune sync on Windows devices. Restarting the device is another way to trigger the Intune device check-in process.
Monitoring Deployment Progress
- Sign in to the Intune admin center > Devices > Configuration.
- Choose the Device Configuration profile you want to work with, and at the top of the page, you’ll see a quick view of the Success, Failure, Conflict, Not Applicable, and In Progress status.
- Click on View report to access more detailed information.
End User Experience
- Login on one of the target Windows 10/11 devices.
- Click on Start, search for PowerShell, and launch the PowerShell console.
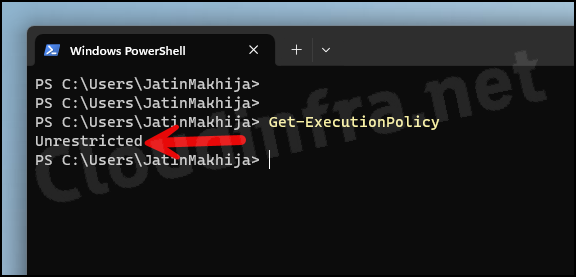
- Type the command:
Get-executionpolicyPress Enter. It will show as Unrestricted as we have configured it to Allow all Scripts via the device configuration profile.
PowerShell Execution Policy Registry Location
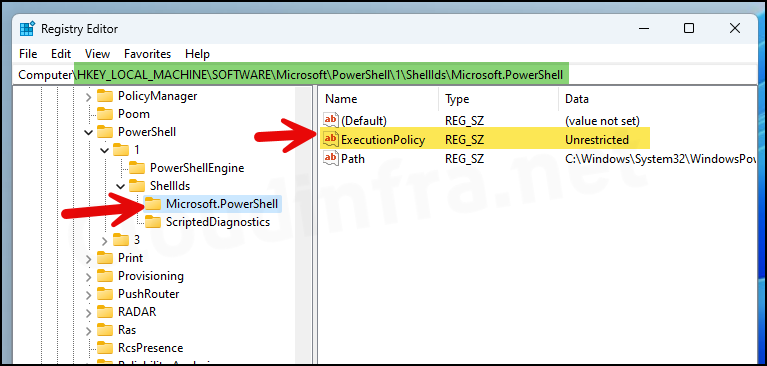
The PowerShell execution policy mode is stored in the registry. To check and confirm it, follow the steps below:
- Press the Windows + R key to open the Run dialog box.
- Type
regeditPress Enter to open the Registry Editor. - Navigate to HKEY_LOCAL_MACHINE\SOFTWARE\Microsoft\PowerShell\1\ShellIds\Microsoft.PowerShell and check the execution policy entry on the right-hand side. It will confirm the PowerShell execution policy configured on your device.
Set PowerShell Execution Policy using Group Policy (GPO)
- Press the Windows key + R to open the Run dialog box.
- Type
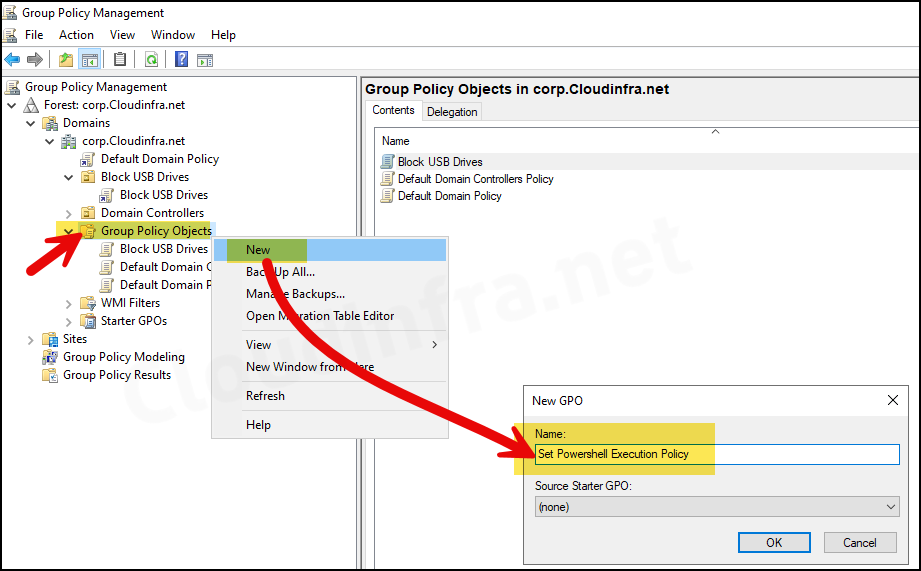
gpmc.mscto open the Group policy management console. - Navigate to the Group Policy Objects, right-click on it, and select New.
- Provide a Name of the GPO, For example: Set PowerShell Execution Policy.
- Right-click on the newly created Group policy and select Edit.
- Navigate to Computer Configuration > Policies > Administrative Templates > Windows Components > Windows PowerShell, and on the right-hand side, locate the policy Turn on Script Execution.
- Double-click on it and Enable this policy. Use the drop-down menu to select the Execution Policy according to your requirements. For Example, if you go with Allow all scripts, it will set the PowerShell execution policy mode to Unrestricted. Click on OK to save the changes.
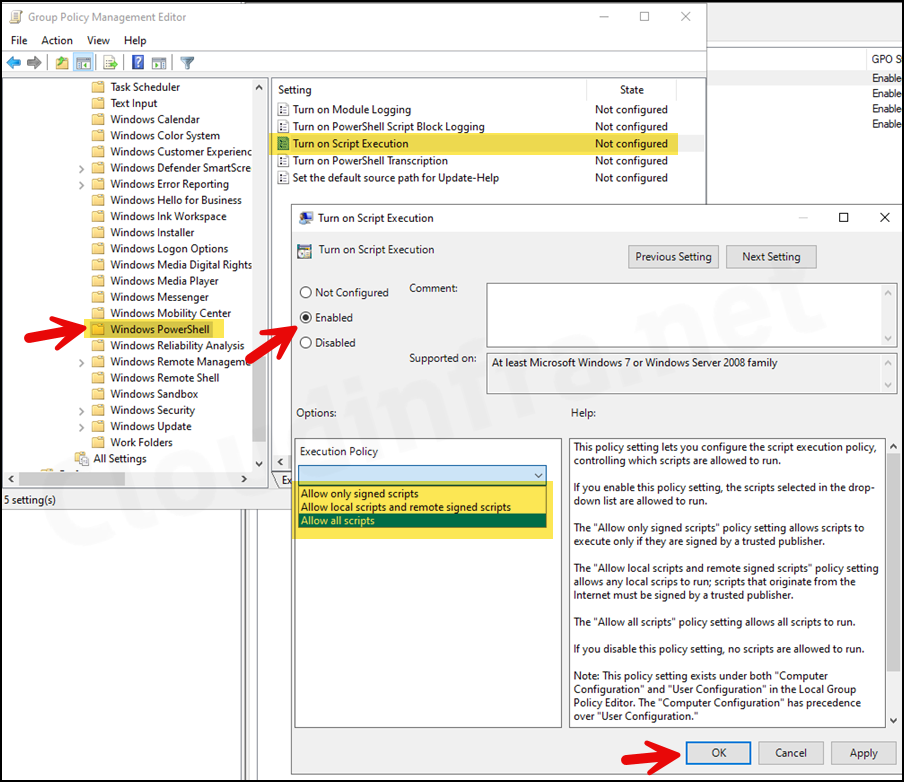
- After creating the GPO, don’t forget to link it to an Organizational Unit (OU) containing Active Directory joined computers. This ensures that the Group Policy Object is applied to the intended computers.
Update Group Policies on Windows Computers
The default Group Policy background refresh interval for Windows client computers, such as those running Windows 10/11, is set to 90 minutes, with a randomized offset time of up to 30 minutes.
If necessary, you can force a Group Policy update (gpupdate /force) to expedite the update process manually on a device or remotely. Alternatively, to apply the Group Policy on all target devices earlier without manual intervention, you can modify the default refresh interval for all computers using a group policy setting called Set Group Policy refresh interval for computers.
