This post is an extension of my previous guide, Setup Multi-App Kiosk Mode on Windows 11 via Intune, where I provided detailed steps for configuring multi-app kiosk mode. This post focuses specifically on configuring autologon for a dedicated Microsoft Entra ID user in a multi-app kiosk setup. By the end of the guide, you will have a Windows 11 device setup in multi-app kiosk mode and configured to autologon using an Entra ID user account.
I will skip the configuration details and will not walk through the different XML blocks required to create a multi-app kiosk mode configuration, as this is already covered in my Multi-App Kiosk Mode setup guide. I will reuse the same XML file that I previously created and demonstrated in the Putting It All Together section.
For configuring autologon with an Entra ID user, we will be using autologon64.exe from Microsoft Sysinternals. This small utility needs to be deployed on the target devices first. After that, we will be using Intune device remediation scripts for configuring the autologon on a Windows 11 device. For the deployment of autologon64.exe, we will create a Win32 app on the Intune admin center, which will copy this exe under C:\Program Files\KioskTools\Sysinternals on target devices.
You can use the same steps demonstrated in this post for configuring autologon for an Active Directory domain user on kiosk devices. Simply replace the Entra ID user information with the Active Directory user details in the script and use the domain user in the config section of Multi-app XML.
Contents
Step 1: Deploy autologon64.exe on Windows devices
First, download the Autologon64.exe file, and then use PowerShell scripts to copy it to the Program Files folder on the kiosk devices. Let’s take a look at the steps:
1. Download autologon64.exe
- Download Autologon from Microsoft website: Autologon – Sysinternals | Microsoft Learn.
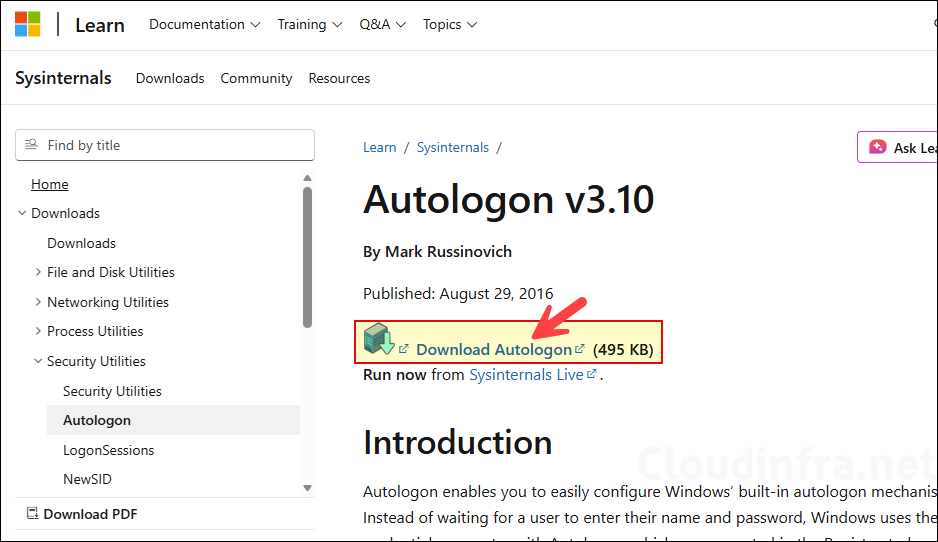
- Extract Autologon zip file into a folder; we will need Autologon64.exe from this folder. Copy this file and place it into a separate folder, which will be used for Win32 app deployment.

2. Download PowerShell Scripts
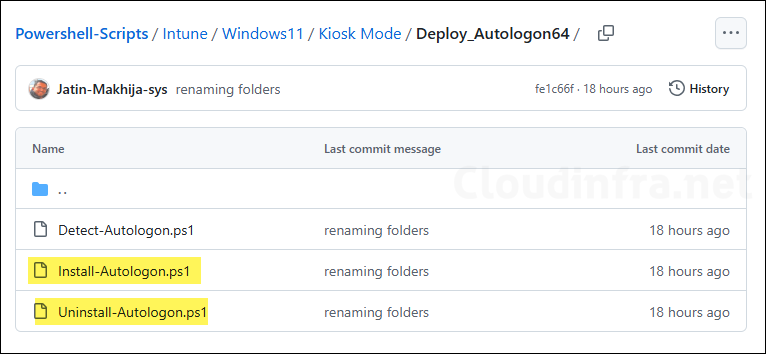
Next, download the Install-Autologon.ps1 and Uninstall-Autologon.ps1 PowerShell scripts from my GitHub repository: Powershell-Scripts/Intune/Windows11/Kiosk Mode/Deploy_Autologon64 · GitHub.
- Install-Autologon.ps1: This script will create a folder KioskTools\Sysinternals under Program Files and copy Autologon64.exe.
- Uninstall-Autologon.ps1: This script will remove Autologon64.exe and also disable autologon configured on the device by removing the necessary registry entries.
There is one more script in this folder called Detect-Autologon.ps1; we will use it during the creation of the Win32 app deployment.
3. Create IntuneWin file
As we are going to use Win32 app deployment method to deploy Autologon64.exe on Windows 11 kiosk devices. This app deployment method requires the application source files to be packaged in IntuneWin file format. Follow below steps to create .Intunewin file.
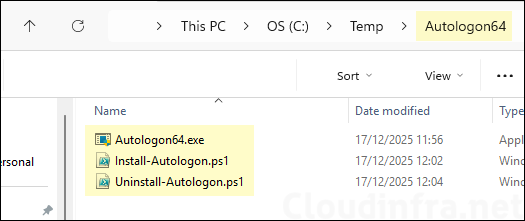
- Create a new folder and copy below files into this folder. Ensure that there are no other folders or files inside this folder. (Refer to the screenshot).
- Autologon64.exe
- Install-Autologon.ps1
- Uninstall-Autologon.ps1
- Download the Microsoft Win32 Content Prep Tool (IntuneWinAppUtil.exe) from the official Microsoft GitHub repository.
- Change to the folder where IntuneWinAppUtil.exe is located. Run IntunewinAppUtil.exe from a command prompt window, and enter the following information:
- Source Folder: C:\Temp\Autologon64
- Setup File: Install-Autologon.ps1
- Output folder: C:\Output
- Catalog folder: Type N and press Enter.

- Go to the C:\Output folder where you will find Install-Autologon.intunewin file. We will use this file in the next step to create Win32 app deployment on Intune admin center.
4. Create Win32 app in Intune
- Sign in to the Intune admin center at https://intune.microsoft.com.
- Go to Apps > All apps.
- Select + Create, then in App type choose Windows app (Win32).
- Click on the Select app package file to select the Install-Autologon.intunewin file package. Click OK.
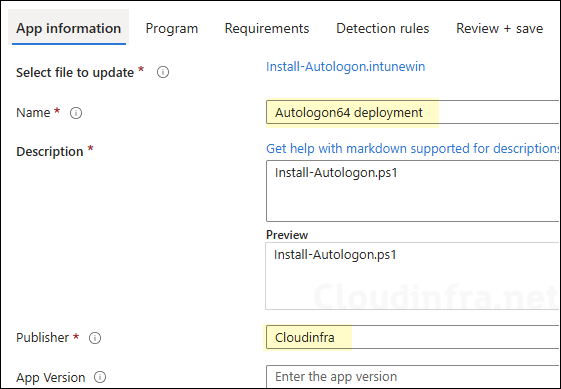
- On the App information page, fill in:
- Name: Autologon64 deployment
- Description: Provide a description or keep default.
- Publisher: Cloudinfra
- Any optional information (category, logo, etc.) to match your requirements.
- Click Next.
- On the Program tab:
- Install Command: %windir%\SysNative\WindowsPowerShell\v1.0\powershell.exe -NoProfile -ExecutionPolicy Bypass -File .\Install-Autologon.ps1
- Uninstall Command: %windir%\SysNative\WindowsPowerShell\v1.0\powershell.exe -NoProfile -ExecutionPolicy Bypass -File .\Uninstall-Autologon.ps1
- Installation time required (mins): Keep default
- Allow available uninstall: Keep default
- Install behavior: System
- Device restart behavior: No specific Action
- Specify return codes to indicate post-installation behavior: Keep default

- Requirements:
- Check Operating system architecture: Select Yes. Specify the systems the app can be installed on and select Install on x64 system.
- Minimum operating system: Choose the minimum Windows 10/11 version you support.
Click Next.
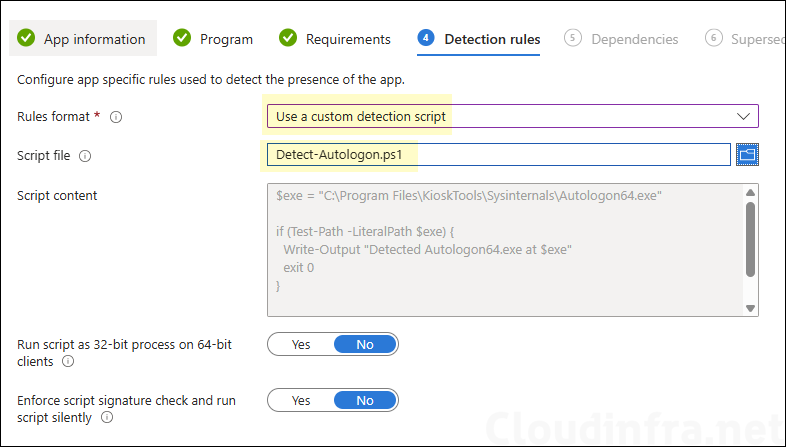
- Detection rules: Download Detect-Autologon.ps1 script from Powershell-Scripts/Intune/Windows11/Kiosk Mode/Deploy_Autologon64 · GitHub.
- Rules Format: Use a custom detection script.
- Script file: Browse to the detection script Detect-Autologon.ps1.
- Run script as 32-bit process on 64-bit clients: No
- Enforce script signature check and run script silently: No
Click Next.
- Dependencies: Click Next.
- Supersedence: Click Next.
- Scope tags (optional): A scope tag in Intune is an RBAC label you add to resources (policies, apps, devices) to limit which admins can see and manage them. For more information, read: How to use Scope tags in Intune.
- Assignments: Assign the app to Entra security groups that contain the target kiosk devices. As a best practice, pilot with a small set first; once validated, roll it out more broadly. For guidance on assignment strategy, see Intune assignments: User groups vs. Device group.
- Review + create: Review the deployment summary and click Create.
5. Verify autologon64.exe Deployment
First, verify that the Intune deployment for the Autologon64 Win32 app has completed successfully. Then proceed to the next step to confirm that Autologon64.exe has been copied to the target kiosk devices.

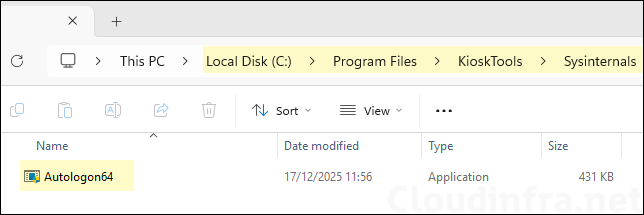
- Sign in to one of the target Windows devices and navigate to C:\Program Files\KioskTools\Sysinternals. Confirm that Autologon64.exe exists in this location. This is an important step before proceeding to configure autologon for the Entra ID user.
Step 2: Configure Autologon for an Entra User
Now that Autologon64.exe has been successfully placed on the Windows devices, this step uses Autologon64.exe to configure autologon for an Entra ID user.
1. Decide the Entra ID user account for autologon
The first step is to decide which Entra ID user account will be used for autologon on the kiosk device. You will need the user principal name (UPN), the account password, and the domain information. Ensure the kiosk Entra ID user is excluded from MFA and any terms of use policies, if they are applied.
Exclude this Entra ID user from MFA and Terms of Use Conditional Access policies. Multi-app kiosk sign-in can fail by design if the kiosk user is targeted by Conditional Access policies that require user interaction, such as MFA or acceptance of Terms of Use. Microsoft explicitly states that MFA is currently not supported for multi-app kiosk scenarios and recommends excluding kiosk users from these policies. For more information, refer to Users can’t log on to Windows 10 or Windows 11 computers with multi-app kiosk profile assigned – Intune | Microsoft Learn.
Best practices for Kiosk Entra User Account
If you are using an Entra ID user account or an Active Directory domain account, ensure these accounts are well protected. An Entra ID or domain account may have access to organizational resources and could therefore increase the security risk if misconfigured. When autologon is configured using Autologon64.exe, the credentials are stored in the registry as an encrypted LSA secret; however, administrators can still recover the password. Therefore, the account configured for autologon must follow the principle of least privilege, and have additional security controls applied. Below are best practices to help protect the kiosk Entra ID or domain account.
- Least Privilege and Minimal Group Membership: Assign only the minimum required permissions and avoid adding the account to privileged or broad access groups.
- Licensing Scope and App Entitlements: Assign only the licenses and applications required for kiosk operation, and revoke access to unnecessary Microsoft 365 services.
- Conditional Access Exclusions for MFA and Interactive Prompts: Exclude the kiosk account from MFA and interactive prompts only where required, while supplementing with strict device and app controls.
- Conditional Access Device Scoping and App Scoping: Restrict sign-ins to compliant or specific kiosk devices and limit access to only the required applications.
- Password Policy, Expiry, and Rotation Strategy: Use a strong, randomly generated password with a controlled rotation process to reduce the risk of credential compromise.
- Account State Controls (No “Change password at next sign-in”, Lockout Handling): Ensure the account is not forced to change its password at next sign-in and define a clear lockout recovery process.
- Sign-in Monitoring and Alerting (Entra Sign-in Logs): Monitor sign-in activity and configure alerts to detect unexpected or suspicious access attempts.
- Restrict Where the Account Can Sign In (Device and Location Controls): Limit sign-ins to approved devices, locations, or IP ranges to prevent misuse outside the kiosk environment.
- Local Admin Access and Credential Exposure Boundary: Prevent the kiosk account from having local administrator rights to reduce the risk of credential extraction and lateral movement.
- Break-Glass and Recovery Plan: Maintain a documented recovery method to regain access if the kiosk account becomes locked or misconfigured.
- Governance, Documentation, and Change Control: Document the kiosk account configuration and enforce change control to ensure any modifications are reviewed and approved.
2. Download PowerShell scripts to configure autologon
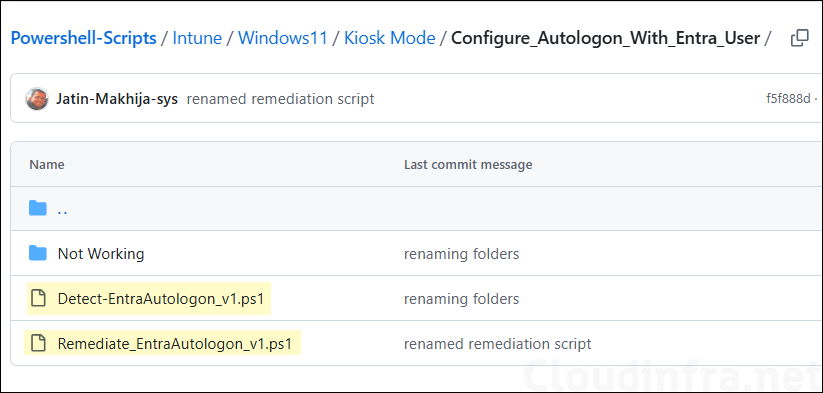
We will use Intune device remediations to configure the autologon. Download Detect-EntraAutologon_v1.ps1 and Remediate_Entra_Autologon_v1.ps1 from my GitHub repository: Powershell-Scripts/Intune/Windows11/Kiosk Mode/Configure_Autologon_With_Entra_User · GitHub.
- Detect-EntraAutologon_v1.ps1: This script will detect if autologon is configured for a given Entra user.
- Remediate_Entra_Autologon_v1.ps1: If detection script fails, this script will configure autologon for the given Entra user.
3. Update PowerShell Scripts
After you download Detect-EntraAutologon_v1.ps1 and Remediate_Entra_Autologon_v1.ps1 scripts, update the Entra user information in the scripts.
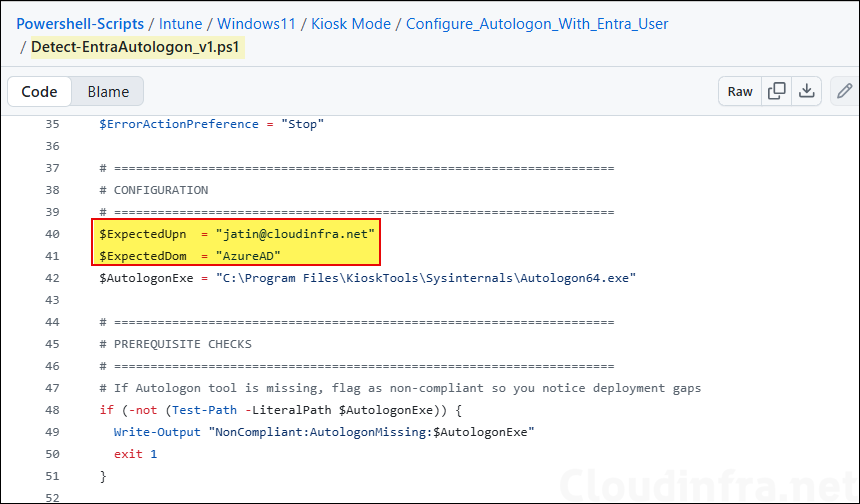
- Detect-EntraAutologon_v1.ps1: Update
$ExpectedUpnvariable to enter the Entra user account UPN. This account will be used for configuration of autologon. Keep$ExpectedDomas AzureAD for Entra ID user. If you are using an active directory domain user, use your AD domain name.
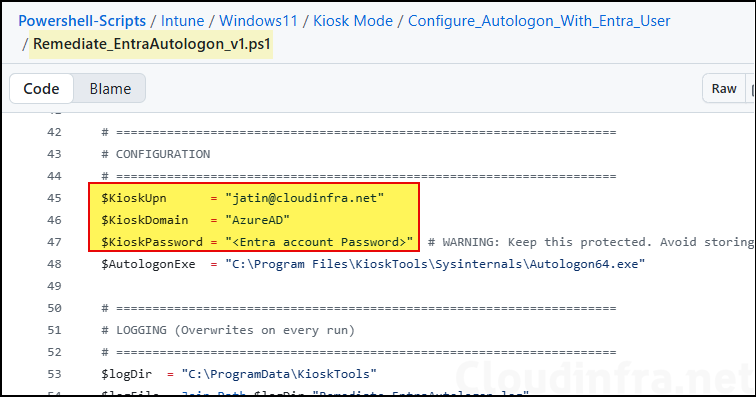
- Remediate_Entra_Autologon_v1.ps1: Update
$kioskUpnand$KioskPasswordvariables. Keep$KioskDomainas Azure AD for Entra ID user. If it’s an Active Directory domain user, update the domain accordingly.
An important point to note is that the password used in the script is in plain text, which can pose a security risk. It is therefore critical to ensure that the Entra ID user account used for autologon has only the minimum required privileges and appropriate security restrictions applied. If you want to avoid using a plain-text password in the script, you can store the password in Azure Key Vault and retrieve it at runtime. This approach requires modifying the script and adding the necessary code to integrate with Azure Key Vault.
4. Create Intune Device Remediations
- Sign in to the Intune admin center > Devices > Scripts and remediations > Click on + Create under the Remediations tab.
- Basics Tab: Provide the Name and Description of the remediation.
- Settings Tab: Browse to detection and remediation scripts and configure below settings.
- Detection script file: Browse to the detection script Detect-EntraAutologon_v1.ps1.
- Remediation script file: Browse to remediation script Remediate_EntraAutologon_v1.ps1.
- Run this script using the logged-on credentials: No
- Enforce script signature check: No
- Run script in 64-bit PowerShell: Yes

- Scope tags (optional): A scope tag in Intune is an RBAC label you add to resources (policies, apps, devices) to limit which admins can see and manage them. For more information, read: How to use Scope tags in Intune.
- Assignments: Click on + select groups to include to add an Entra security group containing kiosk devices. You can also select the schedule to run this script package. You have three options: Once, hourly, or Daily. For information on assignments to users or devices, see Intune assignments: User groups vs. Device groups.
- Review + create: Review the deployment summary and click Create.
5. Monitor Autologon Device Remediation
To monitor the progress of the device remediation scripts, follow below steps:
- Sign in to the Intune admin center > Devices > Scripts and remediations.
- Click on the remediation script package you want to monitor: for example, Configure Entra User Autologon Kiosk. On the Overview page, find the deployment status of the scripts.

Sync Intune Policies
The device check-in process might not begin immediately. If you’re testing this policy on a test device, you can manually kickstart Intune sync from the device itself or remotely through the Intune admin center.
Alternatively, you can use PowerShell to force the Intune sync on Windows devices. Restarting the device is another way to trigger the Intune device check-in process.
End User Experience
Once the Intune device remediation script has run on the kiosk devices, follow the steps below to verify that autologon for the specified user has been configured successfully:
- Open the registry editor (
regedit). - Navigate to the location HKEY_LOCAL_MACHINE\SOFTWARE\Microsoft\Windows NT\CurrentVersion\Winlogon and check if AutoAdminLogon, DefaultDomainName, and DefaultUserName registry entries exist and are configured with the kiosk user account specified in the script.

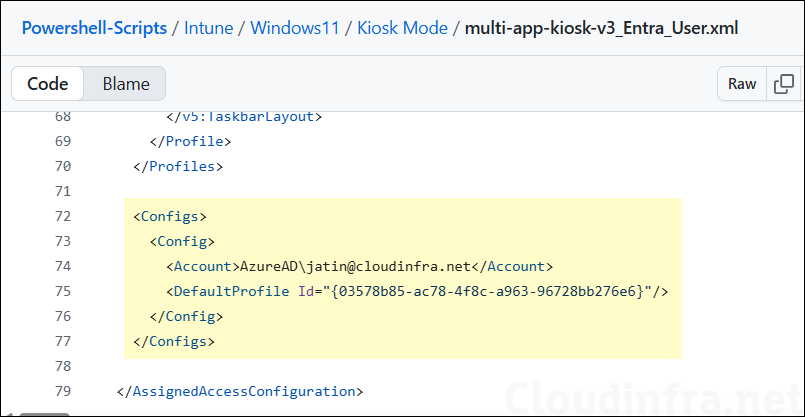
Update or Add Config Section in Multi-App Kiosk XML
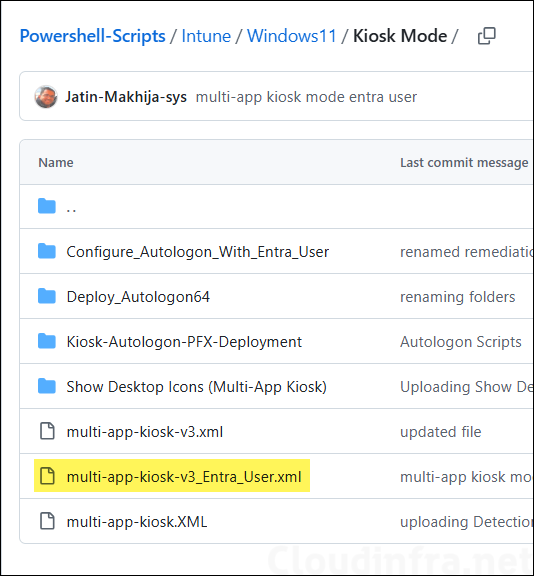
In the multi-app kiosk XML file, update the Config section with the Entra ID user account configured for autologon. For reference, I have uploaded an XML file that uses an Entra ID user account in my GitHub repository: Powershell-Scripts/Intune/Windows11/Kiosk Mode · GitHub.
The screenshot below shows the config section of multi-app-kiosk-v3_Entra_User.xml, which used the Entra user account AzureAD\jatin@cloudinfra.net (format: AzureAD\<Entra user UPN>).
Testing Autologon on Kiosk Device with Entra User Account
Restart the kiosk device to confirm if it’s automatically signing in using the configured Entra credentials. Below video shows that the autologon has been configured with the Entra user and is working successfully.