In this post, I will show you how to deploy an MSI application using the Windows app (Win32) method in Intune. Traditionally, you could deploy MSI applications using the Line-of-business app type in Intune. That approach still works for simple installers, but it is limited in terms of detection, requirements, dependencies, and Autopilot scenarios. I will recommend using Win32 apps as the primary choice for Windows software deployments, even for MSI-based applications, because Win32 apps provide more control and flexibility.
Win32 app method is particularly useful when:
- You need to perform pre-install or post-install actions with PowerShell.
- You must package supporting files together with the MSI.
- You want to use custom detection rules, requirements, or dependencies.
- You are deploying apps during Windows Autopilot OOBE, where Win32 is the recommended format.
Line-of-business (LOB) and Win32 applications can be deployed in the same deployment when you use Autopilot device preparation method for provisioning Windows 11 devices. For more information, refer to the post: Setup Autopilot Device Preparation In Intune.
In this post, I will cover two methods:
- Method 1: Wrap the MSI directly and call
msiexecfrom the Win32 app. - Method 2: Use PowerShell scripts (Install.ps1 / Uninstall.ps1) for more complex scenarios.
At the end, I will also show how to work around the Install behavior greyed out issue when the MSI forces a specific context.
Contents
Method 1: Without Using PowerShell Scripts
In this method, you download the MSI installer and create .intunewin file including only this MSI installer in the intunewin package, then use that package to create a Win32 app deployment. Overall, you will follow the below steps:
- Download the MSI installer.
- Use the Win32 Content Prep Tool to create an
.intunewinpackage that contains only the MSI. - Create a Windows app (Win32) in Intune and specify your
msiexeccommands on the Program tab.
This is the cleanest approach for straightforward MSI deployments when you do not need additional logic in PowerShell. I’ve documented these steps to deploy MSI using Win32 app deployment method, which does not use PowerShell scripts. Refer to the post Deploy Cisco Webex on Windows using Intune for more details.
Method 2: Using PowerShell Scripts
In this method, you package the MSI + PowerShell scripts together as a Win32 app. This gives you maximum flexibility and is often the best option for real-world deployments. Typical reasons to use the script-based method:
- You require pre-install checks (for example, close processes, uninstall a legacy version).
- You require post-install configuration (registry changes, file cleanup, logging).
- You want to overcome MSI context limitations by wrapping the installer in PowerShell.
Typically, you will follow below steps:
- Download the MSI Installer.
- Create Install.ps1 and Uninstall.ps1.
- Build an
.intunewinfile using the Win32 Content Prep Tool. - Create the Win32 app deployment in Intune.
Step 1: Download MSI Application
First, download the MSI application to your local machine. For demonstration, I will use an app called eSigner.msi. You can use any other MSI application and follow the same steps.
Create a working folder. I have created a folder called eSigner under C:\temp and placed the MSI file in this folder.
C:\Temp\eSignerStep 2: Prepare PowerShell Scripts
We will create two PowerShell scripts:
- Install.ps1 – installs the MSI silently.
- Uninstall.ps1 – uninstalls the MSI using one or more MSI product codes (UninstallString values).
Always test these scripts manually on a test device first. Once you confirm they work reliably, you can package and deploy them via Intune.
Install.ps1
msiexec.exe /i "eSigner.msi" /qn /norestartNotes:
/qnperforms a silent installation with no UI./norestartprevents automatic reboots.- If your installer supports additional properties (for example
ALLUSERS=1or custom configuration switches), include them here according to the vendor documentation.
Uninstall.ps1
To uninstall MSI applications by command line, you typically use the product code (GUID) found in the UninstallString registry value.
- Install the app on a test device.
- Open Registry Editor and browse to: HKEY_LOCAL_MACHINE\Software\Microsoft\Windows\CurrentVersion\Uninstall HKEY_LOCAL_MACHINE\Software\WOW6432Node\Microsoft\Windows\CurrentVersion\Uninstall
- Locate your application using the DisplayName value, and copy the UninstallString entries you need.
Some products install multiple MSI components. In such cases, you may have several product codes that need to be removed. Adjust the product codes and number of lines according to your application. If the product has only one MSI, you only require a single line. You can also add basic logging to the scripts if you want to capture installation details in a log file.
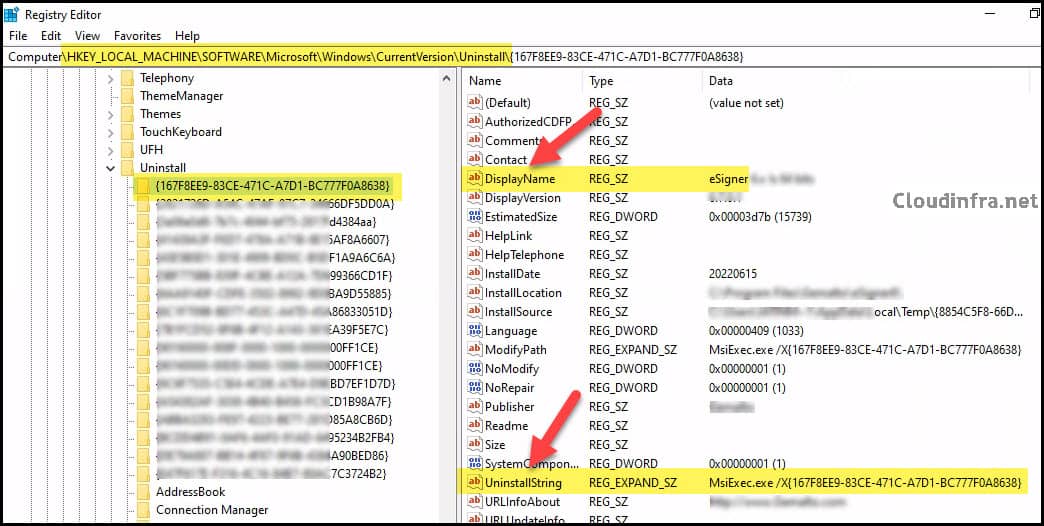
As the eSigner application installs three different components, I am adding one line for each component with its respective product code in the Uninstall.ps1 script.
Uninstall.ps1:
Start-Process "C:\Windows\System32\msiexec.exe" -ArgumentList "/x {167F8EE9-83CE-471C-A7D1-BC777F0A8638} /quiet /norestart" -Wait -NoNewWindow
Start-Process "C:\Windows\System32\msiexec.exe" -ArgumentList "/x {3A06E0D8-7B7C-4044-BF75-2817FD4384AA} /quiet /norestart" -Wait -NoNewWindow
Start-Process "C:\Windows\System32\msiexec.exe" -ArgumentList "/x {ABBA3283-FE97-4223-BE77-281D85A8CB6D} /quiet /norestart" -Wait -NoNewWindow
Step 3: Create .Intunewin file
Follow below steps to create an intunewin file:
- Create an empty folder and copy the MSI Installer file (for example: esigner.msi) into that folder. For demo, I have created a folder called eSigner under C:\temp.
- Copy Install.ps1 and Uninstall.ps1 in the same folder where you copied the MSI Installer.
- As per our example app, ensure the source folder contains:
- eSigner.msi
- Install.ps1
- Uninstall.ps1
- Download Microsoft Win32 Content Prep Tool from the official GitHub repo and extract it to a folder.
- Create an output folder for the .intunewin file, for example, c:\output.
- Open a PowerShell console, browse to the tool folder, and run IntuneWinAppUtil.exe.
Example (Replace the values as per your deployment)
.\IntuneWinAppUtil.exe -c C:\temp\eSigner -s Install.ps1 -o C:\outputIntuneWinAppUtil.exe -c <setup_folder> -s <setup_file> -o <output_folder>
-cis the setup folder that contains the MSI and scripts-sis the setup file used as the entry point on the client (Install.ps1)-ois the output folder where the.intunewinfile will be createdCommand Syntax
- After the command completes, you will see a new .intunewin file in C:\Output.

For more detailed information about creating .Intunewin file, refer to the blog post: How to create an IntuneWin file.
Step 4: Create Win32 app deployment
Now we will use the .intunewin file to create a Windows app (Win32) deployment.
- Sign in to the Intune admin center at https://intune.microsoft.com.
- Go to Apps > All apps.
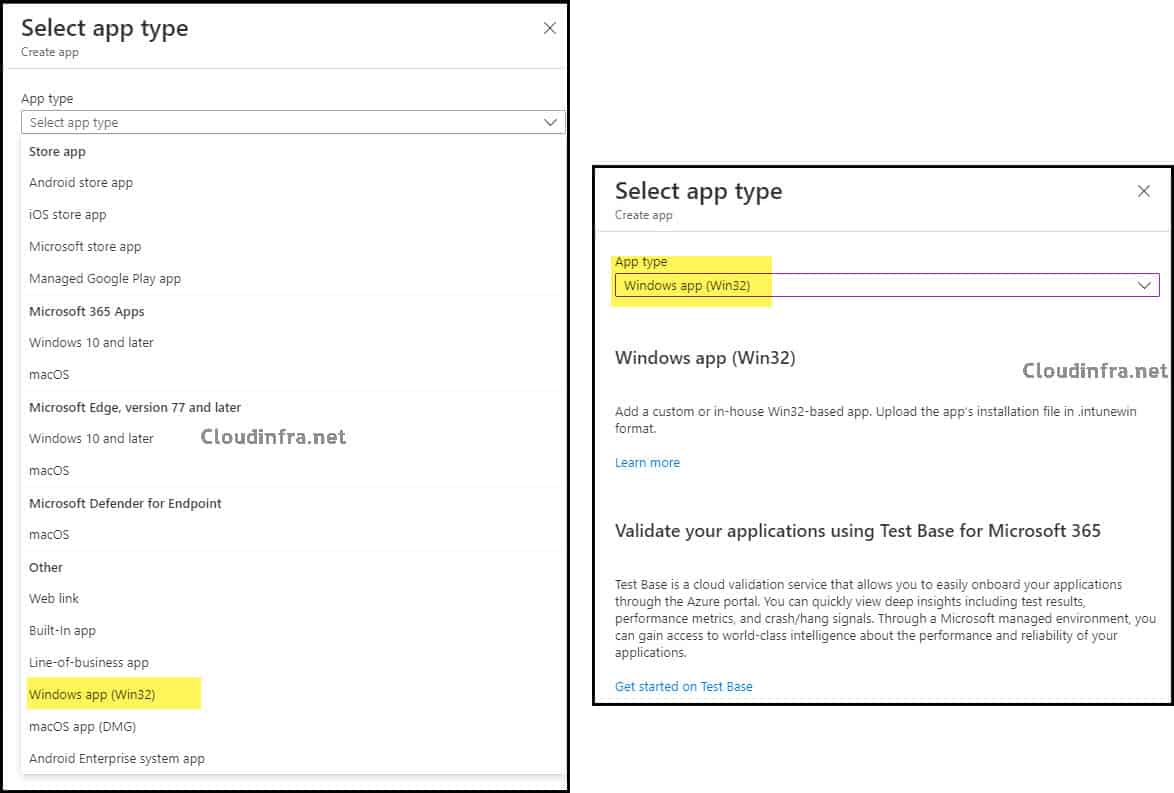
- Select + Create, then in App type choose Windows app (Win32).
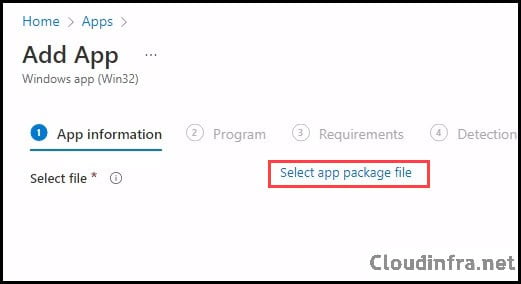
- Click on Select app package file to select the .intunewin file package created earlier.
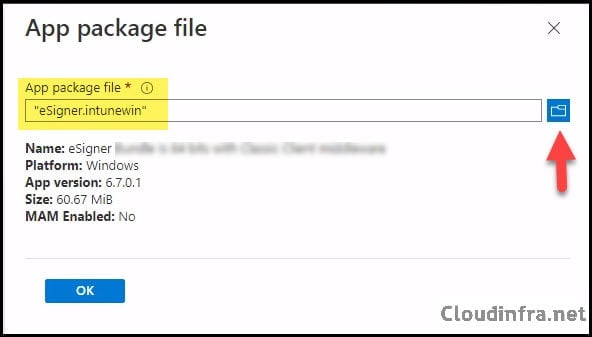
- App Information tab:
- Name: Verify the name of the app; update if required.
- Description: Verify the description or leave default.
- Publisher: Update the publisher of the app.
The remaining fields on the App information tab are optional; however, I recommend filling them in, as this information can help other team members during troubleshooting.
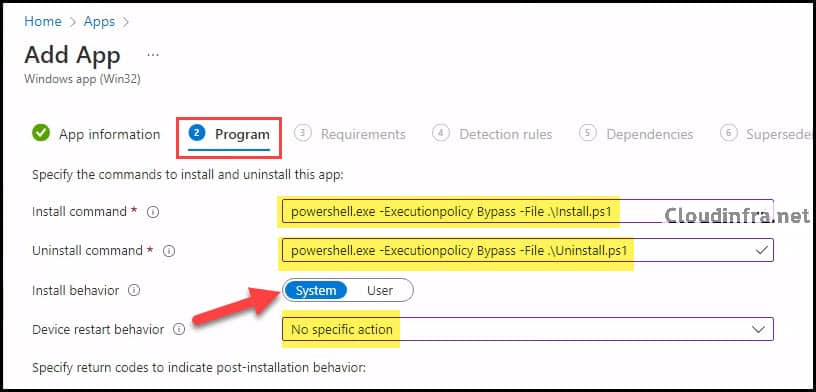
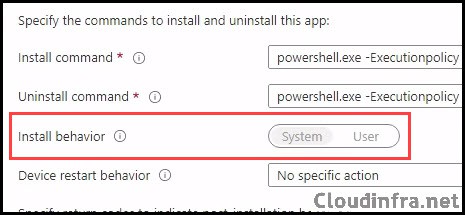
- Program tab:
- Install command: powershell.exe -Executionpolicy Bypass -File .\Install.ps1
- Uninstall command: powershell.exe -Executionpolicy Bypass -File .\Uninstall.ps1
- Installation time required (mins): Keep default
- Allow available uninstall: Keep default
- Install behavior: System
- Device restart behavior: No specific Action
- Specify return codes to indicate post-installation behavior: Keep default
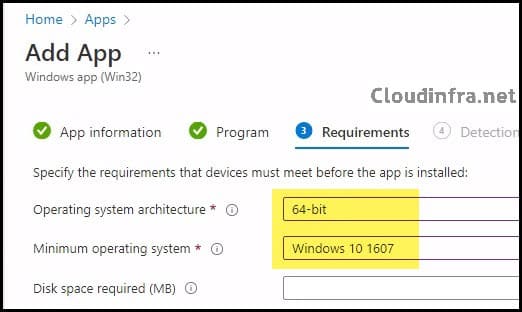
- Requirements: Specify the requirements that the devices must meet before the app is installed.
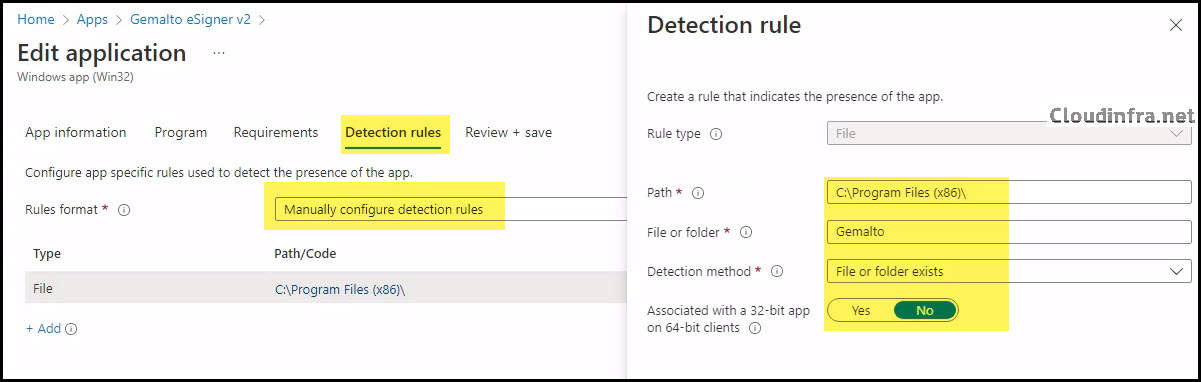
- Detection Rules:
- Rules Format: Select Manually configure detection rules
- Rule Type: File
- Path: C:\Program Files (x86)\
- File or Folder: Gemalto
- Detection Method: File or Folder Exits
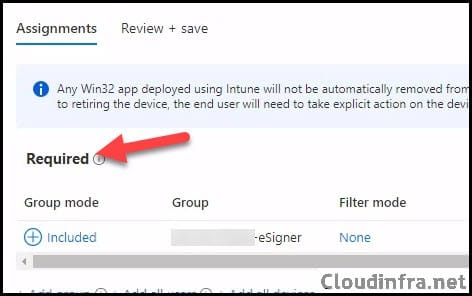
- Assignments: Assign the app to Entra security groups that contain the target users or devices. As a best practice, pilot with a small set first; once validated, roll it out more broadly. For guidance on assignment strategy, see Intune assignments: User groups vs. Device groups.
- Review + create: Review the deployment and click on Create.
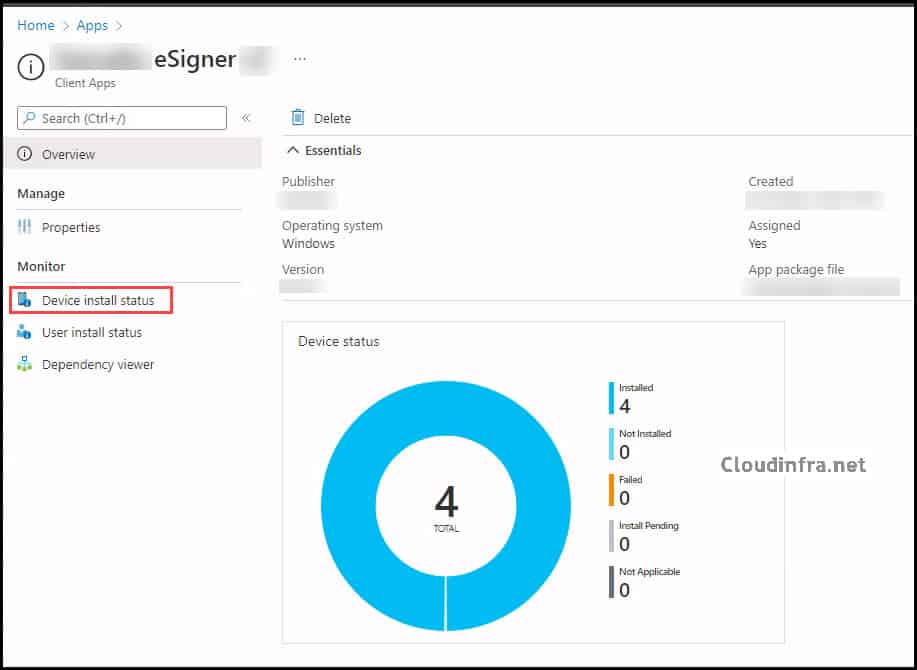
Monitor Deployment progress
To monitor the deployment:
- Go to Intune admin center > Apps > All apps.
- Select your application.
- On the Overview blade, review the Device install status and User install status.
- Use the Device Install Status and User Install Status blades for detailed error codes and to identify devices that failed to install.
Fix Unable to Change the Install Behavior Issue
When working with MSI-based apps (LOB or Win32), you may encounter a situation where the Install behavior / Install context option is greyed out and cannot be changed.
Key points:
- Intune determines the install context based on the MSI.
- Only “dual-mode” MSIs allow you to choose User or Device context manually.
- If the MSI is not dual-mode, Intune automatically sets the context.
This is by design and not an Intune bug.
If you cannot deploy the MSI in the context you need because of this limitation, you have two main options:
- Wrap the MSI in a script-based Win32 app (Method 2 of this post).
- Package Install.ps1 as the entry point.
- Configure Install behavior = System in the Win32 app.
- In the script, call
msiexecwith the required switches (ALLUSERS=1,MSIINSTALLPERUSER=1, or other vendor properties) so the installer runs exactly the way you intend.
- Modify the MSI properties (advanced)
- For some applications, you can edit the MSI with a tool such as Orca to set
ALLUSERS=1orMSIINSTALLPERUSER=1as needed. - This is an advanced packaging change and should be tested and approved internally before use in production.
- For some applications, you can edit the MSI with a tool such as Orca to set
Wrapping the MSI inside a Win32 app with PowerShell is usually the safest and most flexible option, which is precisely what Method 2 in this post provides.
Conclusion
To summarise:
- You can still use the Line-of-business app type for simple MSI deployments, but for most new Windows applications, especially with Autopilot or more complex requirements, the Windows app (Win32) type is the recommended and more future-proof choice.
- Method 1 shows a simple Win32 wrapping of the MSI where Intune calls
msiexecdirectly. - Method 2 uses PowerShell scripts for install and uninstall, giving you full control over pre-install and post-install actions, command line options, and how you handle uninstall.
- If the Install behavior is greyed out for an MSI, that is determined by the MSI itself. Using a script-based Win32 app lets you control context and command-line behavior precisely.