
In this blog post, I will show you the steps to enroll Personal/BYOD macOS devices in Intune. Employees can enroll their own MacBook or iMac using the Microsoft Intune Company Portal app without resetting the device or going through Apple Automated Device Enrollment (ADE).
Once the Mac is enrolled, IT administrators can deploy applications, configure security settings, enforce compliance policies, and manage the device remotely using the Microsoft Intune admin center.
Contents
Prerequisites
- Microsoft Intune license: The enrolling user must have a valid Microsoft Intune license.
- Supported macOS version: The Mac must be running macOS 11 or later.
- Apple MDM Push Certificate: A valid Apple MDM push certificate must be configured in Microsoft Intune.
- Enrollment restrictions: macOS enrollment and personally owned devices must be allowed in the Intune device platform restrictions assigned to the user.
- Work or school account: The user must have a valid Microsoft Entra ID account to sign in to Company Portal.
- Internet connectivity: The Mac must have an active internet connection to communicate with Microsoft Intune and Apple services.
- Local administrator access: The user must have sufficient permissions to install Company Portal and approve the MDM management profile.
1. Configure Apple MDM Push Certificate
The Apple MDM push certificate is required to enroll and manage macOS devices using Microsoft Intune. It enables communication between Intune, Apple’s Push Notification service, and enrolled devices. If the certificate has already been configured in your tenant and is active, you can skip this step.
- Sign in to the Microsoft Intune admin center .
- Navigate to Devices > Enrollment under Device onboarding.
- Select the Apple tab.
- Click on Apple MDM Push Certificate.
- Verify that the certificate is active and has not expired.
If you have not configured the certificate yet, follow this guide Create Apple MDM push certificate for Intune. Note: The certificate must be renewed annually. Always renew the existing certificate using the same Apple account rather than creating a new certificate, to maintain management of your enrolled Apple devices.
2. Allow Personally Owned macOS Device Enrollment
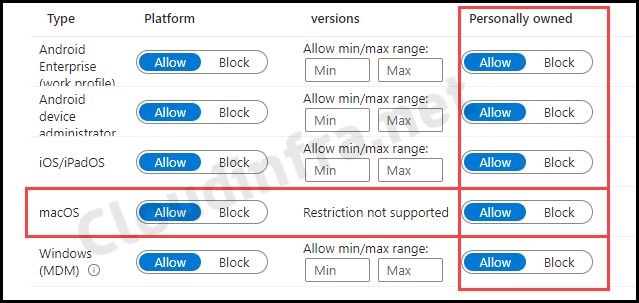
To enroll a personal Mac in Intune, ensure that the device platform restrictions allow macOS enrollment and personally owned devices.
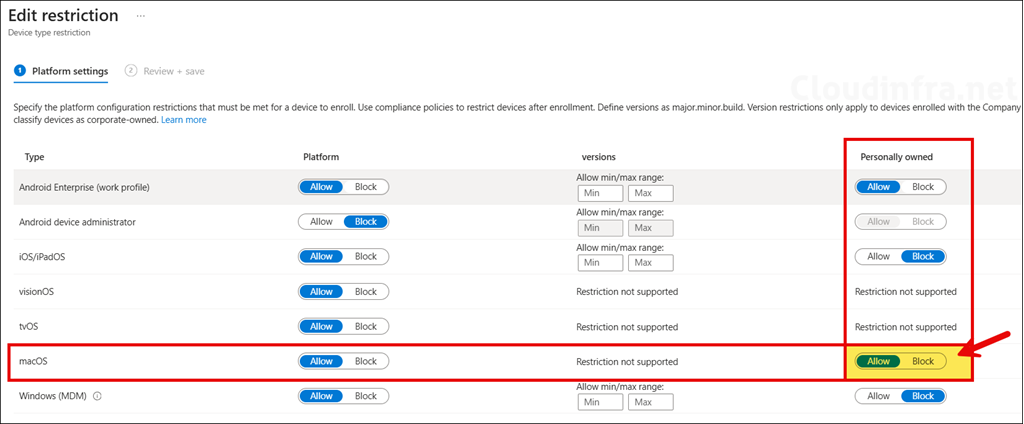
Sign in to the Intune admin center and go to Devices > Enrollment > Device platform restrictions. Select the default All Users policy or an existing custom policy that applies to the user. Go to Properties > Platform settings > Edit and ensure that Personally owned is set to Allow for macOS devices. (refer to the screenshot below).
If you have multiple device platform restriction policies, check which policy applies to the enrolling user. A custom policy with a higher priority can override the default policy.
Steps to Enroll a Personal/BYOD Mac in Intune
For this demonstration, we will use a personally owned MacBook and enroll it into Microsoft Intune using the Company Portal app. The enrollment process consists of installing Company Portal, signing in with a work account, downloading the management profile, and approving device management on the Mac.
Step 1: Download and Install the Company Portal App
Company Portal app must be installed on the Mac before starting the enrollment process.
- Sign in to the Mac using an account with permission to install applications.
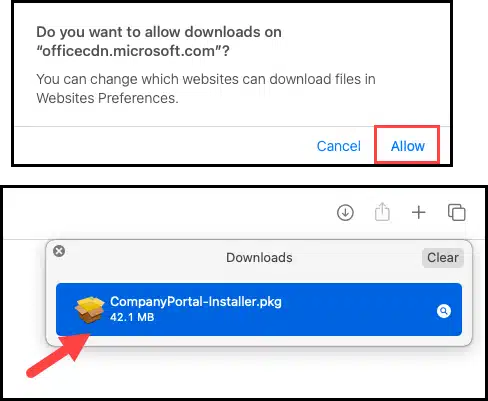
- Click on the link: Install Company Portal Application. [This link will immediately download the CompanyPortal-Installer.pkg file on the device].
- You may get a prompt before the download starts. Click Allow.
- Launch the CompanyPortal-Installer.pkg file.
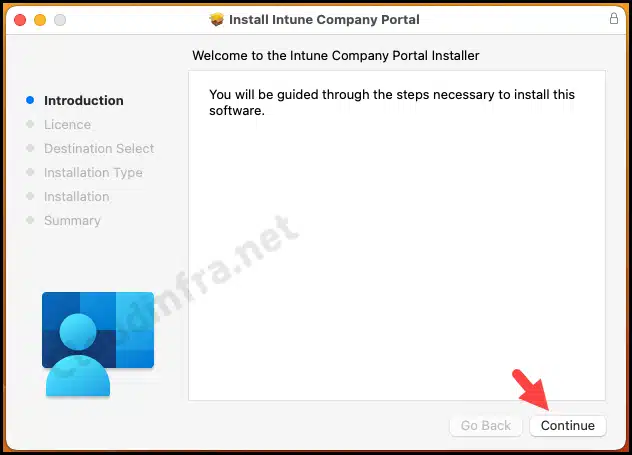
- Click on Continue.
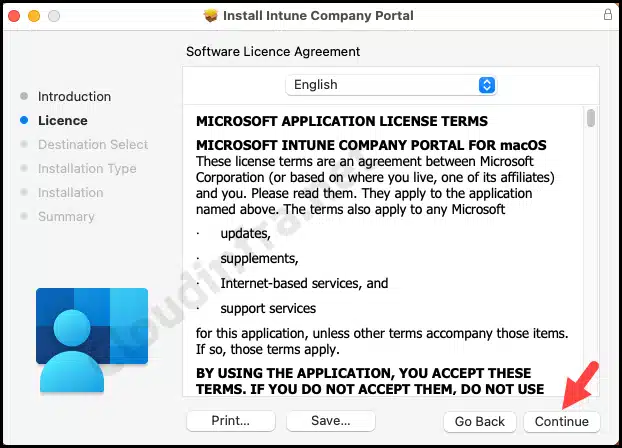
- Click on Continue.
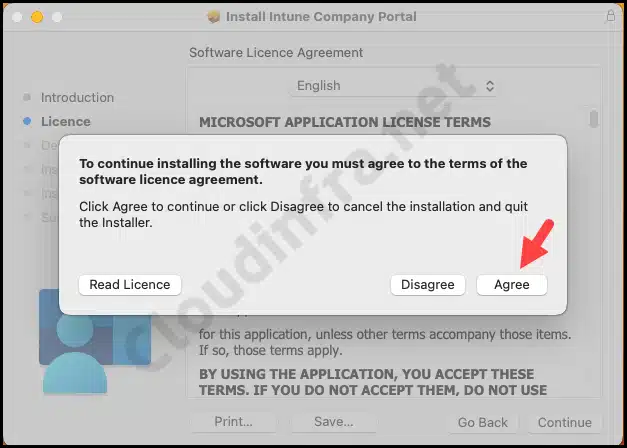
- Click on Agree.
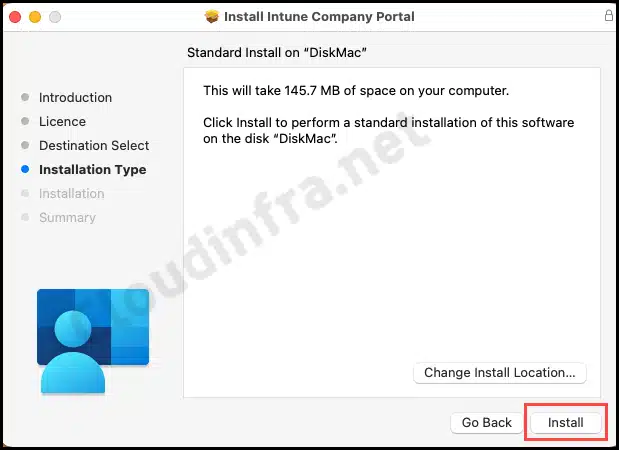
- Click on Install.
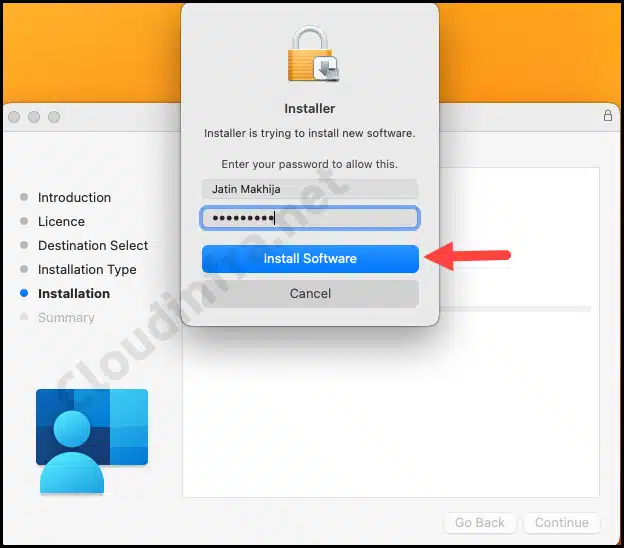
- Enter the local administrator password or use Touch ID, if prompted, and click Install Software.
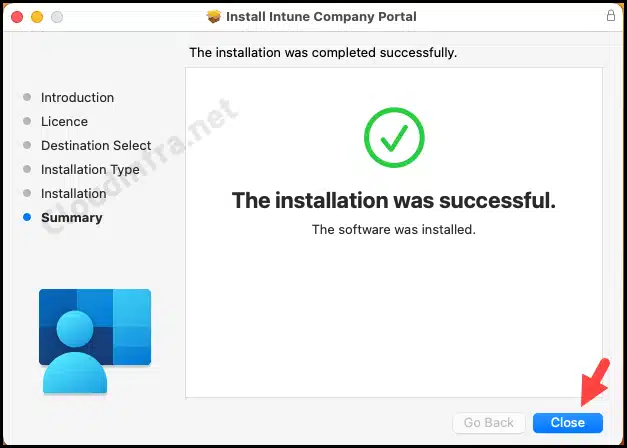
- Wait for the installation to complete. Click Close once Company Portal has been installed successfully.
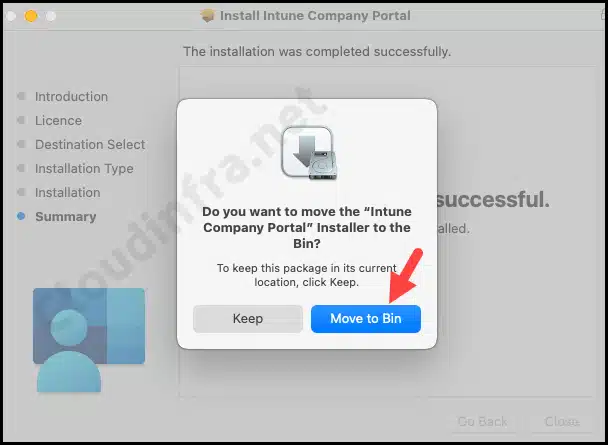
- You can move the installer package to the Bin after the installation is complete.
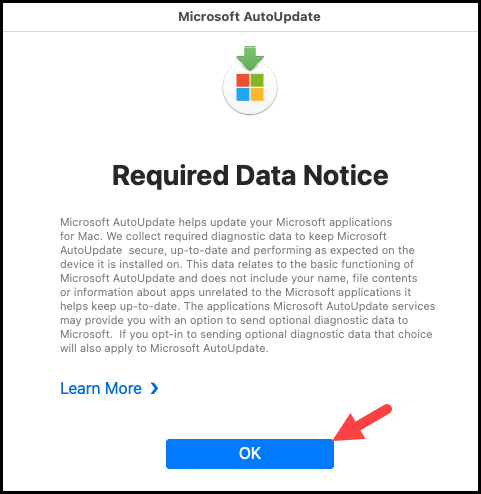
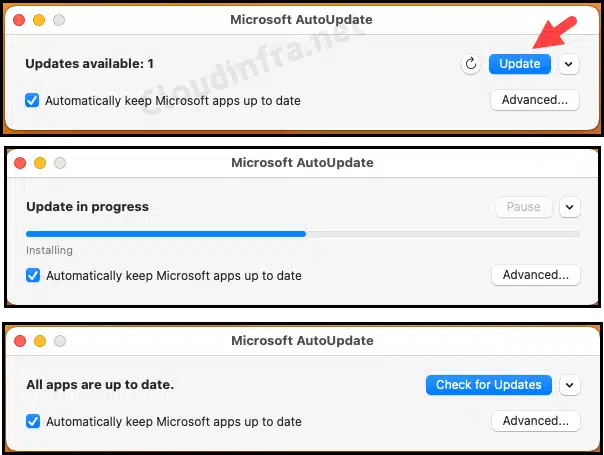
- Note: Microsoft AutoUpdate may launch automatically after installing Company Portal. If updates are available, install them to ensure that you are using the latest version of Company Portal and other Microsoft applications.
Step 2: Launch Company Portal and Sign in
Once the Company Portal app has been installed, follow these steps to begin the enrollment process.
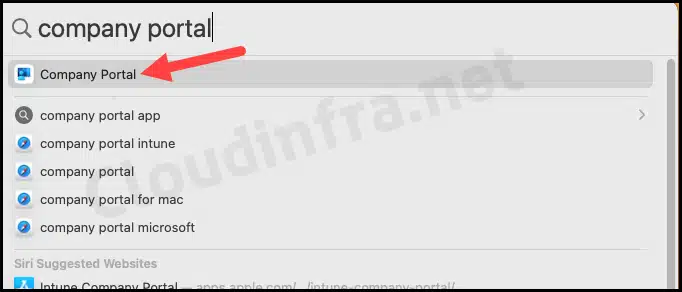
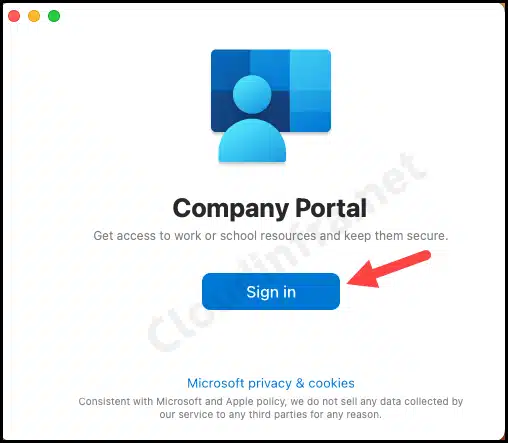
- Open the Applications folder or use Spotlight Search to find Company Portal.
- Click Sign In.
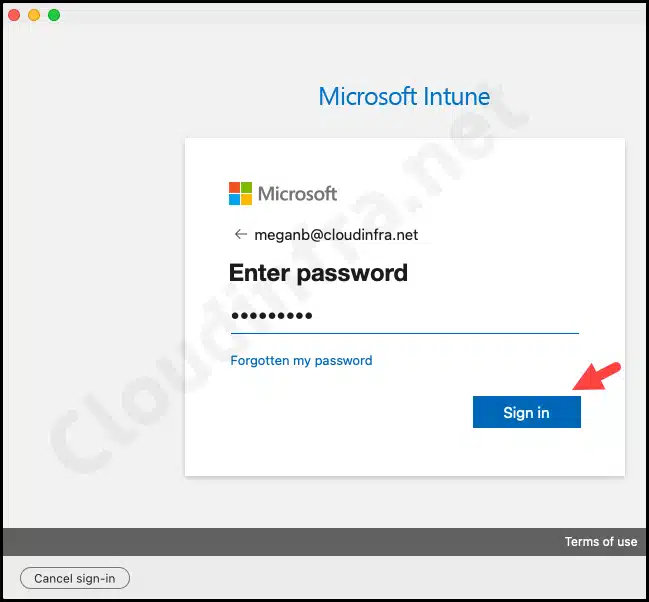
- Enter your organisation’s Microsoft Entra ID user account and password.
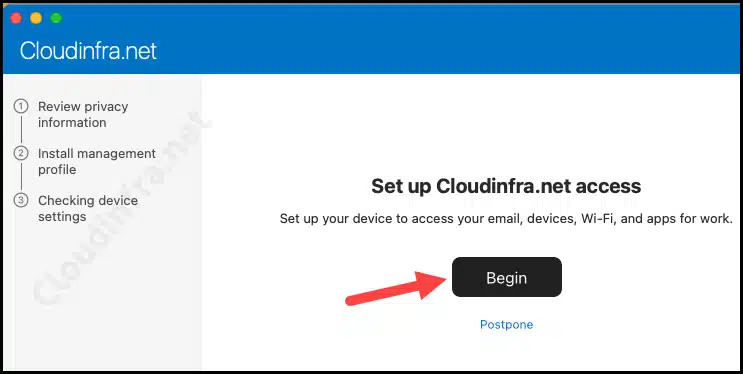
- On the Set up access screen, click Begin.
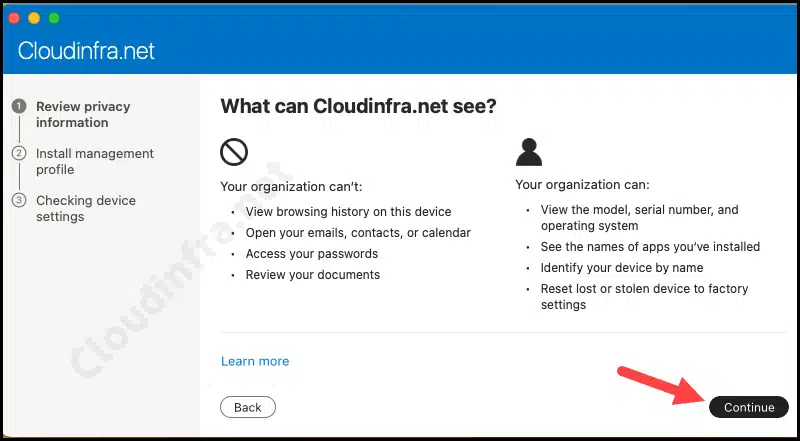
- Review the privacy information, which explains what your organisation can and cannot see after your device is enrolled. Click Continue to proceed.
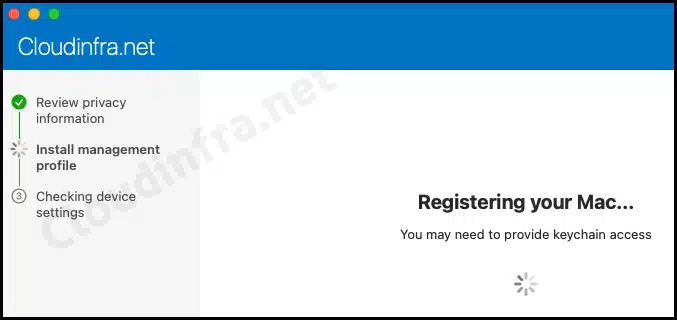
- Registering your Mac…. device with Microsoft Entra ID.
Step 3: Download and Install Management Profile
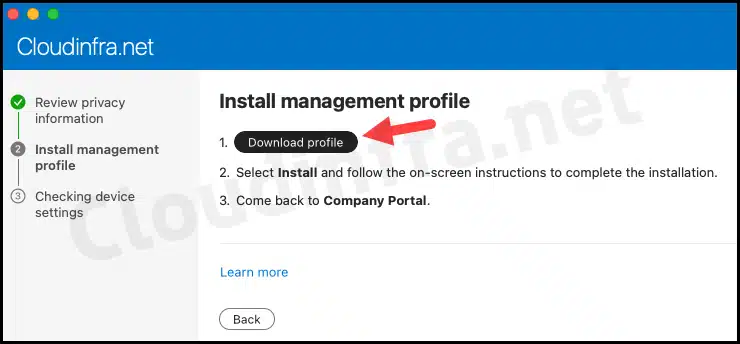
The next step is to download and install the Intune management profile on the Mac. The management profile establishes the MDM connection between your Mac and Intune. Until the profile is installed and approved, Intune cannot fully manage the device.
- To download your device’s management profile, click the Download Profile button.
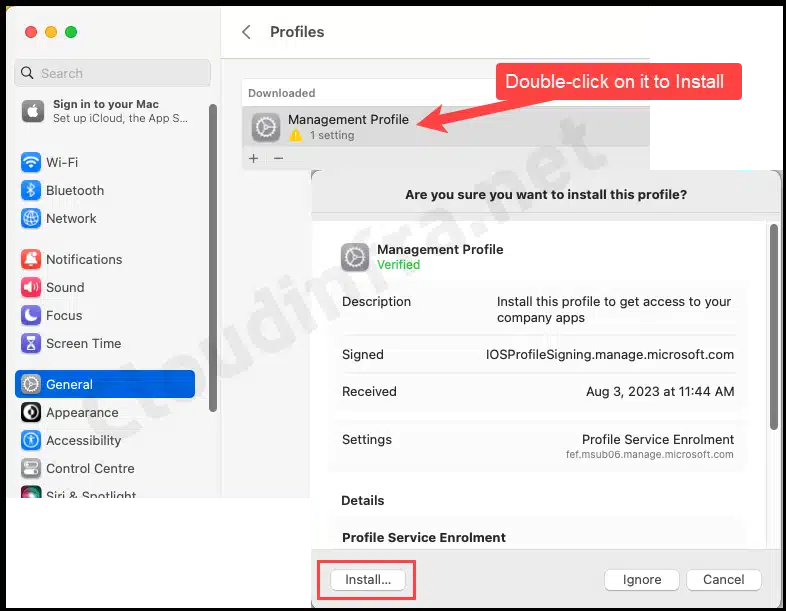
- The management profile will download, and macOS should automatically open System Settings.
- If the Management Profile window does not open automatically, you can manually access it by going to System Settings > General > Profiles. Look for the management profile with a warning sign and double-click on it. Then, click the Install button to proceed with the installation.
Installing the management profile gives your organisation MDM control over the Mac. Before approving enrollment on a personal device, review the management permissions and confirm that you are comfortable with your organisation’s BYOD policy.
Important
- That’s It; The macOS device is now Enrolled with Intune.
More Information
If you want more information about the Management Profile, you can navigate back to System Settings > General > Profiles. From there, double-click the Installed/Active Management Profile to access more information and details.
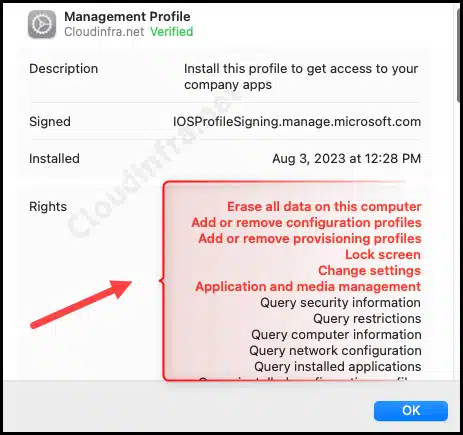
This Management Profile provides below Information:
- Installed date
- Rights / Control it provides to MDM service providers.
- Certificate Details etc.
As you can see from the screenshot, Intune has the rights/control to:
- Erase all data on this computer
- Add or remove configuration profiles
- Add or remove provisioning profiles
- Lock Screen
- Change Settings
- Application and media management
- Query security information
- Query restrictions
- Query computer information
- Query network configuration
- Query installed applications
- Query installed configuration profiles
- Query installed provisioning processes
Verify macOS Registration in Entra admin center
Now that the device registration has been completed successfully, we can verify its status from the Microsoft Entra admin center. Let’s check the steps:
- Sign in to the Entra admin center.
- Click on Devices > All devices under Identity.
- You’ll notice that our MacBook Pro is registered in Entra ID. The MDM column shows that the Microsoft Intune manages it.

Verify macOS Enrollment in Intune
You can also verify the status of your macOS device in the Intune admin center to ensure it’s listed under All devices. Follow these steps to check and confirm the registration of your macOS device:
- Sign in to the Intune admin center > Devices > All devices.
- You should be able to locate the newly registered Mac within Intune. Please make sure to take note of the Compliance Status and the Primary User UPN, which, in my case, is MeganB@cloudinfra.net.
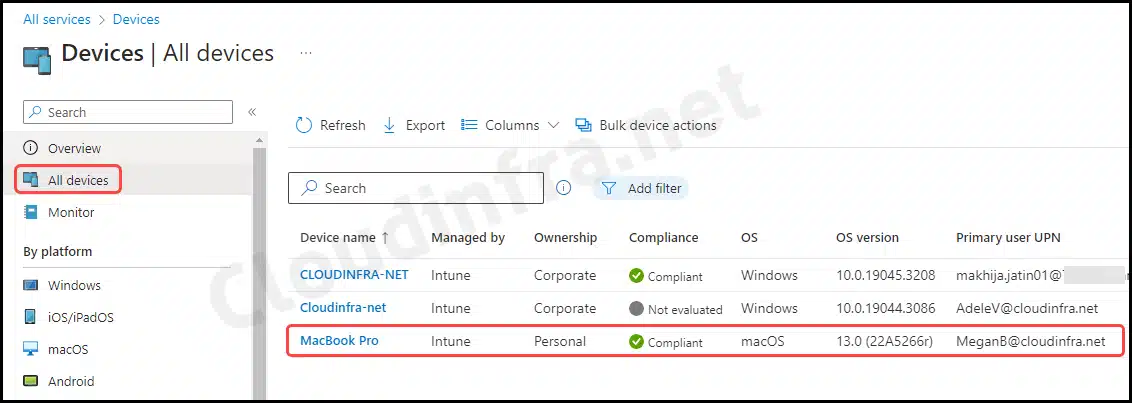
If you haven’t already set up Device compliance policies for Mac, creating one that specifically covers the macOS device platform is important. Now that this Mac device is enrolled in Intune, you can manage it, deploy configuration policies, run scripts and deploy applications, and monitor its status from the Intune admin center.
FAQS
1. Fix the Profile Installation Failed Error
You might encounter an error message that reads, Profile Installation Failed: Could not obtain the final profile using the Encrypted Profile Service. The credentials within your profile may have expired. Try downloading a new profile. This error occurs when attempting to install the management profile.
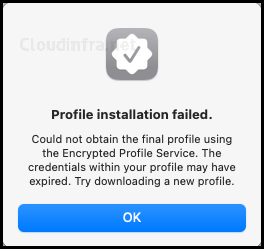
Refer to the blog post on how to fix the macOS Profile Installation Failed error during Intune enrollment.
2. Enroll Company-Owned macOS devices
Enrolling a company-owned macOS device into Intune offers greater management capabilities to an Intune administrator than enrolling a device through user-owned BYOD methods. Three methods are available for enrolling a company-owned macOS device.
- Apple Automated Device Enrollment.
- Device enrollment manager (DEM).
- Direct enrollment.
Refer to the below guide to learn about automated device enrollment, Apple Business, and enrollment of company-owned iOS devices in Intune.
- Setup Apple Business With Intune – Part 1.
- Setup Apple Business With Intune – Part 2.
- Enroll Company-Owned IOS Devices In Intune.
3. Profile installation failed. Bad Request
You might get the error Profile installation failed, bad request while installing the management profile for enrolling the BYOD Mac device into Intune. Company Portal downloaded the enrollment profile successfully, but macOS rejected the second-stage profile returned by Intune’s Encrypted Profile Service. The “bad request” message commonly means that Intune cannot accept the VM’s device identity or enrollment request.
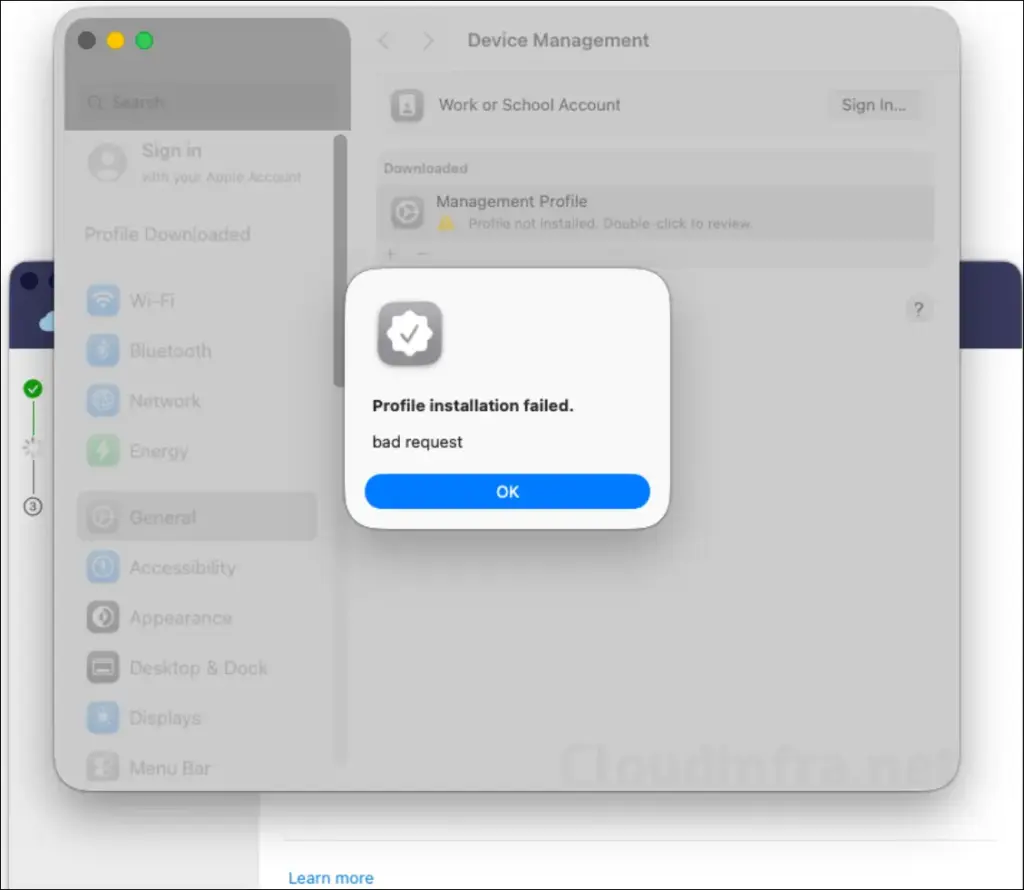
In my case, the issue was caused by the Device Platform Restrictions policy for macOS, where enrollment of personally owned devices was blocked. To resolve the issue, go to Devices > Enrollment > Device platform restrictions, open the macOS restrictions policy, and ensure that the Personally owned device enrollment setting is configured as Allow. After making the change, return to the Mac and install the management profile again. The installation should now complete successfully.
If you do not want to enroll personally owned (BYOD) devices into Intune, this error is expected, and there is no need to modify the Device Platform Restrictions policy for macOS. You can leave the Personally owned device enrollment setting configured as Block.
4. How to Remove a Personal Mac from Intune
If you no longer need to use your personal Mac for work, you can remove the device from Microsoft Intune using the Company Portal app.
- Open Company Portal on your Mac.
- Sign in using your work or school account.
- Navigate to Devices and select the Mac you want to remove.
- From the application toolbar, select the Devices menu > Remove.
- Confirm the removal when prompted.
Conclusion
In this blog post, we’ve covered enrolling a BYOD macOS device in Intune. This step-by-step guide includes screenshots for each enrollment step. We’ve also addressed the Profile Installation Failed error message and provided solutions to resolve it. This error typically occurs during the installation of the management profile on a macOS device.
