In this guide, I will show you how to allow or block website URLs with Microsoft 365 Defender. Web content filtering is part of the Web protection capabilities in Microsoft Defender for Endpoint and Microsoft Defender for Business. It lets you track and regulate access to websites based on content categories such as social networking, high bandwidth, adult content, and more. For more information, refer to the link: Web content filtering – Microsoft Defender for Endpoint | Microsoft Learn.
Once you configure a web content filtering policy, it is enforced across supported browsers:
- Microsoft Edge uses Windows Defender SmartScreen.
- Non-Microsoft browsers (Chrome, Firefox, Brave, Opera) are controlled using Network protection.
Sometimes you need to block categories by default, but allow a specific site inside that category (for example, allow facebook.com while blocking social networking in general). In Microsoft Defender for Endpoint, this is done by creating an Allow indicator for that URL or domain. Allow indicators override web content filtering policies for that site.
Similarly, if you want to block a specific URL or domain, you can do that as well. For example, if you would like to block certain AI websites like chatgpt.com or https://copilot.microsoft.com/ etc. on all Windows 11 computers protected by Defender, you can use indicators and create a block execution rule for that URL or domain.
Contents
License Requirements
To use Web content filtering and URL/Domain indicators, your subscription must include one of the following plans:
- Windows 10/11 Enterprise E5
- Microsoft 365 E5
- Microsoft 365 A5
- Microsoft Defender Suite
- Microsoft 365 E3
- Microsoft Defender for Endpoint Plan 1 or Plan 2
- Microsoft Defender for Business
- Microsoft 365 Business Premium
Your devices must also meet these requirements:
- Operating system (for web content filtering):
- Windows 11
- Windows 10 Anniversary Update (version 1607) or later
- Windows Server 2019 or later
- macOS / Linux when using Network protection as documented
- Browser: Edge, Chrome, Firefox, Brave, Opera
- Protection settings:
- Microsoft Defender Antivirus in active mode
- Behavior monitoring enabled
- Cloud-based protection turned on
- Network protection enabled in block mode for URL/Domain indicators to be enforced in non-Microsoft browsers
You also need access to the Microsoft Defender portal (https://security.microsoft.com) and a role that can manage Defender for Endpoint settings, such as Security Administrator or equivalent.
Step 1: Enable Web Content Filtering and Custom Network Indicators
Before you can whitelist or block specific URLs/domains, you must turn on two advanced features from Microsoft 365 Defender portal.
- Web content filtering
- Custom network indicators (needed for URL/Domain indicators)
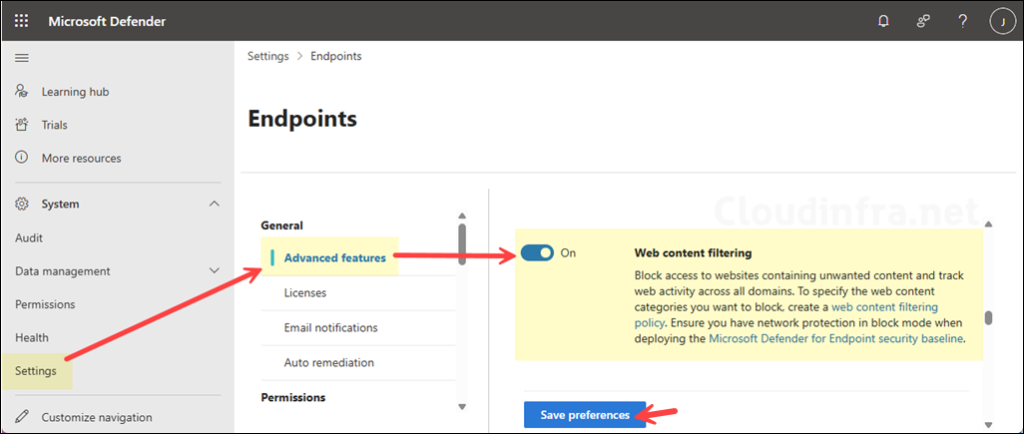
Turn on Web Content Filtering
- Sign in to the Microsoft Defender portal at https://security.microsoft.com.
- In the left navigation, expand System > go to Settings > Endpoints > General > Advanced features.
- Scroll down and find Web content filtering.
- Switch the toggle to On, then select Save preferences.
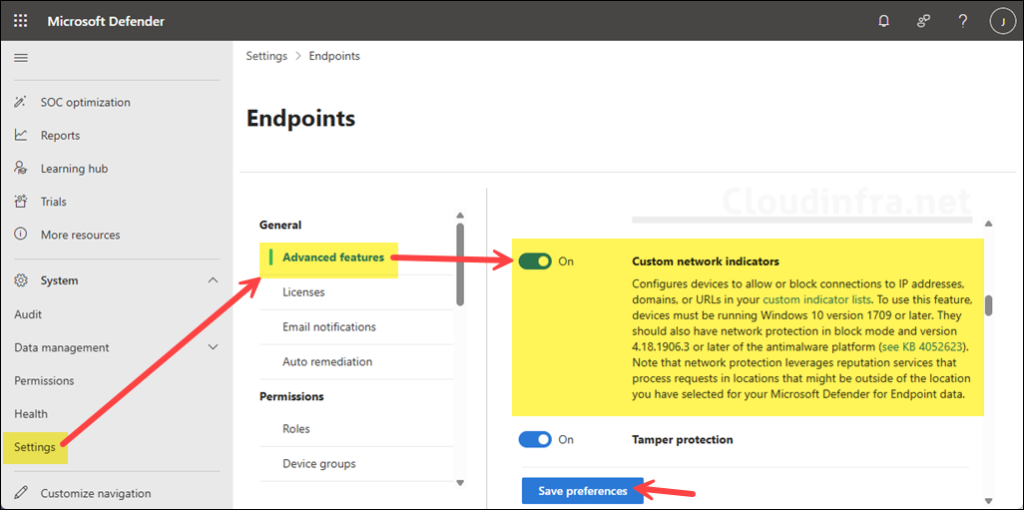
Turn on Custom Network Indicators
Custom network indicators are what allow you to define allow / warn / block actions for specific IPs, URLs, and domains.
- In the same Advanced features page, find Custom network indicators.
- Switch the toggle to On, then select Save preferences.
Step 2: Allow or Block URL or Domain on Microsoft Defender
There are two levels at which you can allow or block URLs or domains in Microsoft 365 Defender. The first level is to block entire pre-categorized site groups, such as adult sites or social networking sites, using Web Content Filtering policies. The second level is to block specific URLs or domains using URL or Domain indicators.
- Web content filtering policies: block or audit categories for device groups.
- URL/Domain indicators: Allow or block specific URLs/domains, overriding category decisions.
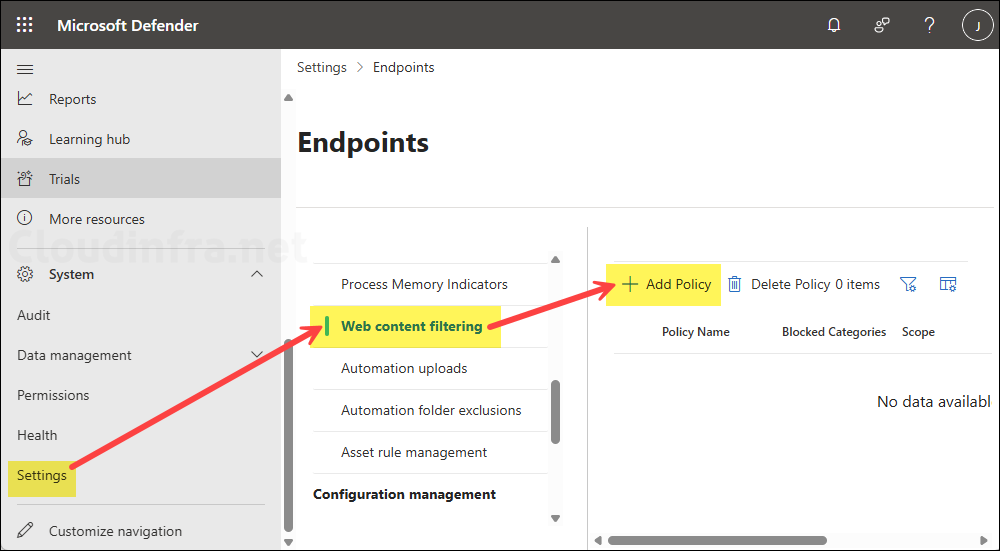
Block Entire Category (social networking or high bandwidth etc.)
To block an entire category (for example, social networking or high bandwidth), follow below steps:
- Sign in to the Microsoft Defender portal at https://security.microsoft.com.
- In the left navigation, expand System > go to Settings > Endpoints > Web content filtering.
- Select + Add policy.
- Choose the categories to block and the device groups to apply the policy to.
Allow or Block Specific URLs or Domains via Defender
To allow/whitelist or block a specific URL or domain, even if its category is blocked, follow below steps:
- Allow indicators take precedence over web content filtering for that site. Allow > Warn > Block is the policy conflict order for URL/Domain indicators.
- It can take up to 2 hours (sometimes up to 48 hours in edge cases) for new indicators to be enforced on all devices, although most changes are applied much faster.
Important points
- Sign in to the Microsoft Defender portal (https://security.microsoft.com).
- In the left navigation, expand System > go to Settings > Endpoints.
- Under Rules, select Indicators.
- Select the URLs/Domains tab.
- Click + Add item to add a URL or domain.

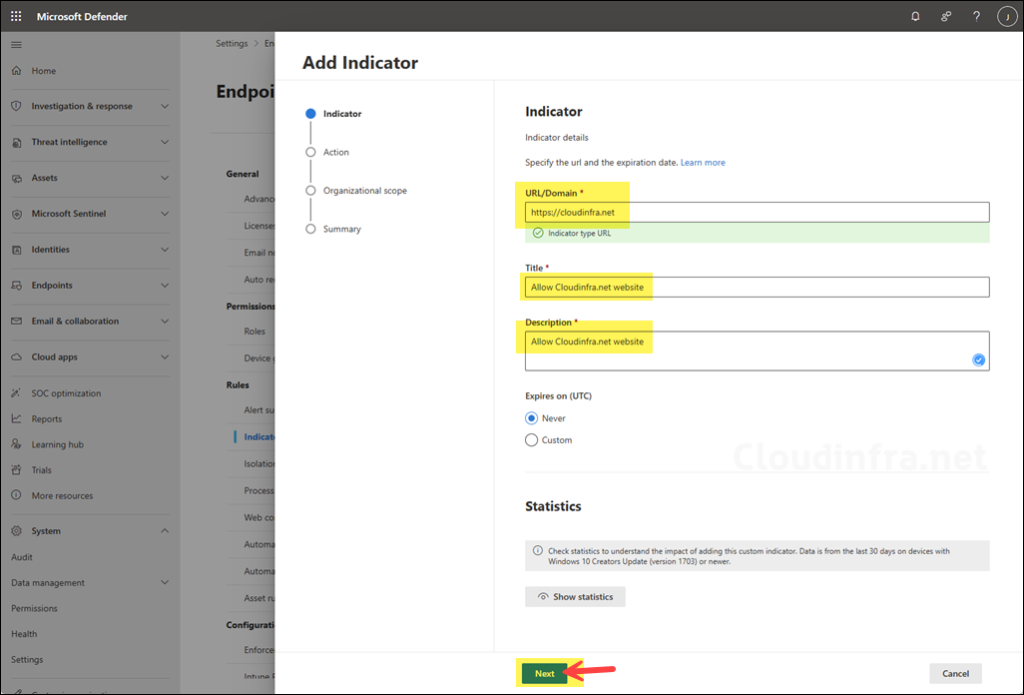
After you click on the + Add item, it will open the Add indicator wizard. Use the wizard to allow or block a URL or domain. Let’s walk through the steps to understand the process.
- Indicator screen:
- URL/Domain: Enter the domain or the URL. For example, I will add the web URL https://cloudinfra.net. You could also enter cloudinfra.net, which will target the entire domain, not just the specific URL.
- Title: Provide the title that shows on the portal.
- Description: Provide a description of the block; you could also include a service request or incident number here for tracking.
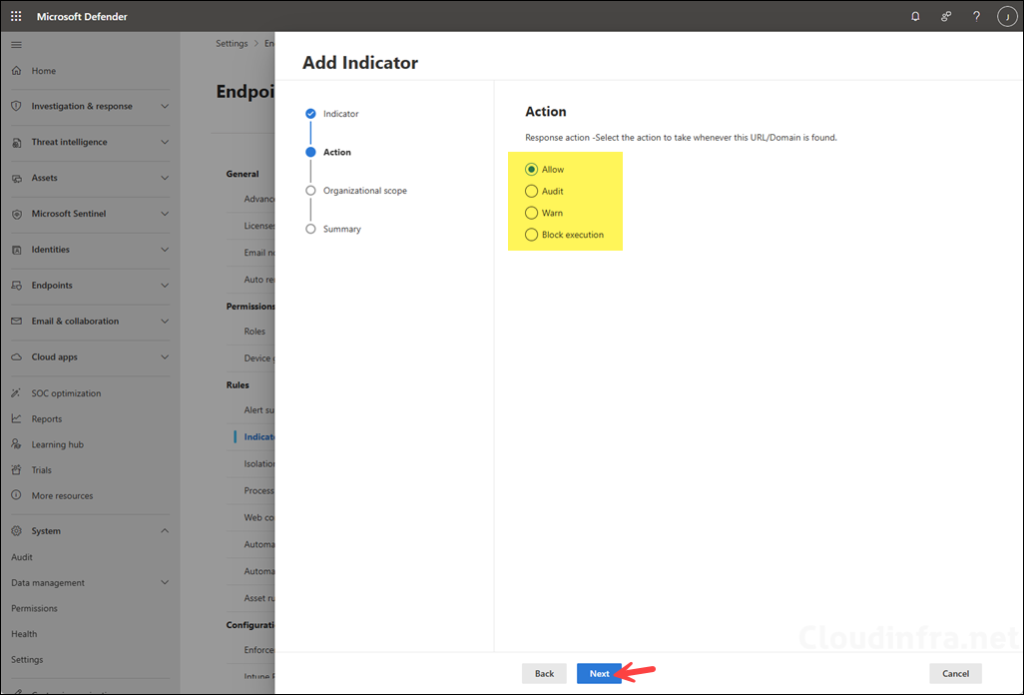
- Action screen: You can take one of the below actions for the given URL or domain:
- Allow: To whitelist the website or domain.
- Audit: Audit the URL or domain.
- Warn: Show a warning toast/page and optionally allow user bypass for a limited time.
- Block execution: Block access to the site or domain.
- Organizational scope:
- Select the device group scope to either All devices in my organization or Specific machine groups. If you select specific machine groups, you should create a device group first from System > go to Settings > Endpoints and click on Device groups under Permissions.

- Summary screen:
- Review the configuration and click Submit.

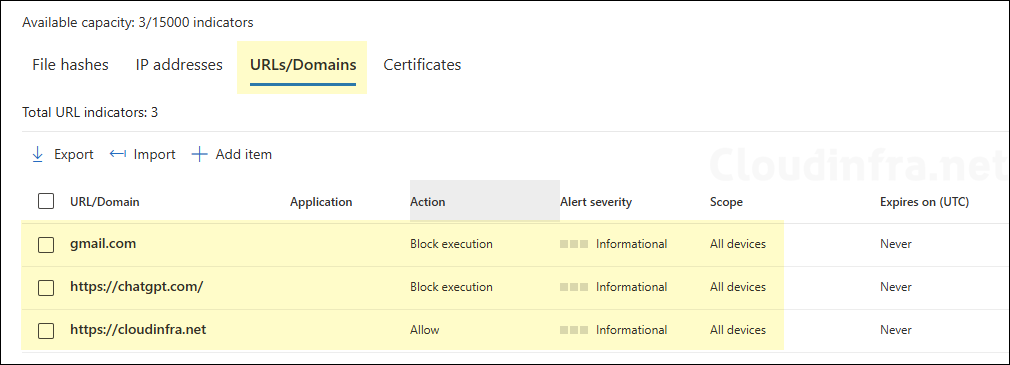
Similarly, add more items you want to allow or block. I have added several more websites and domains like https://chatgpt.com and gmail.com. To block DeepSeek and other AI websites, simply repeat the above steps for those websites and select Block execution.
End User Experience
Once your policies and indicators are in place, the user experience depends on the browser and whether the site is allowed or blocked.
If the site is whitelisted (allowed)
If you have created an Allow indicator for a previously blocked site, users on targeted devices will:
- Be able to browse that site normally.
- Still see blocks for other sites in the same category (because only the allowed URL/domain is overridden).
If the site is blocked
If you configure an indicator with Block action (or the site falls into a blocked category without an allow override):
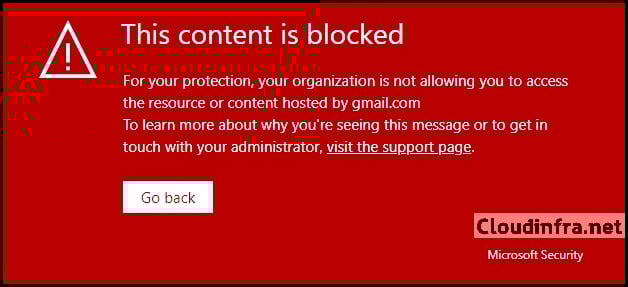
- Microsoft Edge will show an in-browser block page like:
This content is blocked
For your protection, your organization is not allowing you to access the resource or content hosted by gmail.com. To learn more about why you're seeing this message or to get in touch with your administrator, visit the support page.
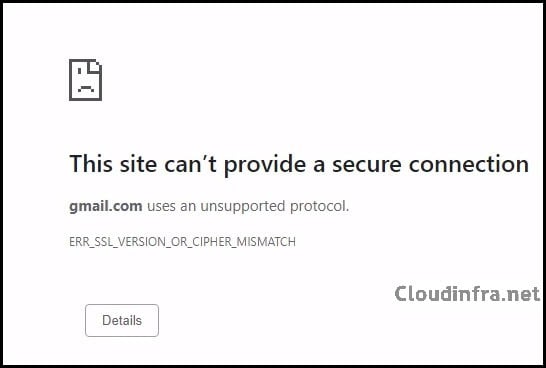
- Google Chrome and other browsers will typically show a system-level error. Network protection intercepts the traffic and can lead to messages such as: This site can’t provide a secure connection.
ERR_SSL_VERSION_OR_CIPHER_MISMATCH. This is expected behavior when Network protection blocks HTTPS connections at the OS level rather than through an in-browser page.
This site can't provide a secure connection. Gmail.com uses an unsupported protocol. ERR_SSL_VERSION_OR_CIPHER_MISMATCH.
Conclusion
In this post, we looked at how to:
- Enable Web content filtering and Custom network indicators in Microsoft 365 Defender.
- Use URL/Domain indicators with the Allow action to whitelist specific websites or domains that might otherwise be blocked by category.
- Understand the end user experience when sites are blocked in Edge and in third-party browsers.
- Use the same mechanism to block other sites, such as DeepSeek, across your estate.
The combination of category-based web content filtering plus fine-grained allow / block indicators gives you a clean way to enforce corporate browsing policies while still allowing exceptions for business-critical sites.