Apple Business normally receives device information automatically when your organisation purchases iPhones and iPads directly from Apple, an Apple Authorized Reseller, or a supported mobile network provider. However, you may also have corporate devices purchased from another retailer or devices that were acquired before Apple Business was configured.
Apple Configurator app for iPhone allows you to manually add these devices to Apple Business and then assign them to a MDM service such as Microsoft Intune for Automated Device Enrollment. This guide explains how to add an iPhone or iPad to Apple Business using the Apple Configurator app installed on another iPhone.
Contents
What Is Apple Configurator App?
Apple Configurator is a free app that can be installed on an iPhone. IT administrators can use it to manually add supported Apple devices to their organisation in Apple Business.
For this process, you need two devices:
- Administrator iPhone: The iPhone running the Apple Configurator app.
- Target device: The corporate iPhone or iPad that you want to add to Apple Business.
This method does not require a Mac or a USB connection. Administrator iPhone detects and pairs with the target device during Setup Assistant. After the target device is added, it can be assigned to an MDM service such as Microsoft Intune and enrolled through Automated Device Enrollment.
When Should You Use Apple Configurator?
Apple Configurator is useful in the following situations:
- The device was not purchased directly from Apple.
- The device was purchased from a retailer that is not linked to your Apple Business account.
- The reseller did not add the device to your Apple Business account.
- You have existing corporate devices that need to be brought under Automated Device Enrollment.
- A replacement or previously purchased device does not appear in Apple Business.
Devices purchased through a linked Apple reseller normally appear automatically and do not need to be added through Apple Configurator.
Note
Prerequisites
Before starting, make sure the following requirements are met:
| Requirement | Details |
|---|---|
| Apple Business account | Your organisation must have an active Apple Business account. |
| Administrator iPhone | The iPhone running Apple Configurator must have iOS 16 or later. |
| Target iPhone or iPad | The target device must have iOS 16 or iPadOS 16 or later. |
| Apple Configurator app | Install the Apple Configurator app from the App Store. |
| Managed Apple Account | Use an account with permission to manage devices. |
| Internet connection | The administrator iPhone and target device require internet access. |
| Factory-reset device | The target iPhone or iPad must be in Setup Assistant. |
| Device management service | Microsoft Intune or another MDM service should already be connected to Apple Business. |
| Intune enrollment token | An active Enrollment Program Token should be configured in Intune. |
The target device must be on the Choose a Wi-Fi Network screen in Setup Assistant. If the device has already been configured and is displaying the Home Screen, it must be erased before it can be added.
Step 1: Install Apple Configurator App on Administrator Phone
The first step is to install the Apple Configurator app on an administrator’s iPhone. This is not the device that you want to add to Apple Business; instead, it will be used to add other iOS/iPadOS devices to Apple Business.
You must sign in to the Apple Configurator app using a Managed Apple Account that has permission to add devices to Apple Business. A personal Apple account should not be used for this process.
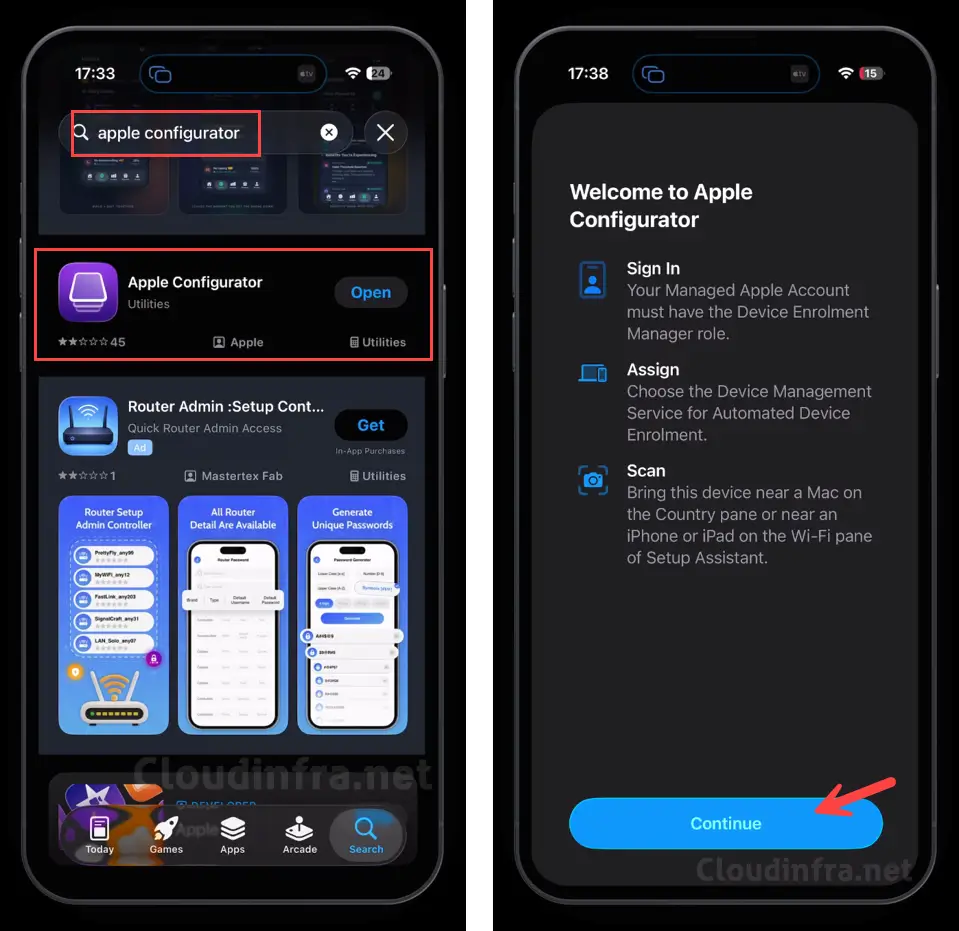
- Download the Apple Configurator app from the App Store. Open the app, and on the Welcome to Apple Configurator screen, click Continue.
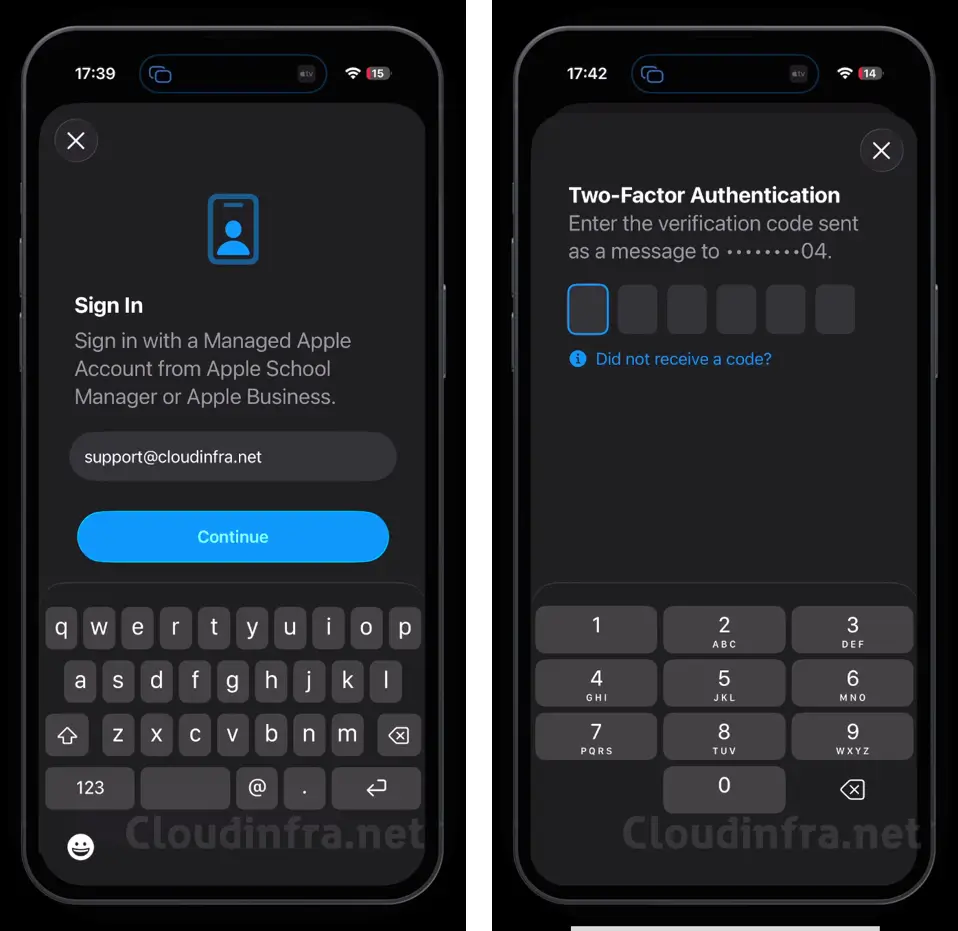
- Sign in using a Managed Apple Account that has permission to add devices to Apple Business. Complete the two-factor authentication (2FA) process to successfully sign in to the Apple Configurator app.
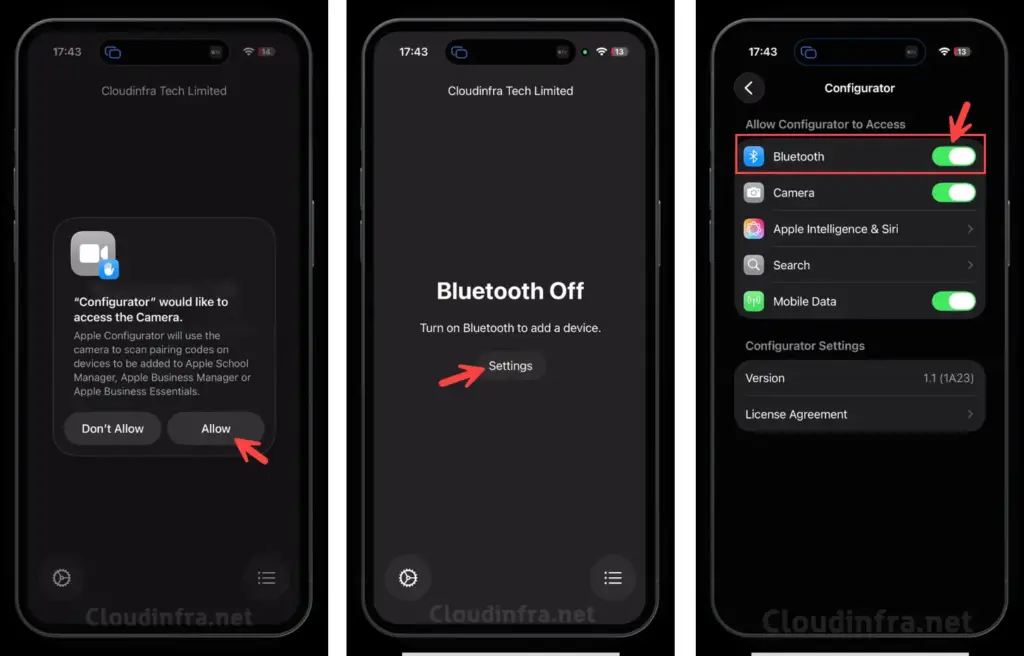
- The Apple Configurator app requires access to the Camera to add devices to Apple Business, so click Allow when prompted. Also, enable Bluetooth for the app when requested, as it is required during the device onboarding process.
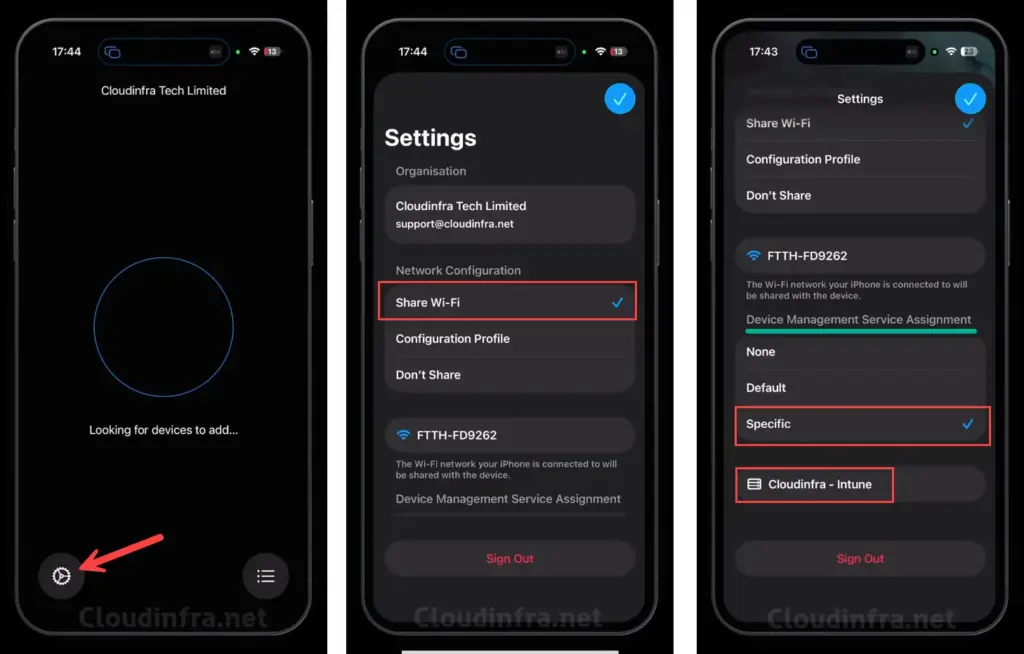
- Click the Settings icon, and then select Share Wi-Fi. Scroll down to the Device Management Service Assignment section. Here, the app shows Cloudinfra-Intune, which is the device management connection we previously created in Apple Business.
- Share Wi-Fi: Apple Configurator shares the administrator iPhone’s current Wi-Fi connection with the target device. This is normally the easiest option when both devices are being configured in an office or test environment.
- Configuration Profile: This option uses a Wi-Fi configuration profile containing the required network settings. It may be useful when the target device must connect to a corporate network that requires certificates or additional authentication settings.
- Don’t Share: The network details are not shared. The person configuring the target device must manually select and connect to a network. For most standard deployments, select Share Wi-Fi.
- Select None, Default, or a specific device management service, depending on how you want the device to be assigned in Apple Business. This determines which device management connection the device will be associated with after it is added.
- None: The device is added to Apple Business but is not automatically assigned to an MDM service.
- Default: The device is assigned to the default service configured for that device type.
- Specific: The device is assigned to a specific device management service.
When using Microsoft Intune, select Specific, and then select the device management service associated with your Intune Enrollment Program Token. Automatic assignment reduces the number of manual steps required after the device is added.
That’s it. No further configuration is required on the administrator’s iPhone in the Apple Configurator app. Next, we will reset an Apple device and add it to Apple Business using the Apple Configurator app that we just installed on the administrator’s phone.
Step 2: Prepare the Target iPhone or iPad
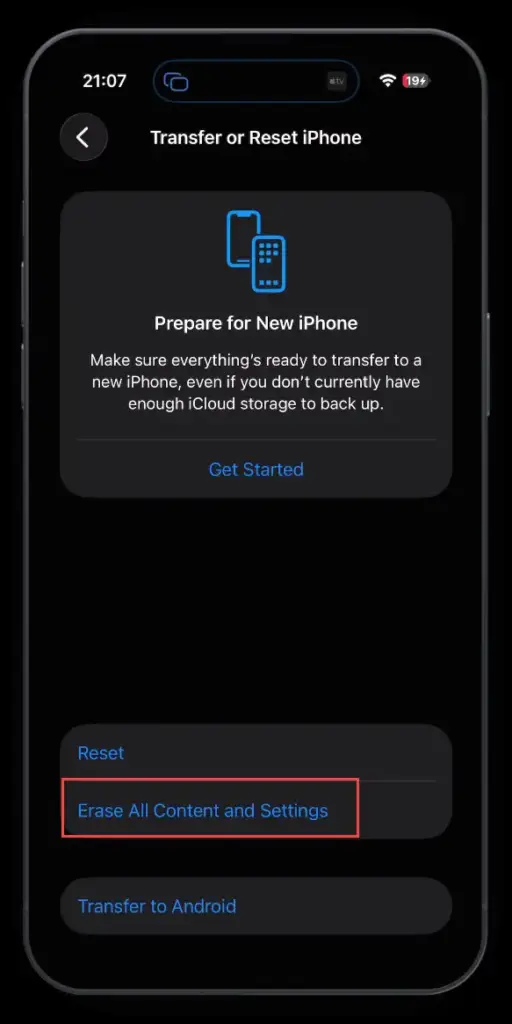
Adding an existing device to Apple Business requires resetting it to its factory settings. This process removes all applications, settings, accounts, and user data from the device. If the device contains any important data, make sure to back it up before proceeding. It is also recommended to sign out of your Apple account and disable Activation Lock before resetting the device. Once you are ready, reset the device to its factory default settings using the steps below:
Reset the target phone
- Open Settings > General > Transfer or Reset iPhone/iPad.
- Select Erase All Content and Settings and follow the on-screen prompts to complete the reset.
Step 3: Pair the Device Using Apple Configurator
After the device has been reset, we will pair it using the Apple Configurator app installed on the administrator’s iPhone. Follow the steps below to pair the device:
- We are now connected to the device that we want to add to Apple Business. The device has been fully factory reset and restarted. On the Hello screen, select your preferred language. I will select English and proceed to the next step.
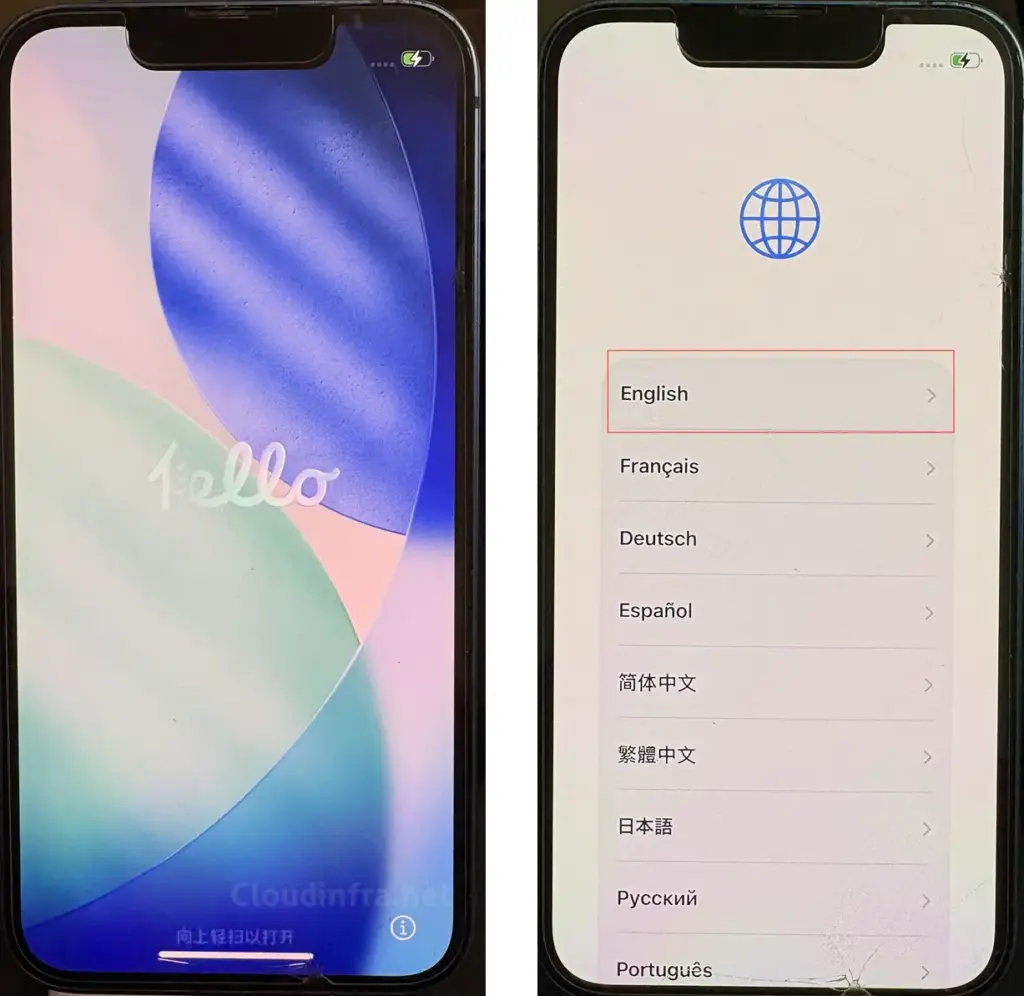
- Select your Country or Region, and then on the Appearance screen, choose your preferred display size: Default, Medium, or Large. Once selected, click Continue to proceed.
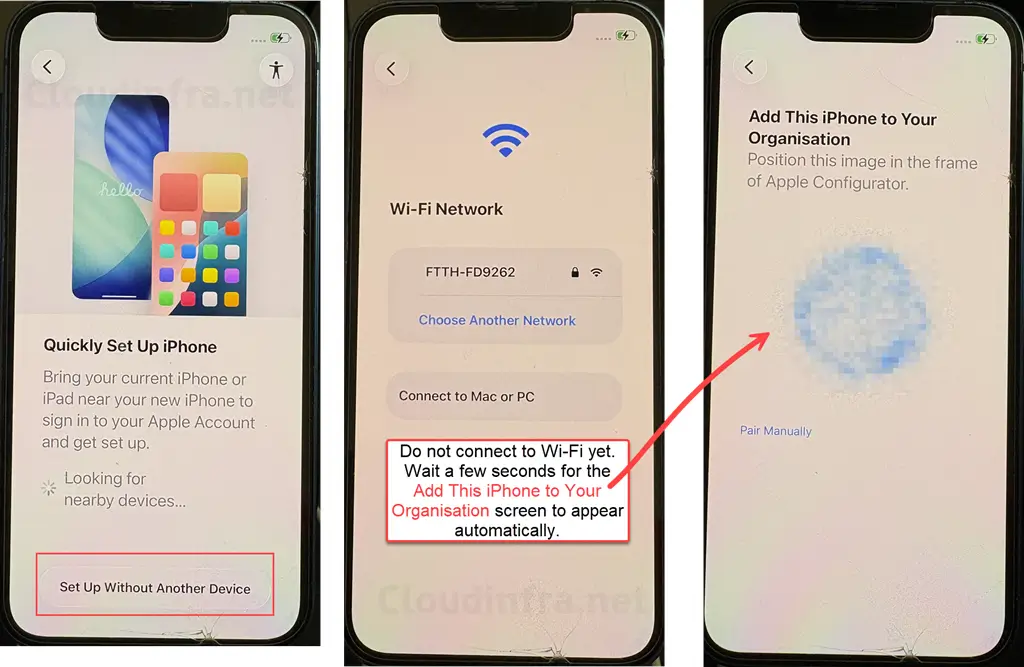
- Now, on the Quickly Set Up iPhone screen, the device will start searching for nearby Apple devices. Nearby, we have the administrator’s iPhone with the Apple Configurator app installed. You may see a pop-up on the administrator’s iPhone prompting you to set up a new iPhone or iPad. Do not tap Continue on this prompt. Instead, tap the X in the top-right corner to close it.
- Now, on the iPhone or iPad that you want to add to Apple Business, tap Set Up Without Another Device.
- Bring the administrator’s iPhone, which has the Apple Configurator app installed, close to the target iPhone or iPad.
- The next screen will prompt you to connect to a Wi-Fi network. Do not connect to Wi-Fi yet. Wait a few seconds for the pairing image to appear on the target device. This image will be used by the Apple Configurator app to pair and add the device to Apple Business.
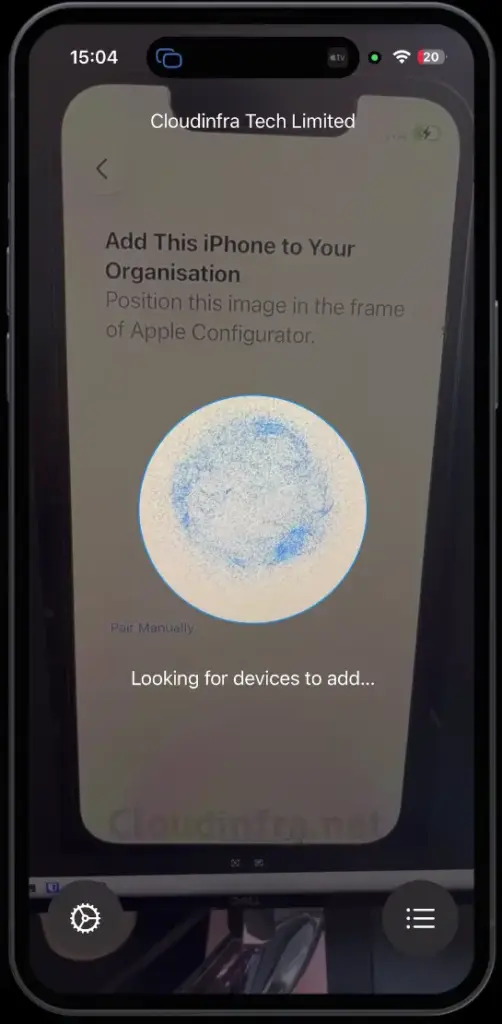
- Using the Apple Configurator app on the administrator’s iPhone, scan the pairing image displayed on the target device. Alternatively, if you do not want to use the camera, you can pair the device manually by selecting the manual pairing option and entering the six-digit code shown on the target iPhone or iPad.
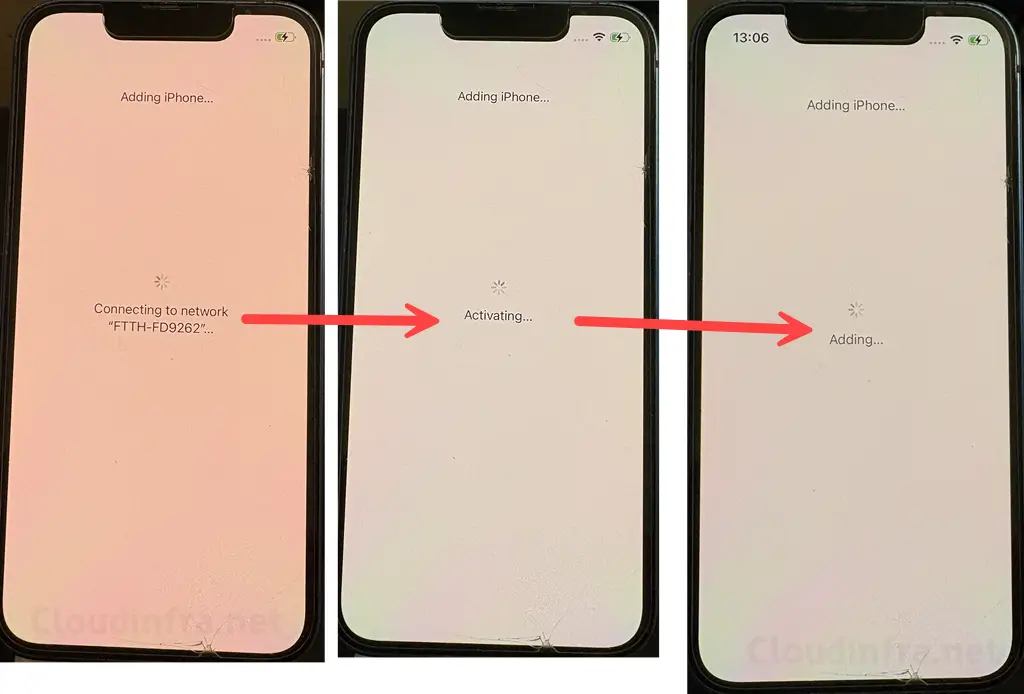
- Since we selected the Share Wi-Fi option in the Apple Configurator app, the target iPhone or iPad will automatically connect to the Wi-Fi network and begin the process of adding the device to Apple Business.
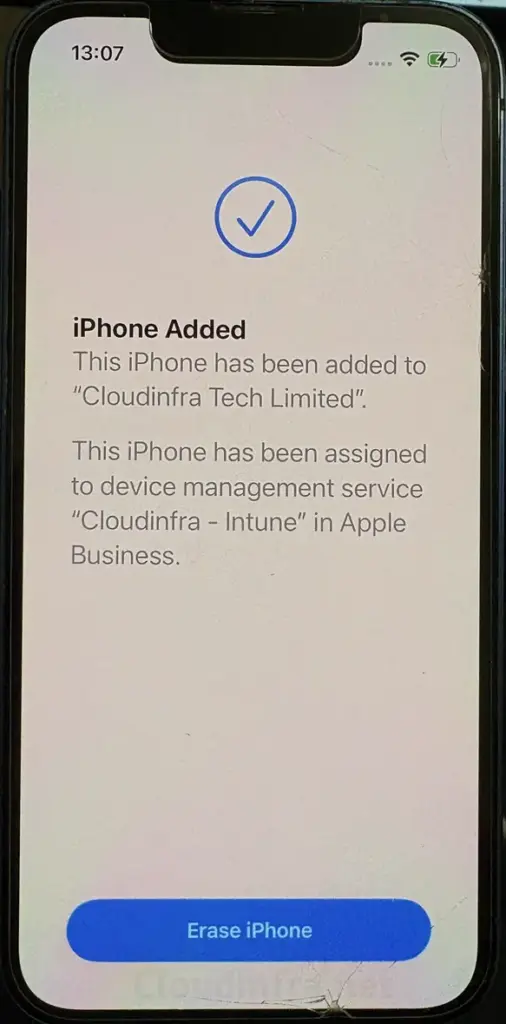
- Since we selected a specific device management service in the Apple Configurator app, the device has been automatically assigned to the Cloudinfra-Intune MDM connection. As a result, the device will automatically synchronize with Microsoft Intune and be available for management.
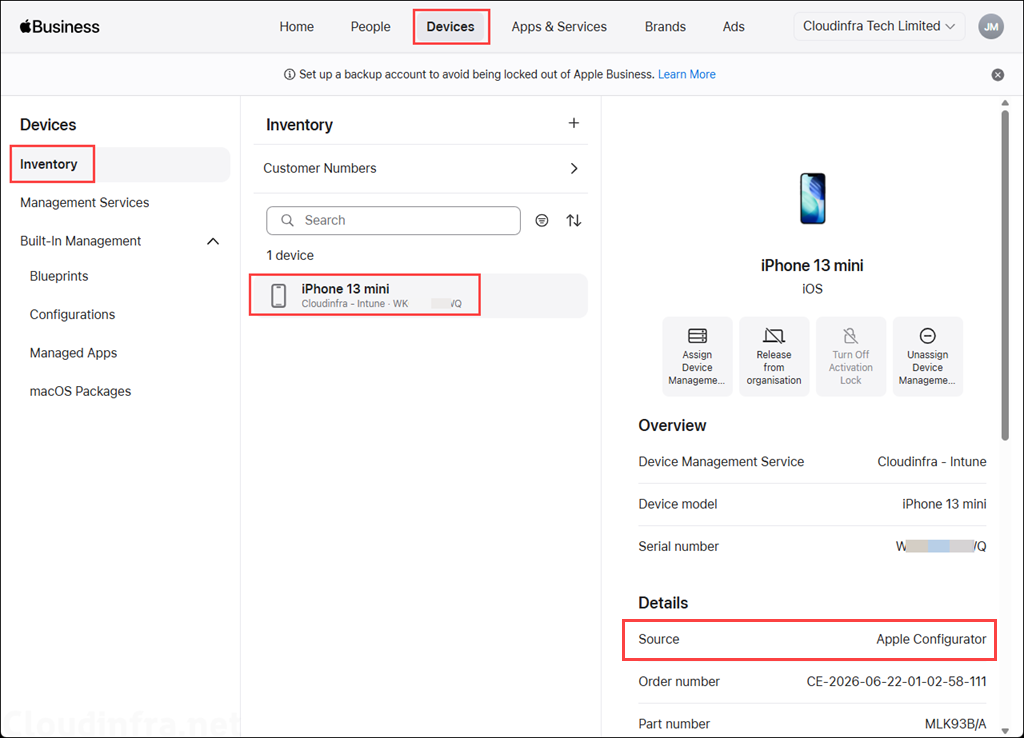
Verify Device Status on Apple Business
Sign in to the Apple Business portal and navigate to Devices > Inventory to verify that the device is listed. The screenshot below shows the device that we just added to Apple Business using the Apple Configurator app.
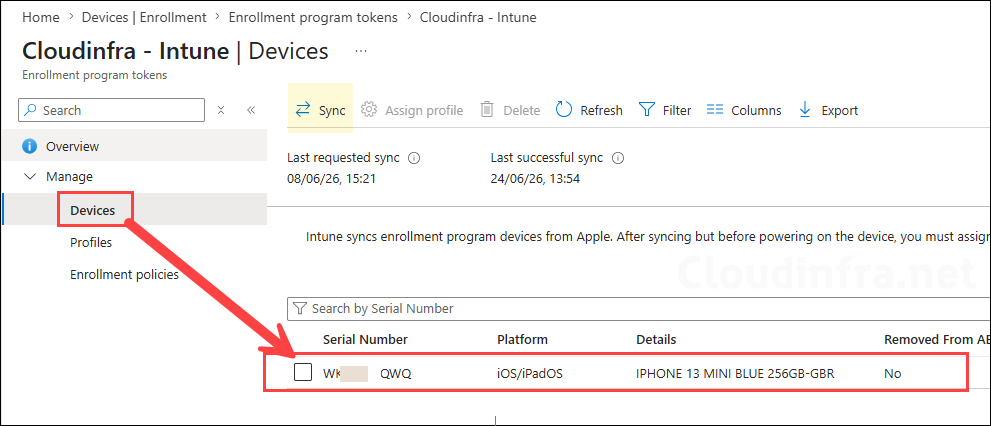
Verify Device Status on Intune admin center
Once the device is added to Apple Business, it will automatically synchronize with the Intune admin center through the Cloudinfra-Intune device management service connection that we created. After the sync is complete, the device will be available in Intune for assignment of enrollment profiles, apps, and policies.
On the Intune admin center > Devices > Apple > Enrollment > Enrollment program tokens. Select the token, go to Devices to check and confirm if the device is synced to Intune. If it’s not showing here, you can click on the Sync button to initiate the sync between Apple Business and Intune.
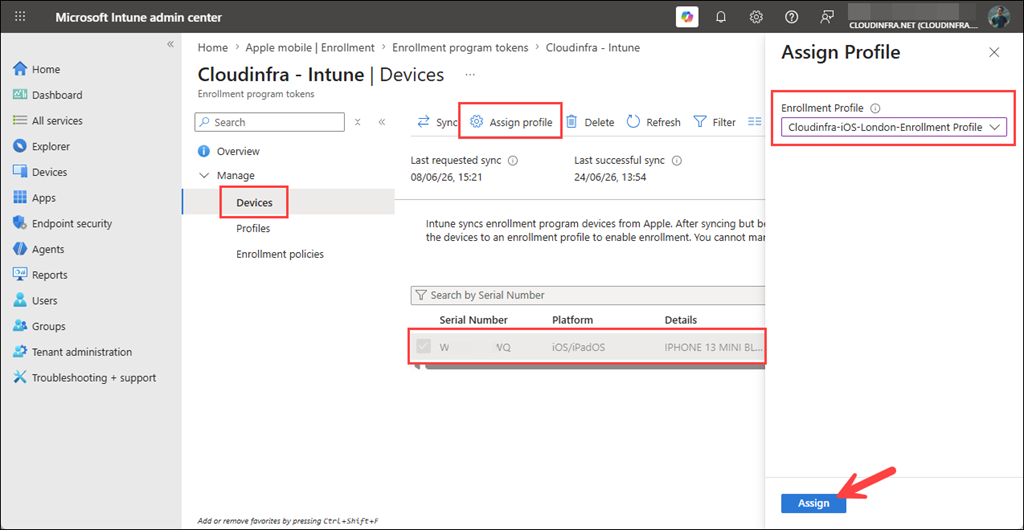
Assign Enrollment Profile
After you see the device in Intune, you can assign the automated enrollment profile. Go to the Intune admin center > Devices > Apple > Enrollment > Enrollment program tokens. Select the token, and go to Devices. Select the device and click on Assign profile. Then select the Enrollment profile and click Assign.
If you have configured a default enrollment profile for iOS/iPadOS devices, the profile will be assigned automatically when the device synchronizes with Intune. In that case, you do not need to manually select the device and assign an enrollment profile.
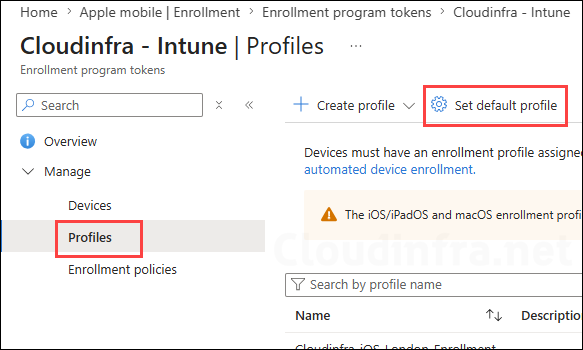
To configure a default profile, go to Intune admin center > Devices > Apple > Enrollment > Enrollment program tokens. Select the enrollment token, navigate to Profiles, click Set default profile, and then choose the default profile for your iOS/iPadOS and macOS devices.