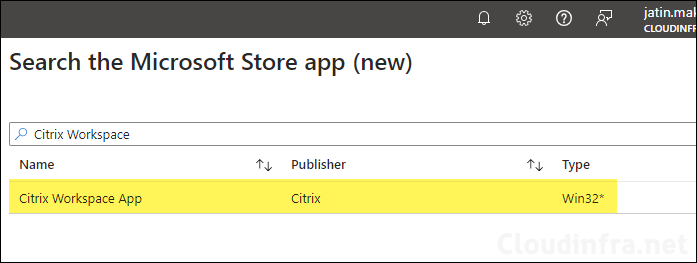
In this blog post, we will learn to deploy Citrix Workspace app using Intune. Citrix Workspace app is a unified platform for users to securely access virtualized desktops, applications, and data from various devices and locations.
Citrix Workspace app must be installed on users devices for connecting to Citrix-based applications and desktops. Deployment of the Citrix Workspace app involves four steps:
- Download the Citrix Workspace app from the Citrix website.
- Create a .intunewin file to generate a Win32 app deployment within Intune.
- Set up the Win32 app deployment to distribute Citrix.
- Monitor the progress of the app deployment.
Blog post
Contents
1. Download Citrix Workspace App
Download the latest version of Citrix Workspace app using this download link.
2. Create .IntuneWin file
- Once you download the Citrix Workspace app, move it to a separate folder containing only application setup files. I have moved it to the D:\CitrixWorkspaceSetup folder.
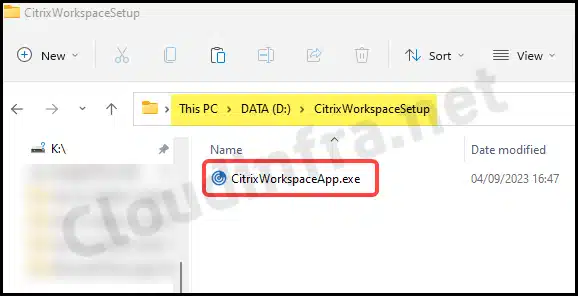
- Create an empty folder called Output anywhere in C:\ or D:\ drive. You can name it whatever you like. This will be the folder where we will generate .Intunewin file.
- Download and Extract Microsoft Win32 Content Prep tool. I have extracted it to C:\IntuneContentPrepTool.
- Launch the Powershell console as an administrator and then navigate to the folder where the Microsoft Win32 Content Prep Tool is located to set it as the current directory.
- Run
IntunewinAppUtil.exeand you will get options to specify Source Folder, Setup File, Output Folder and Catalog Folder.- Source Folder: Provide the location of the folder where all application setup files are copied. D:\CitrixWorkspaceSetup.
- Setup File: Provide the name of the .exe file which installs applications on user device. CitrixWorkspaceApp.exe
- Output folder: Provide a location of a folder where .Intunewin file will be generated. You can provide any folder you like, But i generally create an empty folder called Output for this. C:\output
- Catalog folder: Specify N to not specify any Catalog folder or simply press Enter to skip.

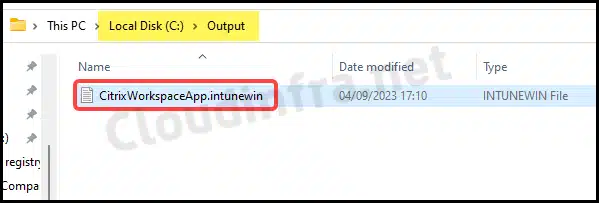
If you are facing any issues creating .Intunewin file, you can refer to my Step-by-step guide, which provides more details on How to create an IntuneWin file.
How to create Intunewin file (Step-by-step) Guide
3. Create Win32 app Deployment
Now that we have created the .intunewin file, we will use this file to create a Win32 app deployment on the Intune admin center to deploy the Citrix Workspace app on target devices.
- Sign in to the Intune admin center > Apps > All Apps.
- Click on + Add and Select Windows app (Win32) from app type.
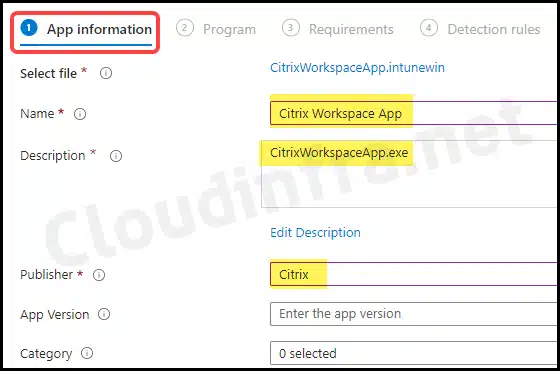
- App Information – Click on Select app package file and browse to .Intunewin file.
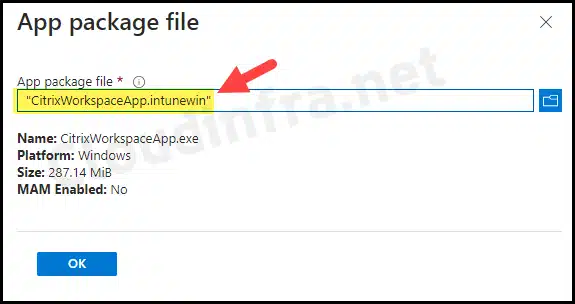
Provide Information in below mandatory fields. The rest of the fields are optional but useful for application documentation and troubleshooting issues.
- Required Fields:
- Name – Provide a unique name of the application.
- Description – Provide a helpful description.
- Publisher – Provide Publisher Information. For example, Citrix.
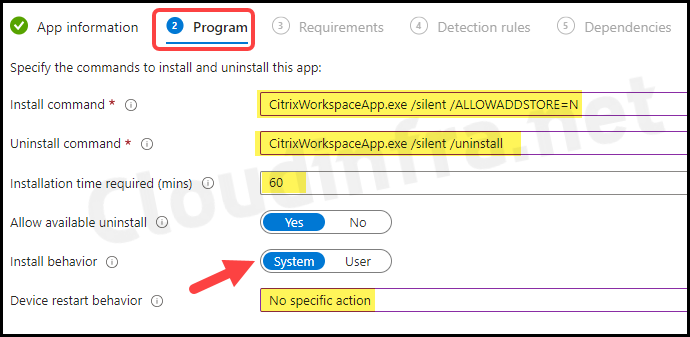
- Program:
- Install command: CitrixWorkspaceApp.exe /silent /ALLOWADDSTORE=N
- Uninstall command: CitrixWorkspaceApp.exe /silent /uninstall
- Installation time required (mins): Keep the default, which is 60 minutes.
- Allow available uninstall: Yes
- Install behavior: System
- Device restart behavior: Select No specific action.
- Requirements: You can specify the requirements that devices must meet to deploy the app. If your devices mix 32-bit and 64-bit types, check the boxes for 32-bit and 64-bit in the operating system architecture drop-down. Else, go with 64-bit.
- Operating System Architecture: 64-bit
- Minimum operating system: Select the minimum OS requirement for this deployment.
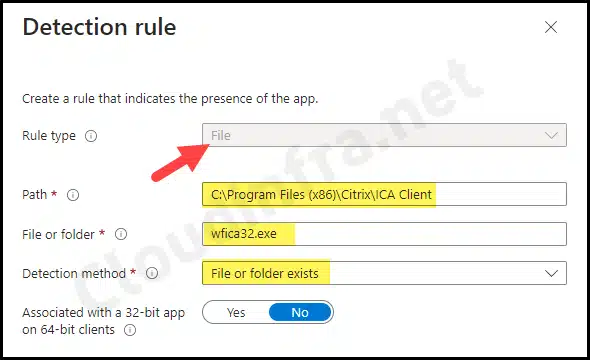
- Detection Rules: Select Manually configure detection rules and click on +Add to add a detection rule.
- Rule Type: File
- Path: C:\Program Files (x86)\Citrix\ICA Client
- File or folder: wfica32.exe
- Associated with a 32-bit app on 64-bit clients: No
- Assignments: Assign the policy to Entra security groups that contain the target users or devices. As a best practice, pilot with a small set first; once validated, roll it out more broadly. For guidance on assignment strategy, see Intune assignments: User groups vs. Device groups.

- Review + create: Review the deployment and click on Create to start the deployment process.
Sync Intune Policies
The device check-in process might not begin immediately. If you’re testing this policy on a test device, you can manually kickstart Intune sync from the device itself or remotely through the Intune admin center.
Alternatively, you can use PowerShell to force the Intune sync on Windows devices. Restarting the device is another way to trigger the Intune device check-in process.
Monitoring Deployment Progress
Intune admin center > Apps > All apps. Click on the deployment and check the Overview page to monitor the deployment status.
End User Experience
Let’s check if the application has been installed on the end-user device. To check and confirm the Installation, please follow the below steps:
- Press Windows Key + R to open Run dialog box
- Type appwiz.cpl and press enter to open the programs and features window
- Find the Citrix Workspace application in the list of Installed programs to confirm the Installation.
Conclusion
In this blog post, we’ve explored the process of deploying the Citrix Workspace app using the Intune Win32 app deployment method. Another option is to deploy the Citrix Workspace app is through the Microsoft Store Apps (new) method, but it offers limited customization, and Win32 app deployment using this method is still in Preview. If you require the flexibility to use switches with the CitrixWorkspace.exe app, the Win32 app deployment method is recommended.
