In this post, I will show you how to deploy Cisco Webex on Windows using Intune. Cisco Webex is a secure, reliable, all-in-one collaboration platform for meetings, calls, messaging, and webinars, offering high-quality audio and video. There are multiple ways to deploy this app via Intune, including line-of-business app, Win32 app deployment, and Enterprise app catalog app method.
MSI deployment method is the simplest and fastest way to deploy this app. You can also use the Win32 app deployment method, which is more advanced and involves additional steps compared to the MSI approach. If you have the required licenses for the Enterprise app catalog, you can use it as well.
Contents
Download Cisco Webex MSI Installer
Download Cisco Webex MSI installer file using below steps:
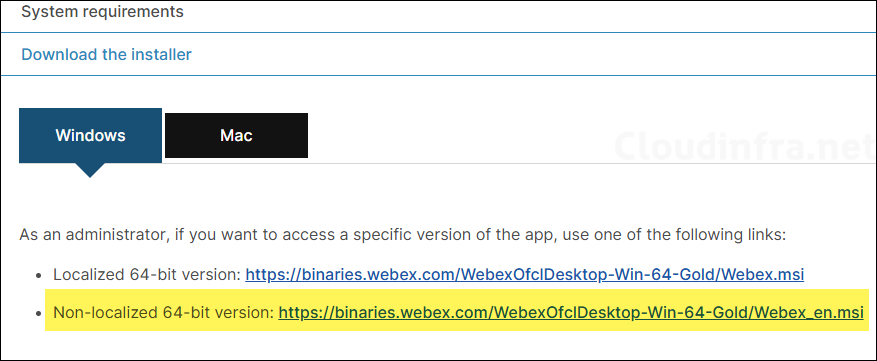
- Visit the website: Webex App | Installation and automatic upgrade.
- Expand the Download the installer section and download the Non-localized 64-bit version of Cisco Webex. Do not use the Localized 64-bit version for deployment, as it has known issues when uninstalling the app through MDM. The installer is an MSI file with a size of approximately 250 MB.
1. Using Line-of-Business App Deployment Method
Once you have downloaded the MSI installer file for Cisco Webex, you can start with the creation of Intune deployment using line-of-business app deployment method. It’s the simplest and quickest way to deploy this app using Intune. Let’s take a look at the steps.
- Sign in to the Intune admin center > Apps > All Apps > + Create.
- Using the App type drop-down, Select the Line-of-business app option.
- Browse the downloaded MSI file and click OK.
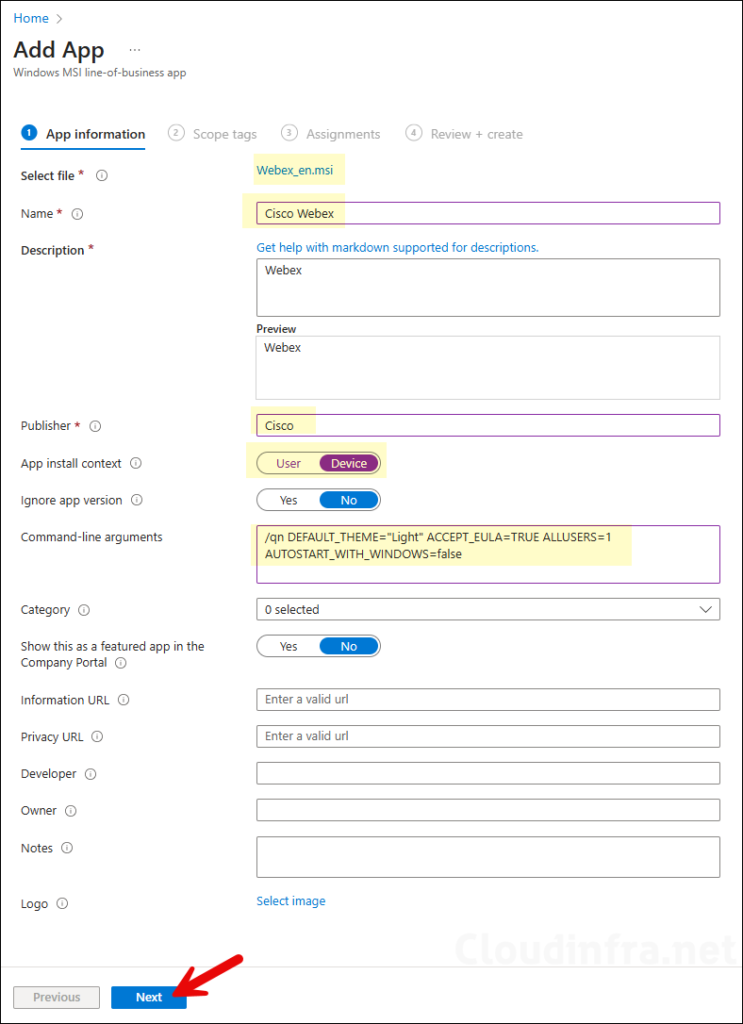
- App information tab:
- Name: Update the name of the app from Webex to Cisco Webex.
- Publisher: Cisco
- App install context: Device, you can also install it in User context. For more info on this setting, see: #app-information.
- Ignore App version: Keep default, For more info on this setting, see: #app-information.
- Command-line arguments: /qn DEFAULT_THEME=”Light” ACCEPT_EULA=TRUE ALLUSERS=1 AUTOSTART_WITH_WINDOWS=false. For more command-line parameters, go to the section: #command-line-parameters.
- Scope tags (optional): A scope tag in Intune is an RBAC label you add to resources (policies, apps, devices) to limit which admins can see and manage them. For more Information, read: How to use Scope tags in Intune.
- Assignments: Assign the app to Entra security groups that contain the target users or devices. As a best practice, pilot with a small set first; once validated, roll it out more broadly. For guidance on assignment strategy, see Intune assignments: User groups vs. Device groups.
- Review + create: Review the deployment summary and click Create.
2. Using Win32 App Deployment Method
You can also use the Win32 app deployment method to deploy Cisco Webex application on Windows devices. This method involves a few additional steps, as it requires the installer to be in the .intunewin file format. Therefore, you must first convert the source installer files to this format before creating the Win32 app deployment in Intune. Let’s look into the steps:
Repackage the Installer into IntuneWin File Format
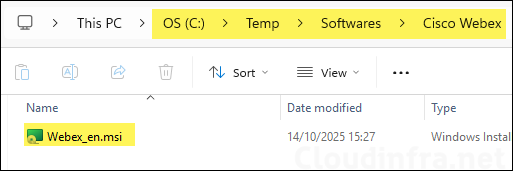
- Copy the Cisco Webex MSI installer file into a dedicated folder that does not contain any other files or subfolders. In this example, I have copied the setup file into a separate folder, C:\temp\Softwares\Cisco Webex (see the screenshot below).
- Download the Microsoft Win32 Content Prep tool and extract it.
- Launch PowerShell console and navigate to the extracted folder.
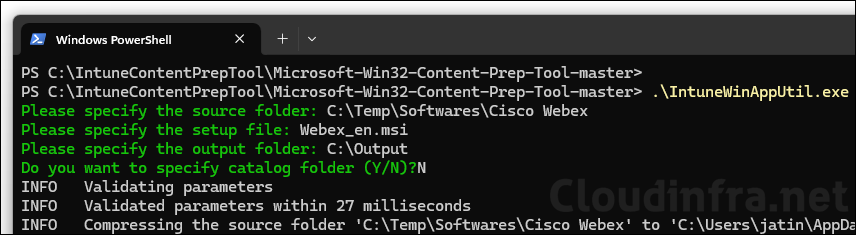
- Run IntunewinAppUtil.exe
- Source Folder: C:\temp\Softwares\Cisco Webex (this is the folder where you have copied the setup file, just provide the path of the source folder).
- Setup File: Webex_en.msi (Provide the name of the installer file with extension).
- Output folder: C:\Output (Provide a folder path where .Intunewin file will be generated).
- Catalog folder: Type N and press Enter.
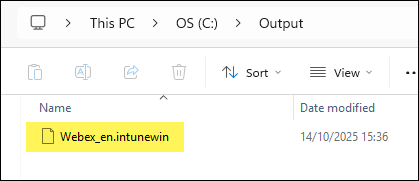
- Check the Output folder (e.g., C:\Output) to locate the .intunewin file.
Create Win32 App Intune Deployment for Cisco Webex
- Sign in to the Intune Admin Center >Apps > All Apps.
- Click on + Create and Select Windows app (Win32) from the app type.
- App Information tab: Click on Select app package file to browse to Webex_en.intunewin file.
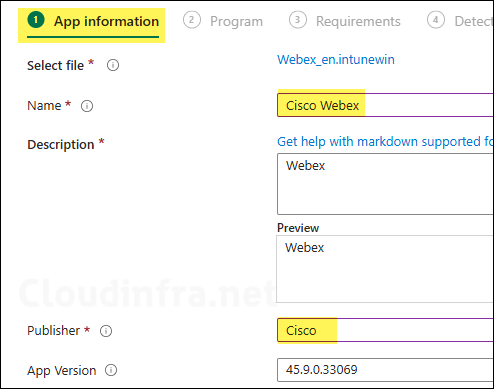
- Name: Update the name to Cisco Webex.
- Description: Update the description or leave default.
- Publisher: Provide publisher as Cisco.
The remaining fields on the App information tab are optional; however, I recommend filling them in, as this information can help other team members during troubleshooting.
- Program tab:
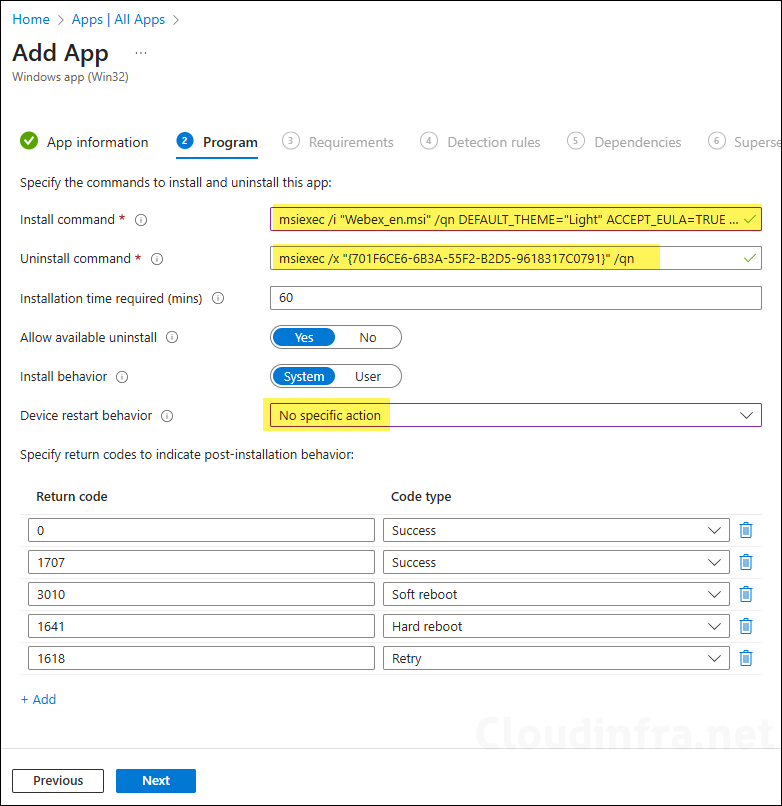
- Install command: msiexec /i “Webex_en.msi” /qn DEFAULT_THEME=”Light” ACCEPT_EULA=TRUE ALLUSERS=1 AUTOSTART_WITH_WINDOWS=true. For more command-line parameters, go to the section: #command-line-parameters.
- Uninstall command: msiexec /x “{701F6CE6-6B3A-55F2-B2D5-9618317C0791}” /qn
- Installation time required (mins): Keep default
- Allow available uninstall: Keep default
- Install behavior: System
- Device restart behavior: No specific Action
- Specify return codes to indicate post-installation behavior: Keep default
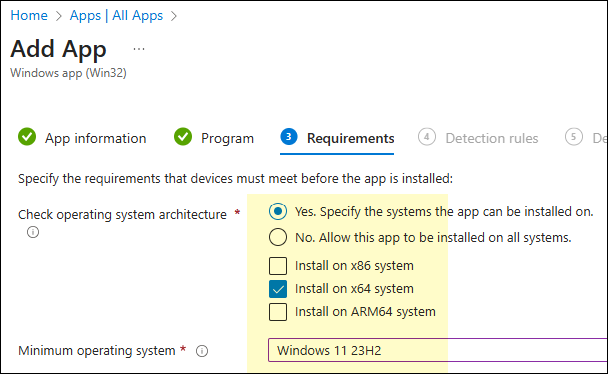
- Requirements: Specify the requirements that the devices must meet before the app is installed. As it’s a x64 bit app, I will select Install on x64 systems and provide minimum operating system as Windows 11 23H2.
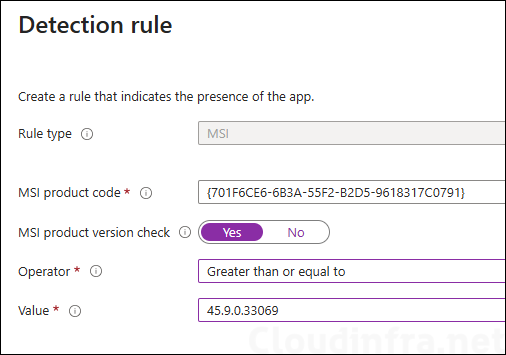
- Detection Rules:
- Rules Format: Select Manually configure detection rules
- Rule Type: MSI
- MSI Product code: This should be automatically populated, if it’s not populated for you, then you will need to check the MSI product code and add it here.
- MSI product version check: Yes
- Operator: Greater than or equal to
- Value: Provide the version of the app (you can get it from App information tab).
- Dependencies: Click Next.
- Supersedence: Click Next.
- Scope tags (optional): A scope tag in Intune is an RBAC label you add to resources (policies, apps, devices) to limit which admins can see and manage them. For more Information, read: How to use Scope tags in Intune.
- Assignments: Assign the app to Entra security groups that contain the target users or devices. As a best practice, pilot with a small set first; once validated, roll it out more broadly. For guidance on assignment strategy, see Intune assignments: User groups vs. Device groups.
- Review + create: Review the deployment summary and click Create.
3. Using Enterprise App Catalog App Deployment Method
You’ll need an additional license to use the Enterprise App Catalog feature in Intune. You can either purchase the Intune Suite license or a standalone Enterprise App Management license to enable this feature.
- Sign in to the Intune Admin Center >Apps > All Apps.
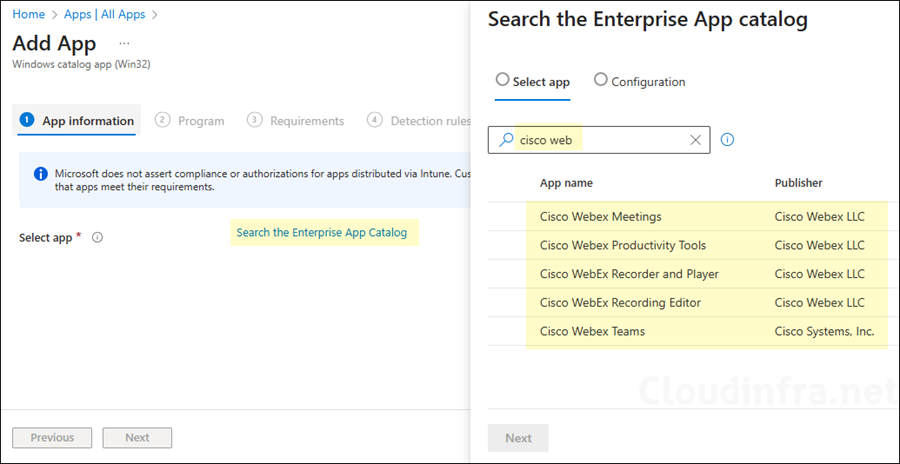
- Click on + Create and Select Enterprise app catalog app from the app type.
- Search the Enterprise App catalog for Cisco Webex app and select the one you want to deploy.
Update Intune Policies
The device check-in process might not begin immediately. If you’re testing this policy on a test device, you can manually kickstart Intune sync from the device itself or remotely through the Intune admin center.
Alternatively, you can use PowerShell to force the Intune sync on Windows devices. Restarting the device is another way to trigger the Intune device check-in process.
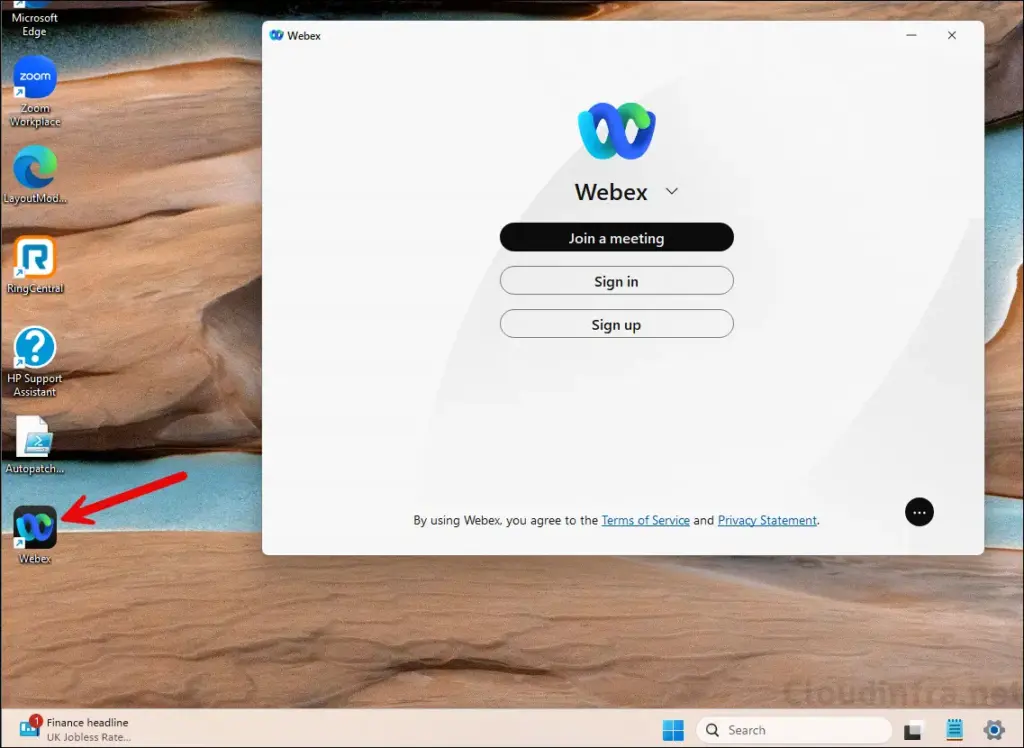
End User Experience
After the app is installed, it will create a desktop shortcut and an entry in Start menu. Also note that the MSI switches DEFAULT_THEME=”Light” and AUTOSTART_WITH_WINDOWS=true. By default, Cisco Webex operates in dark theme, so if you prefer that the remove the switch DEFAULT_THEME=”Light”. Also, if you do not want the application to auto start with Windows, then change AUTOSTART_WITH_WINDOWS=true to false.
Cisco Webex Command-Line Parameters
| Parameter | Description |
|---|---|
| ALLUSERS=1 | Installs the app for all users in device context (requires administrator rights). |
| /qn | Performs a completely silent installation with no user interface. |
| ACCEPT_EULA=TRUE | Automatically accepts the end-user license agreement. |
| AUTOSTART_WITH_WINDOWS=true | Set this to false if you do not want to autostart this app with Windows. |
| DEFAULT_THEME=”Light” | Other option “Dark” |
| DELETEUSERDATA=1 | Deletes user data and logs during installation (0 retains data; default is 0). |
| EMAIL=<value> | Prepopulates the sign-in email address (supports tokens like $userPrincipalName, $mail, $SAMAccountName). |
| ENABLEOUTLOOKINTEGRATION=1 | other option value 0 |
| FORCELOCKDOWN=LockWhenCompatible | Locks the Meetings app when the version matches the site’s compatible version (bundle only). |
| INSTALL_ROOT=”C:\Path” | Specifies a custom installation directory (typically used for per-device installs). |
| INSTALLWV2=1 | Ensures Microsoft Edge WebView2 runtime is installed with Webex. |
| FORCECLIENTSPCOMPATIBLEVERSIONNO=## | Forces the Meetings client to match a specific site-compatible version (bundle only). |
| PREVENT_PRELOGIN_UPDATES=1 | Prevents update checks before sign-in, allowing updates only after user login. |