Table of Contents
Sysprep, short for System Preparation, is a Microsoft Windows tool for preparing and customizing Windows operating system images for deployment across multiple computers. It is primarily used in enterprise and IT environments to streamline the installation and configuration of Windows on multiple computers with similar hardware.
The main idea is that Sysprep helps prepare a Windows installation for deployment on different hardware by creating a clean slate regarding identifiers and hardware-specific configurations. This ensures that each deployed system has unique identifiers (SIDs) while allowing for the adaptation of GUIDs to the specific hardware configuration on each machine.
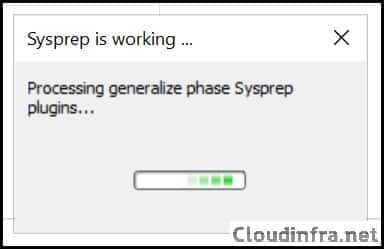
Recently I got an error message while performing a sysprep on a Windows 11 machine. I was preparing an Image for Azure Virtual Desktop, and during the Generalization of the Windows 11 system, I received a pop-up error message as shown below screenshot:

| Error Message |
|---|
| Sysprep was not able to validate your windows installation. Review the log file at %WINDIR%\System32\Sysprep\Panther\setupact.log for details. After resolving the issue, use Sysprep to validate your installation again. |
1. SYSPRP Failed to remove apps for the current user: 0x80073cf2
Browse to the path %WINDIR%\System32\Sysprep\Panther\setupact.log and open the log file. Scroll to the end of the log file to check the error message. As per the log file, the error message is related to Onedrive as shown below. You may see a different app in the error log, apply the fix accordingly.
2022-06-08 11:09:16, Info                  SYSPRP SysprepSession::CreateXPathForSelection: Sysprep mode in registry is <null>
2022-06-08 11:09:16, Info                  SYSPRP SysprepSession::CreateXPathForSelection: Processor architecture in registry is AMD64
2022-06-08 11:09:16, Info                  SYSPRP ActionPlatform::LaunchModule: Executing method 'ValidateBitLockerState' from C:\Windows\System32\BdeSysprep.dll
2022-06-08 11:09:16, Info                  SYSPRP ActionPlatform::LaunchModule: Successfully executed 'ValidateBitLockerState' from C:\Windows\System32\BdeSysprep.dll
2022-06-08 11:09:16, Info                  SYSPRP ActionPlatform::LaunchModule: Executing method 'SysprepGeneralizeValidate' from C:\Windows\System32\AppxSysprep.dll
2022-06-08 11:09:16, Info                  SYSPRP Entering SysprepGeneralizeValidate (Appx) - validating whether all apps are also provisioned.
2022-06-08 11:09:17, Error                 SYSPRP Package Microsoft.OneDriveSync_21220.1024.5.0_neutral__8wekyb3d8bbwe was installed for a user, but not provisioned cloudinfra.net. for all users. This package will not function properly in the sysprep image. cloudinfra.net.
2022-06-08 11:09:17, Error                 SYSPRP Failed to remove apps for the current user: 0x80073cf2.
2022-06-08 11:09:17, Error                 SYSPRP Exit code of RemoveAllApps thread was 0x3cf2.
2022-06-08 11:09:17, Error                 SYSPRP ActionPlatform::LaunchModule: Failure occurred while executing 'SysprepGeneralizeValidate' from C:\Windows\System32\AppxSysprep.dll; dwRet = 0x3cf2
2022-06-08 11:09:17, Error                 SYSPRP SysprepSession::Validate: Error in validating actions from C:\Windows\System32\Sysprep\ActionFiles\Generalize.xml; dwRet = 0x3cf2
2022-06-08 11:09:17, Error                 SYSPRP RunPlatformActions:Failed while validating Sysprep session actions; dwRet = 0x3cf2
2022-06-08 11:09:17, Error      [0x0f0070] SYSPRP RunDlls:An error occurred while running registry sysprep DLLs, halting sysprep execution. dwRet = 0x3cf2
2022-06-08 11:09:17, Error      [0x0f00d8] SYSPRP WinMain:Hit failure while pre-validate sysprep generalize internal providers; hr = 0x80073cf2
If you read this log file, you will find that SYSPREP Failed to remove OneDriveSync client package Microsoft.OneDriveSync_21220.1024.5.0_neutral__8wekyb3d8bbwe. In your scenario, it could be a different application(s).
SYSPRP Package Microsoft.OneDriveSync_21220.1024.5.0_neutral__8wekyb3d8bbwe was installed for a user, but not provisioned for all users. This package will not function properly in the sysprep image.
According to Microsoft, the cause of the issue is:
Sysprep has an additional provider that’s added in Windows to clean
Appxpackages and to generalize the image. The provider works only if theAppxpackage is a per-user package or an all-user provisioned package.
To fix this issue, launch Powershell using administrator rights and run the command below to remove the Onedrive Appx package. Replace the Onedrive package name with what it shows in your error log file.
Remove-AppxPackage -Package <packagefullname>
Example:
Remove-AppxPackage -Package Microsoft.OneDriveSync_21220.1024.5.0_neutral__8wekyb3d8bbwe
Remove-AppxPackage -Package Microsoft.OneDriveSync_21220.1024.5.0_neutral__8wekyb3d8bbwe -AllUsers
Remove-AppxProvisionedPackage -Online -PackageName <packagefullname>
Example:
Remove-AppxProvisionedPackage -Online -PackageName Microsoft.OneDriveSync_21220.1024.5.0_neutral__8wekyb3d8bbwe
Once you run the command and restart Sysprep, it should work fine this time. For more information about this error message, you can read it here.
2. Turn BitLocker off to run Sysprep (0x80310039)
You can also find this error message in the setupact.log file. This indicates that BitLocker encryption is enabled for the operating system volume, and Sysprep cannot proceed while BitLocker is active on the system. To resolve this issue, you must temporarily disable BitLocker and then run Sysprep. Here is a snippet of the error message:
Error SYSPRP BitLocker-Sysprep: BitLocker is on for the OS volume. Turn BitLocker off to run Sysprep. (0x80310039)
Error [0x0f0082] SYSPRP ActionPlatform::LaunchModule: Failure occurred while executing ‘ValidateBitLockerState’ from C:\Windows\System32\BdeSysprep.dll; dwRet = 0x80310039
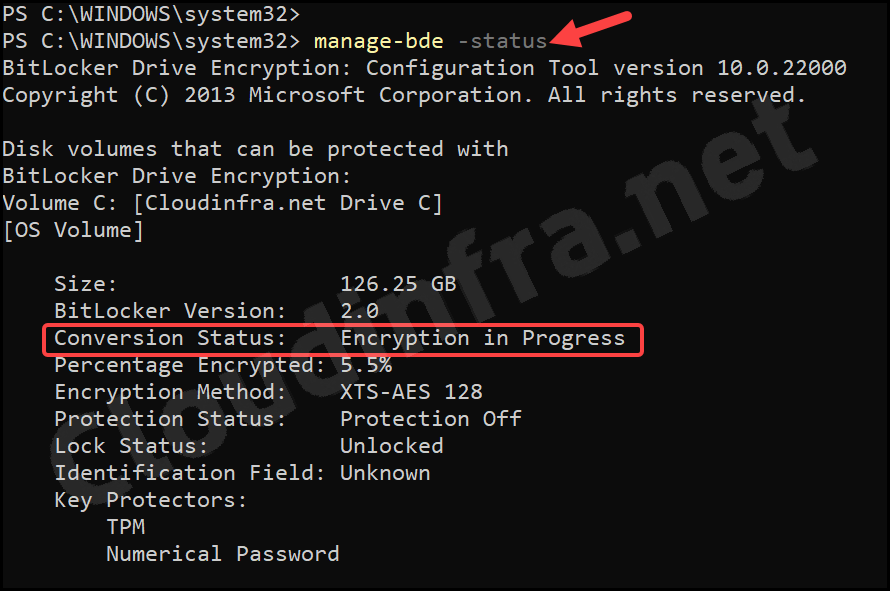
This issue may occur on Windows 10/11 or previous versions due to a feature called InstantGo, also known as InstantOn or Modern Standby (formerly Connected Standby). When you check the status of BitLocker on your device, it may show as “Encryption in progress”. To check BitLocker status, use the below command:
manage-bde -status
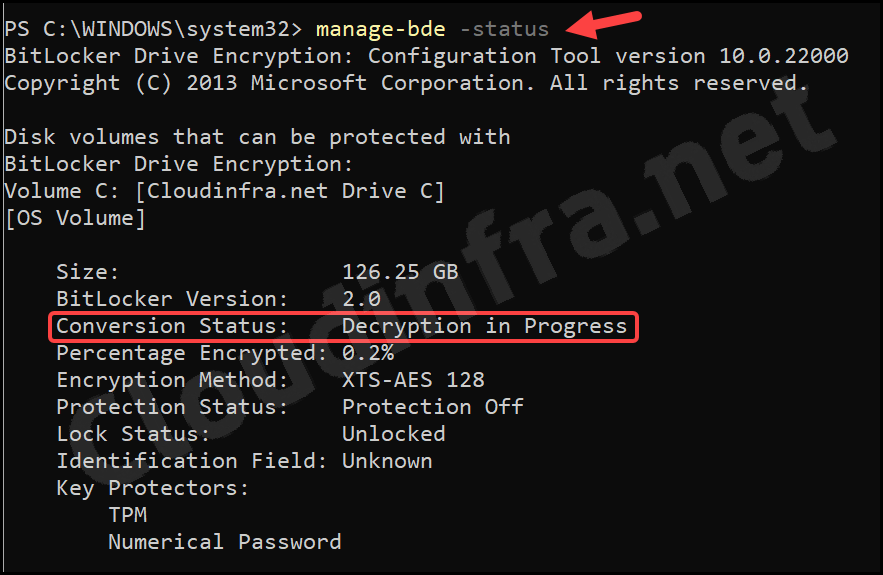
To be able to run Sysprep.exe successfully, you must disable Bitlocker and fully decrypt the OS drive. You can use either of the below two commands to accomplish this. When you run any of the below commands, it will immediately decrypt data on the C:\ drive.
manage-bde -off c:
Disable-BitLocker -MountPoint "C:"
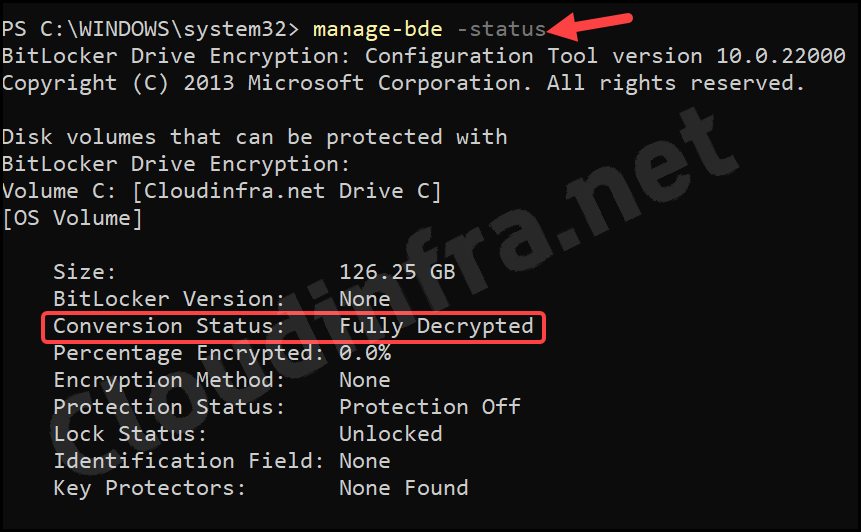
Before you run Sysprep.exe Again, verify once the OS volume is fully decrypted. You can run the below command to verify it. This time it should show as Fully Decrypted. You can check the Protection Status value, also showing as Protection Off.
manage-bde -status
You can now run Sysprep.exe again to check and confirm if the issue has been resolved.
3. Sysprep will not run on an upgraded OS
The error message clearly states that the System will not run on an upgraded OS. This means you may have upgraded your operating system and then tried to Sysprep it. The error message you will get is Sysprep was not able to validate your Windows installation.
As this is a generic error, more information can be found in %WINDIR%\System32\Sysprep\Panther\setupact.log file. You can open this log file and search for any errors related to Sysprep. You may find the below error in the log file:
“[0x0f0036] SYSPRP spopk.dll:: Sysprep will not run on an upgraded OS. You can only run Sysprep on a custom (clean) install version of Windows.
To fix this issue:
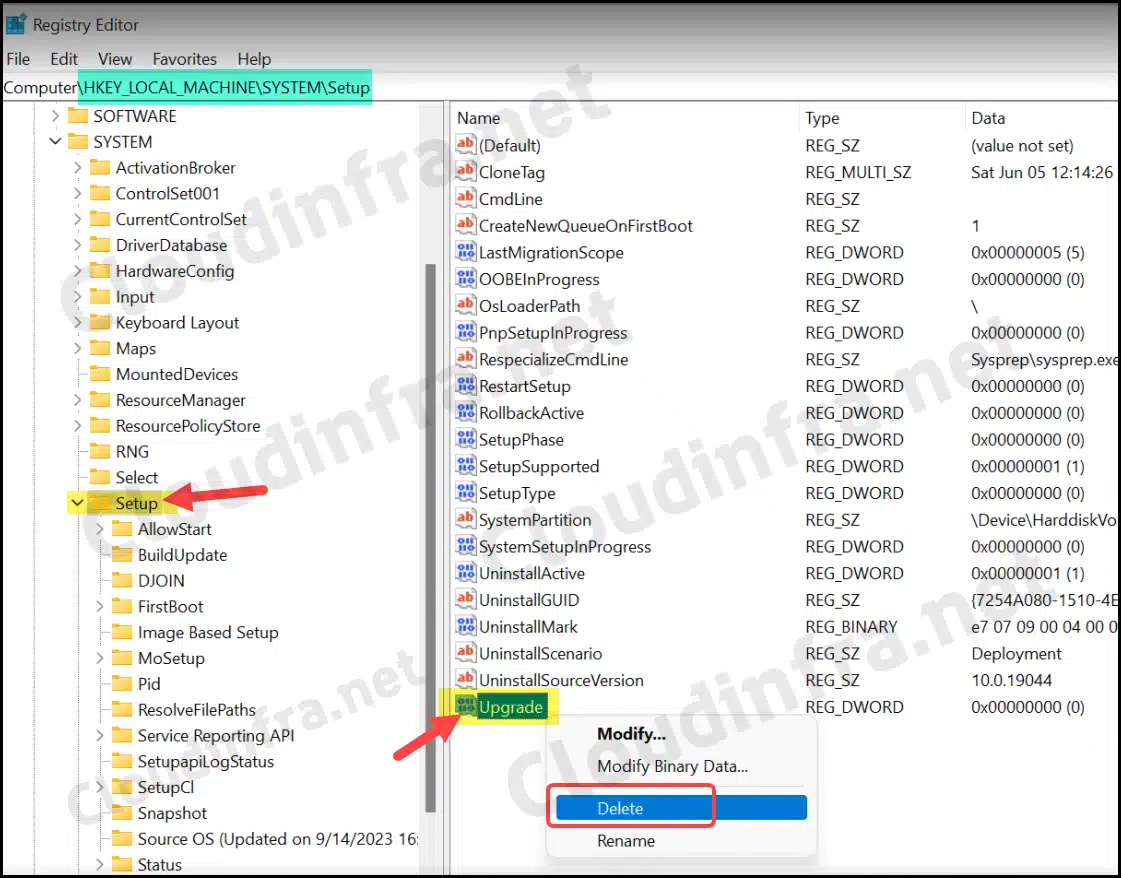
- Delete the Upgrade registry entry under HKEY_LOCAL_MACHINE\SYSTEM\Setup registry key. This will make Windows OS believe it’s a clean Installation, not an upgrade. It is a workaround to fix the Sysprep Issue.
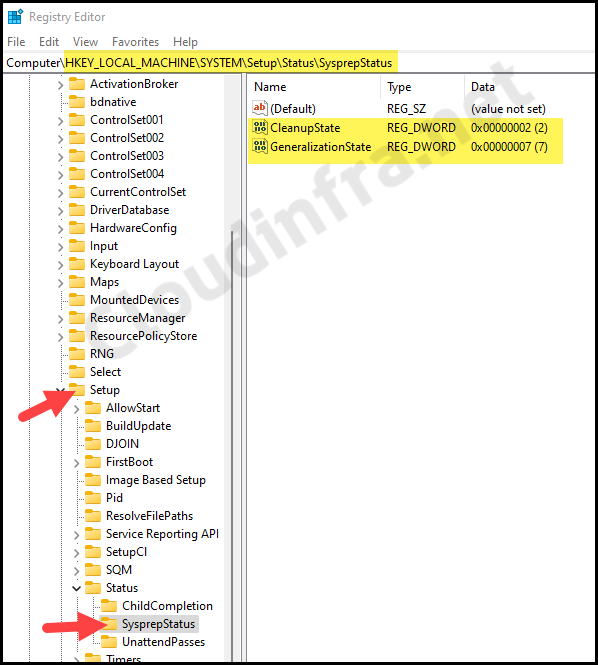
- Browse to HKEY_LOCAL_MACHINE\SYSTEM\Setup\Status\SysprepStatus and update the GeneralizationState value to 7. You may also see a CleanupState DWORD registry entry with a value of 2.
4. Sysprep a Windows device more than 3 times
By default, you cannot run Sysprep on a Windows device more than 3 times. If you try to run Sysprep more than 3 times, you may get an error message: A fatal error occurred while trying to Sysprep the machine. To run Sysprep on a device more than 3 times, you can apply the below workaround:
- Press the Windows key + R to open the Run dialog box
- Browse to HKEY_LOCAL_MACHINE\System\Setup\Status\Sysprep and ensure that CleanupState is set to 2 below and GeneralizationState is set to 7.
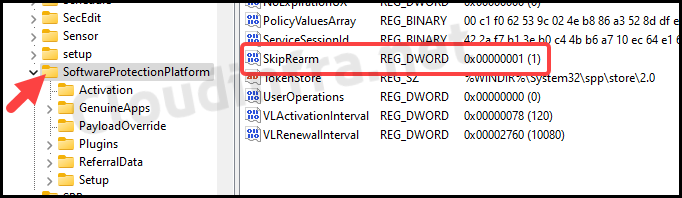
- Browse to HKEY_LOCAL_MACHINE\Software\Microsoft\WindowsNT\CurrentVersion\SoftwareProtectionPlatform and update SkipRearm DWORD reg value to 1.
- Re-install the Microsoft Distributed Transaction Coordinator (MSDTC) service component of Windows using the below commands
Uninstall msdtc
msdtc -uninstall
Install msdtc
msdtc -install
- Rename the Panther folder at C:\Windows\System32\Sysprep location to Panther.old.
- Run
Sysprep.exeagain to check and confirm if it’s working fine now.
Conclusion
In this blog post, we have seen different Sysprep Error messages and how to fix them. I hope one of the solutions listed in this post will help you run Sysprep on your device successfully.