
Below is the full end-to-end process when you only have an Intune tenant and do not yet have an Apple Business account. Apple now refers to Apple Business Manager as Apple Business, but in Intune and many Microsoft articles, you will still see terms such as Apple Business Manager. Apple confirms that Apple Business combines the capabilities previously available in Apple Business Manager, Apple Business Essentials, and Apple Business Connect. For more information, refer to the link: Apple Business Manager User Guide – Apple Support (UK).
https://cloudinfra.net/setup-apple-business-with-intune-part-2
High-Level Setup Overview
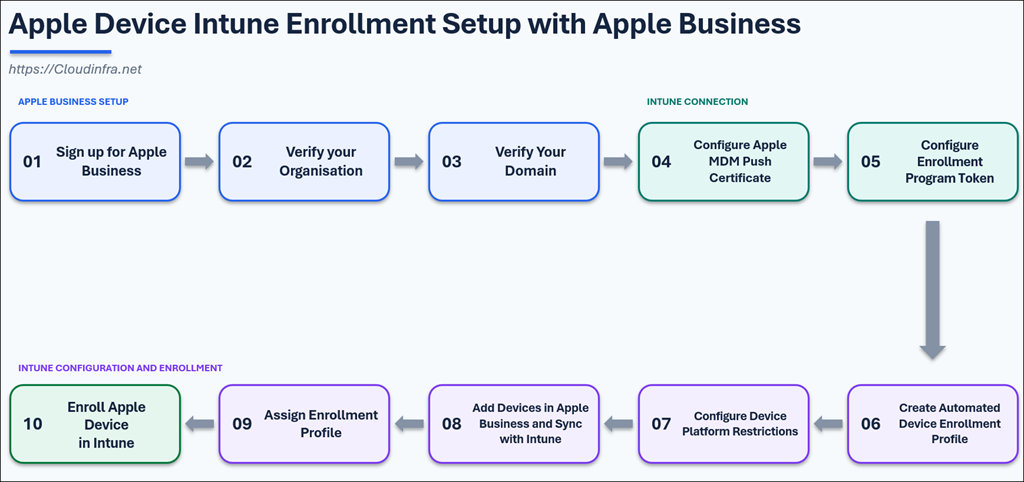
The diagram below provides a high-level overview of the Apple Business and Intune setup process for enrolling company-owned Apple devices. In this guide, we will complete each of these steps to configure the environment and enroll a company-owned Apple device in Intune for demonstration.
Contents
Requirements
Before creating the Apple Business account, collect the following details:
| Requirement | Details |
|---|---|
| Legal organisation name | Use the correct legal business name. |
| D-U-N-S Number | Apple’s UK requirements list a D-U-N-S Number, and it must match the legal organisation name and address. (Apple Support) |
| Work email address | Use a valid, active work email address for the initial Organisation Administrator account. |
| Work phone number | Required for verification and account setup. |
| Organisation address | Use the official business address. |
| Website URL | Optional in some regions, but Apple states that providing it can help speed up organisation verification. (Apple Support) |
| Apple Customer Number | Required if you buy devices directly from Apple and want them added automatically. |
| Reseller Number | Required if you buy devices from an Apple Authorised Reseller or authorised mobile network operator. |
Do not use a personal Apple ID for the initial administrator account. Apple says the initial administrator email address must not already be used as an Apple account for another Apple service, and it should not be associated with an App Store or iCloud account.
Step 1: Sign up for Apple Business
- Go to the Apple Business portal: https://business.apple.com/signup.
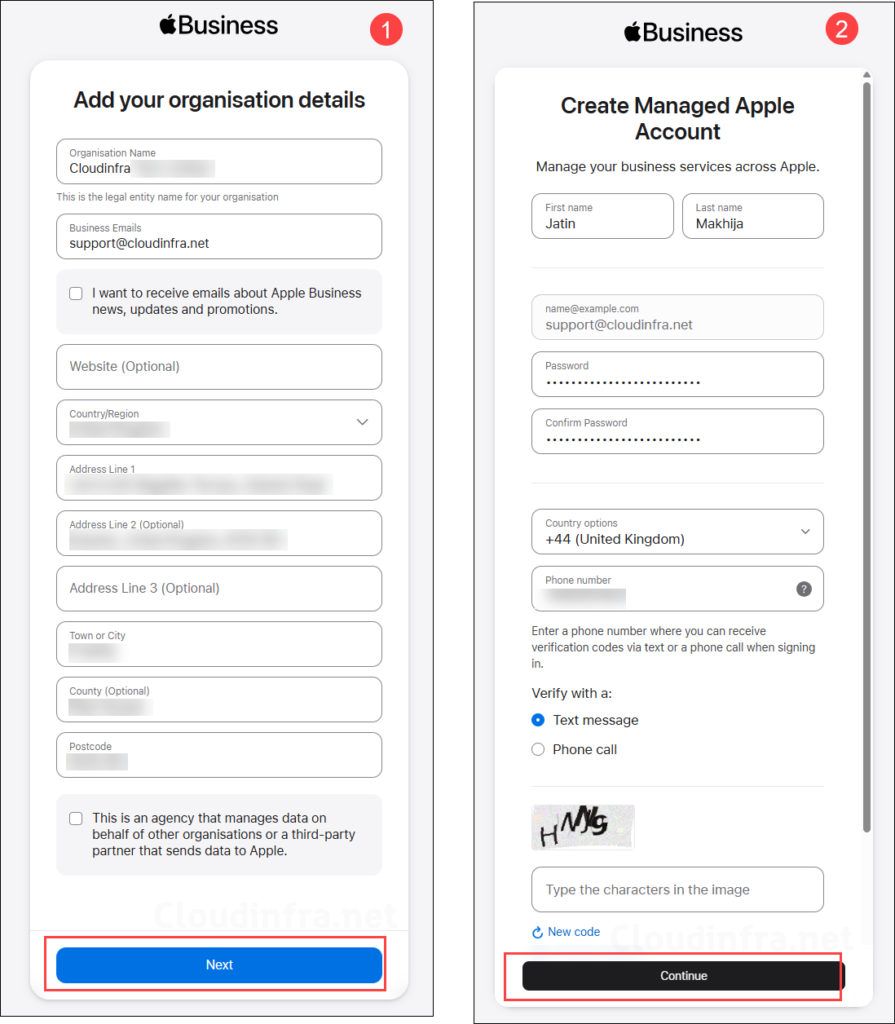
- Enter your organisation details:
- Organisation name: Provide the name of your company.
- Business emails: Provide the work email address for registration.
- Provide company address with postcode.
- In the next step, on the Create Managed Apple Account screen, provide your first name and last name. Create a password and provide your mobile number, complete the CAPTCHA, and click continue.
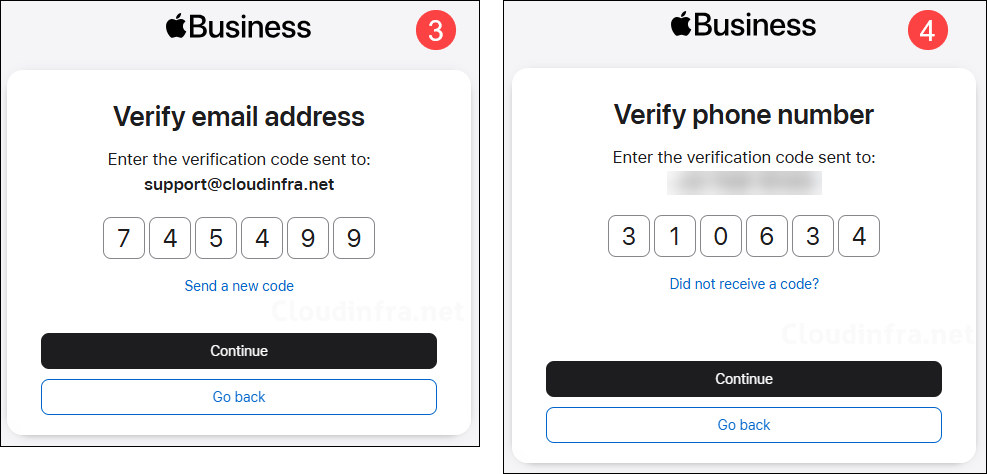
- Verify your email address and phone number.
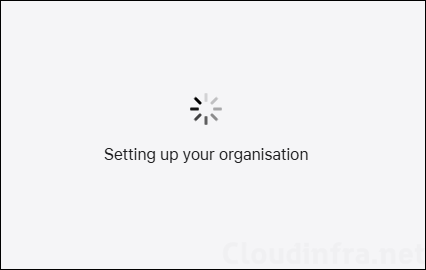
- Once the email address and phone number are verified, it will start setting up your organisation.
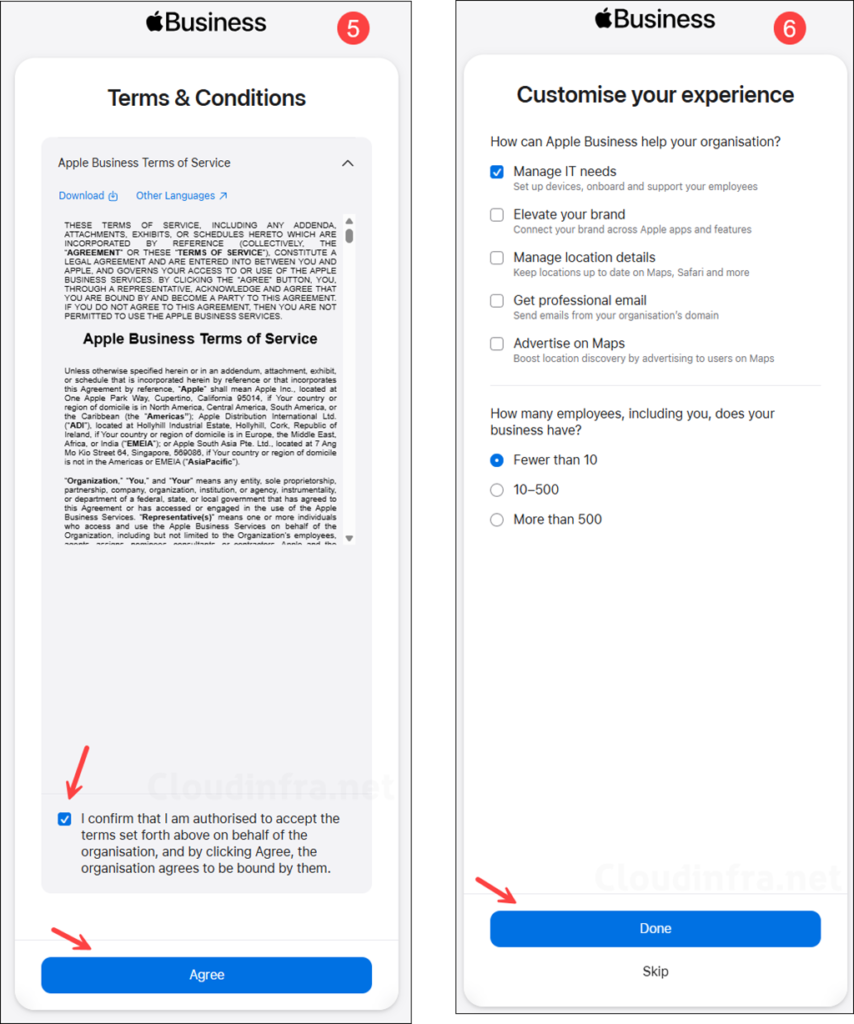
- Accept the Terms & Conditions and optionally customize your experience by using the options provided on the screen.
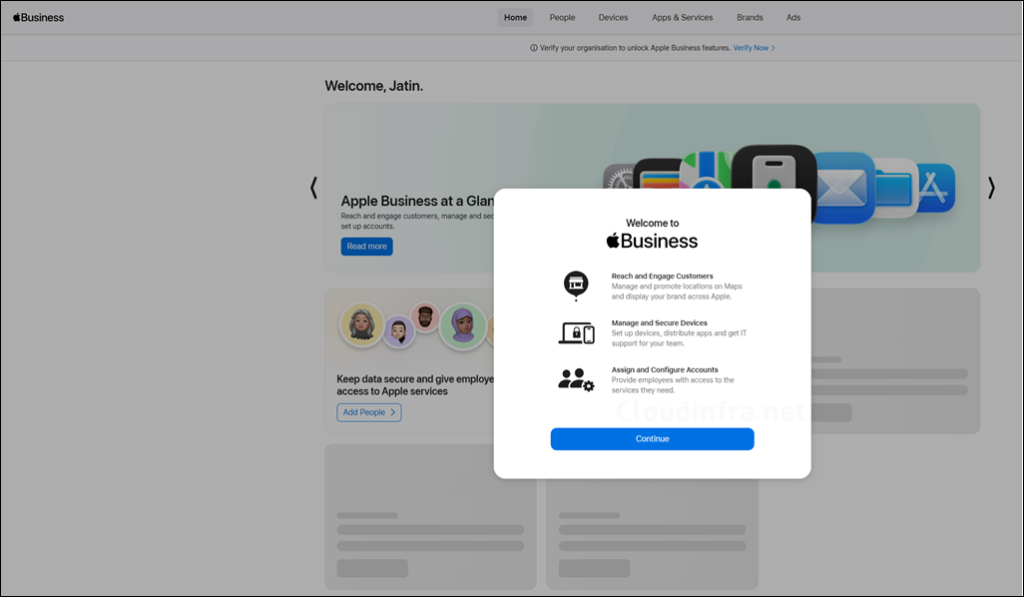
- Welcome to Apple Business. Click on the Continue button.
Step 2: Verify your Organisation
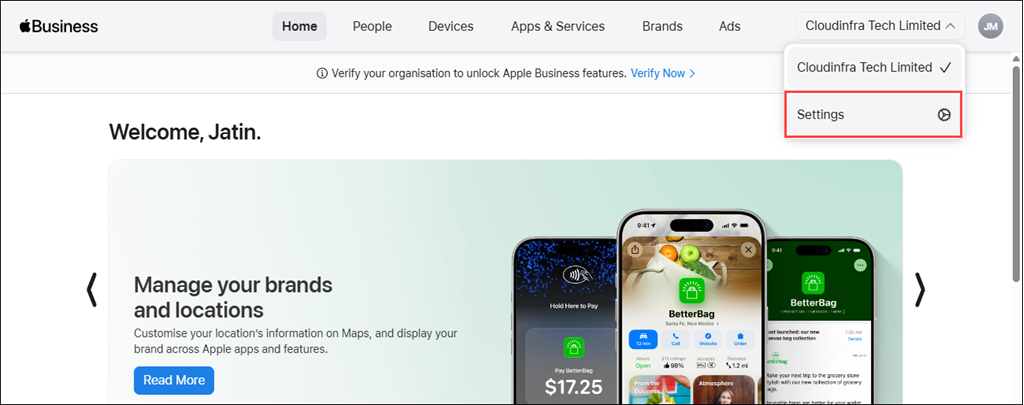
- On the top right-hand side corner, click on your organisation name and then click on Settings.
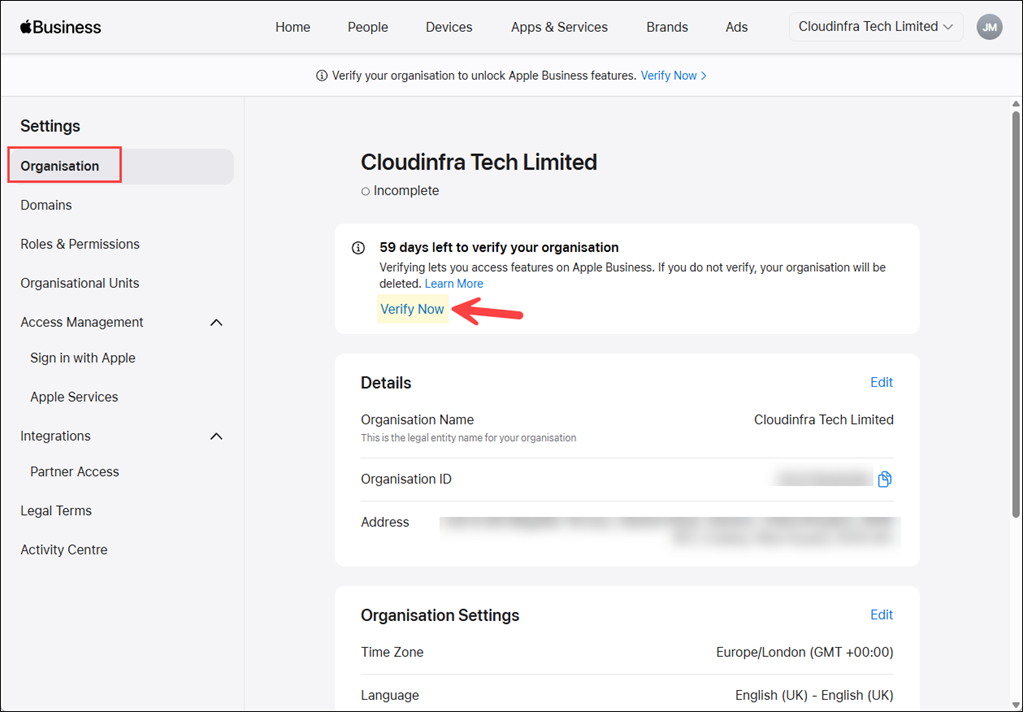
- You will get 59 days to verify your organisation to unlock all Apple Business features. If the organisation is not approved within the verification window, the organisation, data, and Managed Apple Accounts will be deleted. Under Settings > Organisation > Click on Verify now to start the verification process.
- Use the Verification Method 1 and Verification Method 2 drop-downs, which show multiple options for the verification. You can use any of the below methods to verify your organisation and click Send for review.
- Business ID, such as D-U-N-S Number (D-U-N-S® Number – Membership – Account – Help – Apple Developer) or EIN. (Business ID types accepted in Apple Business – Apple Support (UK).
- Domain validation using a DNS TXT record.
- Upload an official document, such as a business license, utility bill, lease, or similar evidence.
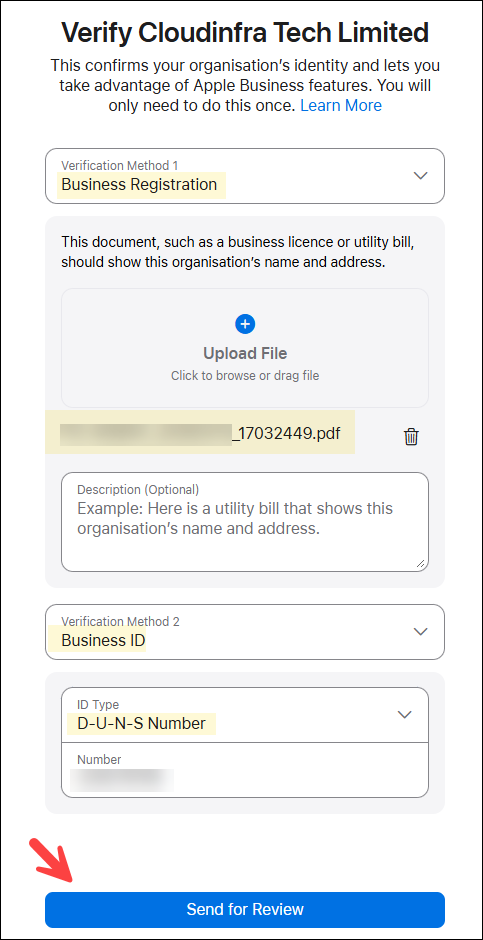
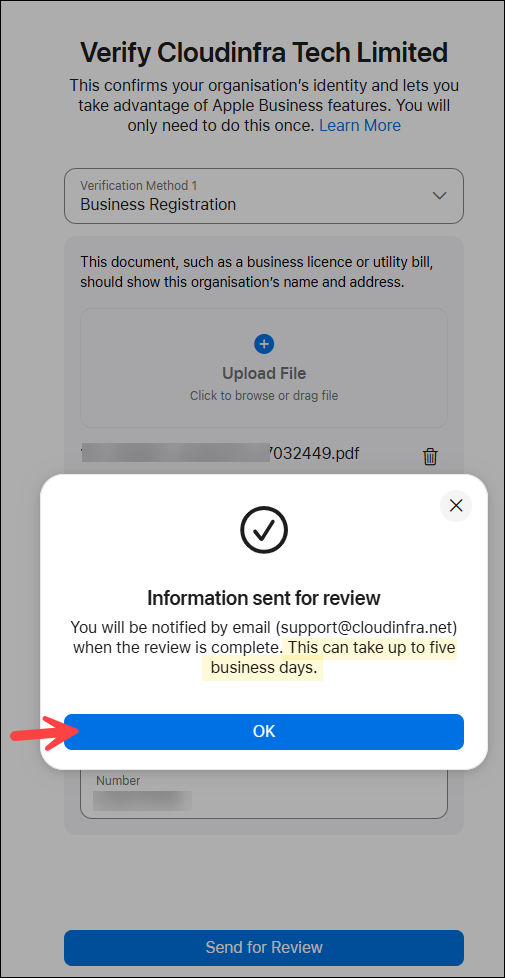
- It can take up to 5 working days to complete the review process. You will also get an email on the registered email address about this.
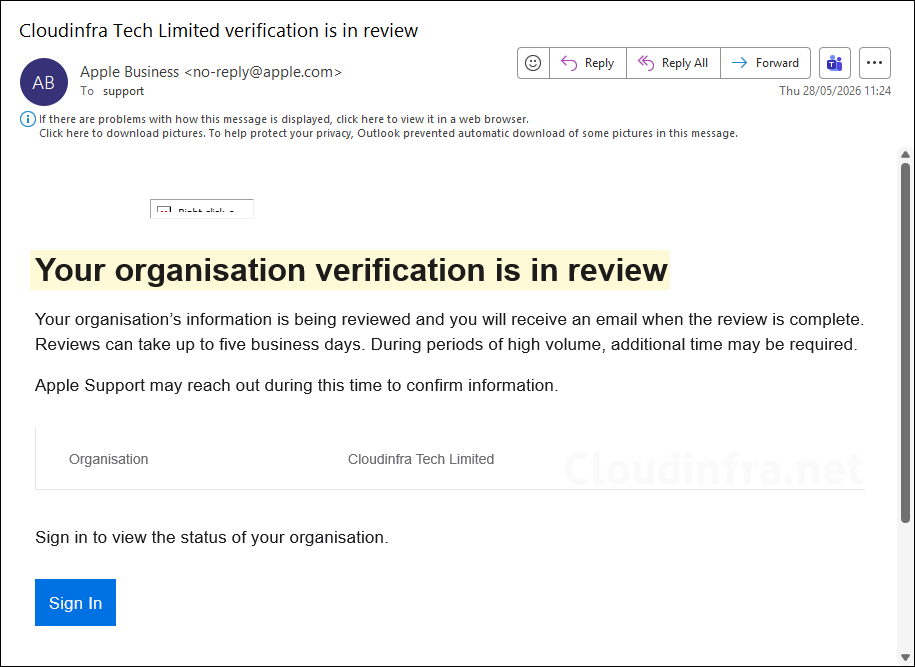
- Email notification from Apple to confirm that your organisation verification is in review.
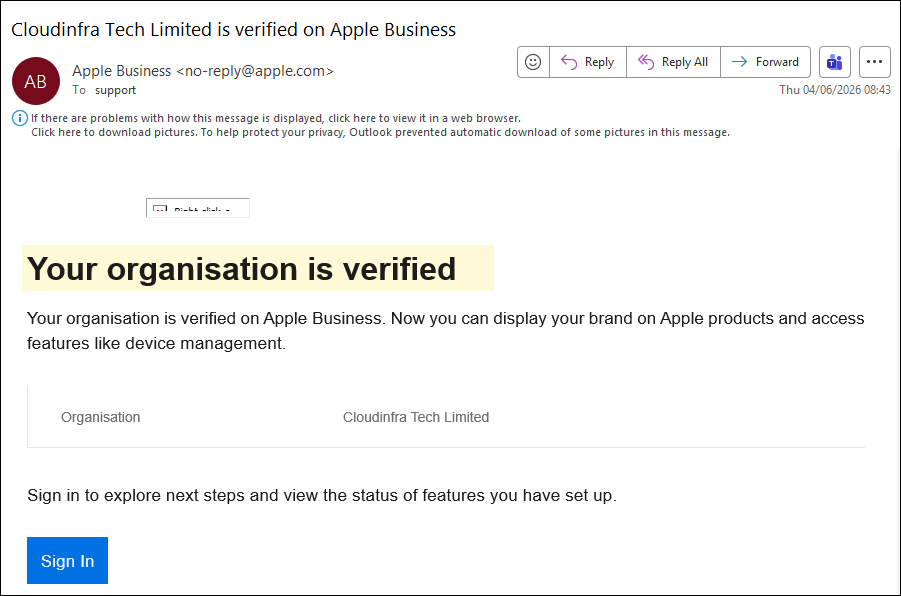
- Apple will perform the necessary verification checks and may request additional documentation if required. Once your organisation has been successfully verified, you will receive a confirmation email similar to the one shown below.
Step 3: Verify Your Domain
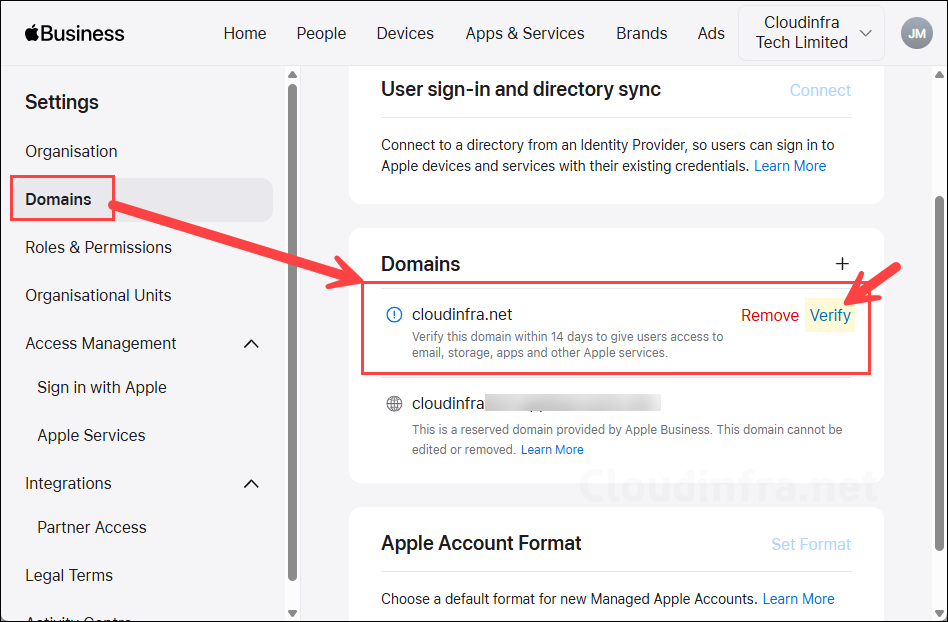
Verify your domain by going to Settings > Domains; next to the domain name, click Verify.
For more information on verifying a domain, refer to the link: Add and verify a domain in Apple Business – Apple Support (UK).
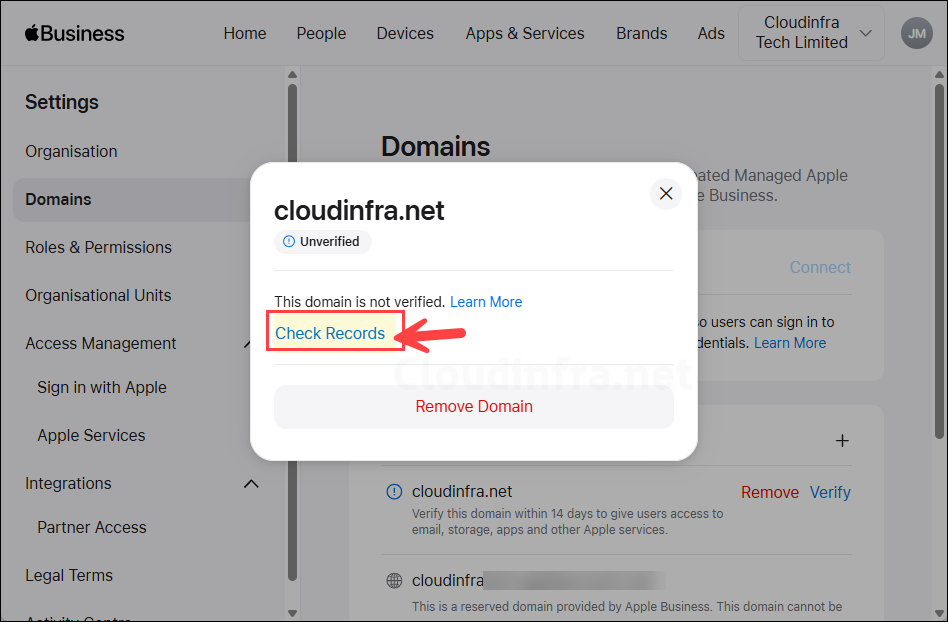
- Click on Check Records.
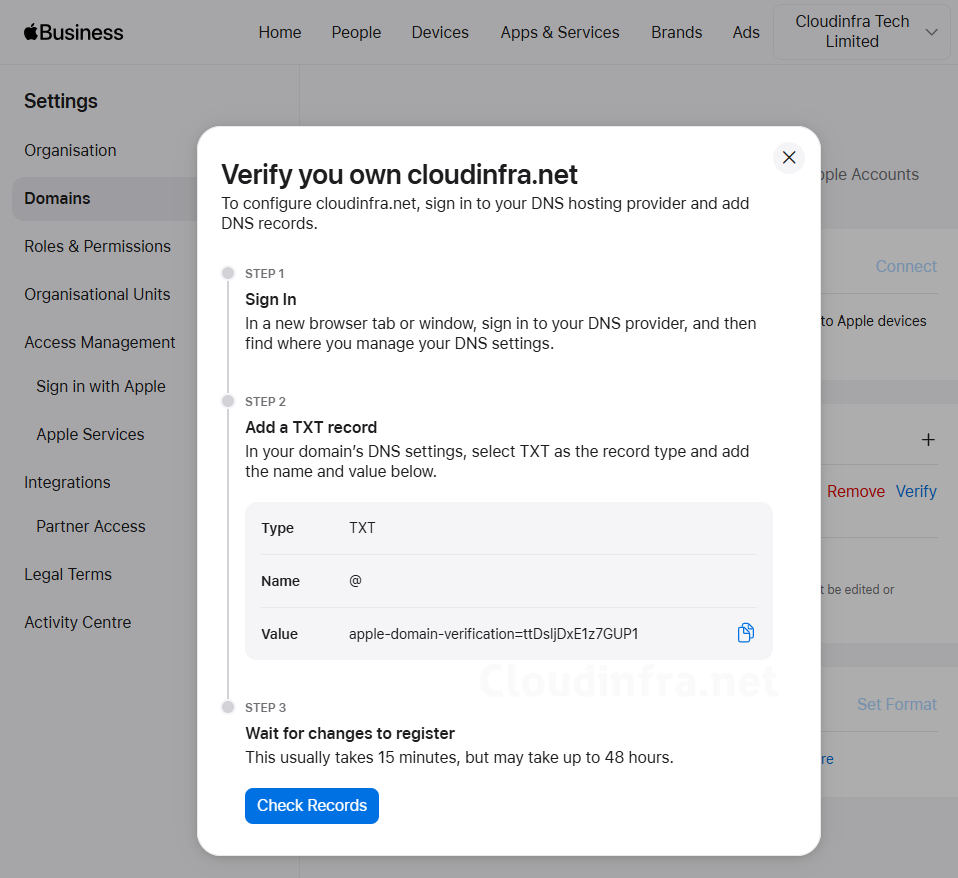
- To verify the domain, you will have to add a TXT record in your domain’s DNS hosting provider. The record details are given on the pop-up. Go to your domain’s DNS provider and add this record, and return to this page to click on Check Records and complete the domain verification process.
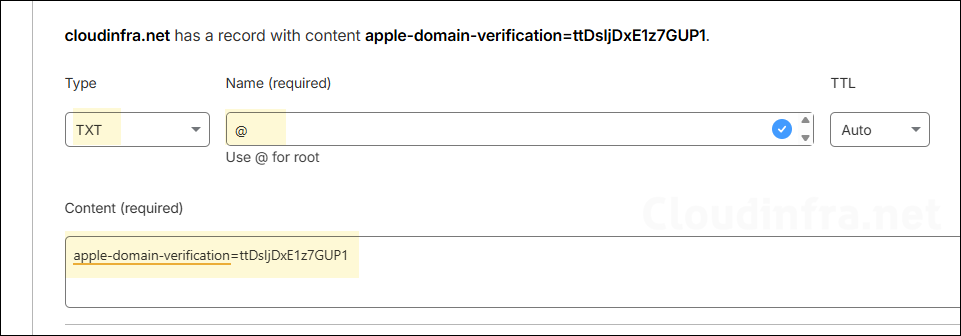
- The screenshot below shows the TXT record added to my DNS hosting provider.
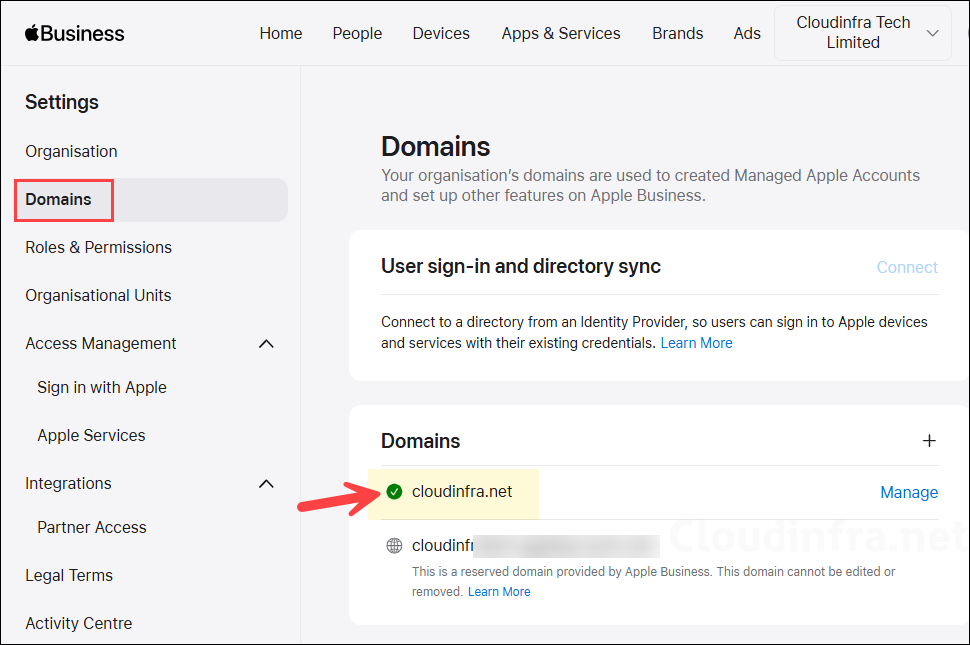
- Return to the Apple Business > Settings > Domains and click on the Check Records button as shown in the previous screen to verify the domain. Once the domain is verified, it will show a green tick next to the domain name.
Step 4: Add Additional Administrator (Recommended)
It is recommended to create an additional backup administrator account in Apple Business Manager in case your primary administrator account becomes inaccessible or gets locked out. You may also see a recommendation banner at the top of the Apple Business Manager portal prompting you to add another administrator when you sign in.

Step 5: Configure Apple MDM Push Certificate
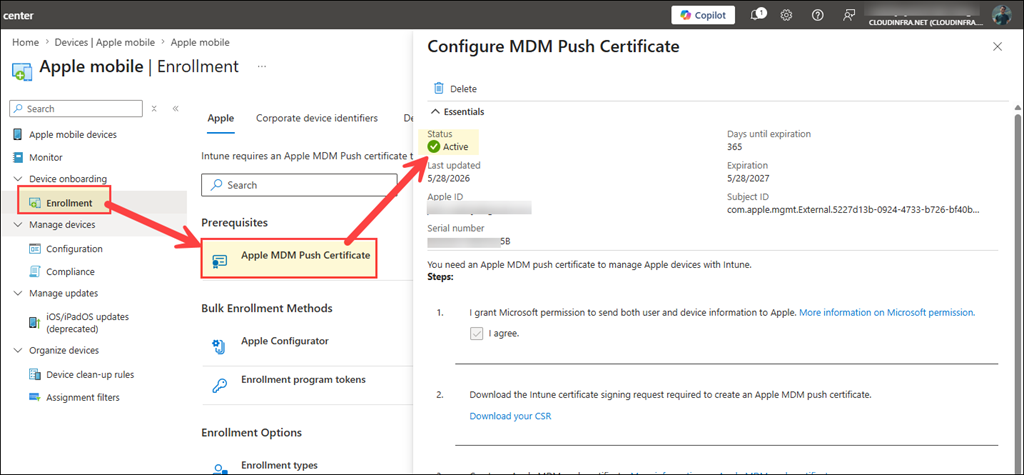
The Apple MDM Push Certificate is mandatory, as it allows Intune to communicate with Apple devices. The Apple MDM Push Certificate is valid for only one year, so you must renew it before it expires. If the certificate expires and you generate and upload a new certificate instead of renewing the existing one, all Apple devices will need to be reenrolled. For detailed step-by-step instructions on configuring and renewing the Apple MDM push certificate, refer to the blog posts below:
Step 6: Configure Enrollment Program Token
This token creates the trust relationship between Intune and Apple Business for Automated Device Enrollment.
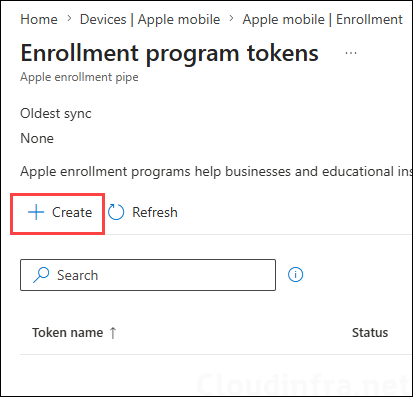
- Go to Intune admin center > Devices > Apple mobile > Enrollment > Enrollment program tokens. Then click on + Create.
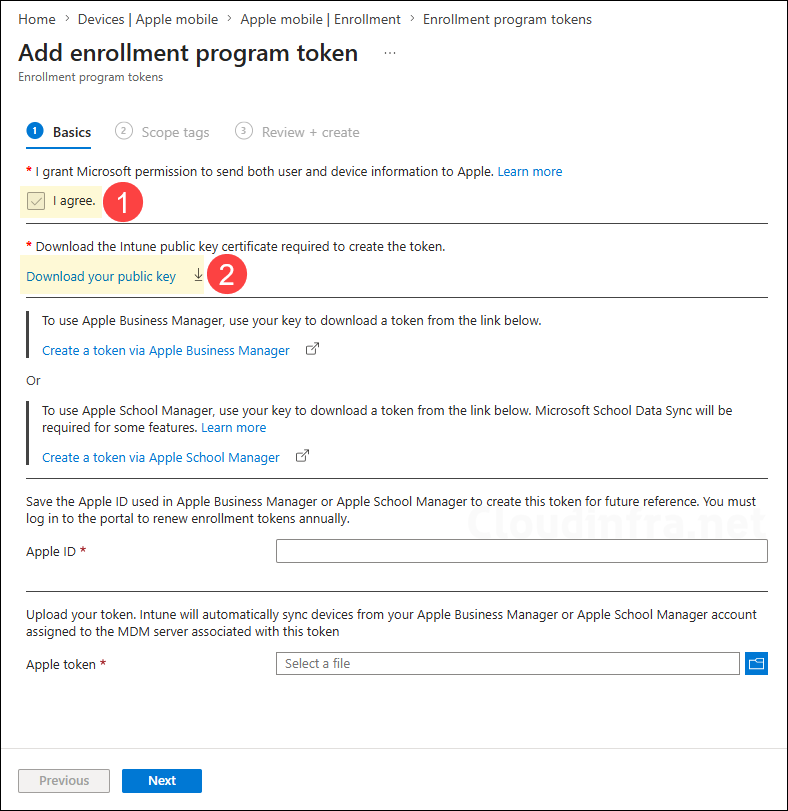
- Select I agree and click on Download your public key.
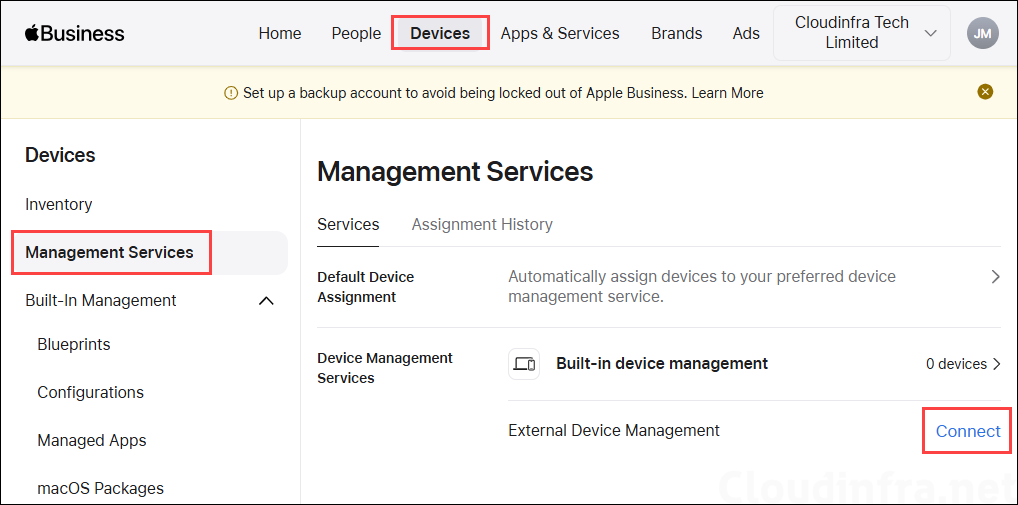
- Go to Apple business > Devices > Management Services > Under Services, click on Connect next to External Device Management.
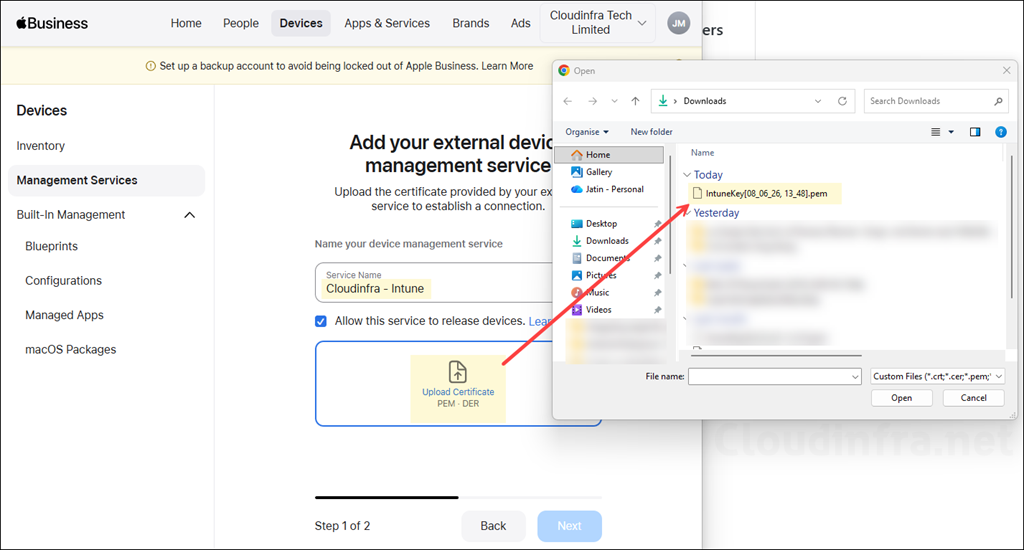
- Provide a service name and select Allow this service to release devices. Then click on Upload Certificate and select the public key (.pem) file downloaded in the previous steps.
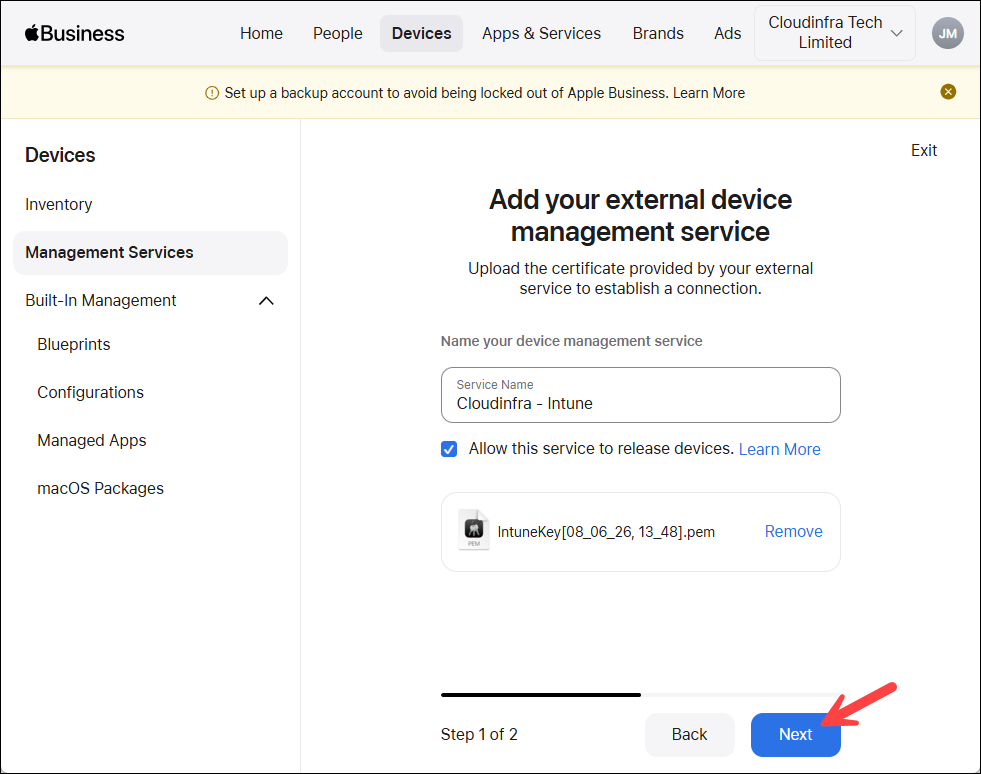
- Click Next.
- Click Download Service Token and then click on Done.
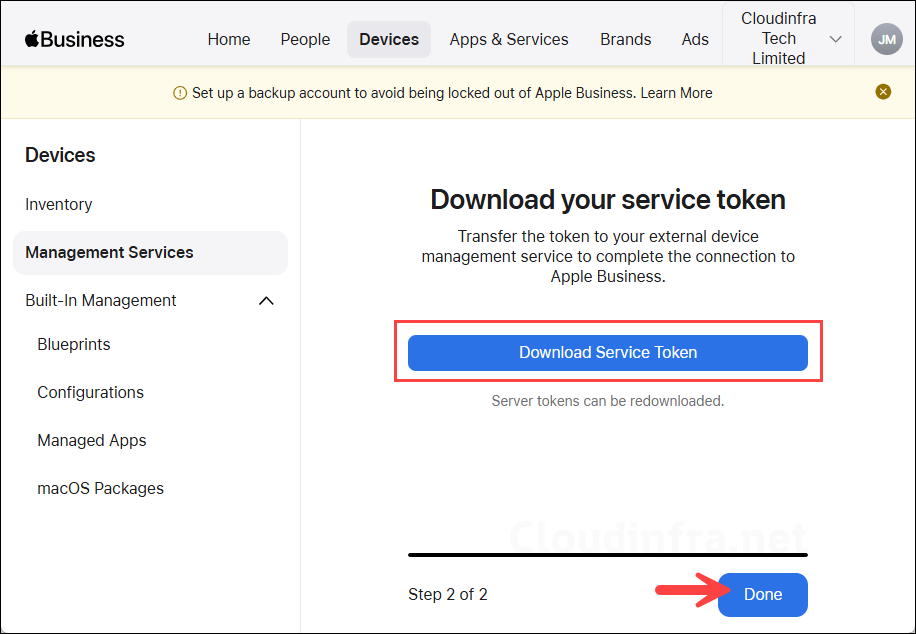
- Click Done.
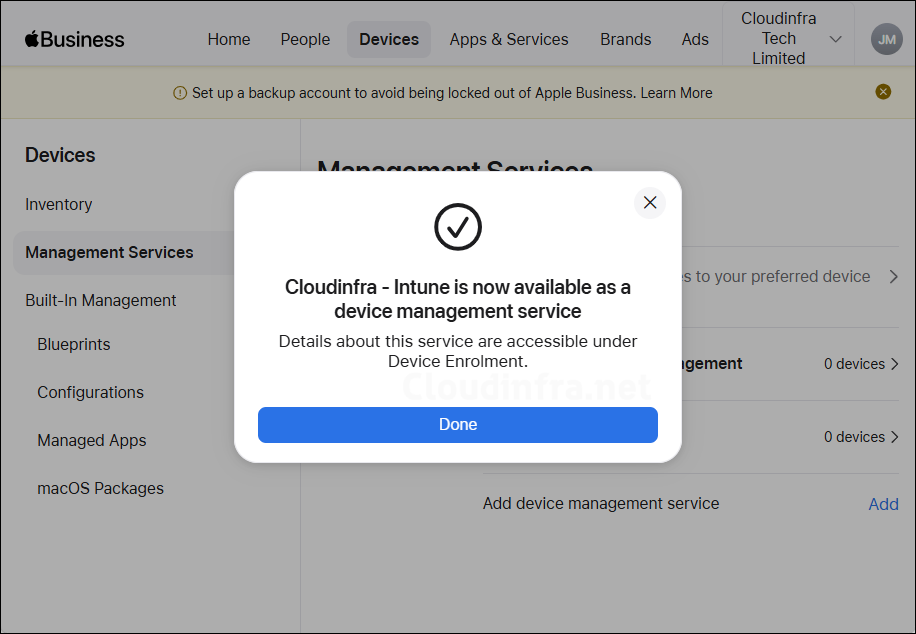
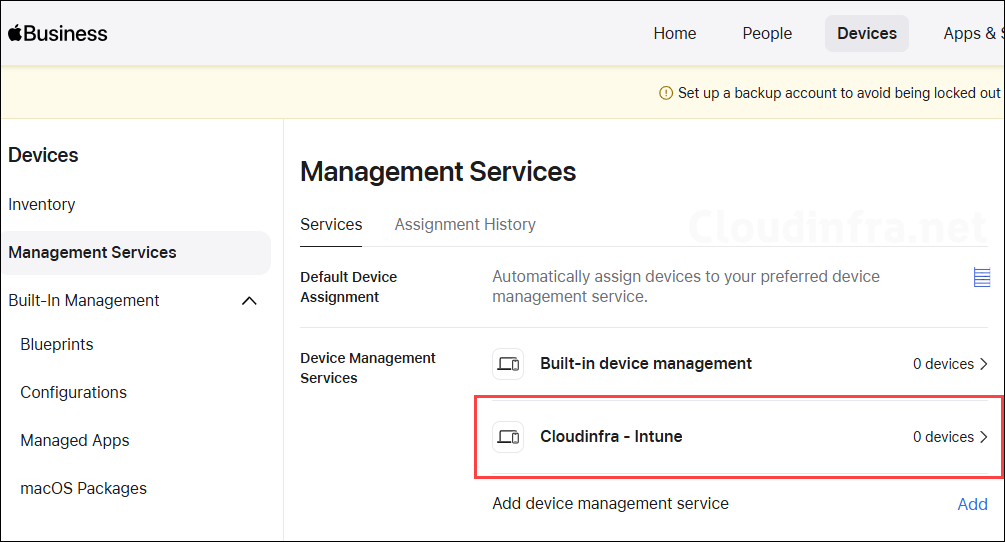
- Under the Services tab, you will find that the new device management connection is showing in the list.
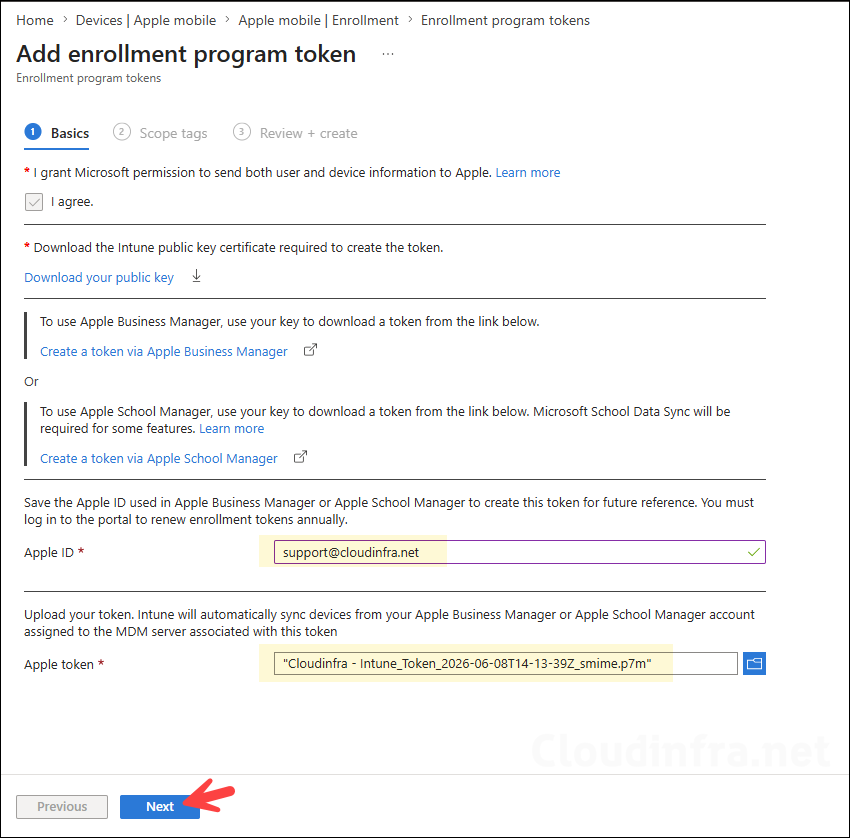
- Now return to the Intune admin center where we were adding the enrollment program token. Enter the Apple ID that was used to download the token, then browse to and select the token file (
.p7m) that downloaded from the Apple Business portal.
Ensure that you securely share the details of this Apple ID with other IT administrators in your team. You will need to use the same Apple ID every year to renew the Enrollment Program Token. If access to this Apple ID is lost, renewing the token can become difficult and may impact device management operations.
- On the Scope tags tab, click Next.
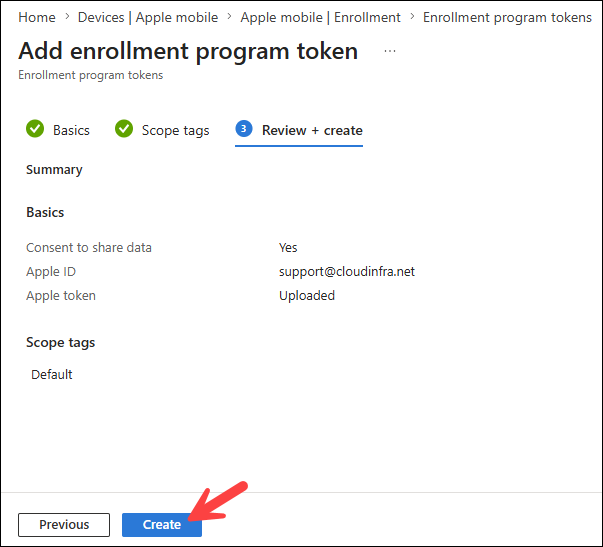
- On the Review + create tab, click Create.
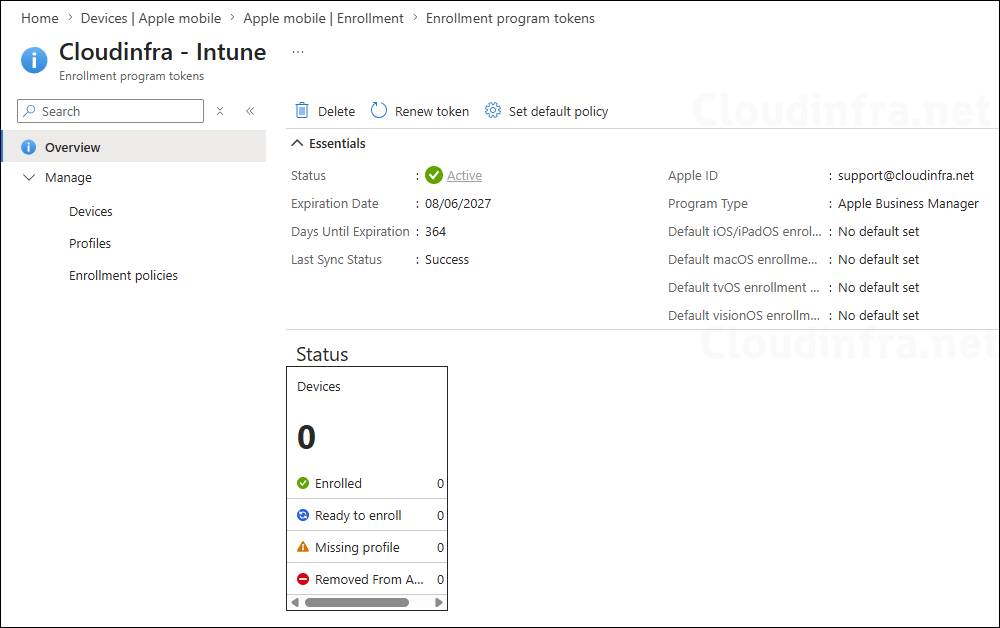
- The next screen displays the Enrollment Program Token. It uses the same name that you specified as the Service Name when creating the connection in Apple Business. Verify that the Status is shown as Active. It’s important to note that the token is valid for only one year. You will have to renew this token every year.
In part 2 of the series, we will continue configuring Apple Business with Intune and complete the setup by demonstrating the enrollment of an Apple device in Intune.
