In this guide, I will show you the steps on how to create a dynamic team in Microsoft Teams. When you create a Team in Microsoft Teams, it automatically creates a Microsoft 365 group in the background with a membership type of assigned. This means that if you need to add a new user to the team, the user must be manually added to the group or team.
Alternatively, you can create a team where membership is automatically updated. For instance, if you’re setting up a team for all employees in your organization, and you also want the new hires to be automatically added to the team. Therefore, instead of adding the new members into the Team manually, you can create a Team based on a dynamic Microsoft 365 group.
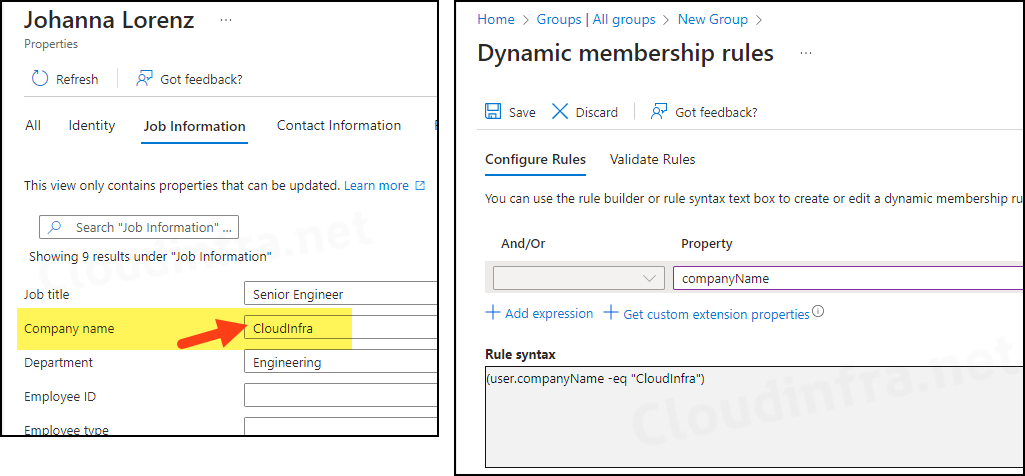
For creating a dynamic Microsoft 365 group, you will need to add a dynamic membership rule. You can create a rule based on the user attributes stored in Entra ID. For example, let’s say you want to create a dynamic Microsoft 365 group for all users where the company name is CloudInfra. Below screenshot shows how such a rule will look like.
Ensure that the Company name attribute is populated for all users with the company name, and then create a group based on the dynamic rule user.companyname -eq "CloudInfra".
The above rule was just an example, you could create a dynamic Microsoft 365 group with any dynamic membership rule as per your business requirement. For example: You could also add to this rule to only include Active users of your organization: (user.companyname -eq “CloudInfra”) and (user.accountEnabled -eq True).
However, I had a specific requirement to create a dynamic Microsoft 365 group/Team based on existing dynamic Entra security groups already in place. These security groups contain all users in the organization, so I wanted to leverage them when setting up the Microsoft 365 group. The dynamic membership rule which I would be using is given below.
The following dynamic membership rule will add any user who is a member of both Security Group 1 and Security Group 2 to the Microsoft 365 group. Let’s go through it in more details in the next sections.
Dynamic membership rule
user.memberof -any (group.objectId -in ['<security group1 object ID>', '<security group2 object ID>', ....])Contents
Create a Dynamic Microsoft 365 group
The first step is to create a dynamic Microsoft 365 group in the Entra admin center using a dynamic membership rule tailored to your specific use case. In this case, I will be leveraging existing dynamic Entra security groups called London Users and Delhi Users, which are based on the dynamic membership rules of (user.city -eq "London") and (user.city -eq "Delhi"), respectively.
Before we proceed, I will copy the Object IDs of both these security groups. London Users (4d826af1-ed76-46ca-8ed2-3373a2427aae) and Delhi Users (2f38f5cb-8448-42ff-9977-80a993dc0f1b) which will be required when creating a dynamic Microsoft 365 group.
- Sign in to the Entra admin center.
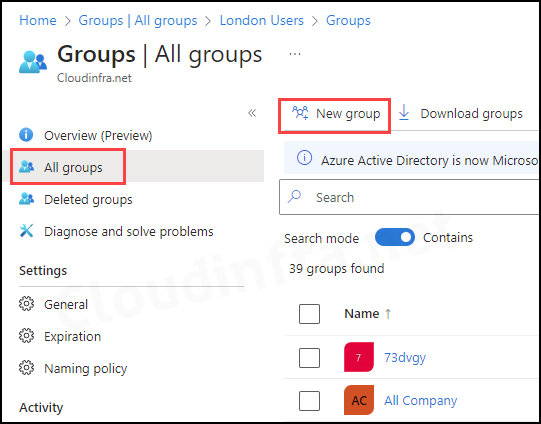
- Go to the Groups > All groups > New group.
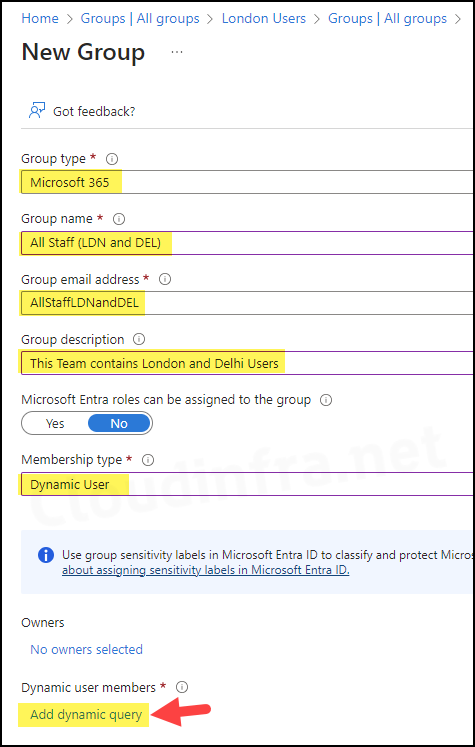
- Create a group by providing below information:
- Group type: Microsoft 365
- Group name: All Staff (LDN and DEL)
- Group email address: Automatically populated
- Group description: Provide description of the group
- Microsoft Entra roles can be assigned to the group: No
- Membership type: Dynamic User
- Under Dynamic user members: Click on Add dynamic query
- If you have a dynamic membership rule already created then you can add the query directly by clicking on Edit, or you could choose the property, operator, and value to construct the rule.
- We will add below dynamic rule which will add all users from both the security groups.
user.memberof -any (group.objectId -in ['4d826af1-ed76-46ca-8ed2-3373a2427aae', '2f38f5cb-8448-42ff-9977-80a993dc0f1b'])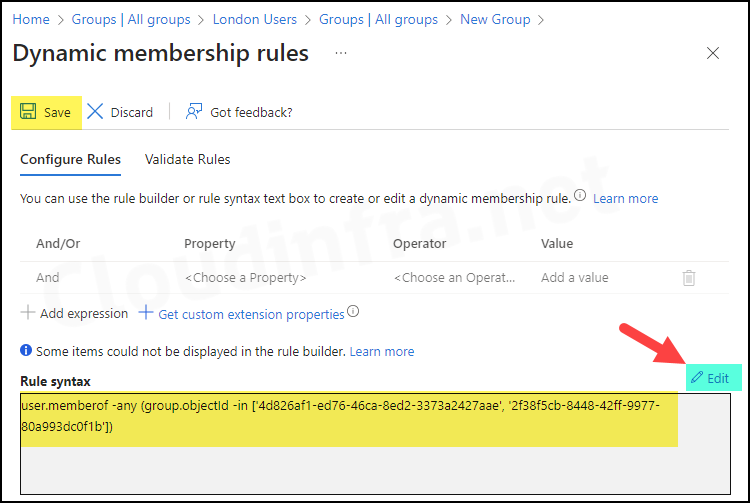
- After a few minutes, users from both security groups will be added to the new dynamic Microsoft 365 group, called All Staff (LDN and DEL).
Create a Team
The next step is to create a team using the dynamic Microsoft 365 group we created in the previous step, called All Staff (LDN and DEL). There are several ways to create a team from an existing Microsoft 365 group: you can use the Microsoft 365 admin center, PowerShell, or the Teams app.
Let’s create a Team using Microsoft 365 admin center.
- Sign into the Microsoft 365 admin center.
- Go to Teams & groups > Active teams & groups.
- Search for the dynamic Microsoft 365 group and click on it.
- Under the General tab, you will find the button called Add Teams.
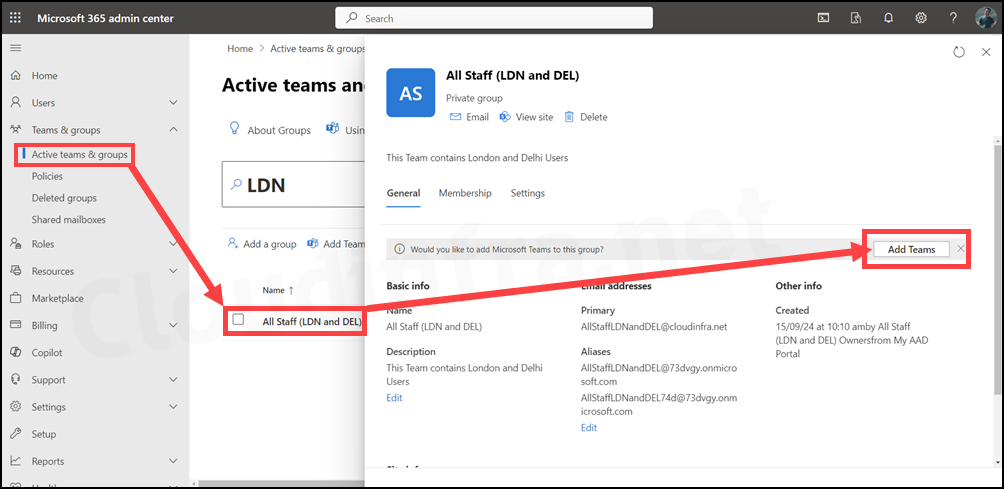
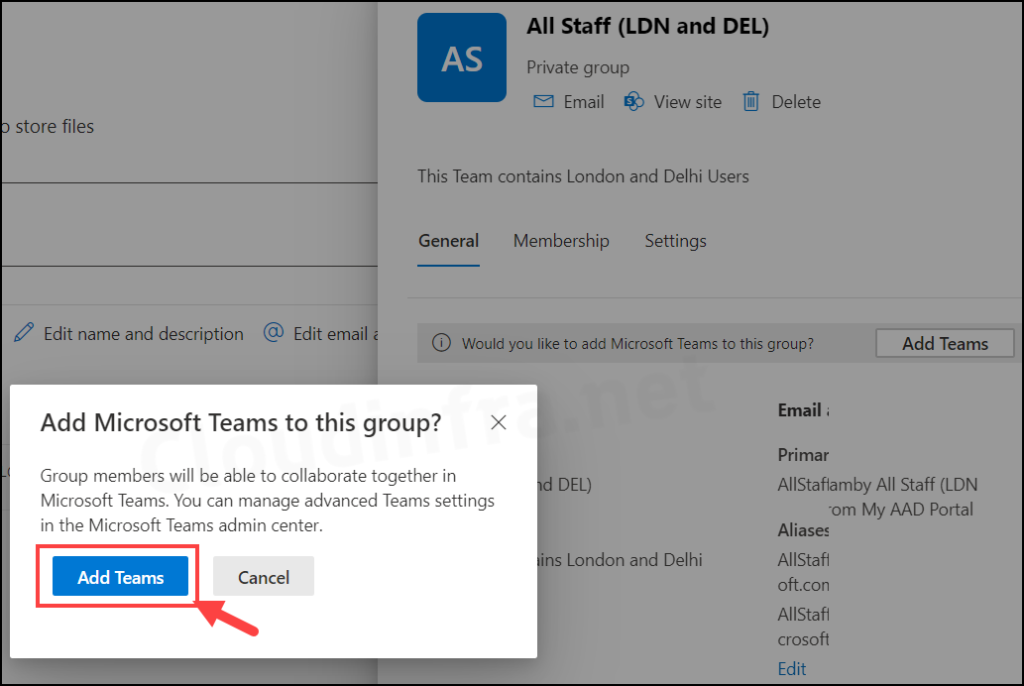
- Click on Add Teams to create a team based on the dynamic Microsoft 365 group.
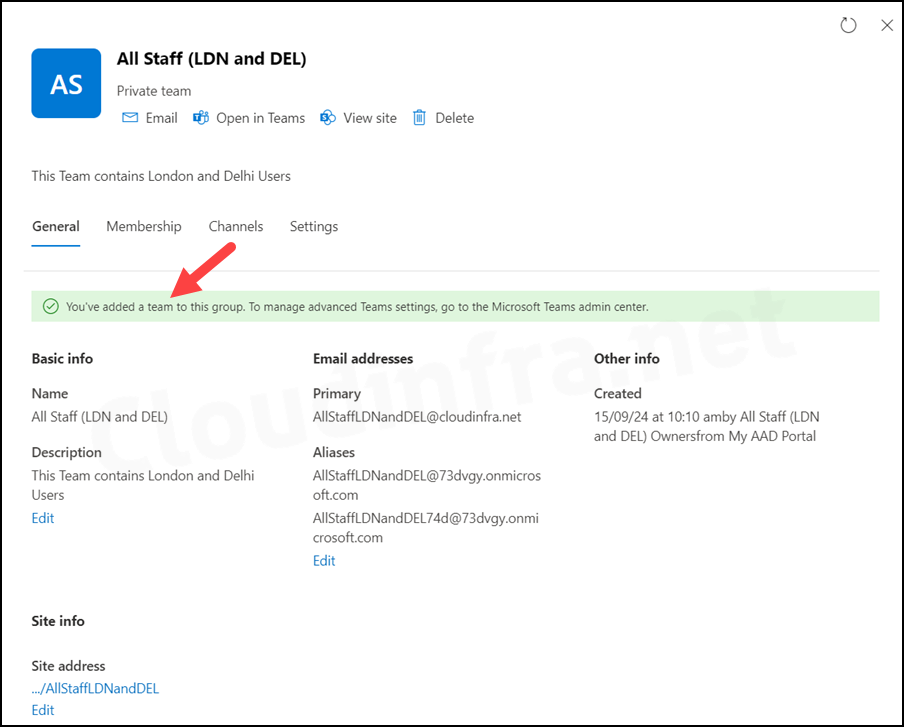
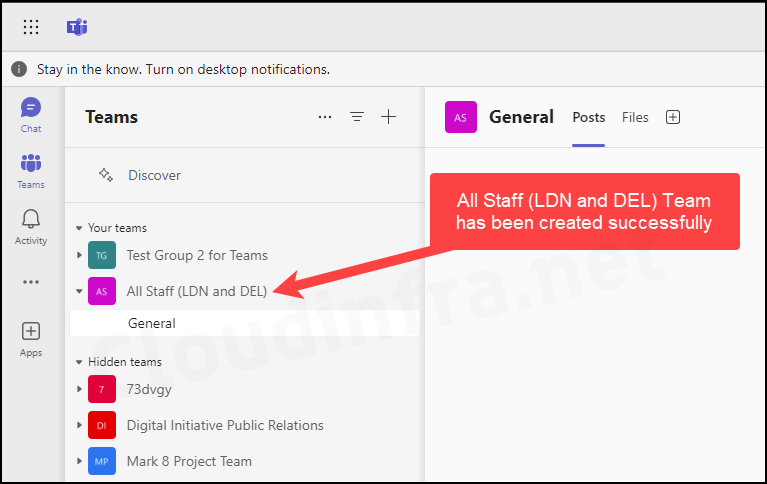
- Once the team is successfully created, a confirmation message will appear on the screen.
- You can verify the new Team in the Teams app as well. Below screenshot shows that the Team is created successfully and visible in the Teams App.
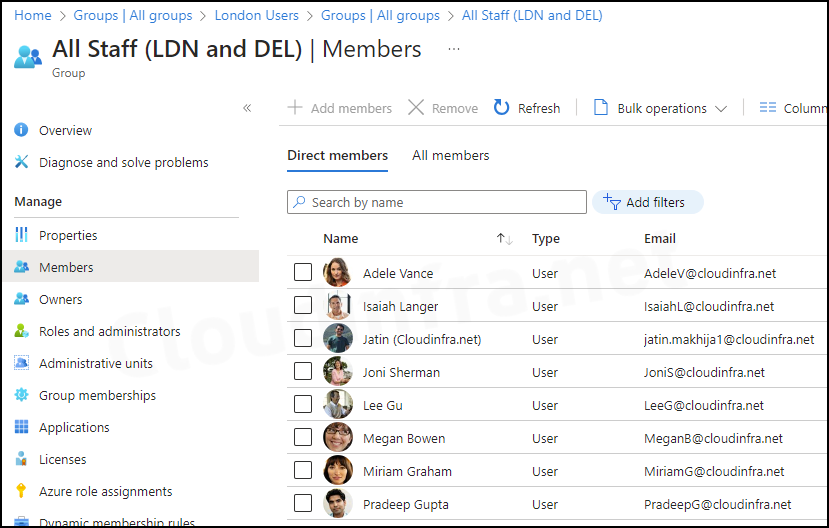
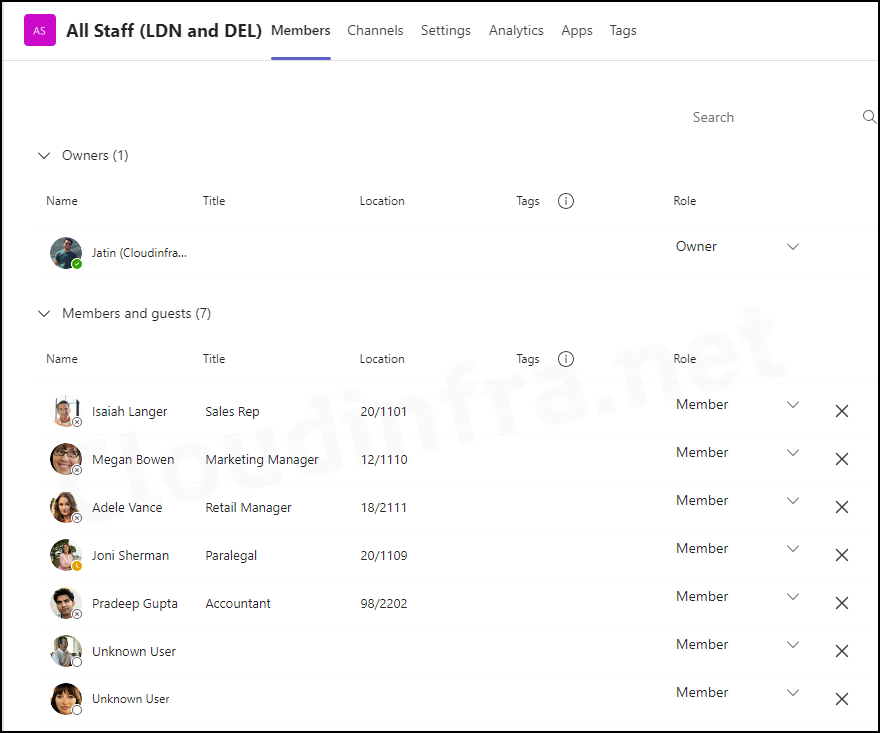
- Click on the three dots (…) next to the team and select Manage team. Under the Members tab, you will see all members who have been automatically added based on the dynamic Microsoft 365 membership. Please note that you cannot remove any members from the team on this page, as the membership is controlled by the dynamic membership rule of the Microsoft 365 group All Staff (LDN and DEL).
Conclusion
In this blog post, we covered the steps for creating a team in Microsoft Teams based on a dynamic Microsoft 365 group. We used the Microsoft 365 admin center to create the team, but you can also use PowerShell to accomplish the same task.
Install-Module -Name MicrosoftTeams -Force -AllowClobber
Connect-MicrosoftTeams
New-Team -GroupId <GroupId>