In this blog post, I will demonstrate how to customize Windows 11 Start menu layout using Intune. This is especially useful for organizations that want to maintain a consistent and seamless experience across all managed devices. You can pin apps and shortcuts to the Start menu that are commonly used by all users for quick and easy access. For example, you can pin an Intranet page, an In-house developed application, Microsoft 365 apps like Word, PowerPoint, Excel etc.
Before starting the process of customization of the Start menu. Let’s understand different areas of Start menu. There are three sections in the Start menu Pinned, All and Recommended.
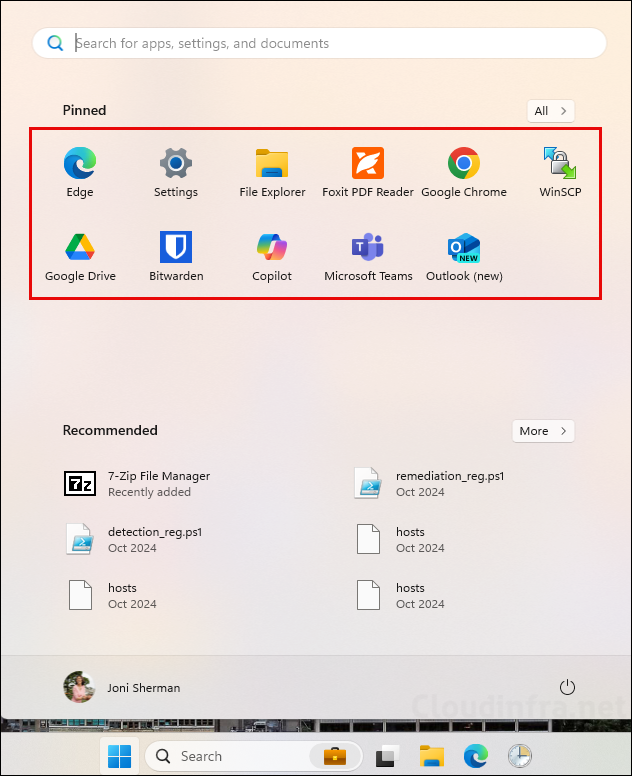
Pinned Icons are for the frequently used apps and manually Pinned Icons.
All section, which was previously labelled as All apps, it contains all installed applications.
Recommended section displays the recently opened applications and files. It also automatically lists the frequently used apps as well.
For customization of the pinned area of the Start menu, we will require a JSON export of the Start menu from a reference device. Using this JSON export, you cannot customize Recommended and All section. There are other policy settings available for managing these sections. We will explore management of Recommended and All sections at the end of the post. I will also show you few more settings that can be applied to the start menu for minimal look.
Contents
Export Start Menu Layout to JSON file
Sign in to a reference Windows 11 device which is similar to the target device where you will deploy the Start menu layout. Customize the pinned apps area by pinning the apps and shortcuts. Ensure that the Items (apps, shortcuts etc.) pinned to the Start menu are also installed/exist on the target device. If you deploy a pinned Start menu item that is not installed on the target device, it will not be displayed, but the rest of the icons as per the deployed layout will be pinned.
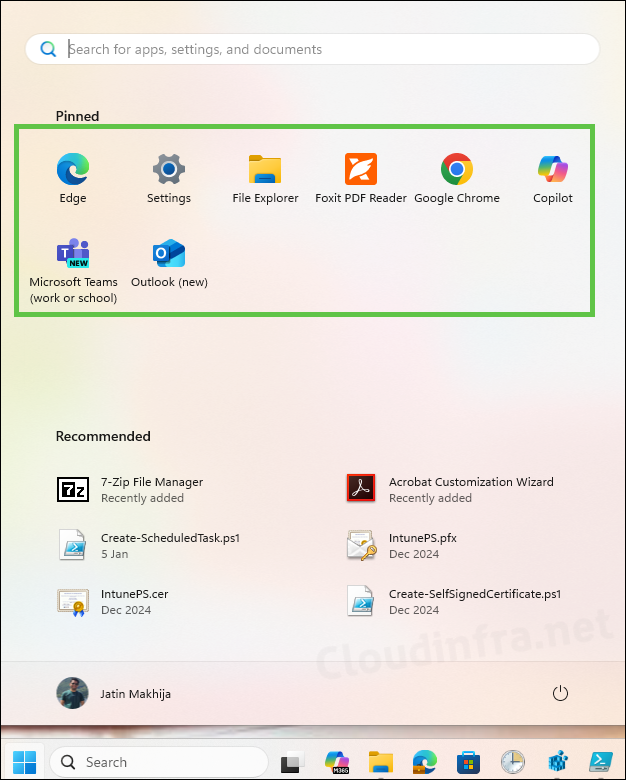
For example, on a reference Windows 11 device, I have created the Start menu layout shown below, which includes Foxit PDF Reader. If I deploy these pinned items to a target device that does not have the Foxit PDF Reader app installed, Foxit PDF Reader icon will not appear in the Start menu of the target device. However, If you install this app at a later point in time, the icon will automatically be pinned according to the deployed Start menu layout.
Once you are happy with all the Pinned Items, Export the Start menu layout using Export-StartLayout PowerShell cmdlet. Open PowerShell console as administrator and execute below command. You can change the name of the file and path to export the JSON file. I am exporting it in to C:\temp folder.
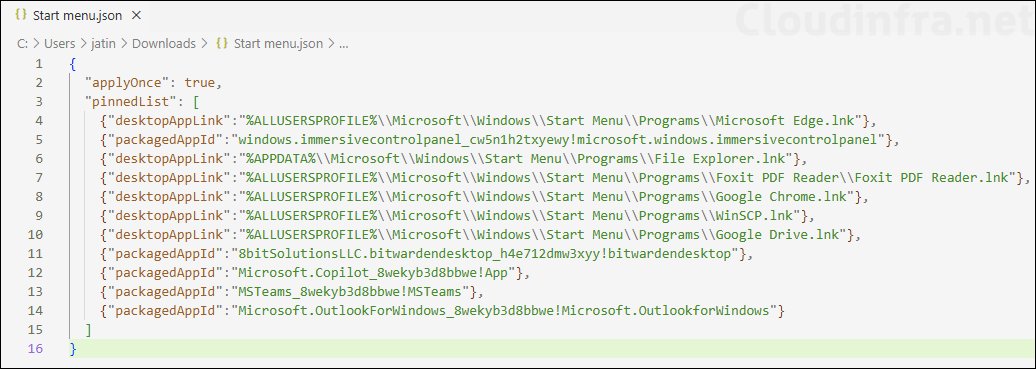
Below are the contents of StartMenuLayout.json file. I have formatted it for better view and readability. However, you don’t have to format it and use it as its exported. You can modify this JSON file to add or remove the Pinned Items, or change the order of the items.
You can modify the JSON file using below keys and add it as per its usage Information given in the Description column. However, It would be easier to pin required items in the Start menu as you want to see on the target devices and export it using PowerShell cmdlet, rather than creating the file from scratch.
Key
Description
packagedAppID
It can be used for Universal Windows Platform (UWP) apps. To pin a UWP app, use the app’s AUMID.
desktopAppID
It can be used for desktop apps. To pin a desktop app, use app’s AUMID. If the app doesn’t have an AUMID, use the desktopAppLink instead.
desktopAppLink
It can be used for desktop apps that don’t have an associated AUMID. To pin this type of app, use the path to the .lnk shortcut that points to the app.
secondaryTile
Used for Microsoft Edge pinned sites
To find AUMID (Application User Model ID) information, you can open Powershell console and run Get-StartApps cmdlet. It will display all the apps that appear in the Start menu. For more Information on finding AUMID, refer to the link: How to find AUMID.
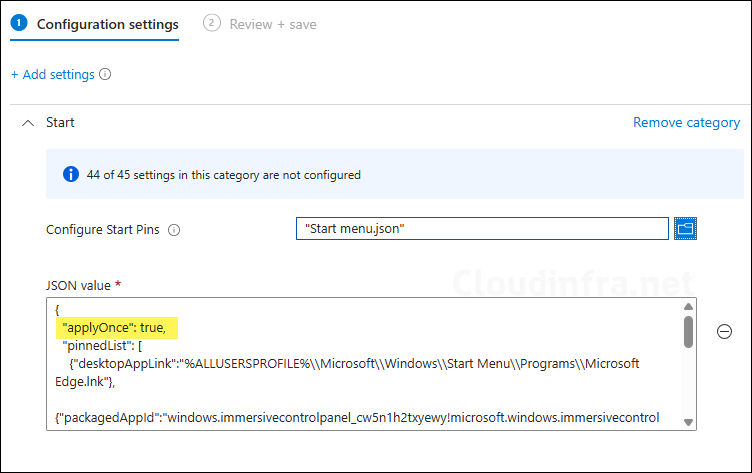
Starting with Windows 11, version 24H2 with KB5062660, you can now use applyOnce property. When you set applyOnce to true, pinned list is applied only once, users can modify the list afterwards and the changes will not be overwritten on future logins. When you set applyOnce to false, pinned list is reapplied at every login, if users has made changes to the pinned items, it will reset the changes. Below JSON code shows an exported start menu layout with “applyOnce”: true.
In short, when you set applyOnce to true, the start menu will be initially configured for the users as per the JSON file, after that users can add or remove the Pins and customize the Start meny as they like and it will not be overwritten by intune policy.
Now that we have customized Pinned Items in the Start menu and exported it to StartMenuLayout.json file. We can deploy this file using a Settings catalog policy setting called Configure Start Pins. Let’s take a look:
Sign in to the Intune admin center >Devices > Configuration > Create > New Policy.
Platform: Windows 10 and later, Profile type: Settings Catalog.
Basics: Provide a Name and Description of the policy.
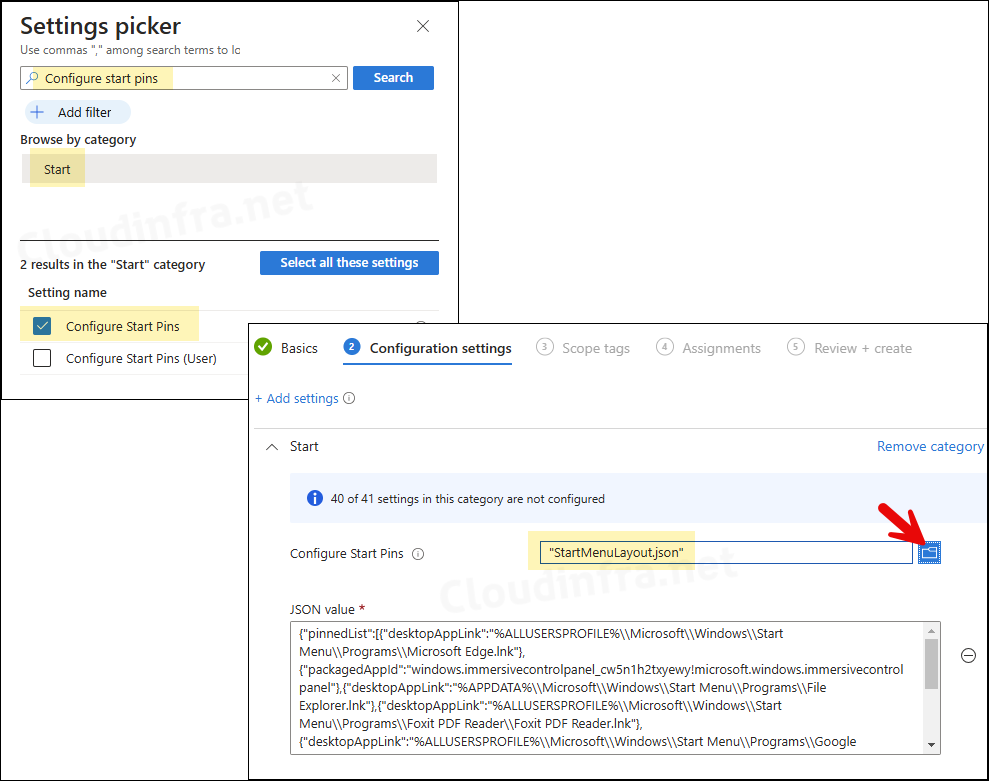
Configuration settings: Click on + Add settings and search for Configure start pins in the settings picker. Click on the category called Start and check the box next to Configure Start Pins.
Browse to StartMenuLayout.json file or alternatively paste the contents of JSON file in JSON value textbox.
Please note that you can also use Configure Start Pins(User) policy to configure Start menu Pins. It’s a user based setting, therefore, you can assign this to Entra security group containing users. If you use Configure Start Pins, which is what we are using, It applies at the device level which affects all users using that device.
Configure Start Pins(User)
Scope tags (optional): A scope tag in Intune is an RBAC label you add to resources (policies, apps, devices) to limit which admins can see and manage them. For more Information, read: How to use Scope tags in Intune.
Assignments: Assign the policy to Entra security groups that contain the target users or devices. As a best practice, pilot with a small set first; once validated, roll it out more broadly. For guidance on assignment strategy, see Intune assignments: User groups vs. Device groups.
Review + create: Review the deployment summary and click Create.
Choose the Device Configuration profile you want to work with, and at the top of the page, you’ll see a quick view of the Success, Failure, Conflict, Not Applicable, and In Progress status.
Click on View report to access more detailed information.
Sync Intune Policies
The device check-in process might not begin immediately. If you’re testing this policy on a test device, you can manually kickstart Intune sync from the device itself or remotely through the Intune admin center.
Alternatively, you can use PowerShell to force the Intune sync on Windows devices. Restarting the device is another way to trigger the Intune device check-in process.
End User Experience
After the deployment is completed successfully, you will notice that the Start menu layout, with respect to pinned items, has changed according to the StartMenuLayout.json file. You may find that some icons are missing from the pinned items on the target device’s Start menu.
This is because those pinned items in the JSON file are referencing apps that are not installed on the target device, such as WinSCP and BitWarden. As a result, the icons for these apps are not displayed. Once you install these apps on the target device, the pinned icons will automatically appear on the Start menu, in accordance with the deployed Start menu layout JSON file.
Troubleshooting
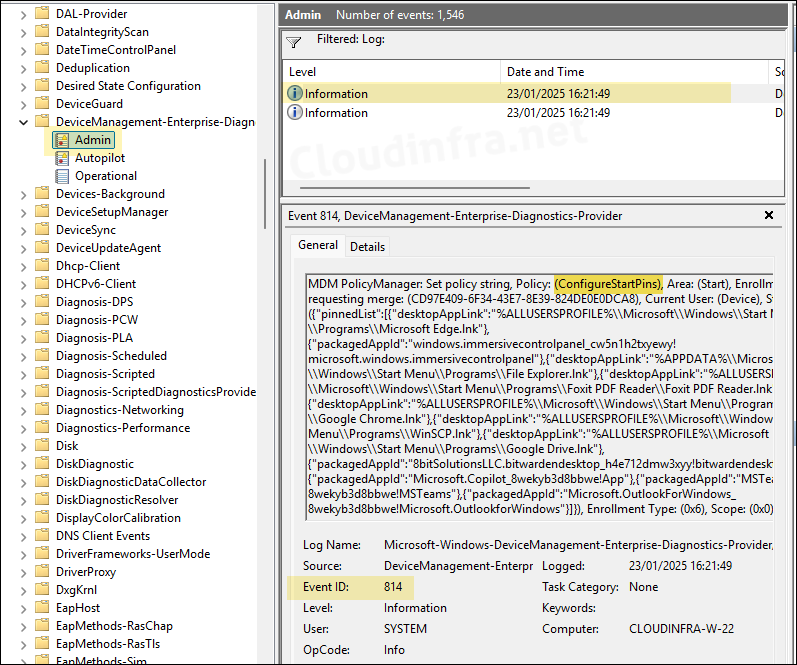
To find logs related to your deployment, open Event viewer> Application and services logs> Microsoft > Windows > device management-enterprise-diagnostics-provider> Admin. Right-click on Admin folder > Filter Current log. Filter it using Event ID 814 and go through the logs to find logs related to a particular Intune deployment. Below screenshot shows ConfigureStartPins policy string JSON that we have deployed on this device.
Further Customize Start Menu Layout using Intune
Now that we have customized one section of the Windows 11 Start menu, the pinned items, you can also customize other areas, such as the All and Recommended sections. Let’s explore the different Intune policies available to manage these sections of the Start menu.
Intune Policy to Remove All Apps Section in Start Menu
You can use a Settings catalog policy to remove All section which was previously labeled as All Apps. It’s a button displayed on the top right-hand side corner of the Start menu. Clicking on the button will list all the applications installed on your device.
You can easily hide and remove this option from Start menu by using an Intune Settings catalog policy setting called Remove All Programs list from the Start menu.
You can also use Remove All Programs list from the Start menu(User) policy setting for this. It can be used if you want to hide and remove All button from Start menu per user as it applied in the User context. If you use Remove All Programs list from the Start menu, which is what we are using, it will affect all users using this device.
Remove All Programs list from the Start menu(User)
Remove All Programs list from Start menu: Enable it
Choose one of the following actions (Device): Remove and disable setting.
End User Experience: After this policy is applied on the target device, All button will be removed from the Start menu. Below are the screenshots captured before (left-hand side) and after (right-hand side) applying the Intune policy to remove All button.
Intune Policy to Hide Recent JumpLists and Frequently Used Apps in Start Menu
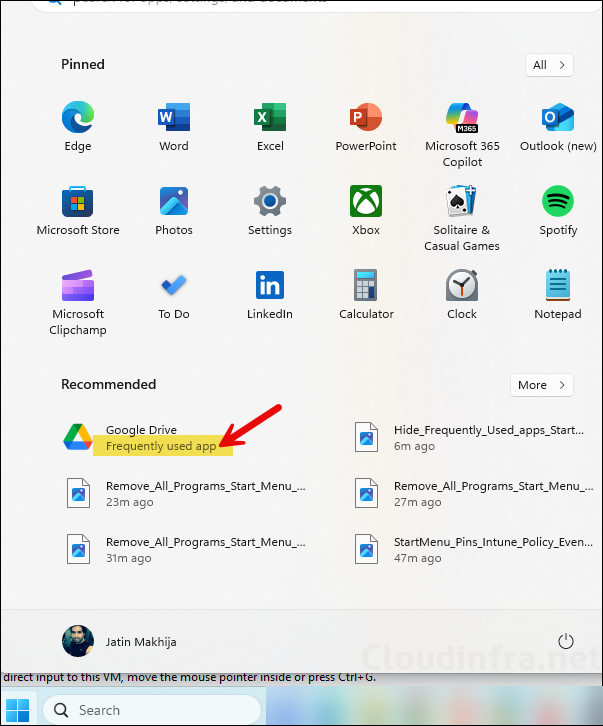
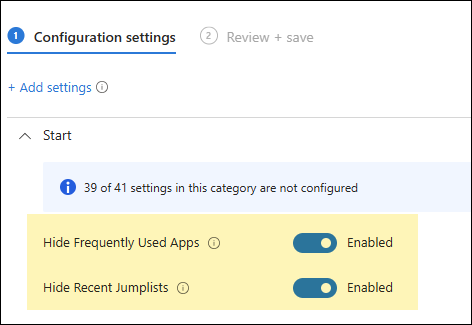
The apps that you use frequently are automatically displayed in the Recommended section. If you do not want to show frequently used apps, you can enable an Intune Settings catalog policy called Hide Frequently Used Apps. Below screenshot shows an example of a frequently used app displayed in the Recommended section.
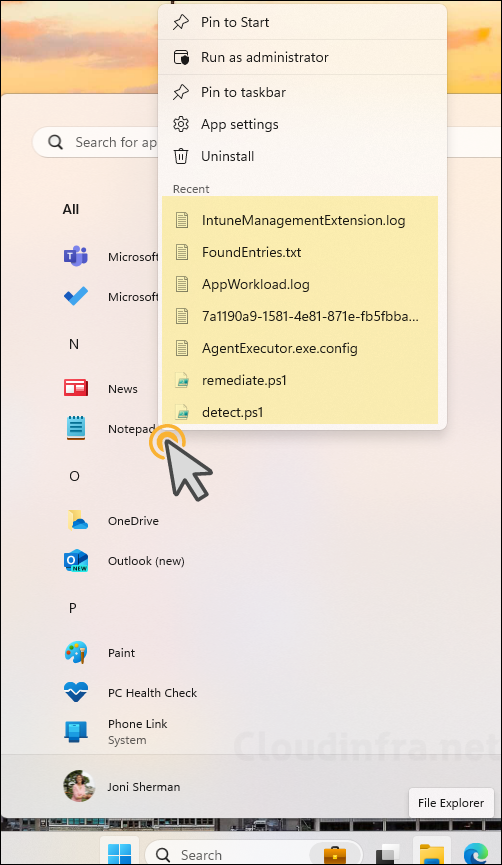
When you right-click on an application Icon, If there are recently opened Items with respect to that app, It will be display a jumplist for quick access. Below screenshot shows an example of a Jumplist when right-clicked on Notepad app. You can also disable this with a Setting Catalog Intune policy setting called Hide Recent Jumplists.
Create an Intune Policy and Enable Hide Frequently Used Apps and Hide Recent Jumplists. Below screenshot shows an Intune policy which I have applied on Windows 11 devices. After the deployment of this policy is completed successfully, you will no longer see frequently used apps in the Start menu and Recent Jumplists will also not appear upon right-clicking on an Icon in the Start menu.
Intune Policy to Disable Context Menu in Start Menu
Instead of hiding recent jumplists, you can completely disable the context menu in the Start menu on Windows 11 devices. A context menu appears when you right-click on any icon in the Start menu on Windows 10/11 devices, providing you with a list of quick actions you can take. I have provided more details about the policy along with End user experience in my blog post: Disable Context Menu in Start Menu using Intune.
Intune Policy to Hide Recommended Section in Start Menu
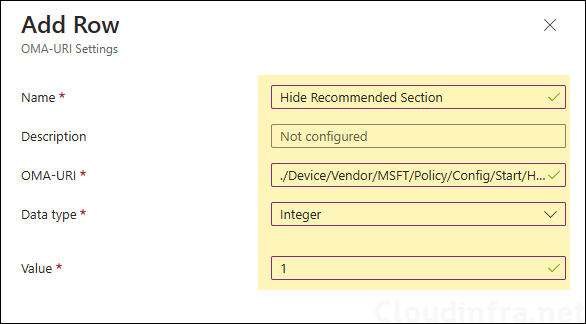
You can completely remove or hide the recommended section from Start menu. As of now there is no Settings catalog policy to hide the recommended section, therefore we need to use OMA-URI setting for this. Create a custom device configuration profile and target the devices or users to hide the recommended section.
Sign in to the Intune admin center > Devices > Configuration > Create > New Policy.
Select Platform as Windows 10 and later, Profile type as Templates, Template Name: Custom.
Basics Tab: Provide a Name and Description of the policy.
Configuration settings: Click on the Add button to add OMA-URI settings and provide the following:
You can also use ./User/Vendor/MSFT/Policy/Config/Start/HideRecommendedSection which is a Per User based policy and applied in User context. When you use this OMA-URI setting, you can assign it to an Entra group containing Users. I would be using ./Device/Vendor/MSFT/Policy/Config/Start/HideRecommendedSection setting, which is a device based setting and affects all users using that device.
Note
Scope tags (optional): A scope tag in Intune is an RBAC label you add to resources (policies, apps, devices) to limit which admins can see and manage them. For more Information, read: How to use Scope tags in Intune.
Assignments: Assign the policy to Entra security groups that contain the target users or devices. As a best practice, pilot with a small set first; once validated, roll it out more broadly. For guidance on assignment strategy, see Intune assignments: User groups vs. Device groups.
Applicability Rules: You can set up rules on this page to target specific versions or OS editions.
Review + Create: Review the deployment summary and click Create.
Intune Policy to Hide Search box in Start Menu
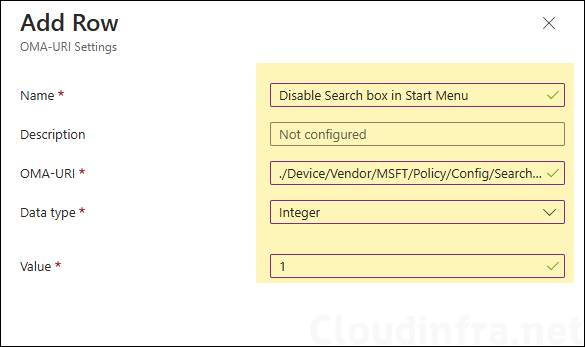
Search box is useful for searching any apps or files directly from the Start menu. However, If you do not use it and want to further unclutter the Start menu, you can disable the Search box as well. Let’s check the steps:
Sign in to the Intune admin center > Devices > Configuration > Create > New Policy.
Select Platform as Windows 10 and later, Profile type as Templates, Template Name: Custom.
Basics Tab: Provide a Name and Description of the policy.
Configuration settings: Click on the Add button to add OMA-URI settings and provide the following:
Scope tags (optional): A scope tag in Intune is an RBAC label you add to resources (policies, apps, devices) to limit which admins can see and manage them. For more Information, read: How to use Scope tags in Intune.
Assignments: Assign the policy to Entra security groups that contain the target users or devices. As a best practice, pilot with a small set first; once validated, roll it out more broadly. For guidance on assignment strategy, see Intune assignments: User groups vs. Device groups.
Applicability Rules: You can set up rules on this page to target specific versions or OS editions.
Review + Create: Review the deployment summary and click Create.
Final Look of the Start Menu
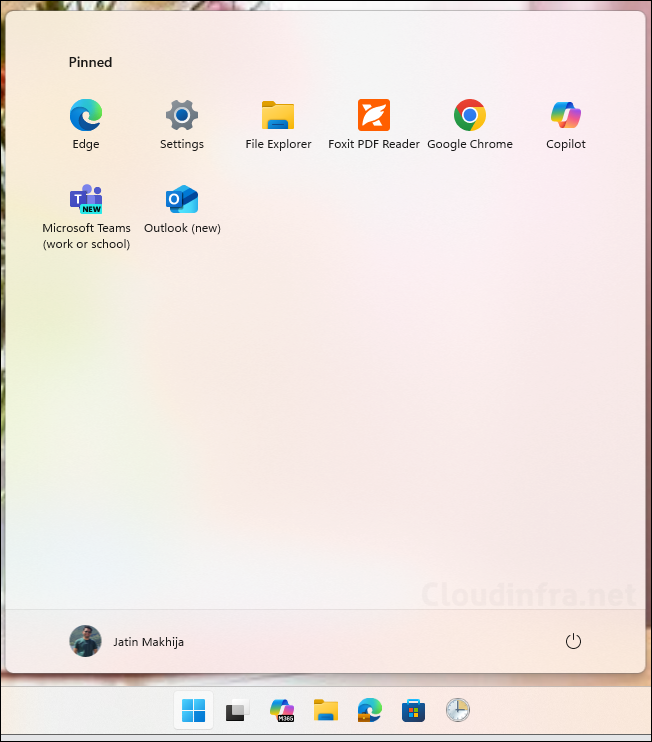
After applying all these policies to customize the Start menu on a Windows 11 device including Start Menu Layout JSON file, I want to show you how it looks. The screenshot below demonstrates that there is no Search box, no Recommended section, and no All Apps section. Additionally, right-clicking on any of the icons does not display a context menu. It prevents users from making changes to the Start menu, which is a similar experience when you setup kiosk mode on Windows 11.
Intune Policy for Hiding Power Options in the Start Menu
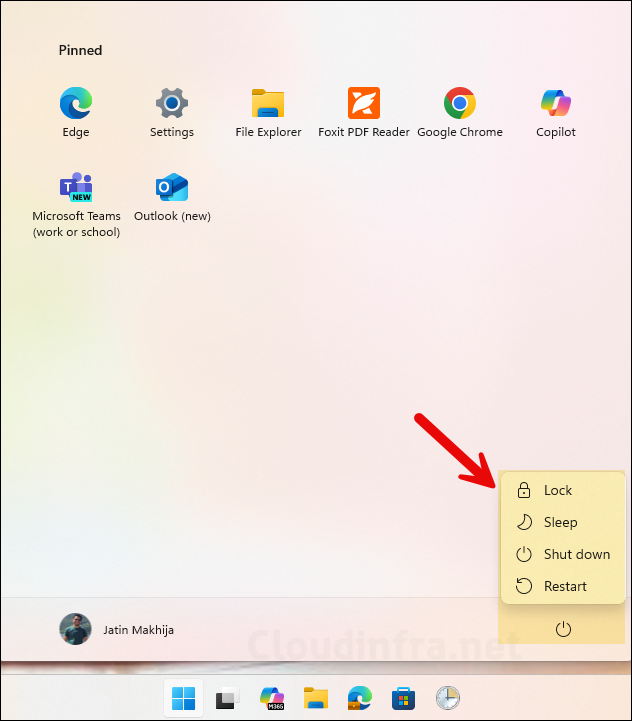
You can also further customize the Start menu by hiding Power options. You can Hide Hibernate, Lock, Power button, Restart, Shutdown, Sleep options using Intune. Let’s take a look at the policy settings.
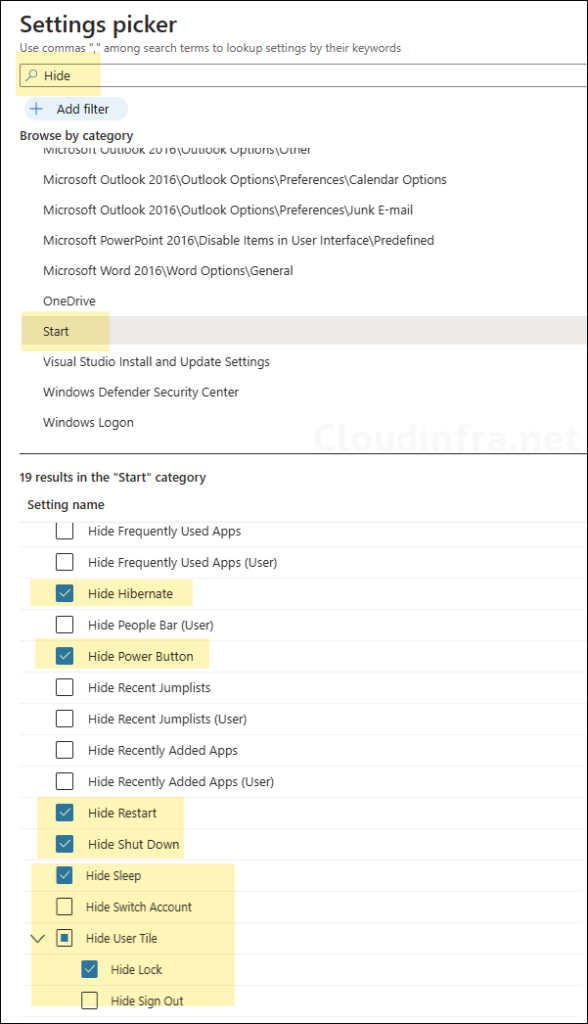
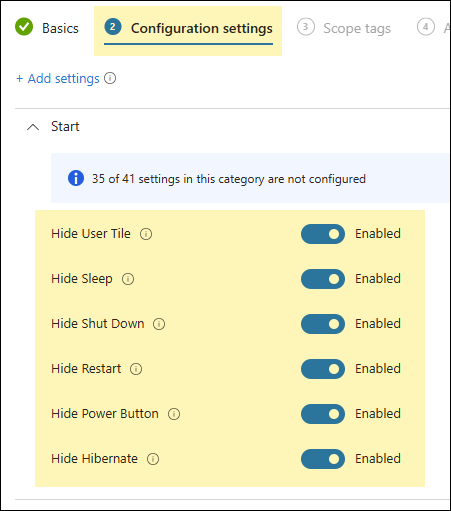
Below screenshot shows all the settings related to Power options in the Start menu. Search using a keyword Hide in the Settings picker and click on the category Start. Select the Power options you want to hide.
I have selected most of the Power options for demonstration purpose except Hide Sign Out. Therefore, after I apply this policy, only Sign out option would be displayed. Let’s take a look at the End user experience.
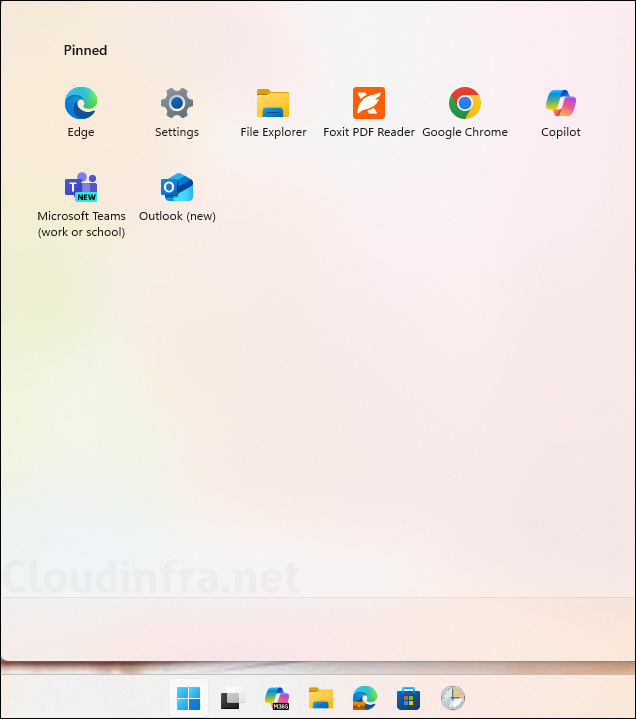
End User Experience: After the Intune policy has been deployed on the target device, you will notice that the Power switch is no longer displayed as we have hided all the Power options.
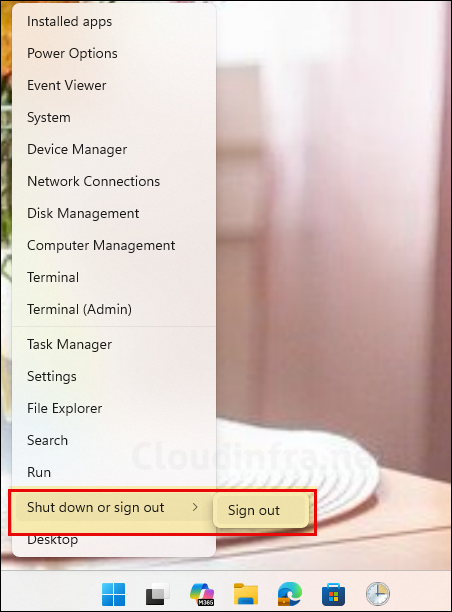
The only option we have kept is the Sign out option which can be accessed by right-clicking on Windows Icon > Shut down or sign out > Sign out.
Other Start Menu Customization Intune Policies
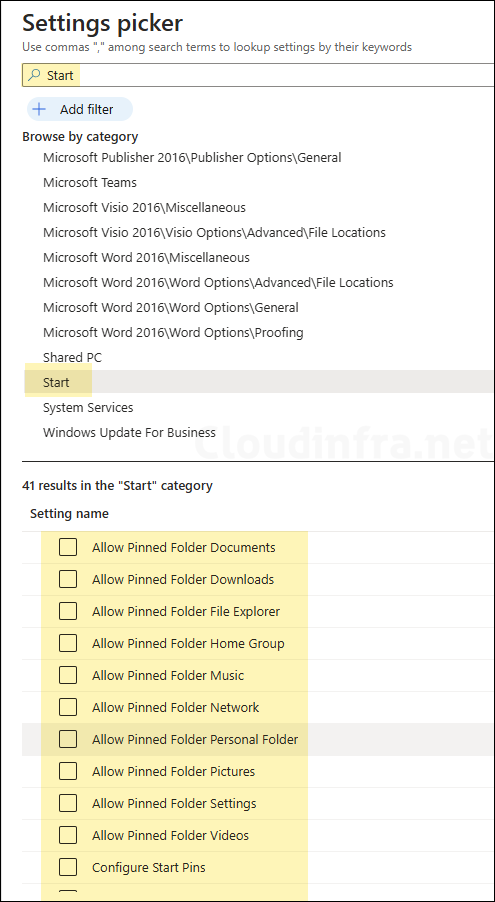
There are many other Start menu customization policies available in the Intune admin center. Below screenshot shows all the settings you can use to customize the Start menu. Simply search for the keyword Start in the Settings picker and select the Start category. Then, choose the policy setting you want to configure. If you’re unsure what a specific policy setting does, hover your mouse over the i icon next to the setting to view more information.
Below table lists all the settings available in Start category as shown in the above screenshot.
Category
Policy Setting
Start
Allow Pinned Folder Downloads Allow Pinned Folder File Explorer Allow Pinned Folder Home Group Allow Pinned Folder Music Allow Pinned Folder Network Allow Pinned Folder Personal Folder Allow Pinned Folder Pictures Allow Pinned Folder Settings Allow Pinned Folder Videos Configure Start Pins Configure Start Pins (User) Disable Context Menus Disable Context Menus (User) Disable Editing Quick Settings Force Start Size Force Start Size (User) Hide App List Hide App List (User) Hide Change Account Settings Hide Frequently Used Apps Hide Frequently Used Apps (User) Hide Hibernate Hide People Bar (User) Hide Power Button Hide Recent Jumplists Hide Recent Jumplists (User) Hide Recently Added Apps Hide Recently Added Apps (User) Hide Restart Hide Shut Down Hide Sleep Hide Switch Account Hide User Tile Import Edge Assets No Pinning To Taskbar Simplify Quick Settings Start Layout Start Layout (User)