In this blog post, I will show you the steps to disable Local drive redirection using Intune. It’s also sometimes referred to as Client drive redirection. Local Drive redirection and peripheral devices such as cameras, USB drives, and printers are enabled for Windows 365 Cloud PCs. This feature allows users to seamlessly share data between their Cloud PC and local machine, enhancing flexibility and productivity.
While local drive redirection and peripheral device access enhance user convenience and productivity in Windows 365 Cloud PCs, they pose potential security risks for enterprises. The data transfer between Cloud PC and local devices could compromise sensitive company information.
Contents
Disable Local Drive Redirection Policy
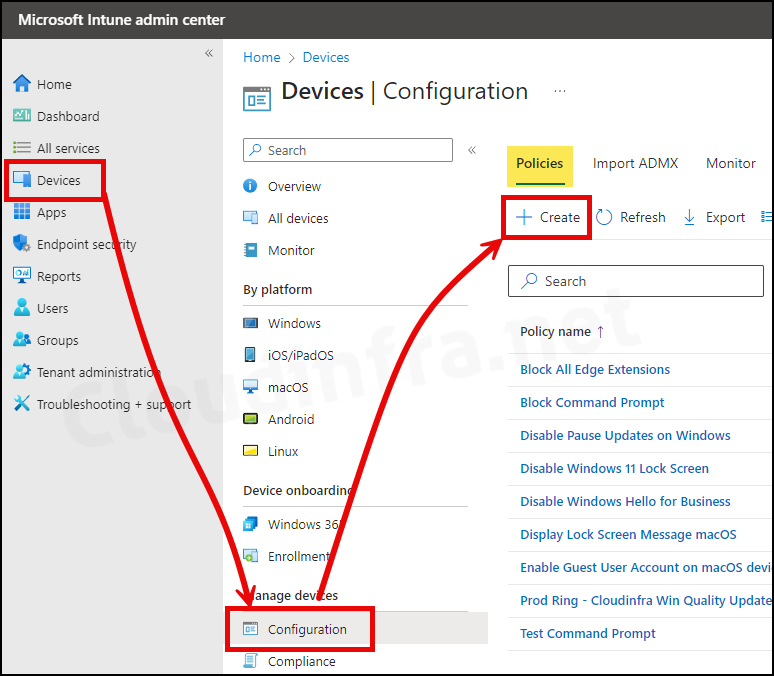
- Sign in to the Intune admin center > Devices > Configuration > Create > New Policy.
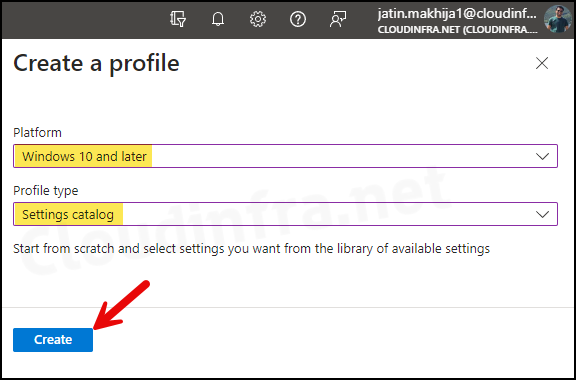
- Select Platform as Windows 10 and later
- Profile type as Settings Catalog
- Click on the Create button.
- Basics Tab: Enter the Name and Description of the profile.
- Configuration Settings:
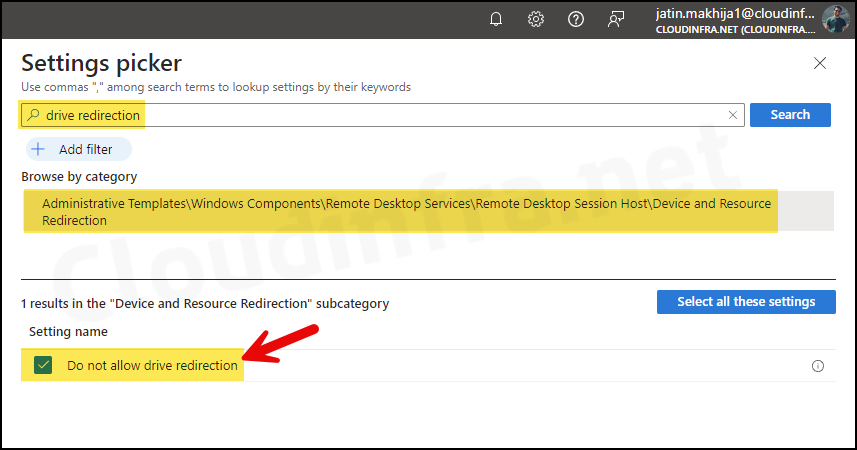
- Click on + Add settings.
- In the Settings picker, search for drive redirection.
- Click on the Category Administrative Templates\Windows Components\Remote Desktop Services \Remote Desktop Session Host\Device and Resource Redirection.
- Check the box for Do not allow drive redirection.
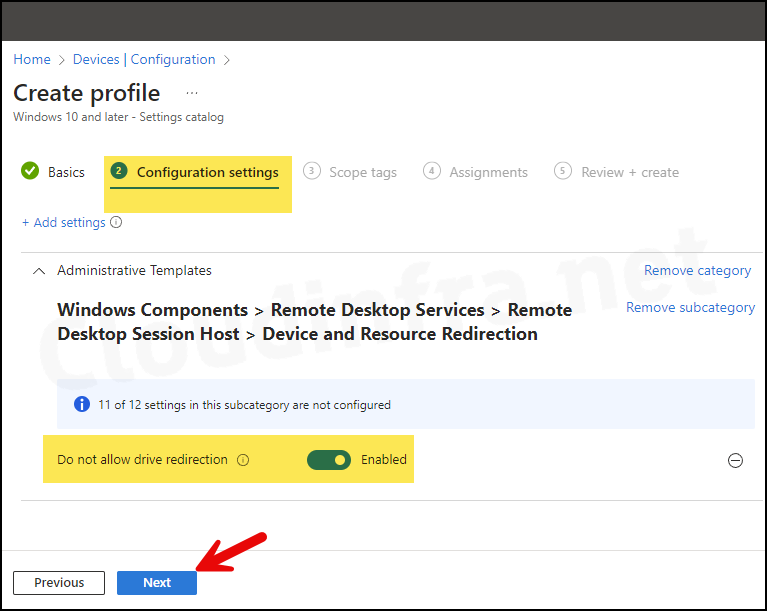
- Use the toggle switch to Enable Do not allow drive redirection.
- Scope tags (optional): A scope tag in Intune is an RBAC label you add to resources (policies, apps, devices) to limit which admins can see and manage them. For more Information, read: How to use Scope tags in Intune.
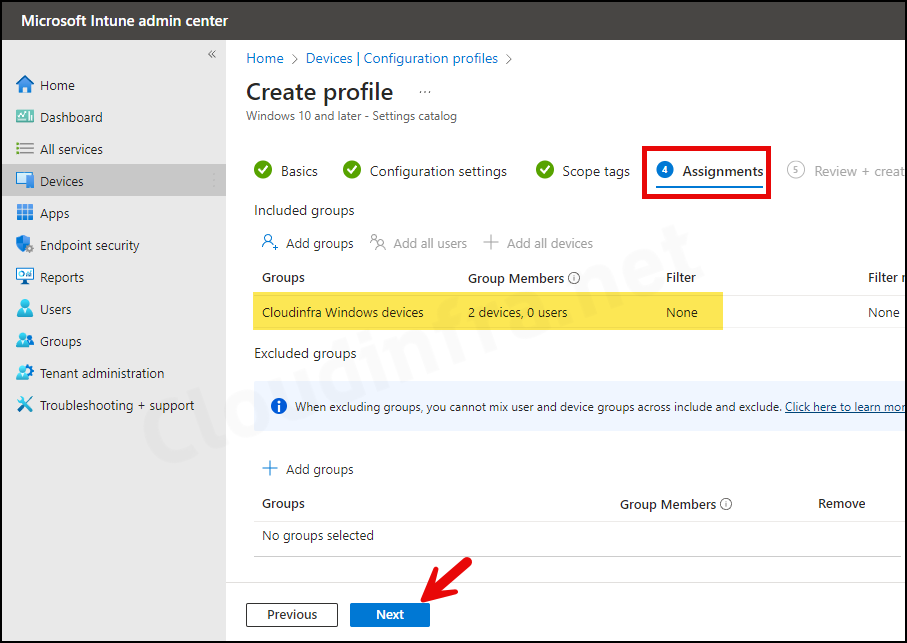
- Assignments: Assign the policy to Entra security groups that contain the target users or devices. As a best practice, pilot with a small set first; once validated, roll it out more broadly. For guidance on assignment strategy, see Intune assignments: User groups vs. Device groups.
- Review + create: Review the policy summary and click Create.
Sync Intune Policies
The device check-in process might not begin immediately. If you’re testing this policy on a test device, you can manually kickstart Intune sync from the device itself or remotely through the Intune admin center.
Alternatively, you can use PowerShell to force the Intune sync on Windows devices. Restarting the device is another way to trigger the Intune device check-in process.
