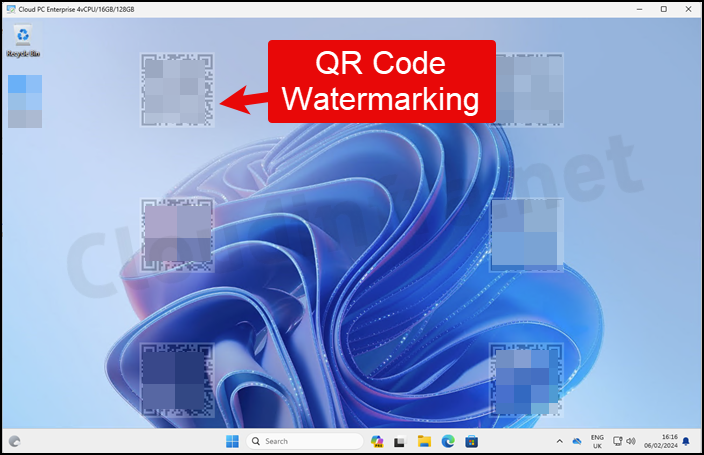
In this blog post, I will show you the steps to enable Watermarking on Windows 365 Cloud PC/AVD. Watermarking for Windows 365 Cloud PCs and Azure Virtual Desktop (AVD) is an excellent security feature that can be enabled alongside screen capture protection. When you activate watermarking, a QR code watermarks will appear within Cloud PCs and AVDs. This QR code helps trace session information back to identify user details.
The implementation of watermarking in Cloud PCs and AVDs serves as a protective measure, preventing information from being stolen, used, or altered without the owner’s permission.
Contents
Prerequisites
- Remote desktop client version 1.2.3317 or later on Windows 10 and later client endpoints.
- You can use the Remote Desktop Client or Windows App for the best results.
- Ensure Azure Virtual Desktop Insights are configured (when enabling Watermarking for AVDs). This is not required for Windows 365 Cloud PCs.
Enable Watermarking on Windows 365/AVD
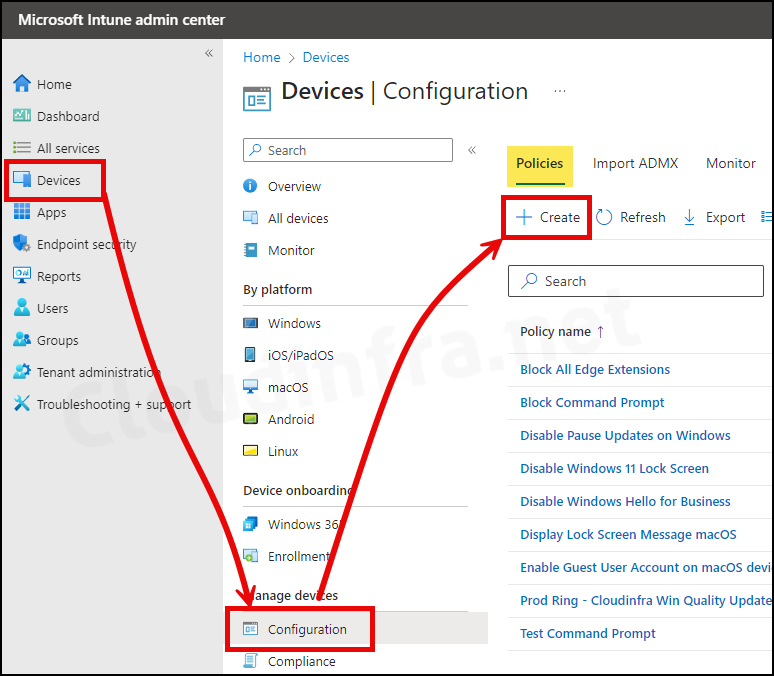
- Sign in to the Intune admin center > Devices > Configuration > Create > New Policy.
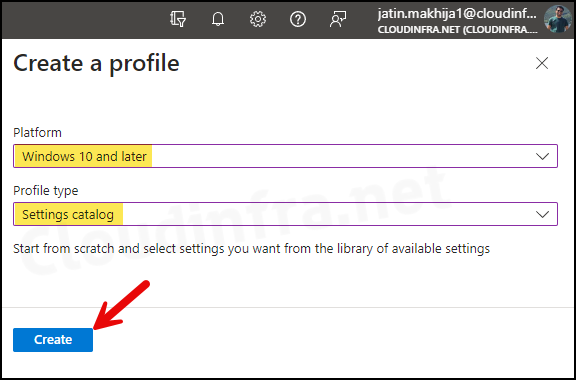
- Select Platform as Windows 10 and later
- Profile type as Settings Catalog
- Click on the Create button.
- Basics Tab: Enter the Name and Description of the profile.
- Configuration Settings:
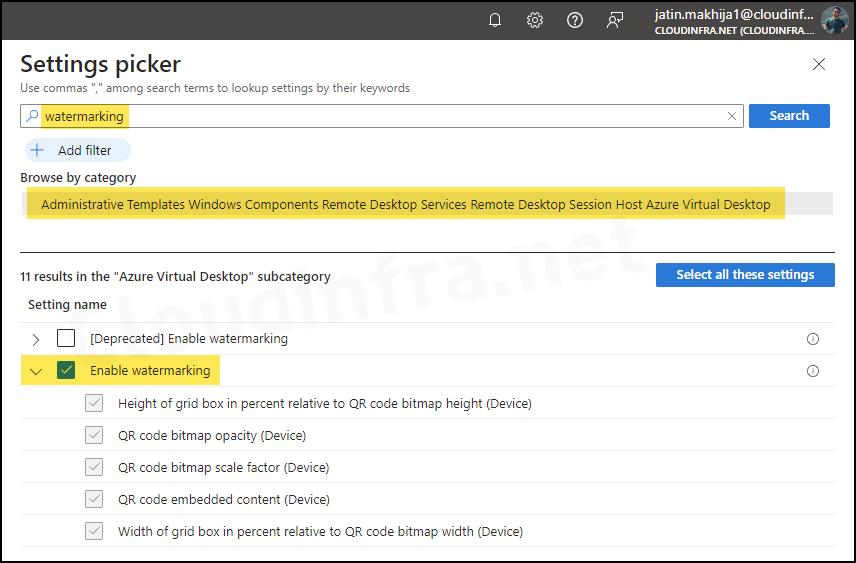
- Click on + Add settings.
- In the Settings picker, search for watermarking.
- Click on Administrative Templates\Windows Components\Remote Desktop Services\Remote Desktop Session Host\Azure Virtual Desktop category.
- Check the box Enable watermarking and exit the settings picker.
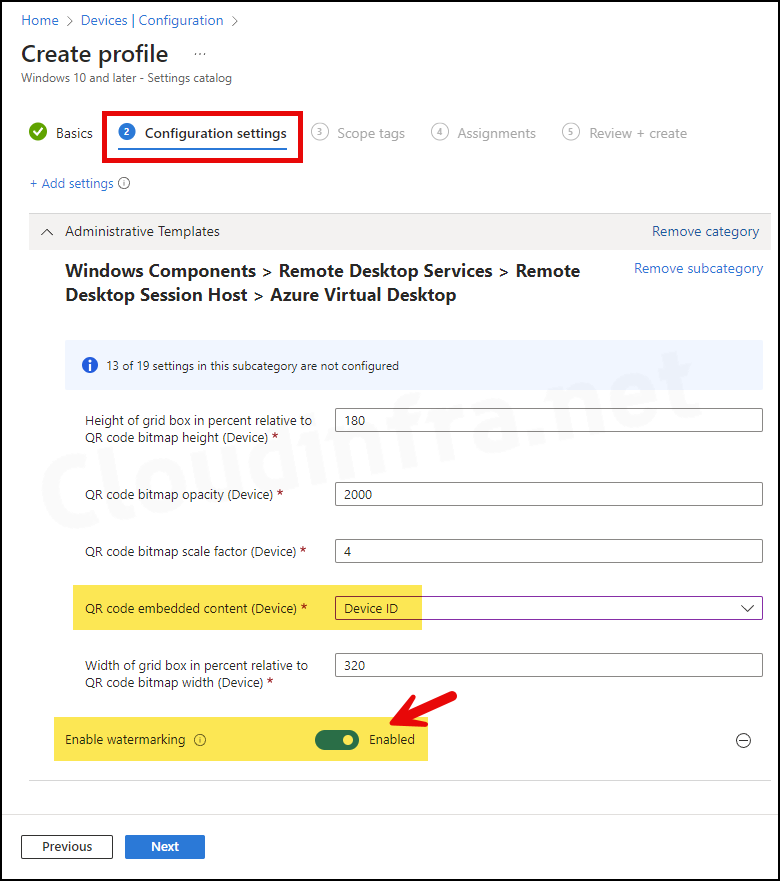
- Toggle the switch to enable watermarking. After enabling watermarking, the following configuration options will be available.
| Watermarking Settings | Values | Description |
|---|---|---|
| Height of grid box in percent relative to QR code bitmap height (Device). | 100 to 1000M (default=180) | The distance between the QR codes is specified in percent. When combined with the width, a value of 100 would make the QR codes appear side-by-side and fill the entire screen. |
| QR code bitmap opacity (Device) | 2000 | The opacity of the watermark is determined by a percentage. A value of 100 is fully transparent, and higher values increase opacity. |
| QR code bitmap scale factor (Device) | 1 to 10 (default = 4) | The size of each QR code dot is measured in pixels. This value determines the number of squares per dot in the QR code. |
| QR code embedded content (Device) | Connection ID and Device ID | When configuring watermarks for Windows 365 Cloud PCs, set this option to ‘Device ID.’ The Device ID option is valid only for target devices that are Microsoft Entra joined or Microsoft Entra hybrid joined. |
| Width of grid box in percent relative to QR code bitmap width (Device) | 100 to 1000 (default = 320) The distance between the QR codes in | The distance between the QR codes is specified in percent. When combined with the height, a value of 100 would make the QR codes appear side-by-side and fill the entire screen. |
- Scope tags: Click on Next.
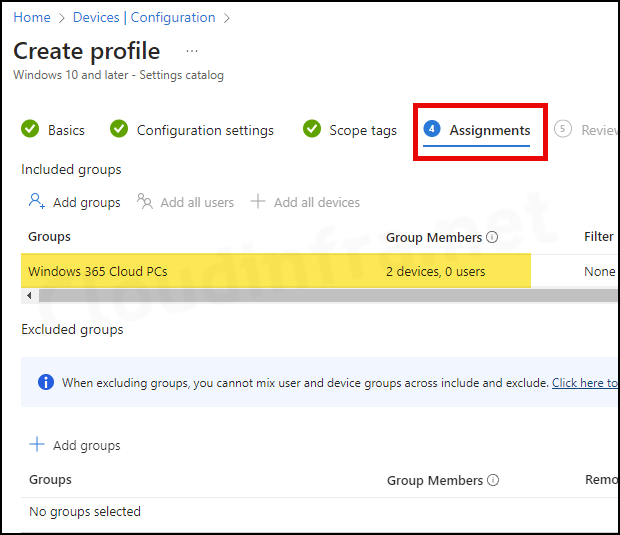
- Assignments: Click Add groups and select an Entra security group containing Cloud PCs.
- Review + create: Review the policy summary and click Create.
Sync Intune Policies
The device check-in process might not begin immediately. If you’re testing this policy on a test device, you can manually kickstart Intune sync from the device itself or remotely through the Intune admin center.
Alternatively, you can use PowerShell to force the Intune sync on Windows devices. Restarting the device is another way to trigger the Intune device check-in process.
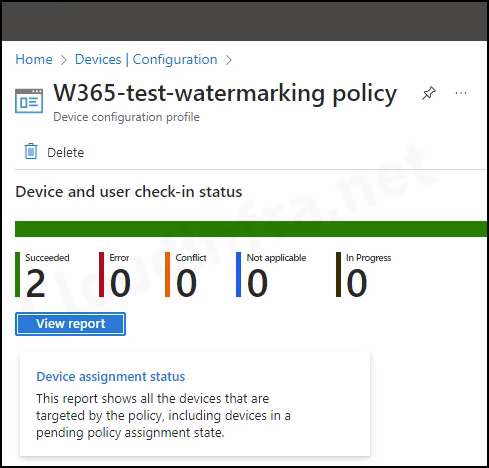
Monitoring Deployment Progress
- Sign in to the Intune admin center > Devices > Configuration.
- Choose the Device Configuration profile you want to work with, and at the top of the page, you’ll see a quick view of the Success, Failure, Conflict, Not Applicable, and In Progress status.
- Click on View report to access more detailed information.
End User Experience
After Cloud PCs have synchronized the watermarking policy deployed via Intune, QR watermarks will appear on the screen. Windows App is the preferred method to connect to a Cloud PC. However, you can connect to Windows 365 Cloud PCs using a browser. QR watermarking will appear regardless of the method used to connect to the Cloud PC.
When configuring watermarks for Windows 365 Cloud PCs, we set the QR code embedded content (Device) to Device ID, the recommended option. Therefore, the QR codes will trace back to the Device ID of the Cloud PCs, which can then be linked back to the user.
FAQs
QR Code Watermarks not getting applied
The policy may take some time to take effect. Restarting the Cloud PC can also help speed up the policy deployment process. Refer to the link for more information about restarting a Cloud PC: 4 different ways to restart your Cloud PCs.