In this blog post, I will show you the steps to deploy ManageEngine Endpoint Central agent using Intune. Endpoint Central is an endpoint management and security solution for managing desktops, laptops, servers, and mobile devices from a central location. You can install patches, deploy software and operating system images, manage assets, software licenses, etc. Endpoint Central Agent is a lightweight software application that needs to be installed on the devices you want to manage from ManageEngine Endpoint Central server.
Contents
Step 1: Download ManageEngine Endpoint Central Agent
Follow the below steps to download ManageEngine Endpoint Central Agent from ManageEngine Endpoint Central Server:
- Sign in to the ManageEngine Endpoint Central Server.
- Go to Agent > Computers > Download Agent.
- Remote Office: Select the Office location.
- Platform: Select Windows platform and click on Download Agent.
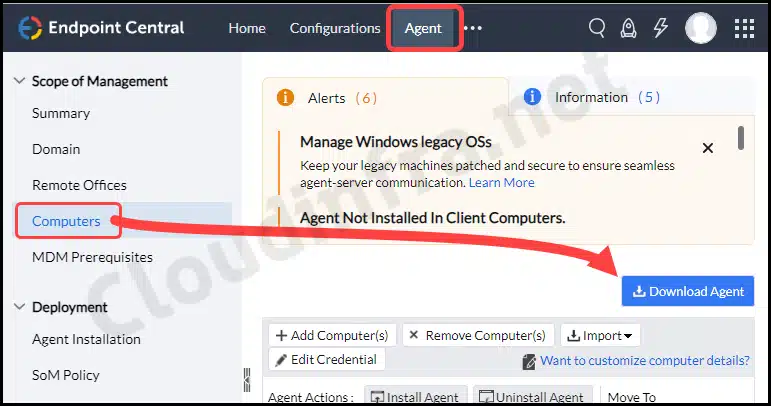
ManageEngine Endpoint Agent will be downloaded after you click Download Agent. I have the default location set as Local Office, and it downloaded a file named LocalOffice_Agent.exe. This is the agent file that we will be deploying using Intune.
If you have already deployed the agent on end-user devices and need to uninstall the Endpoint Central agent, you can do that using Intune. At the end of the post. I have given the steps for uninstalling Endpoint Central agent with Intune.
Step 2: Deploy Endpoint Central Agent using Intune
I will use the Win32 app deployment method in Intune to deploy the agent. The installer file LocalOffice_Agent.exe will be used for the deployment. Win32 app deployment requires the source files to be packaged in the .intunewin file format, so we will first create the .intunewin file and then setup the Intune deployment.
Create IntuneWin file
- Create an empty folder somewhere and give it any name you like. For example, D:\MEEndpointAgent.
- Copy LocalOffice_Agent.exe into this folder.
- Create an Uninstall.ps1 file in the same folder using below code:
Uninstall.ps1
$agent = Get-WmiObject -Class Win32_Product -Filter "Name = 'ManageEngine UEMS - Agent'"
$agent.uninstall() | out-null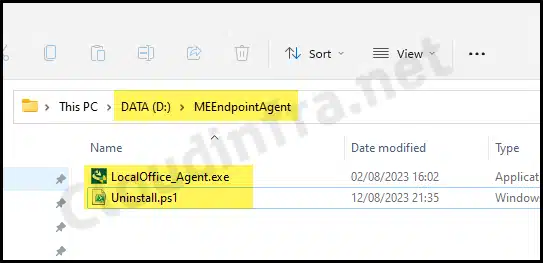
- Download Microsoft Win32 Content Prep Tool.
- Create an empty folder anywhere and with any name you like, for example, C:\output.
Create an Intunewin file:
- Open PowerShell and browse to the directory for the Microsoft Win32 content prep tool.
- Run .\IntuneWinAppUtil.exe tool.
- Source Folder: D:\MEEndpointAgent.
- Setup file: LocalOffice_Agent.exe.
- Output folder: C:\output
- Catalog folder: N
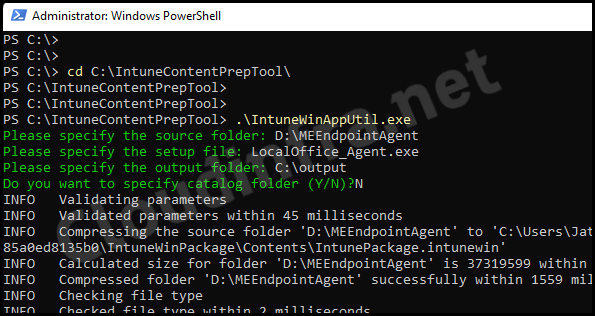
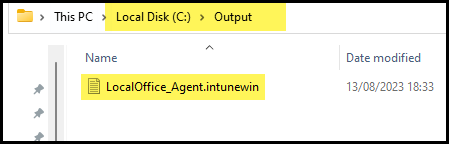
- LocalOffice_Agent.intunewin file has been created successfully.
Create Win32 App Deployment
Now that we have created .Intunewin file, we can begin with the steps to create a Windows app (Win32) app deployment on Intune admin center. Let’s take a look at the steps:
- Sign in to the Intune admin center > Apps > All Apps.
- Click on + Create and select Windows app (Win32) from the app type drop-down.
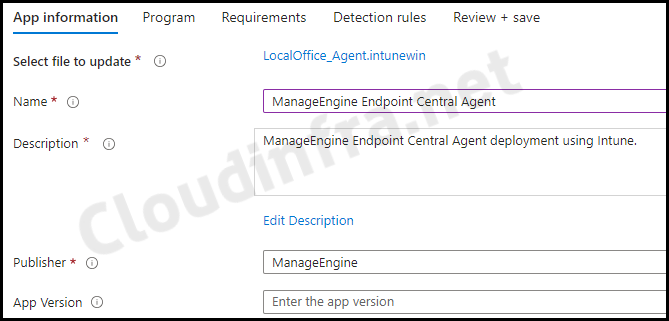
- App Information: Click on Select app package file and browse the Intunewin file generated in C:\Output folder. Provide details about the application, such as its name, description, and publisher information. Other fields, such as app version, category, information URL, and privacy URL, are optional.
- Name: ManageEngine Endpoint Central Agent
- Description: ManageEngine Endpoint Central Agent deployment using Intune.
- Publisher: ManageEngine
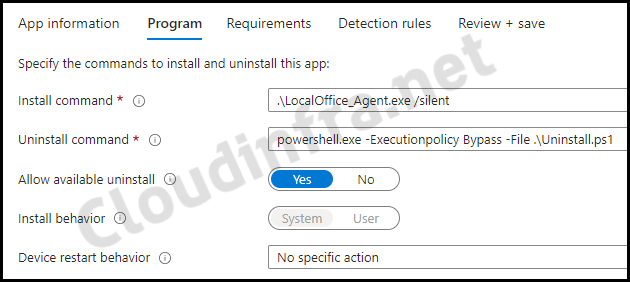
- Program tab:
- Install command: .\LocalOffice_Agent.exe /silent
- Uninstall command: powershell.exe -Executionpolicy Bypass -File .\Uninstall.ps1
- Installation time required (mins): Keep default
- Allow available uninstall: Keep default
- Install behavior: System
- Device restart behavior: No specific Action
- Specify return codes to indicate post-installation behavior: Keep default
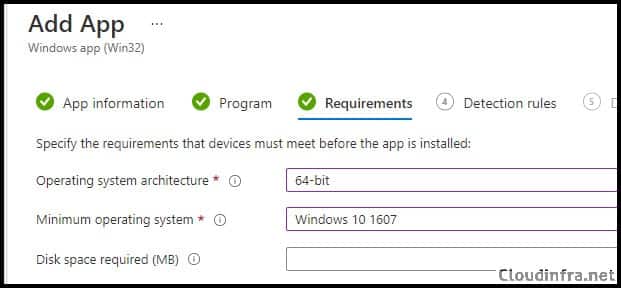
- Requirements: Specify the requirements that the devices must meet before the app is installed.
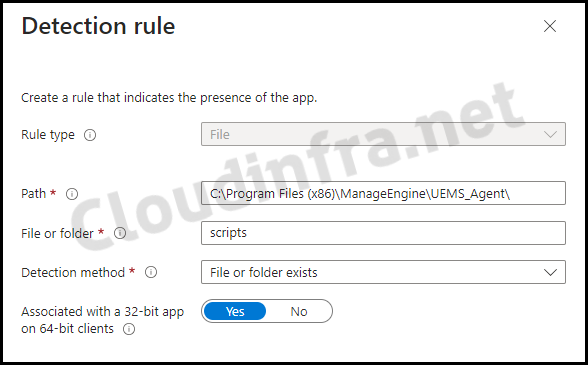
- Detection Rules: Select Manually configure detection rules and click on +Add to add a detection rule.
- Click on + Add, and select rule type File.
- Path: C:\Program Files (x86)\ManageEngine\UEMS_Agent\
- File or folder: scripts
- Associate with a 32-bit app on 64-bit clients: Yes
- Dependencies: Click Next.
- Supersedence: Click Next.
- Scope tags (optional): A scope tag in Intune is an RBAC label you add to resources (policies, apps, devices) to limit which admins can see and manage them. For more information, read: How to use Scope tags in Intune.
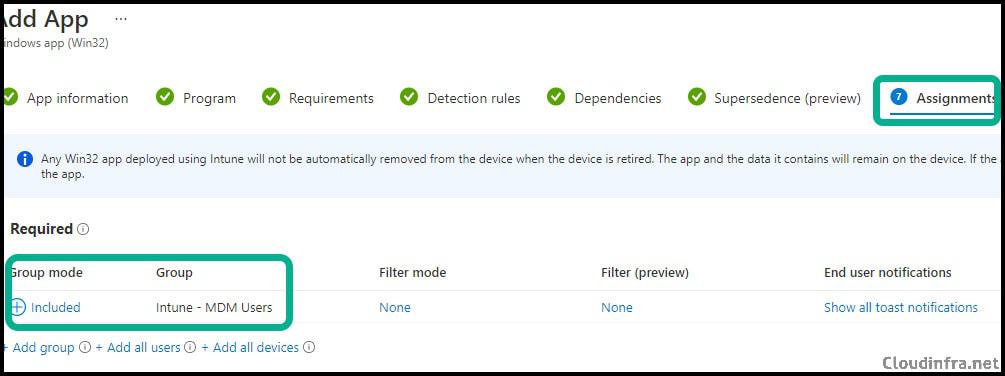
- Assignments: Assign the app to Entra security groups that contain the target users or devices. As a best practice, pilot with a small set first; once validated, roll it out more broadly. For guidance on assignment strategy, see Intune assignments: User groups vs. Device groups.
- Review + create: Review the deployment summary and click Create.
Step 3: Monitoring Endpoint Central Agent Deployment Progress
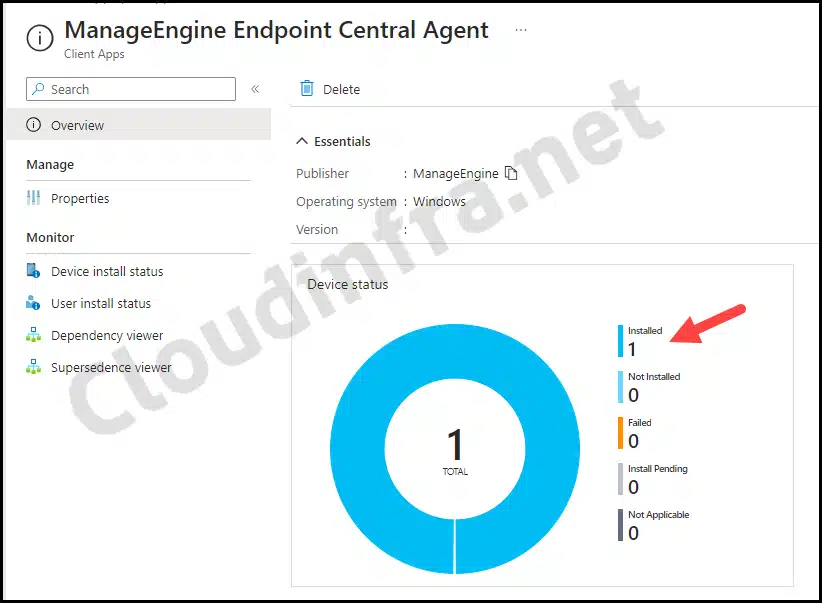
- Sign in to the Intune admin center > Apps > All Apps.
- Click on the Endpoint Central Agent Intune deployment and check the Overview page to monitor the deployment status. For more detailed information, click Device install status or User install status.
Sync Intune Policies
The device check-in process might not begin immediately. If you’re testing this policy on a test device, you can manually kickstart Intune sync from the device itself or remotely through the Intune admin center.
Alternatively, you can use PowerShell to force the Intune sync on Windows devices. Restarting the device is another way to trigger the Intune device check-in process.
End User Experience
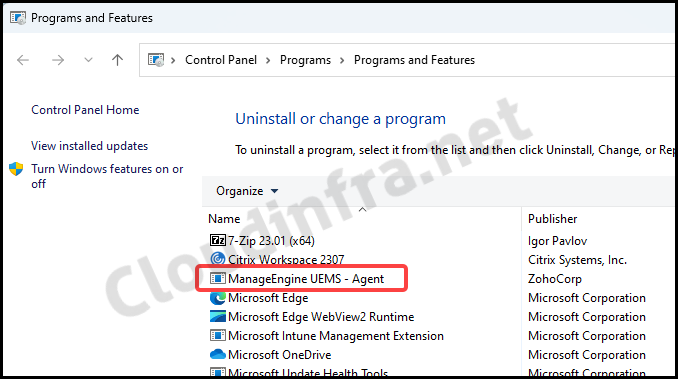
After Intune device check-in process completes, Endpoint Central agent will be installed on the target devices. To verify this, go to Programs and Features and check whether ManageEngine UEMS – Agent appears in the list of installed programs.
Uninstall Endpoint Central Agent using Intune
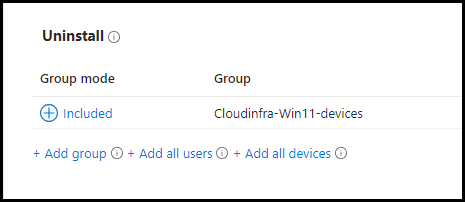
We have already packaged the Uninstall.ps1 script in the .intunewin file and specified the uninstall command in the Program tab when creating the Win32 app deployment in the Intune admin center. Therefore, to uninstall the app, simply add the user or device group to the Uninstall section of the deployment. Make sure that the same device or user is not assigned to both the Install group and the Uninstall group.
- Go to the Intune admin center > Apps > All apps.
- Search for the Intune app deployment for ManageEngine Endpoint Central Agent and open it.
- Click on Properties > Edit Assignments.
- Click + Add group under the Uninstall assignments section and add an Entra security group that contains the users or devices from which you want to uninstall the app.
Deploy Old version of ManageEngine Desktop Central agent using Intune
If you use an older version of the ManageEngine Desktop Central agent and want to deploy it on users’ devices using Intune. Then you can follow below steps.
Download ManageEngine Desktop central agent
Download Agent from Desktop Central > Agent > Computers > Download Agent. You can test the installation of this agent on one test PC manually by using below steps:
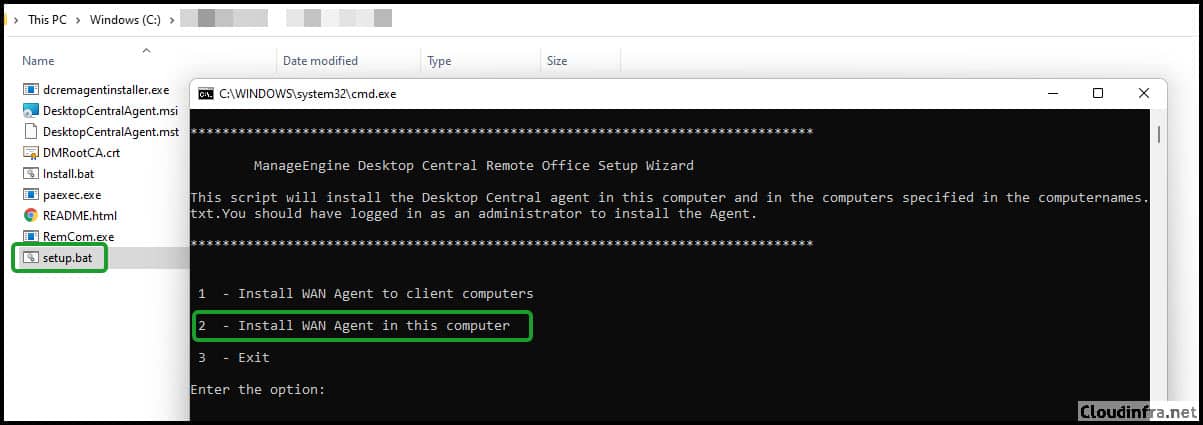
Extract the zip file, Double click on setup.bat Select Option 2 to install the WAN Agent on this computer (As shown in the screenshot below). Ignore the Install.bat file for now, as I created this file, which I will look into later when we create the Intune Package.
Deploy ManageEngine Desktop Central Agent using Intune
Please find below the steps to deploy ManageEngine desktop central agent using Intune:
- Download Agent from Desktop Central > Agent > Computers > Download Agent
- Select the respective office to download the agent setup.
- Extract the zip file.
Create a File Install.bat in the same folder where all other installation files are stored (as shown in the screenshot above).
Install.bat
msiexec /i DesktopCentralAgent.msi /qn REBOOT="REALLYSUPPRESS" MSIRESTARTMANAGERCONTROL="Disable" TRANSFORMS=DesktopCentralAgent.mst ENABLESILENT=yes
- Download Microsoft Win32 Content Prep Tool
- Create an empty folder for example C:\output or anywhere you like.
Use the process below to repackage the application/setup files into a .intunewin file. Launch the command prompt, change the current folder to where the Microsoft Win32 Content Prep Tool is downloaded, and run the command below.
Replace setup_folder with C:\DesktopCentral_Agent (this is where all your setup files are kept)
setup_file with Install.bat
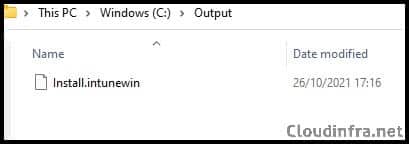
Output_folder with C:\output (this is the folder where .intunewin file will be generated)
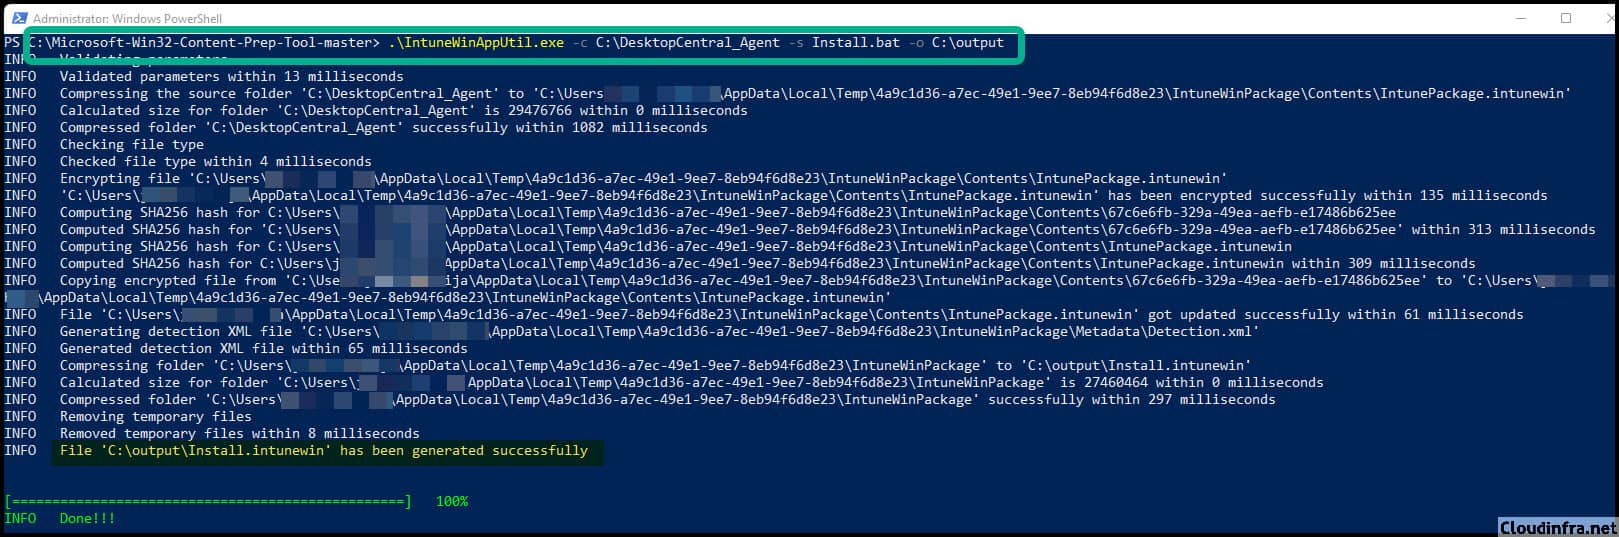
IntuneWinAppUtil.exe -c <setup_folder> -s <setup_file> -o <output_folder>
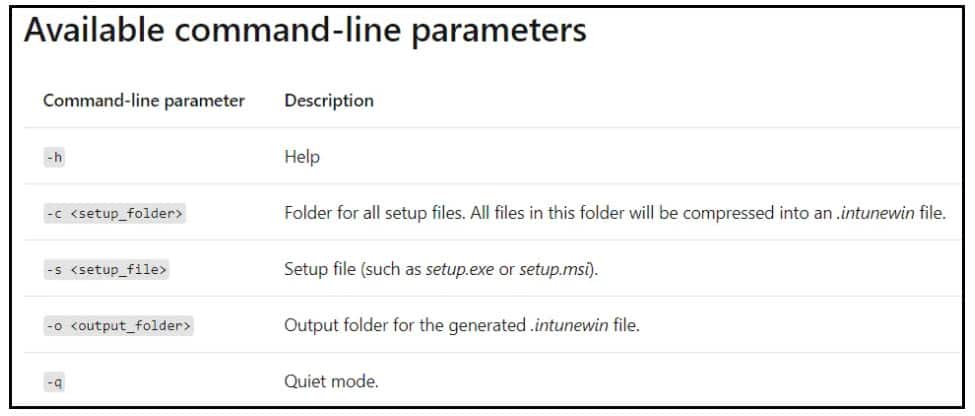
Example:
.\IntuneWinAppUtil.exe -c C:\DesktopCentral_Agent -s Install.bat -o C:\output
Output Folder:
Now once .intunewin file has been created, we can create a Win32 app deployment on Intune admin center using below steps:
- Login on Microsoft Intune admin center.
- Click on Apps -> All Apps -> + Add
- Select App Type to Windows app (Win32)
- Click on Select.
- Select app package file and browse to install .intunewin and click OK.
- Enter / Update the Name of the Application and Publisher Information and click Next.
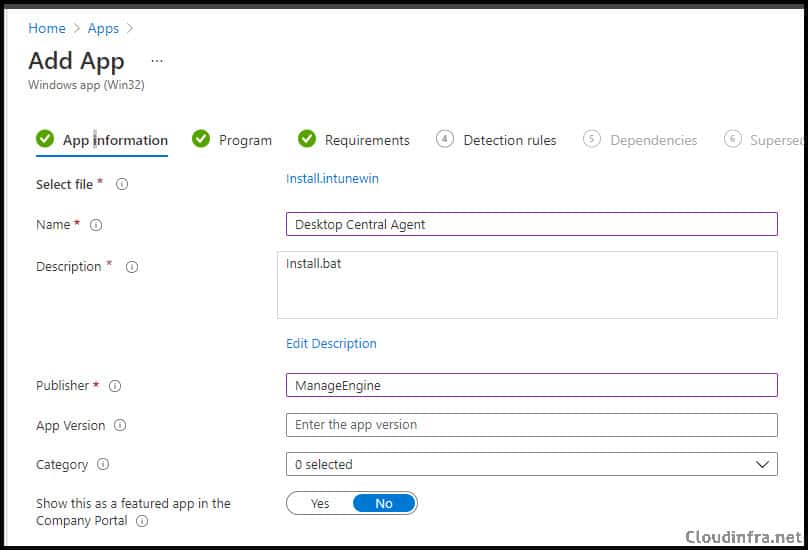
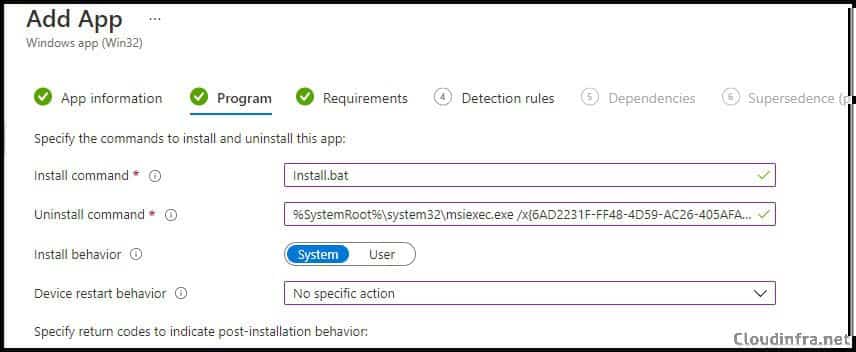
- Program:
- Install Command – Install.bat
- Uninstall Command – %SystemRoot%\system32\msiexec.exe /x{6AD2231F-FF48-4D59-AC26-405AFAE23DB7} MSIRESTARTMANAGERCONTROL=Disable REBOOT=”ReallySuppress” /qn
- Device restart behaviour – No Specific Action
- Click Next.
- Requirements:
- Operating System Architecture – 64-bit
- Minimum Operation System – Windows 10 1607
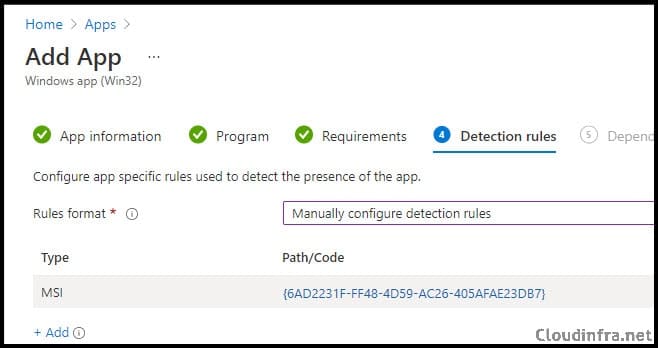
- Detection Rules:
- Rules format – Manually configure detection rules
- Click on + Add, and Select Rule type MSI.
- MSI Product Code – {6AD2231F-FF48-4D59-AC26-405AFAE23DB7}
- MSI product version check – No
- Assignments: Assign the app to Entra security group.
After you click Create, it will upload the files and then push the agent to the users in your Pilot Group.
- Monitor the Installation: You can check the installation status from Application -> Monitor Device Install Status or User Install Status.


There are other ways to Uninstall the Endpoint central agent. If you are a ManageEngine endpoint central server administrator, log in to the admin portal, go to Agent > Computers, Select the computer, and then select Uninstall Agent.
Conclusion
In this blog post, we have seen how to deploy ManageEngine Endpoint Central Agent using Intune. Previously, the agent name was Desktop Central agent, and the setup files were in a different format. I have provided the steps for both the old and new agent Installers. I hope this post will help you deploy the agent across all devices in your organization.
Great guide, however, I’m not clear on the uninstall.ps1 file. Does it get packaged with the LocalOffice_Agent.exe file when running the content prep tool?