In Part 1 of this series, we gained an understanding of the different certificate deployment methods with Intune. We created and configured two certificate templates for SCEP deployment and installed, configured, and tested the NDES server role.
While configuring the NDES server role, we used the application pool identity as the service account configuration. As a best practice, we want to configure NDES with a gMSA (Group Managed Service Account).
However, this is not possible using the NDES configuration wizard, as it requires a username and password for the service account. Since the gMSA password is automatically managed by the domain controller, we selected the application pool identity during the initial configuration.
Now that the NDES role is configured with the application pool identity, we can change the account in the NDES configuration to a gMSA. For detailed steps, refer to the blog post Configure NDES with gMSA for Intune to complete the configuration. Once finished, return to this post to proceed with the next steps.
NDES gMSA configuration steps:
- Add gMSA to IIS_IUSRS local group on NDES server.
- Provide Request Certificates Permission to gMSA on CA.
- Read and Enroll Permission to gMSA on SCEP Certificate Template.
- Configure gMSA in SCEP IIS Application Pool.
- Configure SPN in Active Directory for gMSA [Optional].
- Read Permission for gMSA on RA Certificates.
Contents
Step 4: Requesting NDES Server Certificate
To secure NDES/SCEP URL and ensure that it only uses HTTPS protocol, we will need to Install a certificate on NDES server using NDES-server certificate template.
- Press Win + R to open the Run dialog box.
- Type certlm.msc and press Enter to open Local Computer certificate store.
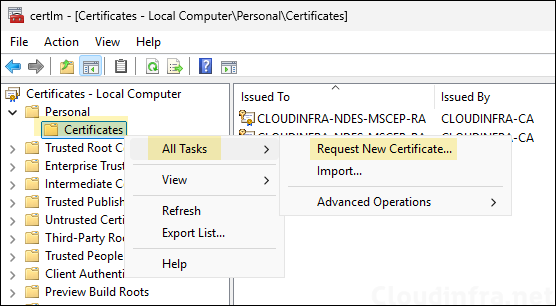
- Navigate to Personal > Certificates. Right click on it > All Tasks > Request New Certificate.
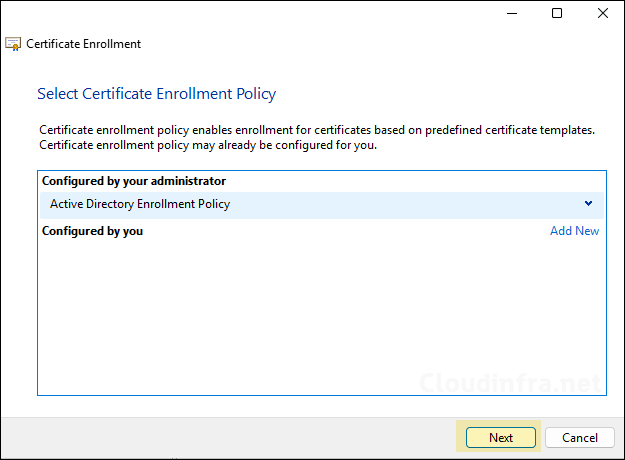
- Click Next.
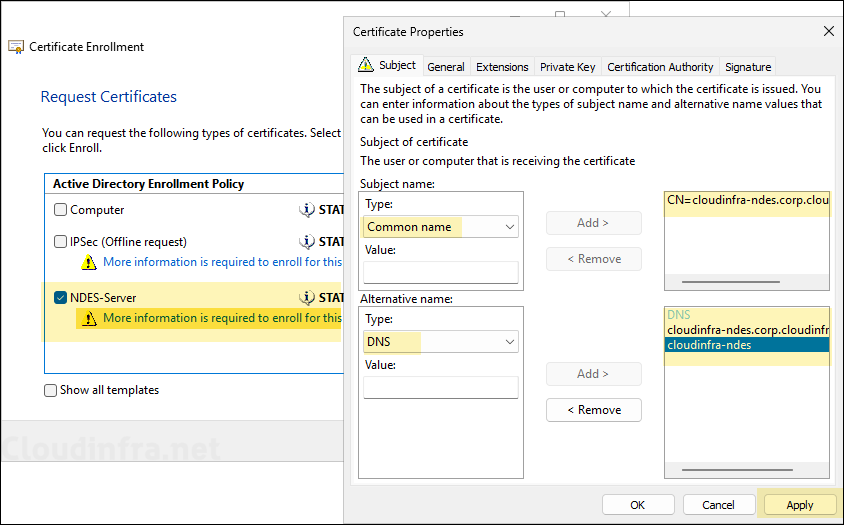
- Select NDES-Server certificate template and click on the link under it to provide more Information about the certificate.
- Common name: Provide the NDES server FQDN. For example, cloudinfra-ndes.corp.cloudinfra.net.
- Alternative name: Select DNS and provide NDES server name (e.g., cloudinfra-ndes) and FQDN once again (e.g., cloudinfra-ndes.corp.cloudinfra.net).
Keep other certificate properties settings as default and click on Apply and Ok to save. Proceed to the Next step.
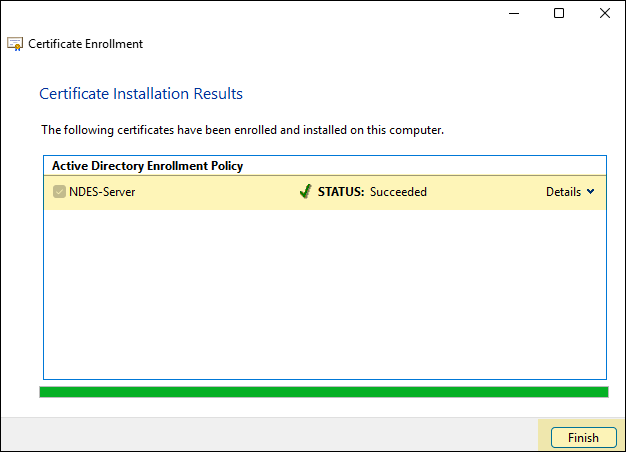
- NDES-Server certificate is issued successfully. Click Finish.
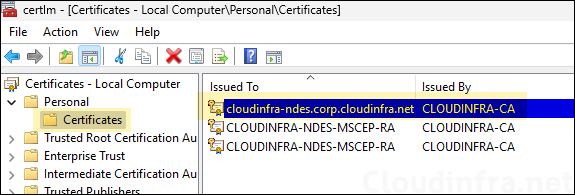
- Once the certificate is issued to the NDES server, you can find it under Personal > Certificates as shown below.
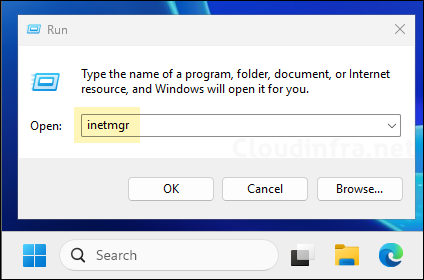
- Press Win + R keys to open the Run dialog box.
- Type inetmgr and press Enter to open the IIS Management console.
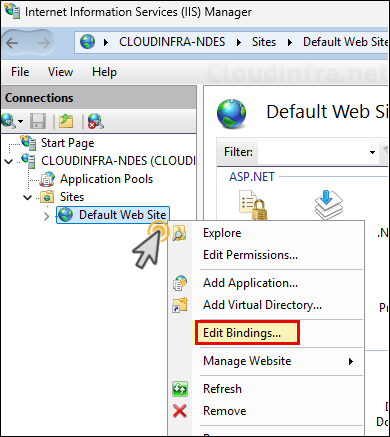
- Right-click on Default Web Site > Edit Bindings.
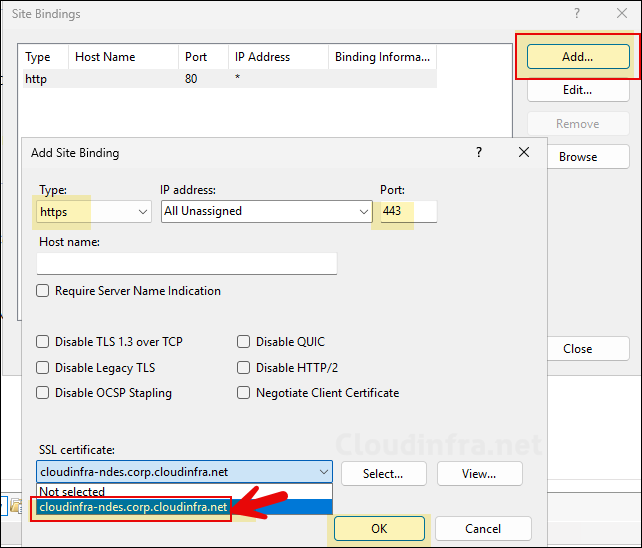
- Click on Add and select the NDES server certificate we installed in the previous step. Ensure the type and Port is selected as https and 443 respectively.
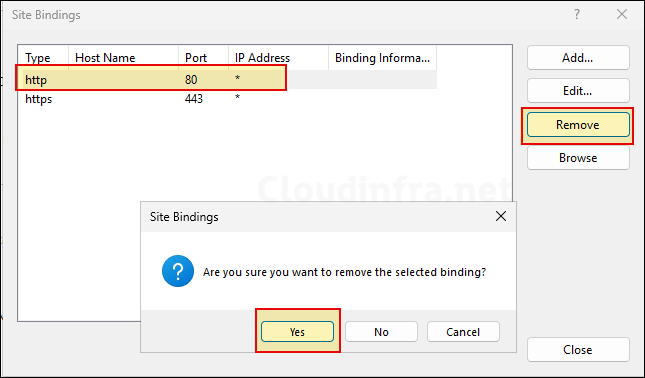
- Remove http port binding as it’s no longer required. This will ensure that HTTP version of the SCEP URL is not accessible.
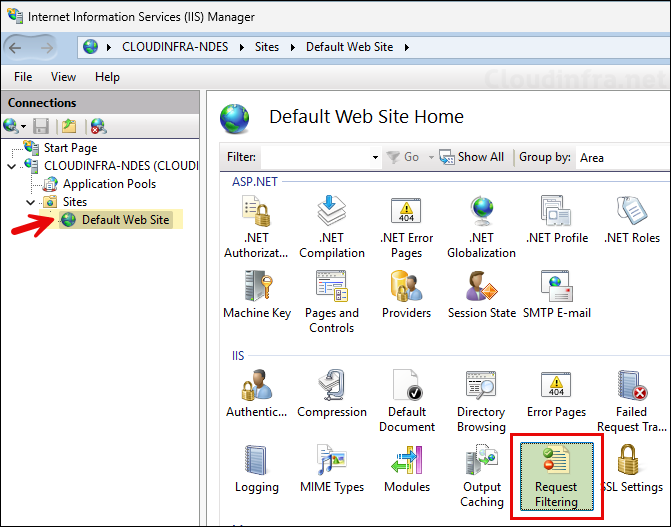
- Select Default Web Site > Request Filtering.
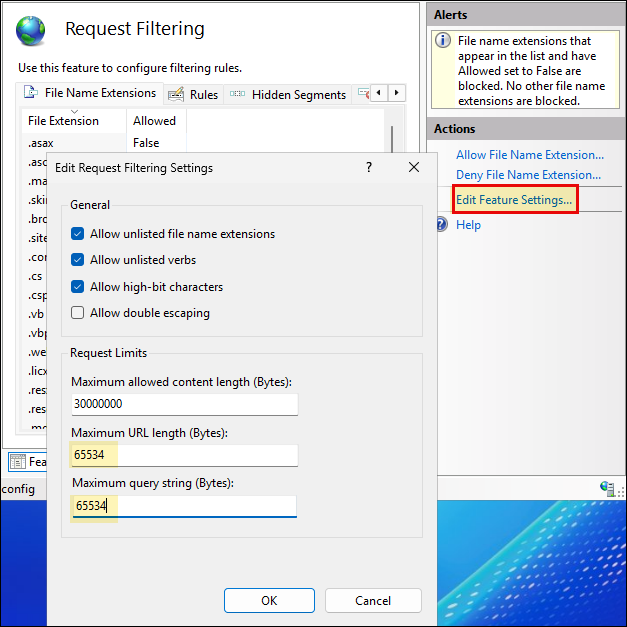
- Provide Maximum URL length (Bytes) value as 65534 and Maximum query string (Bytes) as 65534. This will ensure that the certificate requests coming from Entra app proxy which may have long URL is not blocked by IIS.
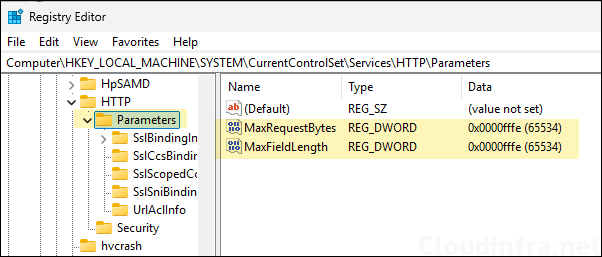
- Also create DWORD registry keys under HKEY_LOCAL_MACHINE\SYSTEM\CurrentControlSet\Services\HTTP\Parameters.
- Name: MaxFieldLength
- Value: 65534 (in decimal)
- —————————
- Name: MaxRequestBytes
- Value: 65534 (in decimal)
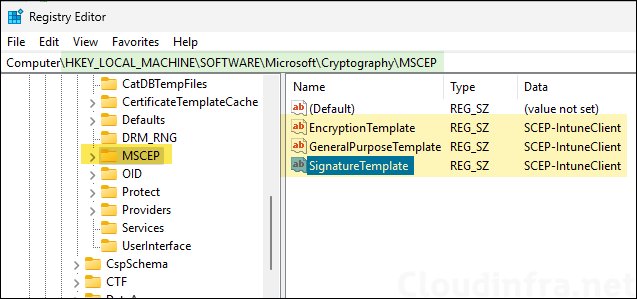
- Update the SCEP Certificate template name to SCEP-IntuneClient in HKEY_LOCAL_MACHINE\SYSTEM:\Software\Microsoft\Cryptography\MSCEP for all three certificate purpose/usage.
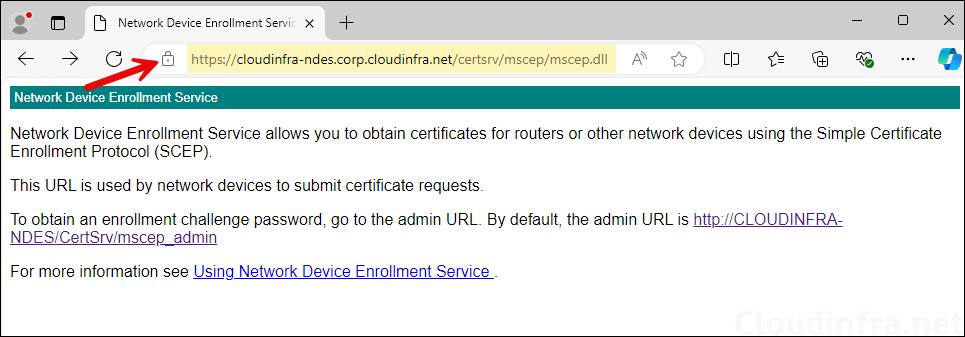
- Test the NDES/SCEP URL using https://<NDES server FQDN>/certsrv/mscep/mscep.dll/. For example: https://cloudinfra-ndes.corp.cloudinfra.net/certsrv/mscep/mscep.dll/.
Step 5: Install Intune Certificate Connector
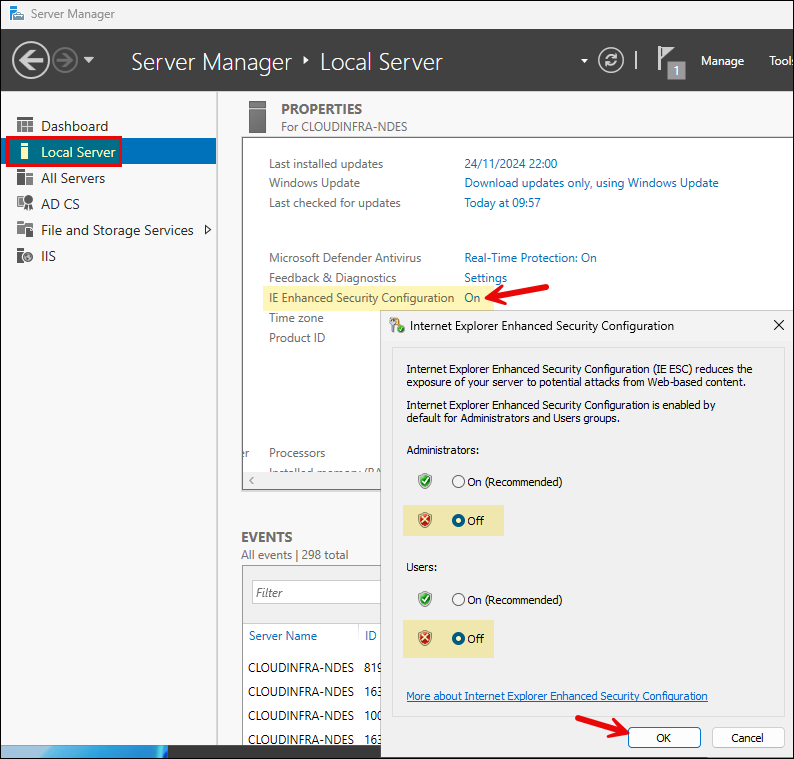
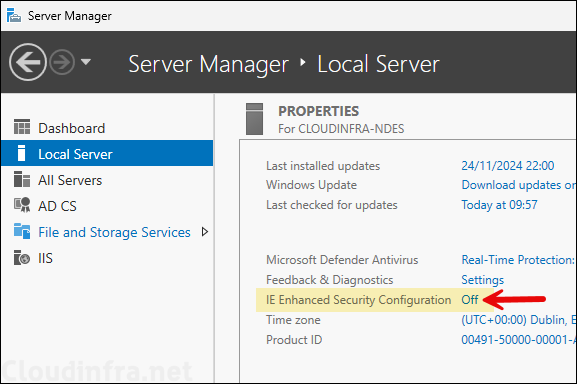
In this step, we will download Intune certificate connector on NDES server and Install it. Before we proceed, ensure that IE Enhanced Security Configuration is Off.
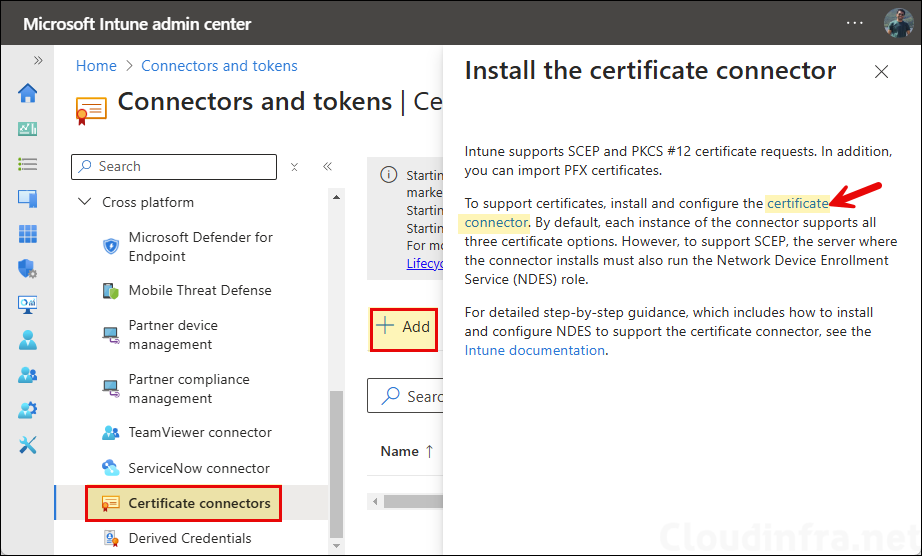
- Sign in to the Intune admin center > Tenant administration > Connectors and tokens > Certificate connectors > Click on Add and then click on certificate connector to download Intune certificate connector software.
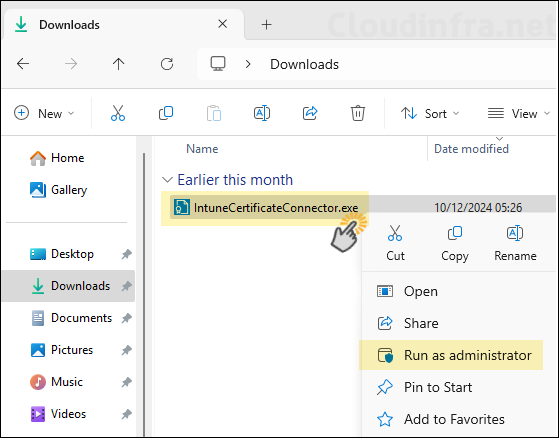
- Copy the IntuneCertificateConnector.exe file on to the NDES server. Right-click on the file and click on Run as administrator.
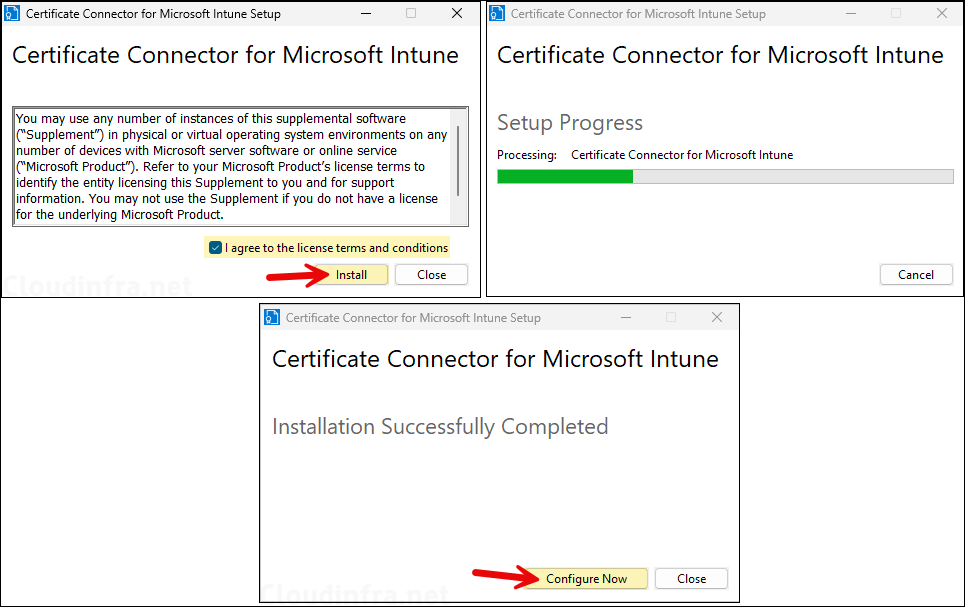
- Click on Install and then Configure Now.
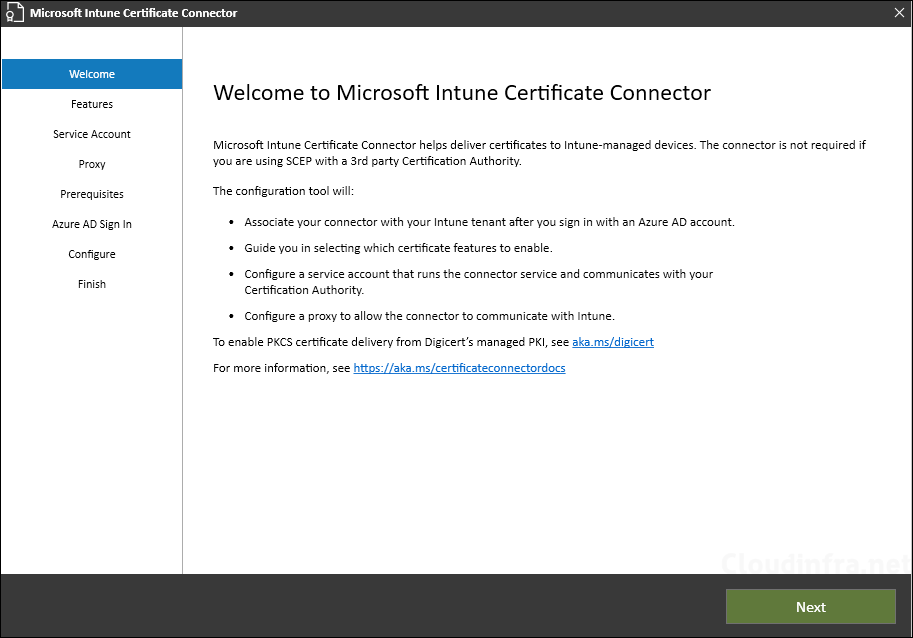
- Click Next on Welcome screen.
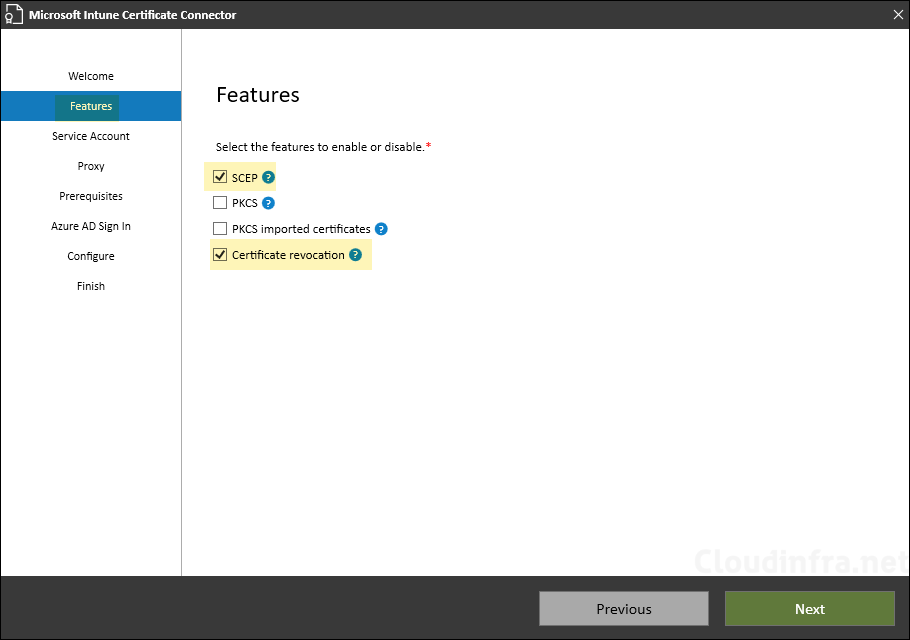
- Select SCEP and Certificate revocation features.
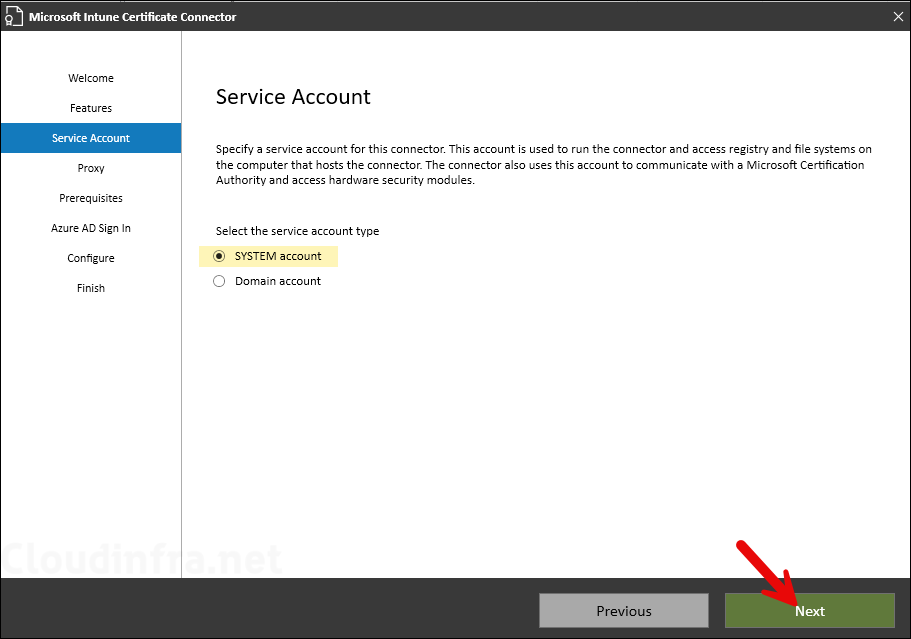
- Select SYSTEM account and click Next. This will configure Intune certificate connector services to run under Local System account.
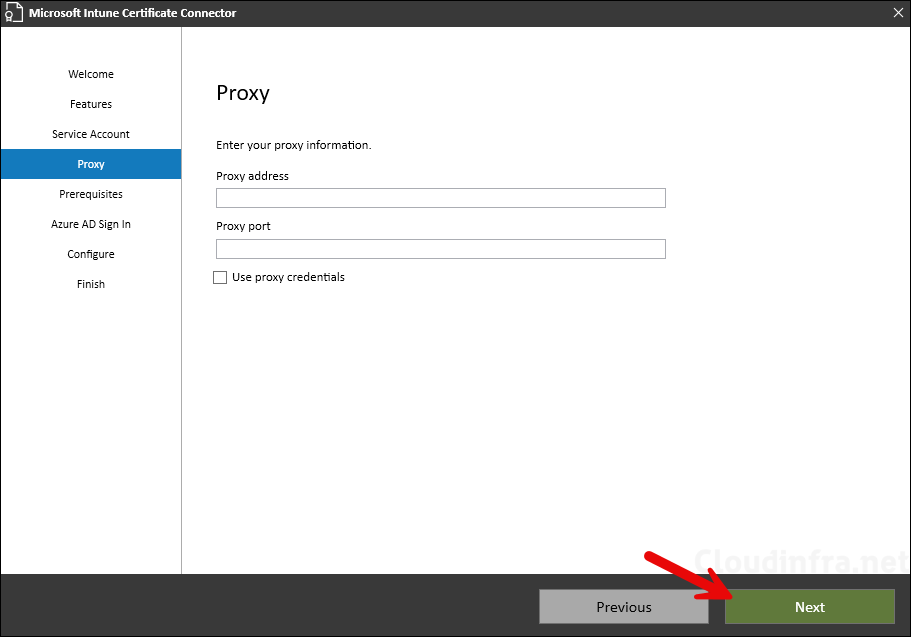
- If the Intune Certificate Connector server is behind a proxy then you can provide the proxy web address and port number and click Next. As I am not using any proxy server for the internet traffic, I will leave it blank and click on Next.
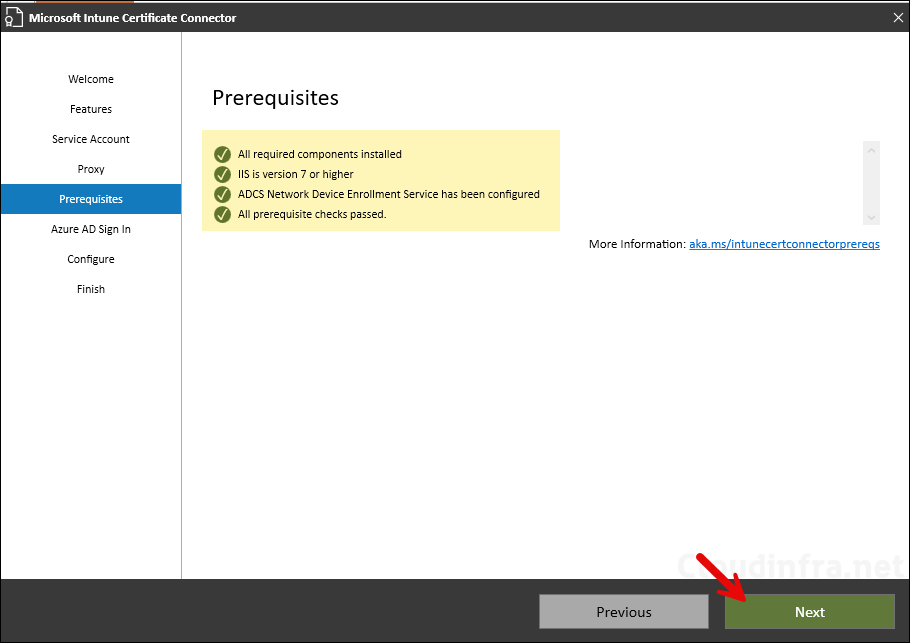
- Intune Certificate Connector software will check if the server meets all Prerequisites. Once it’s verified, you will get a message All prerequisite checks passed. Click Next. Intune certificate connector prerequisites.
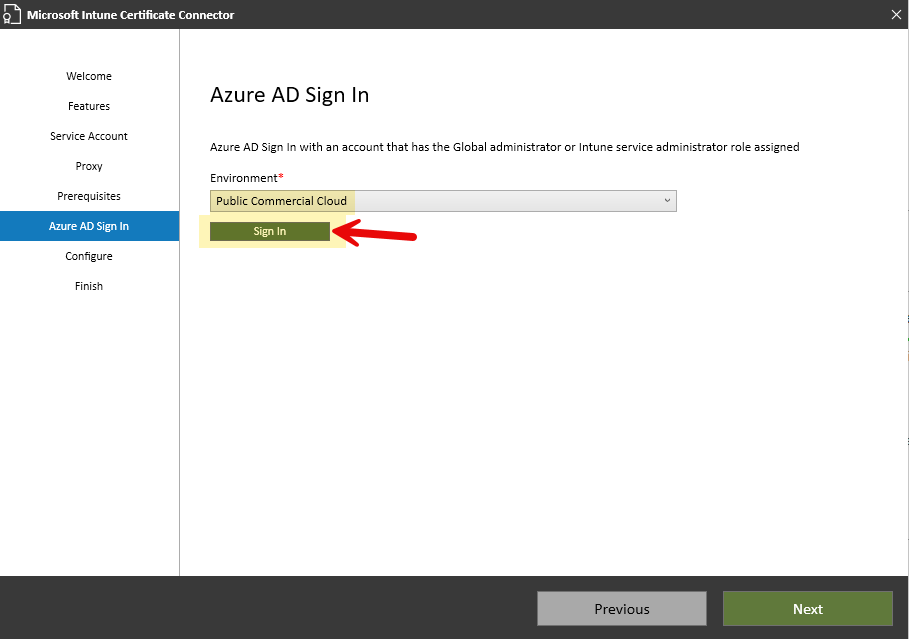
- Select Environment as Public Commercial cloud and click on Sign in using an account with Intune administrator role.
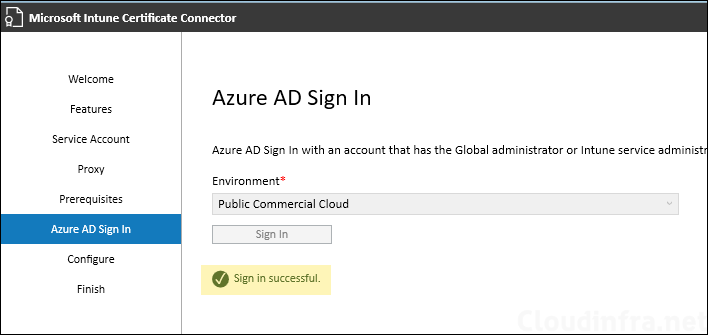
- Sign in successful.
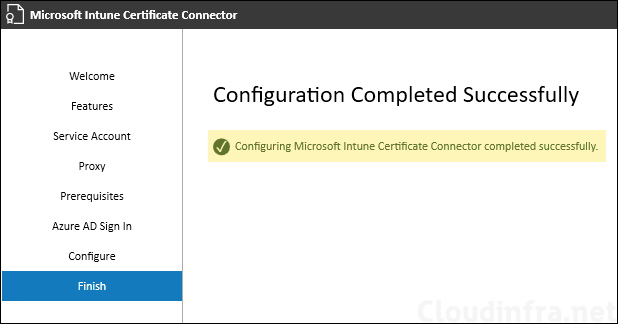
- Configuring Microsoft Intune Certificate Connector completed successfully.
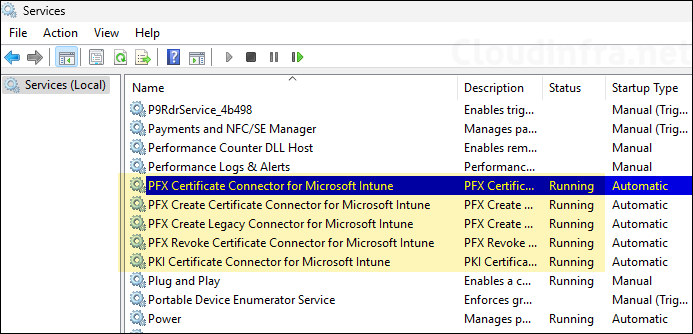
- Intune certificate connector Installs a number of services. Below screenshot shows all the services which starts with PFX are installed by the Intune certificate connector. Ensure that the status of these services is Running.
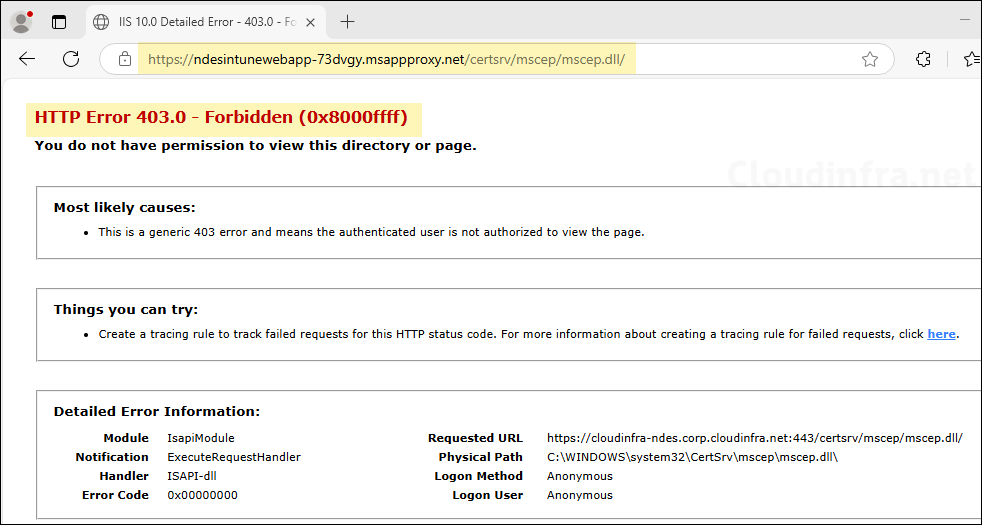
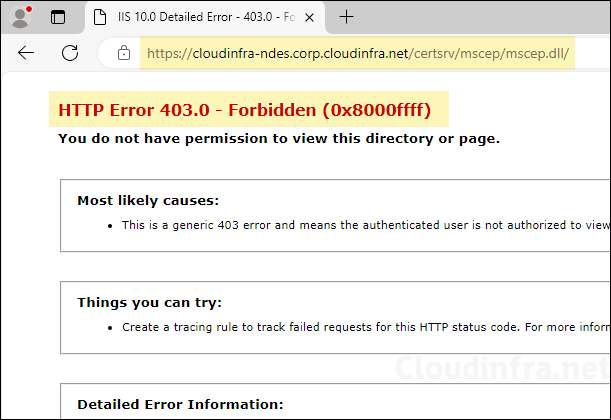
- After you Install Intune certificate connector on the NDES server, try to access the SCEP URL again. This time it will show HTTP Error 403.0 – Forbidden (0x8000ffff). This error page means that the setup is working fine. Intune is successfully protecting the SCEP URL.
- SCEP URL will only work when a certificate is requested by the Intune managed MDM device, and therefore It’s not directly accessible.
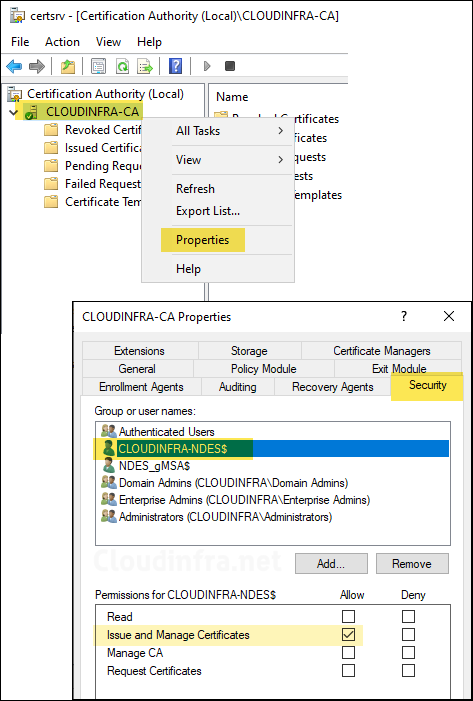
- As we want Intune certificate connector to automatically revoke certificates for the MDM devices which are no longer managed by Intune or decommissioned/wiped/reset. Provide NDES computer account Issue and Manage certificates permissions on the Certificate Authority.
- This is because we have used SYSTEM as service account when configuring Intune certificate connector. If you have used a standard service account for Intune certificate connector, then add that account instead and provide Issue and Manage certificates permission.
- Restart Intune Connector server.
Step 6: Entra Application Proxy Setup
Entra App proxy is required for securely publishing NDES/SCEP URL to the Internet so that devices can request for certificates. For this, download and Install Entra private network connector agent on the NDES server.
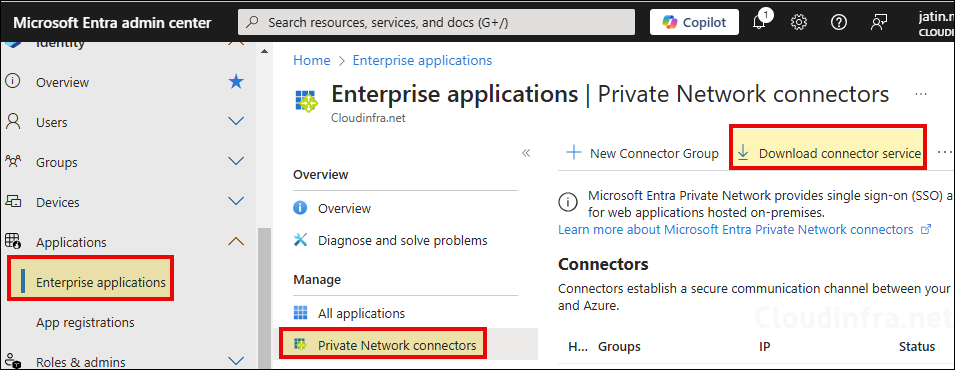
- Sign in to the Entra admin center > Identity > Applications > Enterprise applications > Private Network connectors.
- Click on Download connector service.
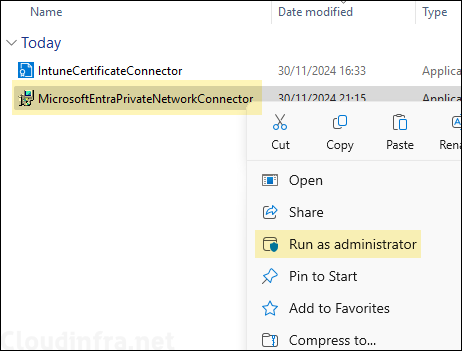
- Right-click on MicrosoftEntraPrivateNetworkConnector setup and Run as administrator.
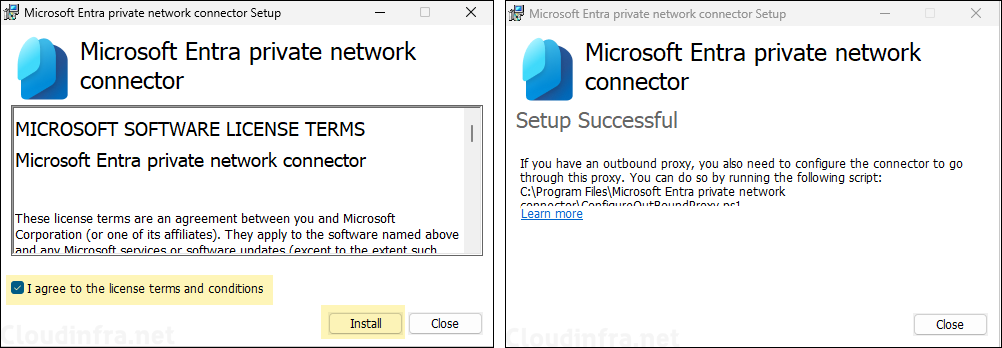
- Accept the terms and conditions and click on Install. During the Installation, it will request for administrator credentials. Provide the credentials of the admin account. Once the installation is completed, you will see a Setup Successful screen.
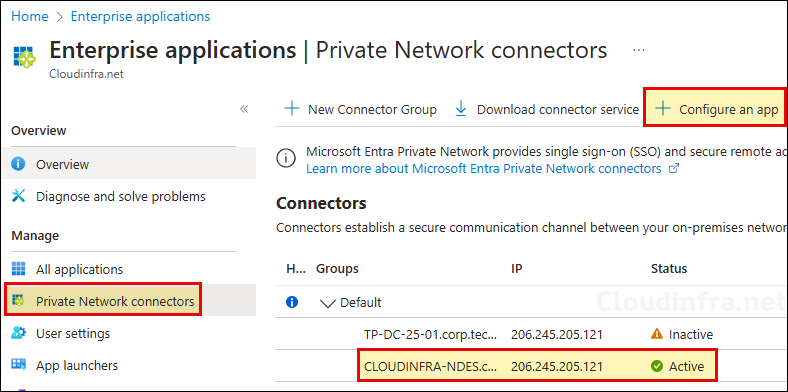
- Under Private Network connectors, you will find the connector and its status. Click on Configure an app.
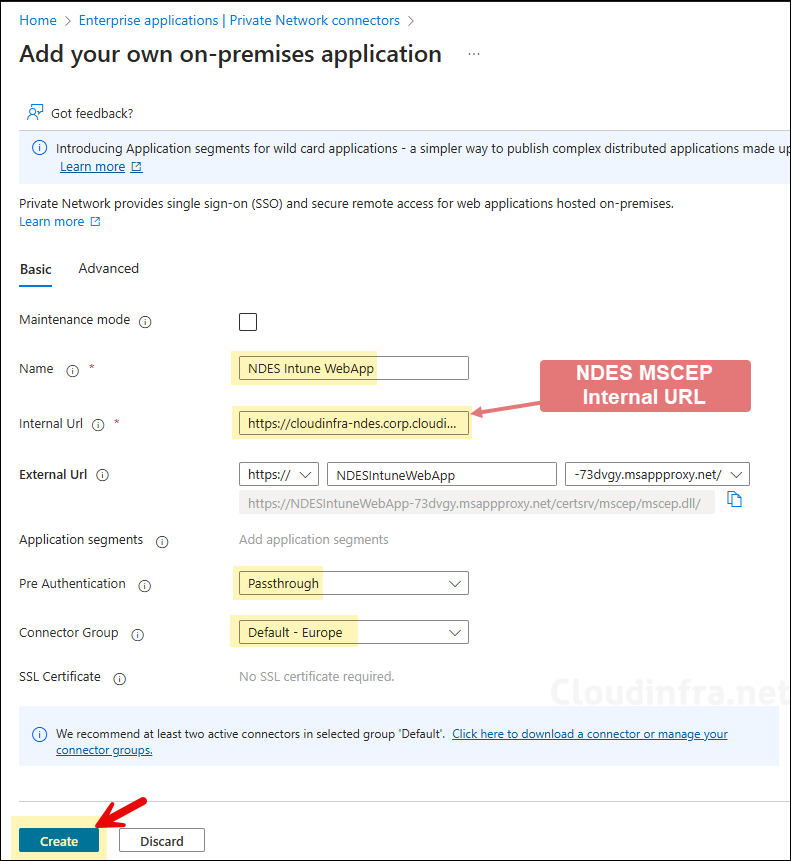
- Name: Provide a name of the app.
- Internal URL: Provide Internal NDES/SCEP URL (e.g., https://cloudinfra-ndes.corp.cloudinfra.net/certsrv/mscep/mscep.dll/).
- External URL: Automatically generated. You can also use the drop-down to customize the External URL and use your domain name. For this, a CNAME would be required in your External DNS. To keep it simple, I will leave it as default.
- Pre Authentication: Must be selected as Passthrough.
- Connector group: Entra private connector by default added the server in the default group. If you have created any connector group and moved the server in that group, provide that connector group otherwise leave default.
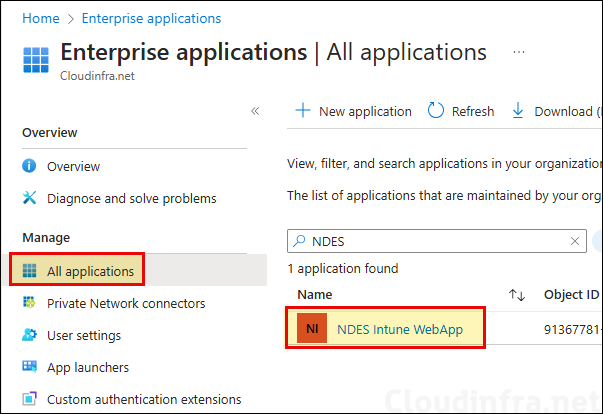
- Entra App called NDES Intune WebApp has been created successfully.
- Access the External URL of the app from Internet and you should see HTTP Error 403.0 – Forbidden (0x8000ffff) which confirms that the URL is working fine. If you get any other message on the page than this, there could be a configuration issue.
