In this blog post, I will show you how to Schedule PowerShell scripts with Intune. For this, we will use Win32 app deployment method, which utilizes a PowerShell script to copy the script and create a scheduled task on target Intune-managed Windows devices.
The scheduled task will have an action configuration to execute the PowerShell script copied to the device. You can modify the scheduled task configuration (e.g., its name, trigger time, trigger account, etc.) in the script as per your requirements.
I have also written another detailed guide which provides the steps to create a more generic scheduled task using Intune: Create a Scheduled Task Using Intune.
Note
Contents
Download PowerShell Scripts
We will use four PowerShell scripts for the deployment. Download these scripts from my GitHub repository. After downloading them, you need to make few changes and provide information about the scheduled task you want to create. Let’s explore the details of each script and the modifications required.
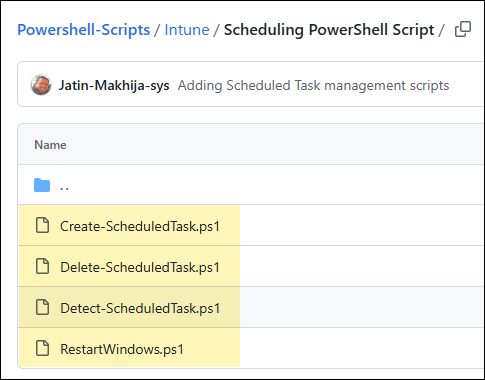
Create-ScheduledTask.ps1
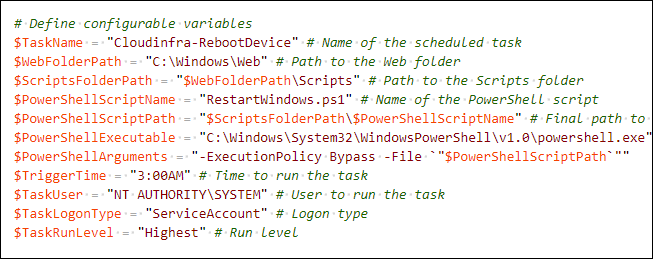
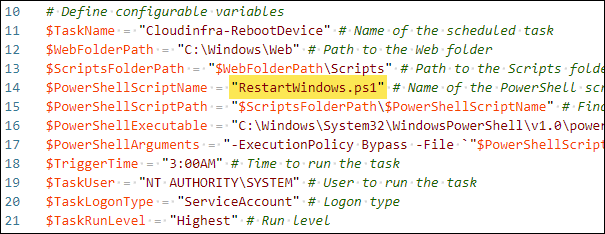
This is the main script file that will create a scheduled task on the target devices. Update below variables in this script as per your requirements.
- $TaskName: Provide the name of the scheduled task.
- $WebFolderPath: This is the path where we will create a folder called Scripts and copy the PowerShell script given in the variable $PowerShellScriptName (e.g., RestartWindows.ps1).
- $TriggerTime: Specifies a date and time to trigger the task.
- $TaskUser: Provide the user account which will be used to run the task.
- $TaskLogonType: Specifies the security logon method that Task Scheduler uses to run the tasks that are associated with the principal. The acceptable values for this parameter are:
- None
- Password
- S4U
- Interactive
- Group
- ServiceAccount
- InteractiveOrPassword
- $TaskRunLevel: Specifies the level of user rights that Task Scheduler uses to run the tasks that are associated with the principal. The acceptable values for this parameter are: Limited and Highest.
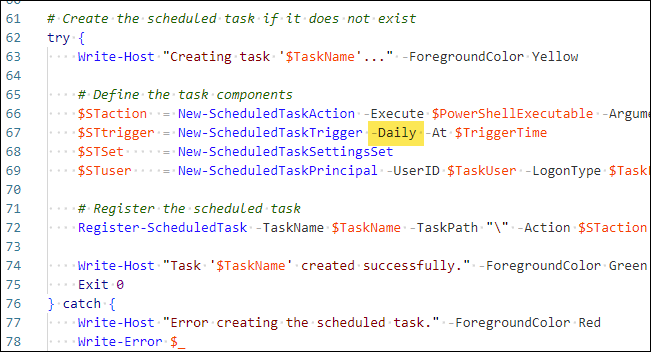
You can also change the value of New-ScheduledTaskTrigger cmdlet from Daily to Weekly or Once. Refer to the link: New-ScheduledTaskTrigger for more information.
Delete-ScheduledTask.ps1
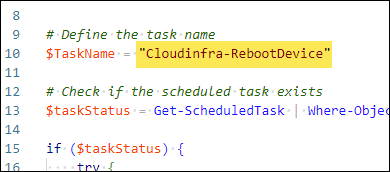
You may want to delete the deployed scheduled task, if it is no longer required. When creating a Win32 app deployment in Intune, use Delete-ScheduledTask.ps1 as the Uninstall script. Open the PowerShell script and update the $TaskName variable to specify the name of the scheduled task you want to delete. No other changes are required in the script.
Detect-ScheduledTask.ps1
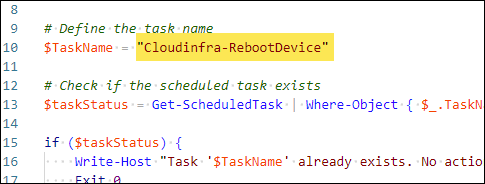
We will use this script to detect the existence of a scheduled task specified in the $TaskName variable. Update this variable to include the name of the scheduled task deployed via Intune.
RestartWindows.ps1
This is the actual script file you want to run using a scheduled task. You can create any PowerShell script and place it in the same folder as the other script files. Update the $PowerShellScriptName variable in the main script, Create-ScheduledTask.ps1.
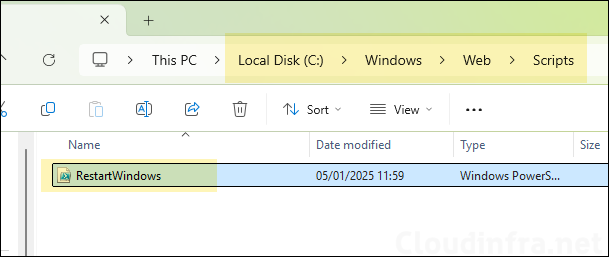
PowerShell script location must be accessible for the scheduled task, so that it can invoke it as per its defined schedule. Therefore, the Create-ScheduledTask.ps1 script will copy the RestartWindows.ps1 script to the C:\Windows\Web\Scripts folder and use this location in the scheduled task. Please note that the Scripts folder will be created if it does not already exist.
You can modify the $WebFolderPath variable if you want to copy the script to a different location.
Create an IntuneWin File
Win32 app deployment method requires the source files must be repackaged into .intunewin file format. Below are the steps to create .intunewin file:
I also have a dedicated blog post on how to create intunewin file. If there are any issues, please refer to this detailed guide.
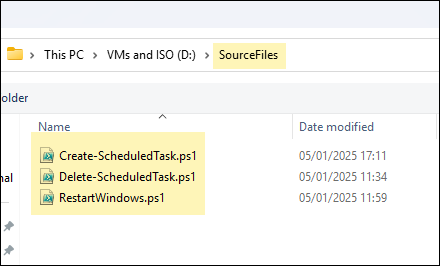
- Create an empty folder (e.g., SourceFiles) and copy all script files in this folder.
- Download Microsoft Win32 Content Prep tool and extract it into a folder. I have extracted it to D:\IntuneContentPrepTool folder.
- Run IntunewinAppUtil.exe and provide Source Folder, Setup File, Output Folder, and Catalog Folder Information.
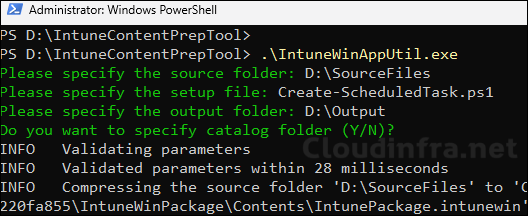
- Intunewin file has been successfully created in the Output folder.
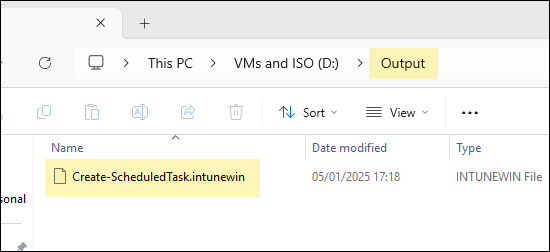
Create Win32 App Deployment
We will use .intunewin file to create a Win32 app deployment on Intune admin center. I will focus on the main steps to create this app deployment, as I have already created a dedicated blog post which provides more details on the deployment of Win32 apps via Intune.
- Sign in to the Intune admin center > Apps > All Apps.
- Click on + Add and Select Windows app (Win32) from the app type.
- App Information: Click on Select app package file and browse the Intunewin file. Provide Information in the mandatory fields below. The rest of the fields are optional but useful for application documentation and troubleshooting issues.
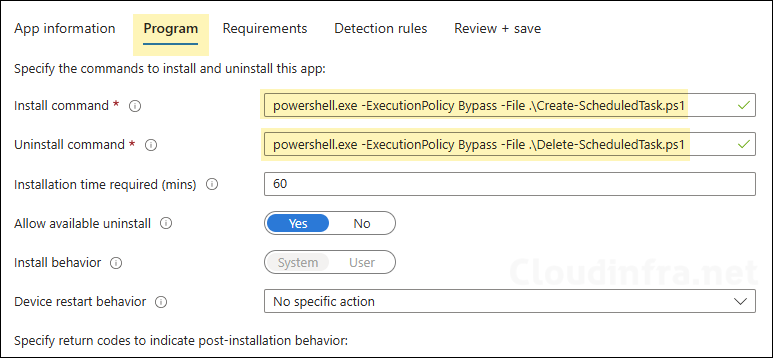
- Program:
- Install command: powershell.exe -ExecutionPolicy Bypass -File .\Create-ScheduledTask.ps1
- Uninstall command: powershell.exe -ExecutionPolicy Bypass -File .\Delete-ScheduledTask.ps1
- Install behavior: System
- Device restart behavior: No specific Action
- Requirements: You can specify the requirements that devices must meet to deploy the app. If your devices mix 32-bit and 64-bit types, check the boxes for 32-bit and 64-bit in the operating system architecture drop-down. Else, go with 64-bit.
- Operating System Architecture: 64-bit
- Minimum operating system: Select the minimum OS requirement for this deployment.
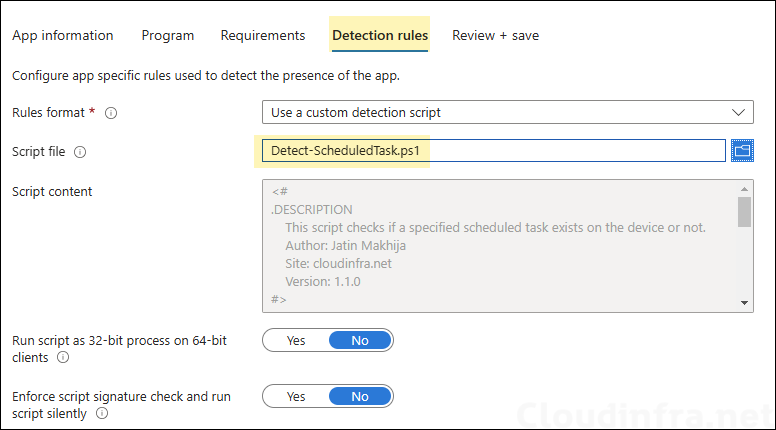
- Detection Rules: Select Use a custom detection script and browse to the detection script file Detect-ScheduledTask.ps1. Run script as 32-bit process on 64-bit clients: No. Enforce script signature check and run script silently: No.
- Scope tags (optional): A scope tag in Intune is an RBAC label you add to resources (policies, apps, devices) to limit which admins can see and manage them. For more Information, read: How to use Scope tags in Intune.
- Assignments: Assign the app to Entra security groups that contain the target users or devices. As a best practice, pilot with a small set first; once validated, roll it out more broadly. For guidance on assignment strategy, see Intune assignments: User groups vs. Device groups.
- Review + create: Review the deployment summary and click Create.
Monitoring Scheduled Task Deployment Progress
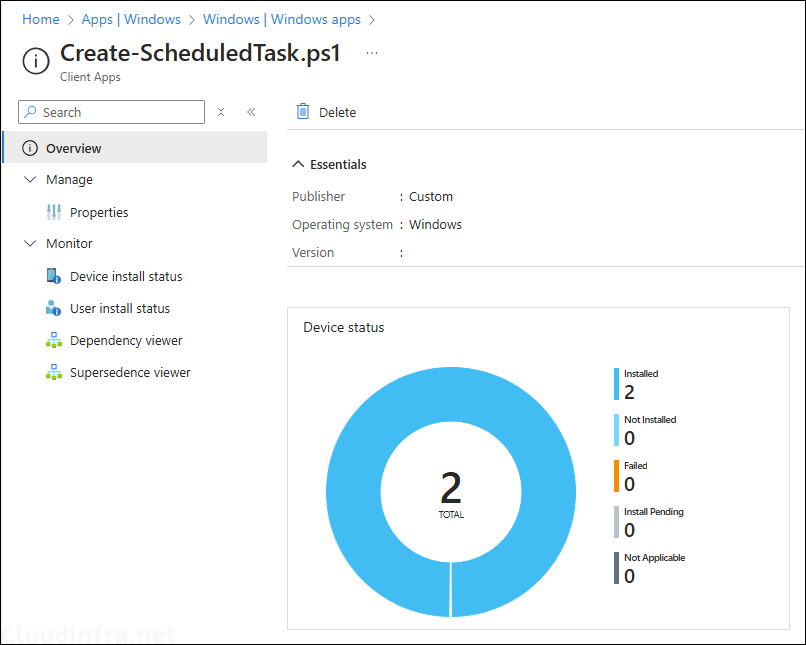
From the Intune admin center > Apps > All apps. Click on the deployment and check the Overview page to show the deployment status.
Sync Intune Policies
The device check-in process might not begin immediately. If you’re testing this policy on a test device, you can manually kickstart Intune sync from the device itself or remotely through the Intune admin center.
Alternatively, you can use PowerShell to force the Intune sync on Windows devices. Restarting the device is another way to trigger the Intune device check-in process.
End User Experience
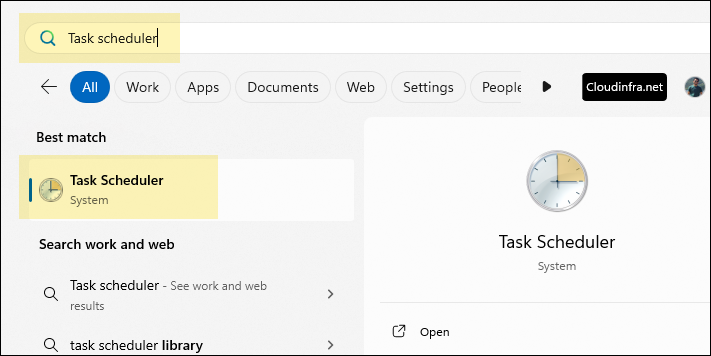
After the deployment is completed successfully, you can open Task scheduler on the target Windows devices and check if the scheduled task has been created.
- Click on Start > search for Task scheduler.
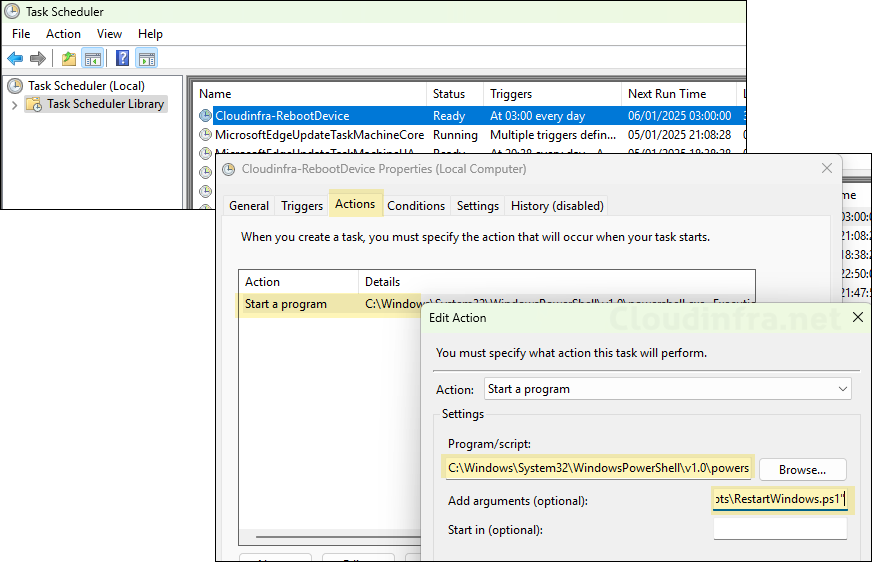
- After Task Scheduler opens, check the Task Scheduler Library to find the task name you created using Create-ScheduledTask.ps1. Open the task and verify that all settings are configured as per the script. Go to the Actions tab and double-click on the configured action to confirm the script name and location.
- Create-ScheduledTask.ps1 also copies the PowerShell script RestartWindows.ps1 to the C:\Windows\Web\Scripts location. Check and confirm if the script exists. If it does not exist, the scheduled task will fail as it’s referring to this location.
