In this blog post, I will show you the steps to setup Integration of defender for cloud apps with Entra ID. To set up Defender for Cloud Apps connection with Entra ID, we’ll create an Entra Conditional Access policy that re-directs app sessions to Microsoft Defender for Cloud Apps. Let’s walk through the process of creating this policy.
Contents
Step 1: Create a Conditional Access Policy
As an Example: We will create a Conditional Access policy that will block downloads from Office 365 applications on non-compliant devices. This policy will utilize the Defender for Cloud Apps Conditional Access App Control feature to block downloads on such devices.
Once you create this conditional access policy, all Microsoft 365 traffic will be routed through the Defender for Cloud Apps reverse proxy for application monitoring and block downloads.
- Login to Entra admin center (https://entra.microsoft.com)
- Search for Entra ID Conditional Access to Access CA Policies page.
- Click on + New Policy to create a CA Policy and configure the settings as per the below information:
| Name | Prevent downloads from unmanaged devices | |
| Users and Groups | Include: All users | Exclude: Your breakglass users |
| Cloud apps or actions | Select apps: Office365 | Exclude: None |
| Conditions | Client apps: Browser | |
| Device State | Include: All device state | Exclude: Devices Marked as Compliant |
| Session | Select Use Conditional Access App Control Block downloads |
In the Session control settings, you have three options: Block downloads, Monitor only, or use a custom policy. We selected Block downloads.
Step 2: Sign in to the Microsoft 365 Apps
As users continue to use Microsoft 365 apps, the Microsoft 365 App connection in Defender for Cloud Apps will automatically refresh to update the connection status, appearing under Available controls as part of Entra Conditional Access.
After creating a Conditional Access policy, if you don’t see M365 App connections created under Defender for Cloud Apps. This could be because of the requirement of at least one user who must initiate a connection by signing in to any of Microsoft 365 Apps or Office 365 apps, which will trigger the connection with Defender for cloud apps.
Note
After waiting for a couple of hours, you will see App connections created, as shown in the screenshot below. Microsoft 365 admin center – General is listed under the App connection. This connection is automatically established once at least one user signs in to the app, and their traffic is routed through Defender for Cloud Apps.

Step 3: Sync Microsoft Teams App with Defender for Cloud Apps
To begin monitoring Microsoft Teams through Defender for Cloud Apps and manage it using the Conditional Access Policy, you must Sign in to the Microsoft Teams app at least once via a web browser. Once you do that, the connection will be proxied according to our CA policy, and the Microsoft Teams connection will be established and visible under Apps on the Defender for Cloud Apps portal.
- Sign in to Microsoft Teams using any web browser.
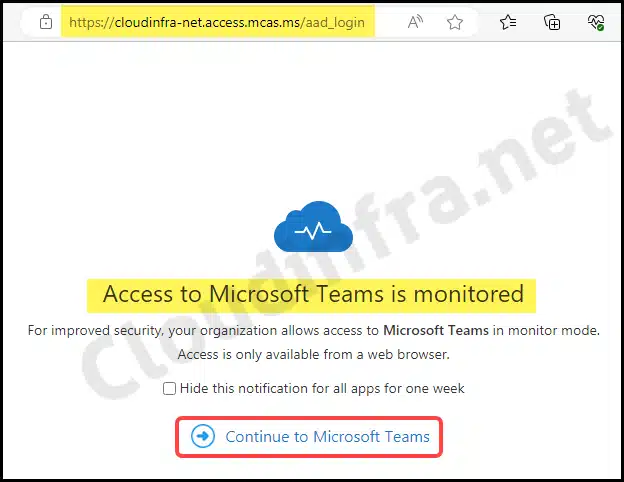
- Once you log in, you’ll notice that the URL in the address bar indicates that the Microsoft Teams application is being proxied via MDCA (Microsoft Defender for Cloud Apps). You’ll then be presented with the following screen. You can click on Continue to Microsoft Teams.
- Additionally, you can click Hide this notification for all apps for one week to prevent you from receiving this notification whenever you attempt to access any Office 365/Microsoft 365 application.

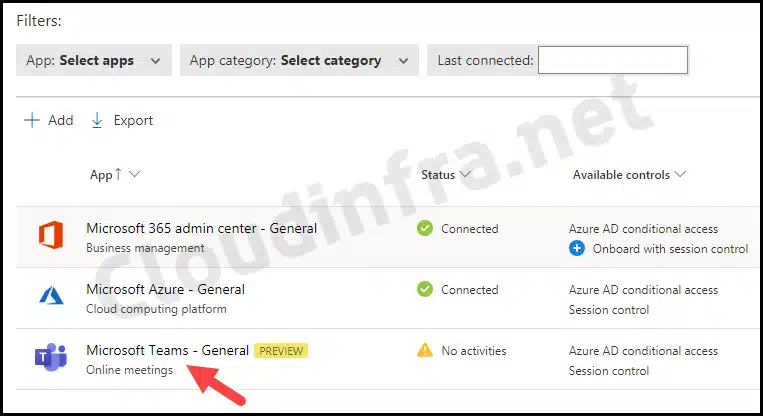
- After a few minutes, the app will be synchronized with the Cloud App Security portal, as shown in the screenshot below.
- You can sync other apps by signing in to each one individually or waiting for users to access the applications. In that case, Defender for Cloud apps will collect the data for that app, which will also appear under the Conditional Access App Control apps tab.
- The screenshot below shows that the Microsoft Teams – General [PREVIEW] app is now under the Conditional Access App Control apps.

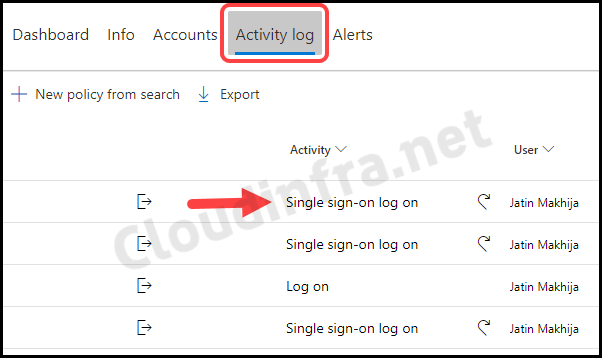
- When you click on the Microsoft Teams – General connection on Defender for cloud apps portal, you can access the Activity log tab to gather more information about user sign-ins, including successes and failures.
- This log provides details on IP information, location, device used, and the date and time of each login. You can also filter the results by users, IP address, location, or specific activities.
- Now that Microsoft Teams app data is synchronized with Defender for Cloud Apps, you can create session policies to inspect and monitor the application actively in real-time.
- You can restrict certain user actions while using Microsoft Teams, such as copying, pasting, or printing information, and sending or receiving sensitive data via chat, such as passwords, bank, credit card information, or social security numbers.
- Click on each event to view more details, such as its Type, Source, App, and Device type.

End User Experience
We’ve previously set up a Conditional Access Policy to prevent downloads from using Office 365 Apps from non-compliant devices. Let’s observe this policy: Prevent downloads from unmanaged devices in action.
- Launch the Microsoft Teams App.
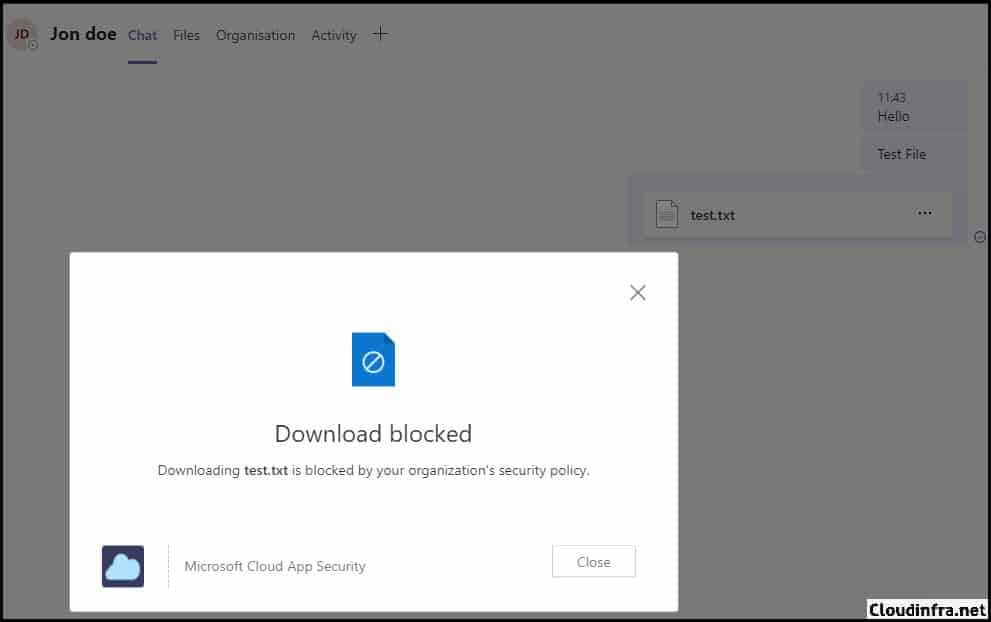
- Try to download a file uploaded to the Microsoft Teams chat.
- You will receive an error message: Download blocked. Downloading <filename> is blocked by your organization’s security policy.

Conclusion
In this blog post, we’ve covered the integration of Entra ID with Defender for Cloud Apps, primarily using the Microsoft 365 Defender Portal for configuration. It’s important to remember to create a Conditional Access Policy to synchronize the apps with Defender for Cloud Apps, enabling the monitoring of traffic and data analysis. We’ve also demonstrated the error message that an end user would encounter when downloading a file from an non-compliant device.
