In this blog post, I will show you 3 ways to block USB drives using Intune. There is always a security risk when USB storage drive access is allowed on corporate devices. Users can download sensitive data on external drives, which, if misused, could affect the organization’s reputation.
Blocking removable storage devices on company-owned devices is essential for preventing potential security breaches. By doing so, you can ensure that confidential information is not saved or copied to personal storage devices, thereby safeguarding sensitive data and maintaining a secure working environment.
You can use Device restriction template or Attack surface reduction policy to block USB drives on Windows 10 and Windows 11 devices. Another option to block USB drives is to use Intune device remediations.
Contents
Method 1: Using Device Restrictions Intune Template
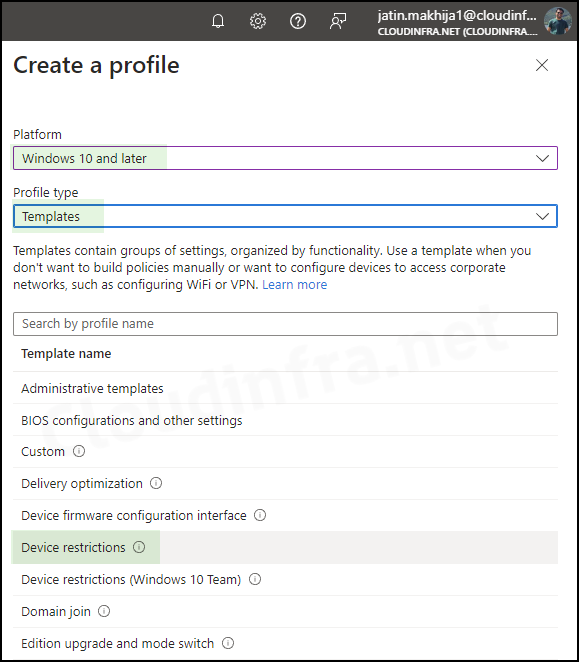
- Sign in to the Intune admin center > Devices > Configuration > Create > New Policy.
- Select Platform as Windows 10 and later
- Profile type as Settings Catalog
- Click on the Create button.
- Basics Tab: Provide a Name and Description of the Policy and Click on Next.
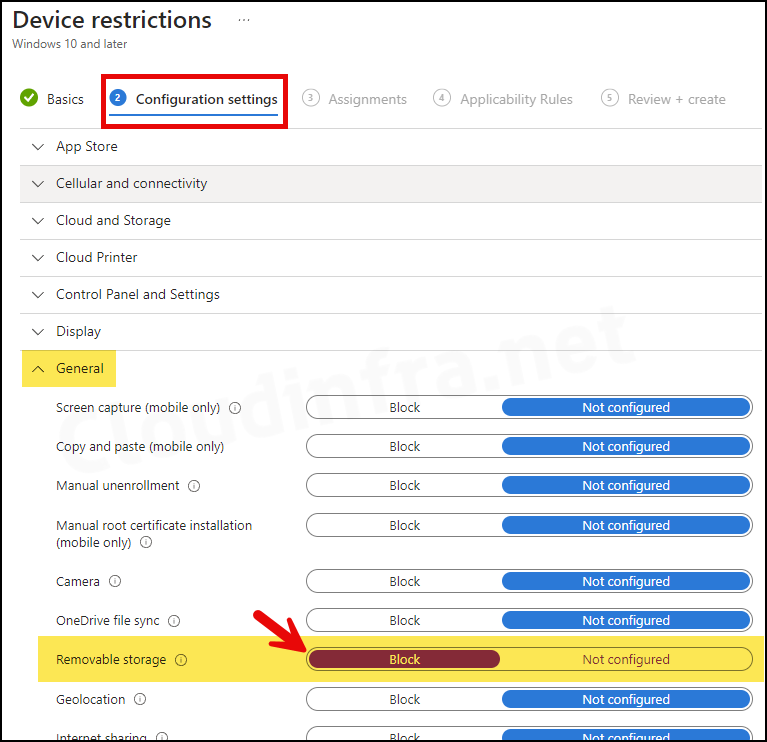
- Configuration settings: Scroll down and Expand the General category settings. Look for Removable storage and use the toggle switch to select Block.
- Assignments: Assign the policy to Entra security groups that contain the target users or devices. As a best practice, pilot with a small set first; once validated, roll it out more broadly. For guidance on assignment strategy, see Intune assignments: User groups vs. Device groups.
- Applicability Rules: You can create rules for assigning this device configuration profile, ensuring it applies only to devices meeting specific criteria, such as OS Edition. If you prefer not to create such a rule, click Next without specifying anything on this page.
- Review + create: Review the deployment summary and click on the Create button.
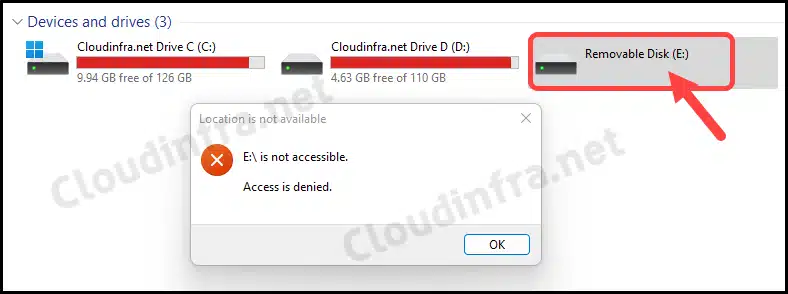
End User Experience
Once the policy has been successfully applied, users will get Access is denied message when trying to access a USB drive. This restriction results from the applied policy, which prevents removable storage.
Method 2: Using Attack Surface Reduction Policy
- Sign in to the Intune admin center > Endpoint security > Attack surface reduction.
- Click on + Create Policy.
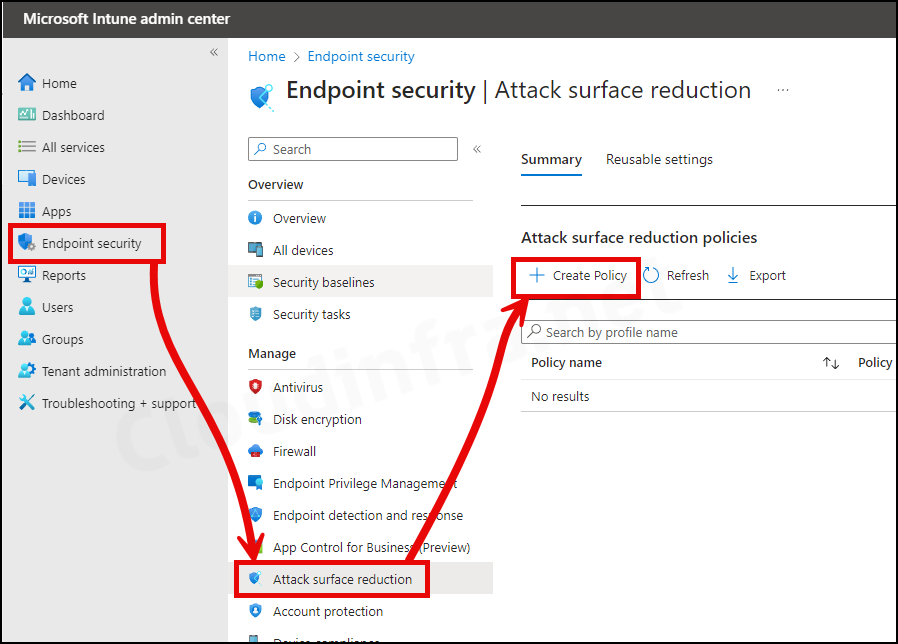
- Platform: Windows.
- Profile: Device Control.
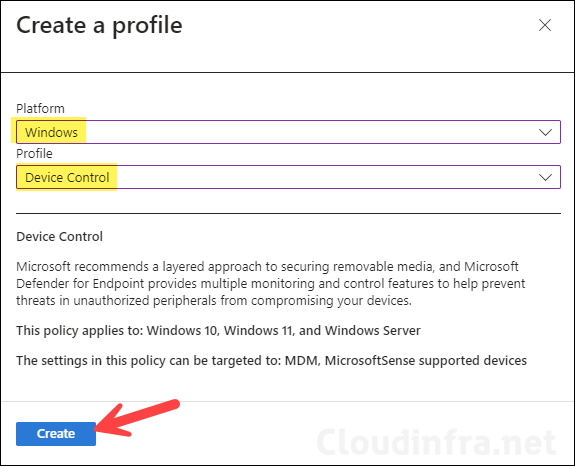
- Basics Tab: Provide a Name and Description of the Policy and Click on Next.
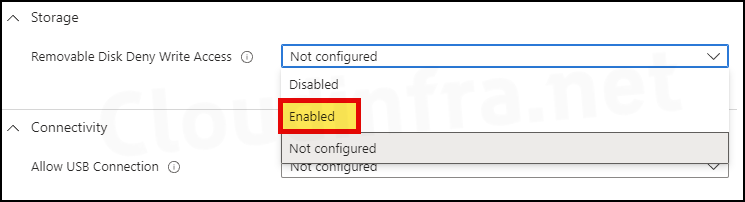
- Configuration settings Tab: Scroll down to find a Removable Disk Deny Write Access setting under Storage. Use the drop-down and select Enabled. Click on Next.
If you enable this policy setting, write access is denied to this removable storage class. If you disable or do not configure this policy setting, write access is allowed to this removable storage class. Note: To require that users write data to BitLocker-protected storage, enable the policy setting Deny write access to drives not protected by BitLocker, which is located in Computer Configuration\Administrative Templates\Windows Components\BitLocker Drive Encryption\Removable Data Drives.
About Removable Disk Deny Write Access
- Scope tags (optional): A scope tag in Intune is an RBAC label you add to resources (policies, apps, devices) to limit which admins can see and manage them. For more Information, read: How to use Scope tags in Intune.
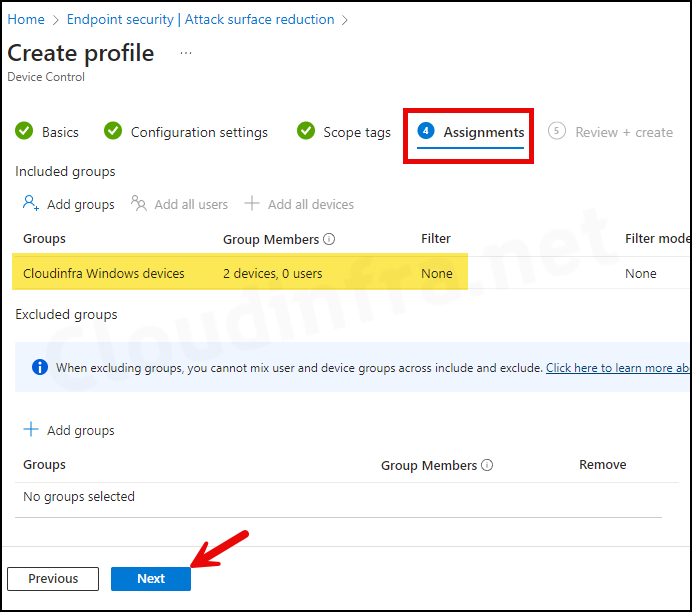
- Assignments: Assign the policy to Entra security groups that contain the target users or devices. As a best practice, pilot with a small set first; once validated, roll it out more broadly. For guidance on assignment strategy, see Intune assignments: User groups vs. Device groups.
- Review + create: Review the deployment Summary and click on the Create button.
Sync Intune Policies
The device check-in process might not begin immediately. If you’re testing this policy on a test device, you can manually kickstart the Intune sync from the device itself or remotely through the Intune admin center.
Alternatively, you can use PowerShell to force the Intune sync on Windows devices. Restarting the device is another way to trigger the Intune device check-in process.
End User Experience
Once the policy has been successfully applied, users will get Destination Folder Access is denied message when attempting to write to the USB drive. Read access to the removable storage will still be permitted as we have used Removable Disk Deny Write Access policy.

Method 3: Using Intune Device Remediations
You can also use Intune Device Remediations to block USB drives. For a detailed, step-by-step guide, please refer to the link: Block USB Drives access on Windows using Intune remediations.
Microsoft removed Profile: Device Control. How can I do?
Hi Ulisses, Thank you for bringing that to my attention. Please select the platform: Windows 10, Windows 11, and Windows Server, and then choose Device Control. I’ve updated the blog post.
If you enable this policy setting, write access is denied to this removable storage class. If you disable or do not configure this policy setting, write access is allowed to this removable storage class. Note: To require that users write data to BitLocker-protected storage, enable the policy setting “Deny write access to drives not protected by BitLocker,” which is located in “Computer Configuration\Administrative Templates\Windows Components\BitLocker Drive Encryption\Removable Data Drives.”
Should it be Enabled instead of disabled?
I have the same question, why set it to disabled? Surely you need to enable the deny access?
Alex did you get this working? I cannot figure this out. Something so simple is worded so awkwardly.
Hey Kevin, Yes, it should be Enabled. The post has been updated. Thank you.
Hi Jatin,
With this setup, I can still access the USB and read but cannot write.
I would like it to stop the access as how you have it on your screenshot.
Do you know why it is not working for me the way you have?
Thank you,
Jay
Hi Jay, You can use the Device restriction template and configue a setting called Removable storage to Block to block complete access to the USB drives. The post has also been updated.
hi sir, is there a way to whitelist for a particular USB drive?
Yes, you can use Device IDs and policies to allow specific devices. For more Information, refer to the link: https://learn.microsoft.com/en-us/intune/intune-service/configuration/administrative-templates-restrict-usb.