In this blog post, we will explore the steps to deploy fonts on macOS using Intune. Typography is important for creating visually appealing and consistent designs. Sometimes, the default fonts on Mac does not fit your brand’s design, so you might want to install custom fonts that match your company’s branding.
macOS devices support different font types like TrueType (.ttf), Variable TrueType (.ttf), TrueType Collection (.ttc), OpenType and OpenType-SVG (.otf), and OpenType Collection (.ttc) fonts.
You can deploy any of these font files on Intune-enrolled macOS devices. We will use a Bash script to download and install font files on Mac devices. But before we do that, You will require:
- A Font File in any of the supported formats mentioned above.
- Font file is stored in a publicly accessible location.
To securely store publicly accessible Font files, you can create an Azure Storage container. However, you can use other locations, such as SharePoint Online or Dropbox, if they provide public accessibility.
Contents
Default Fonts Installation location on Mac
There are two default locations for font installation: /Library/Fonts/ and/Library/Fonts/.
- ~/Library/Fonts/: When fonts are installed at this location, they are only available to a particular user.
- /Library/Fonts/: When you use this location, fonts are available to all users on a Mac device.
We will be using /Library/Fonts/ location to download and install the font files. This way, we will ensure that fonts are available to all users of the Mac device. Let’s check the steps:
Step 1: Copy Font Files to a Publicly Accessible Location
The first step is to copy the font files to a publicly accessible location. For demonstration purpose, we will use Azure storage container. Let’s check the steps to create it and use it for the font files.
To create a storage account using the Microsoft Azure portal, search for Storage account and select the Create option. Then, fill in the necessary details to complete the process.
After creating an Azure Storage account, you can set up a container by navigating to the storage account, selecting Containers, and then clicking + Container.
Provide a name for the container and set the Public access level to Blob (anonymous read access for blobs only). This ensures that font files stored in this container can be publicly accessed. Upload the files.
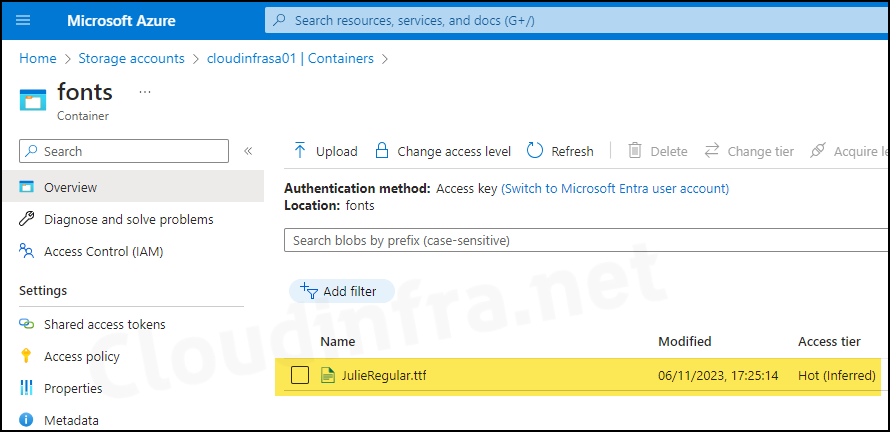
Click on the file to copy the Publicly accessible URL. You can test to confirm if the URLs are publicly accessible by opening an Incognito browser mode.
- https://cloudinfrasa01.blob.core.windows.net/fonts/JulieRegular.ttf
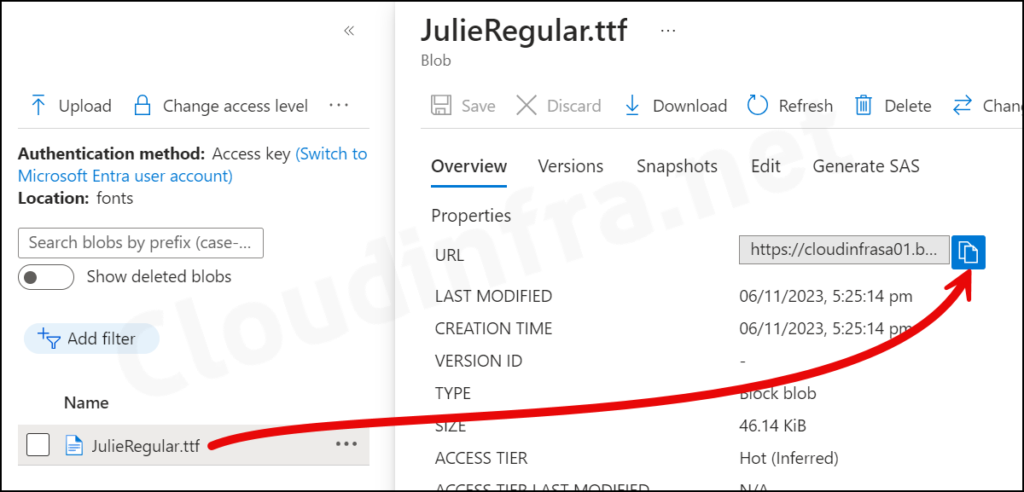
Step 2: Download the Shell script
I have created a shell script for deploying fonts on macOS devices. You can download it from my GitHub Repository. Download Shell script file installFonts.sh.
Step 3: Update the Shell script
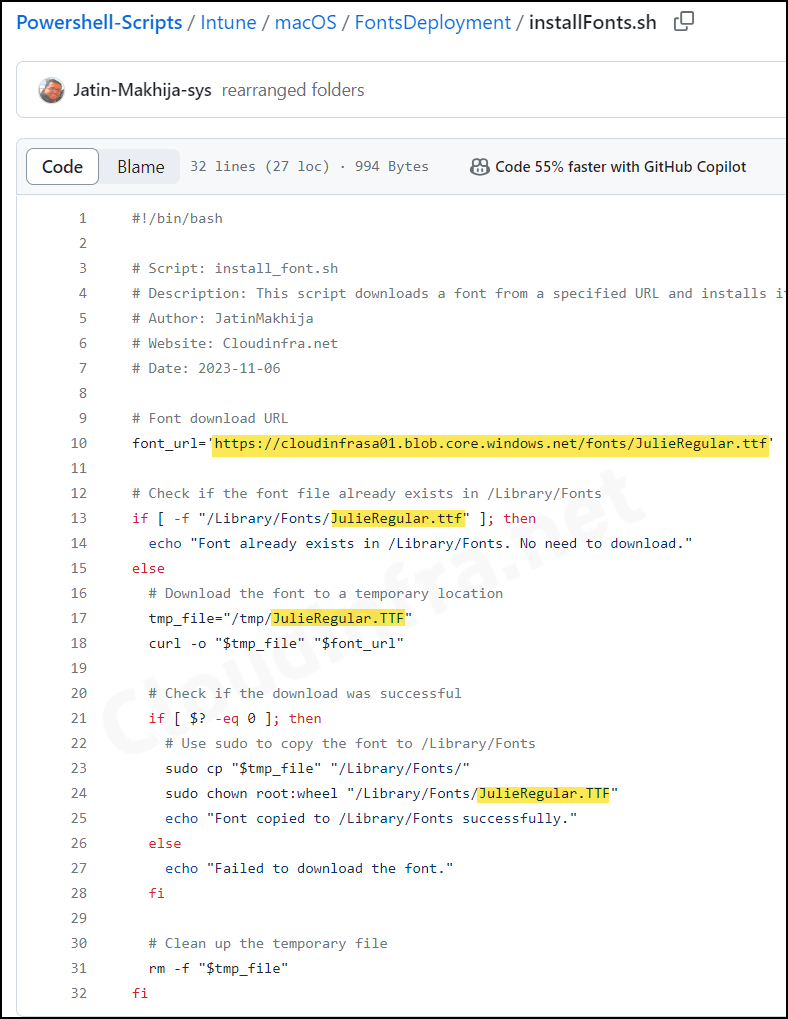
Update the InstallFonts.sh script variables to the correct font file storage location. I have highlighted the values that you need to modify.
- font_url = This is the publicly accessible URL which we copied in Step 1.
- Update the font file name to where it’s highlighted in the screenshot below.
- Once you have completed all the changes, save this Shell script file.
Step 4: Deploy InstallFonts.sh Script
Now, let’s create a deployment in the Intune admin center to deploy the installFonts.sh shell script to macOS devices. When this script runs on the targeted device, it will download the font file from the Azure container to /Library/Fonts location. Let’s go through the steps:
- Sign in to the Intune admin center > Devices > macOS.
- Click on Shell scripts.
- Click on + Add to Add the script for deployment.
- Basics Tab: Provide a name and description of this deployment.
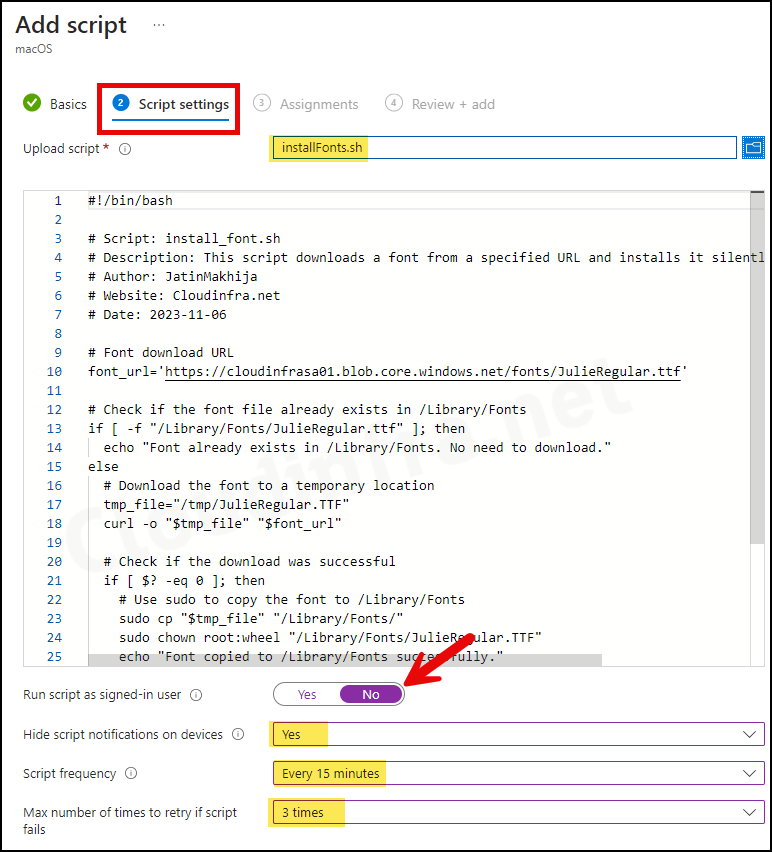
- Script settings: To upload the script, click the blue folder icon and select the installFonts.sh file.
- Run script as signed-in user: No (Script will run using root privileges)
- Hide script notifications on devices: Yes (No notifications will be shown to the users)
- Script frequency: Every 15 minutes (As I am currently testing this on a test macOS device, I have kept the Script frequency at 15 minutes. But once the test is completed successfully, you can change the script frequency to Every 1 day or Every 1 week).
- Number of times to retry if script fails : 3 (If script deployment fails, it will be tried 2 more times)
- Assignments: Assign the policy to Entra security groups that contain the target users or devices. As a best practice, pilot with a small set first; once validated, roll it out more broadly. For guidance on assignment strategy, see Intune assignments: User groups vs. Device groups.
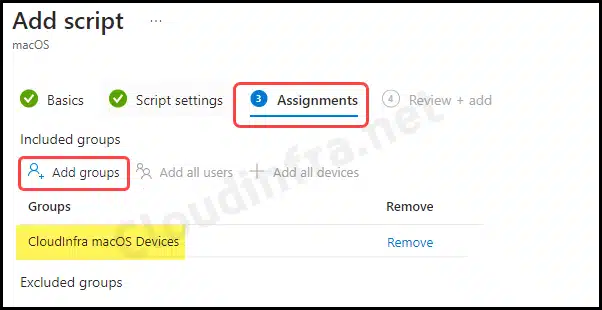
- Review + add: Review the deployment and click Add to deploy the shell script.
Sync Intune Policies
The device check-in process might not begin immediately. If you’re testing this policy on a test device, you can manually kickstart Intune sync from the device itself or remotely through the Intune admin center.
Alternatively, you can use PowerShell to force the Intune sync on Windows devices. Restarting the device is another way to trigger the Intune device check-in process.
End User Experience
Once the deployment process is completed, you can confirm the deployment on one of the target devices by following these steps:
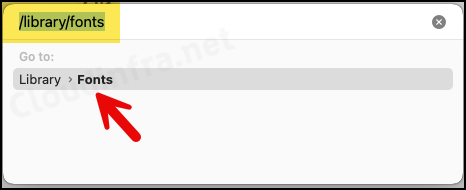
- Go to Finder App > Go > Go to Folder.
- Search for /library/fonts path.
- Double-click on it to open.
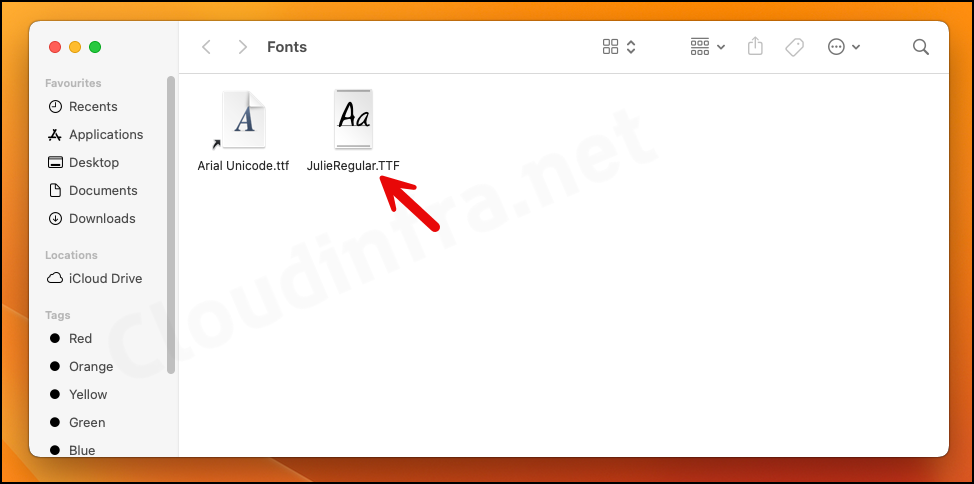
- The screenshot below shows that the custom font has been successfully deployed on macOS devices.
Verify Font Installation using TextEdit App
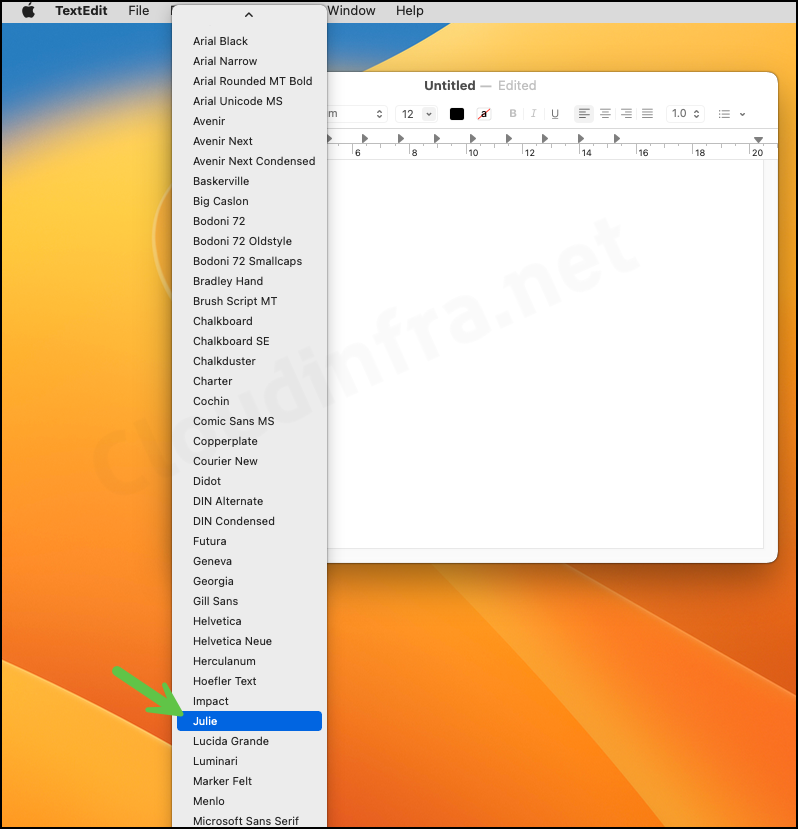
To further verify the deployment of this font file, you can open any application on your Mac device. For example, let’s open TextEdit and verify if the font is now showing on the list.
macOS Intune troubleshooting
If you face any application deployment issues, refer to IntuneMDMDaemon*.log and IntuneMDMAgent*.log files. To find out more information about locating these files on a macOS device, refer to my other blog post: Collect Intune Logs from macOS Devices.
