In this blog post, I will show you how to deploy MSI using Intune Win32 app method. You can deploy MSI application using Line of business method available in Intune. LOB method is more straightforward and easy to use for simple MSI deployments. However, If your deployment is complex and requires changes before or after MSI deployment, or you have other files you want to package and deploy together on the target device, you can use Windows (Win32) app method.
Contents
1. Download MSI Application
First step is to download the MSI application on your local computer. For demo purposes, I would be using an app called eSigner.msi. However, you can use any other MSI application and follow the steps given below.
2. Create .Intunewin file
Next step is to create an .Intunewin file which is the requirement of Windows (Win32) app. Let’s check the steps:
- Create an empty folder and copy the MSI Setup (esigner.msi) Installer into that folder.
- Create Two PowerShell scripts called Install.ps1 and Uninstall.ps1 in the location where you copied the MSI Installer.
- Download Microsoft Win32 Content Prep Tool, It is a zip file therefore extract its contents into a folder.
- Create an empty folder, for example, C:\output, or anywhere else.
- Repackage the esigner.msi file to .intunewin using IntuneWinAppUtil.exe in the Microsoft Win32 Content Prep Tool.
Install.ps1
- Copy the below line of code in Install.ps1 file.
Install.ps1
msiexec.exe /i eSigner.msi /qn
Uninstall.ps1
To uninstall any MSI application using the command line, you will require its UninstallString value from the registry and use it to remove the app from the device.
For eSigner application, I have located its UninstallString at HKEY_LOCAL_MACHINE\Software\Microsoft\Windows\CurrentVersion\Uninstall registry location.
The eSigner MSI app installs three separate components, so I found three Uninstallstrings in the registry for this application. We will use all the Uninstallstrings in our PowerShell script to remove the app.
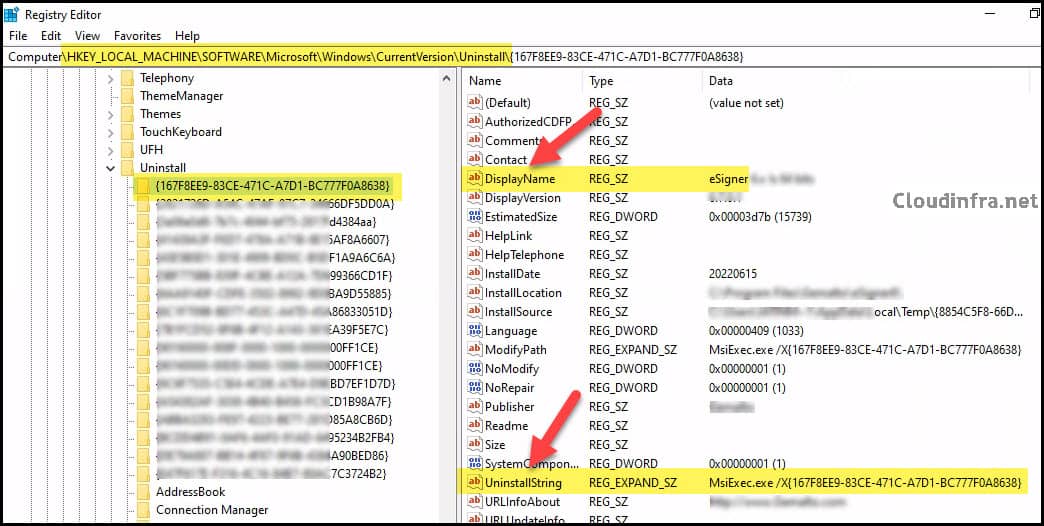
Once you find your application’s UninstallString, you can replace it in the below PowerShell Script. If you have only one UninstallString, remove the second and third lines and start only one msiexec.exe process.
Start-Process "C:\Windows\System32\msiexec.exe" -ArgumentList "/x {167F8EE9-83CE-471C-A7D1-BC777F0A8638} /quiet /noreboot" -Wait -NoNewWindow

Start-Process "C:\Windows\System32\msiexec.exe" -ArgumentList "/x {3a06e0d8-7b7c-4044-bf75-2817fd4384aa} /quiet /noreboot" -Wait -NoNewWindow

Start-Process "C:\Windows\System32\msiexec.exe" -ArgumentList "/x {ABBA3283-FE97-4223-BE77-281D85A8CB6D} /quiet /noreboot" -Wait -NoNewWindow
- Launch the command prompt as administrator, change the current prompt location to where the Microsoft Win32 Content Prep Tool is downloaded, and run the below command.
IntuneWinAppUtil.exe -c <setup_folder> -s <setup_file> -o <output_folder>
- <setup_folder> = Keep your MSI file and PowerShell script in one folder and provide the location of that folder.
- <setup_file> = Install.ps1
- <output_folder> = Create an Empty folder somewhere and provide that location.
Example:
IntuneWinAppUtil.exe -c C:\temp\eSigner -s Install.ps1 -o C:\output
Once you run the above command, it will create a .intunewin file in the C:\output directory. We will use this file to deploy the package on End-User Machines.
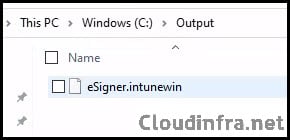
For more detailed information about creating .Intunewin file, refer to the blog post: How to create an IntuneWin file.
3. Create a Win32 app deployment
- Sign in to the Intune Admin Center > Apps > All Apps.
- Click on + Add and Select Windows app (Win32) from the app type.
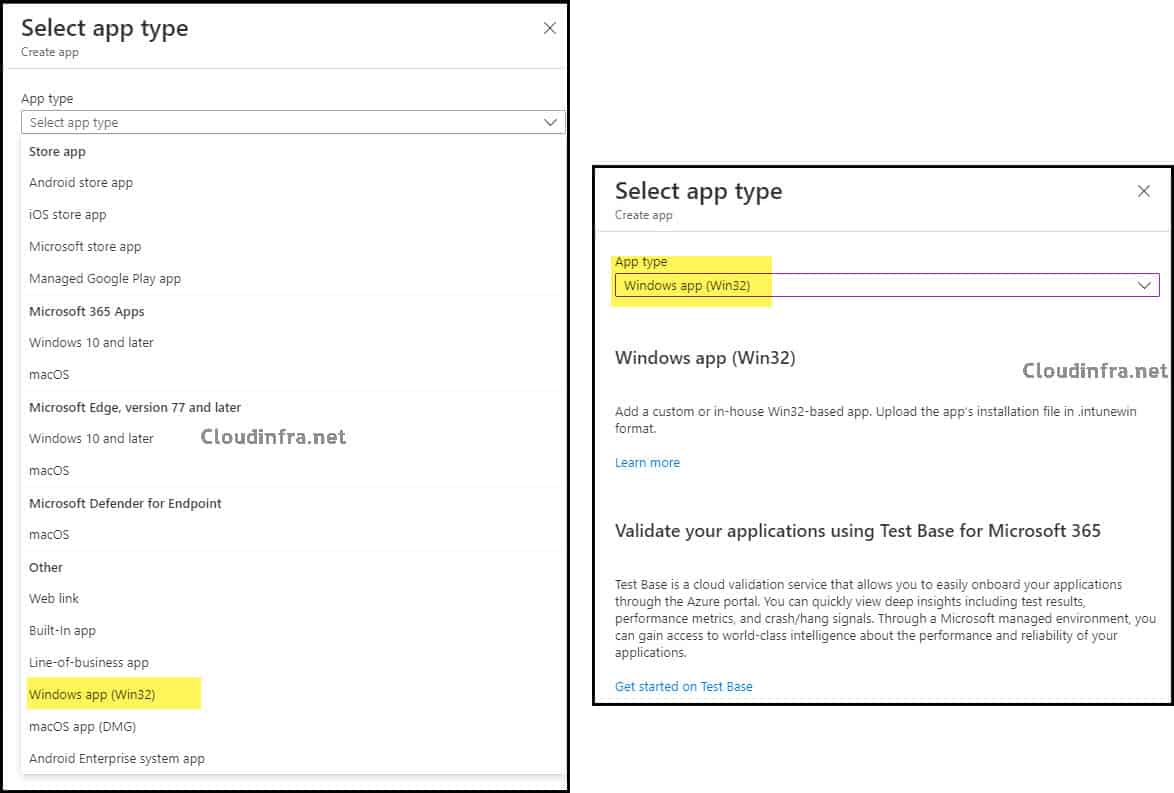
- Click on Select app package file to select the .intunewin file package created earlier.
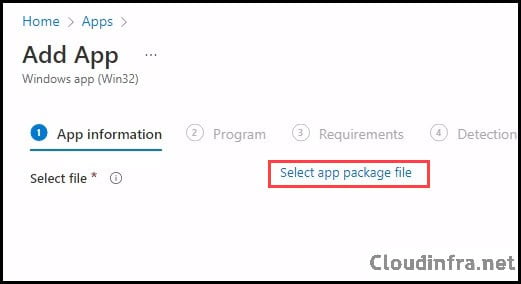
- Select App package file. Browse to the location of .intunewin file to select and click on OK.
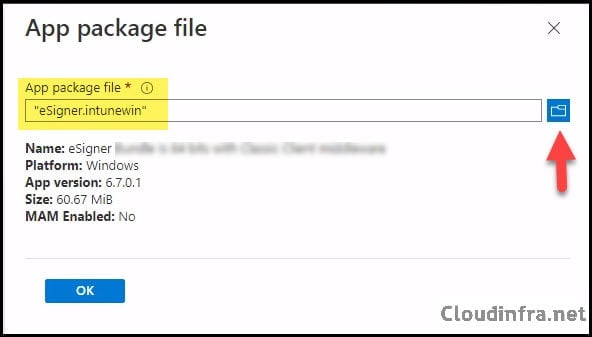
- App Information: After clicking on OK, you will be able to find an App Information page. This will provide a page to Update the Information about the Application. On this page, enter the name of the Publisher. Click on Next from your App Information page.
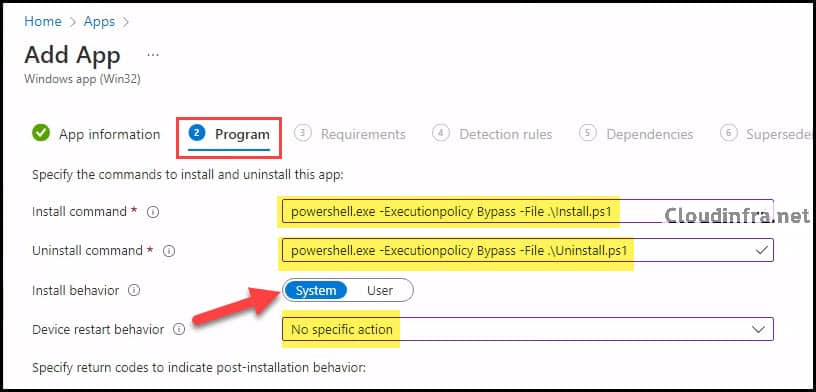
- Program: Provide the Install command and Uninstall command.
Install Command:
powershell.exe -Executionpolicy Bypass -File .\Install.ps1
Uninstall Command:
powershell.exe -Executionpolicy Bypass -File .\Uninstall.ps1
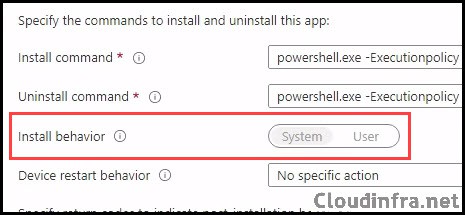
- Install behavior: System
- Device restart behaviour: No specific action
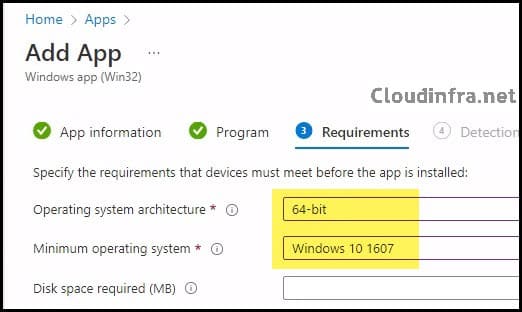
- Requirements: You can specify the requirements that devices must meet to deploy the app. If your devices are a mix of 32-bit and 64-bit types, check the boxes for 32-bit and 64-bit in the operating system architecture drop-down. Otherwise, go with 64-bit.
- Operating System Architecture: Select 64-bit
- Minimum operating system: Select according to the operating system version used in your environment.
- Detection Rules:
- Rules Format: Select Manually configure detection rules
- Rule Type: File
- Path: C:\Program Files (x86)\
- File or Folder: Gemalto
- Detection Method: File or Folder Exits

- Assignments: Click on Add group to add an Entra security group containing users or devices.
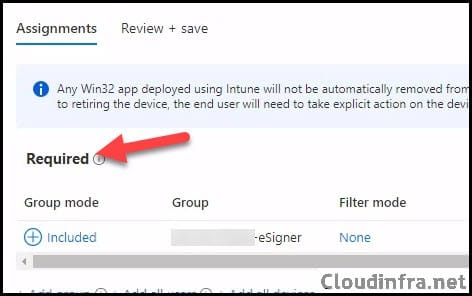
- Review + create: Review the deployment and click on Create.
Monitor Deployment progress
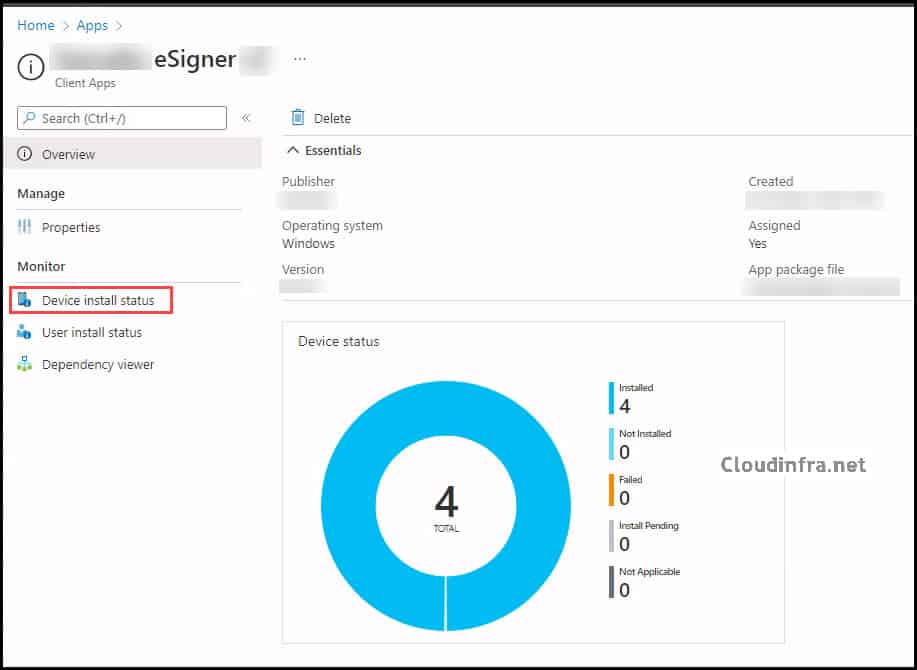
From the Intune admin center >Apps > All apps. Click on the deployment and check the Overview page to show the deployment status.
FAQs
Unable to change the Install behavior
If you are working with an MSI installer and using the Line-of-Business app or Win32 app deployment method, you may encounter a situation where the Install behavior option is greyed out and cannot be changed. This behavior is typically due to the nature of the MSI file, which may not allow deployment in either System Context or User Context, and the option is pre-populated based on the MSI file’s behavior.
If you cannot deploy an MSI application due to the limitations of the Install behavior, you can follow the steps in the blog post. A helpful tip is to create your .intunewin package using an Install.ps1 script as your setup file, instead of the MSI installer file. You can use the IntuneWinAppUtil.exe tool with the following command:
IntuneWinAppUtil.exe -c C:\temp\eSigner -s Install.ps1 -o C:\output.
Conclusion
To deploy MSI applications in Intune, use the Line-of-Business app method. If you encounter issues, you can repackage the app as a .intunewin file and deploy it using PowerShell scripts. Win32 app deployment is handy for customizing installations, such as performing pre-installation checks or running post-installation scripts. Some MSIs may not install in the System Context, but repackaging as .intunewin with an Install.ps1 setup file can help change the Install Behavior for Intune deployment.
