In this blog post, We will see how to disable pause updates feature using Intune. Pause updates setting can be located under Settings App > Windows Updates > Pause updates. If you want to defer updates on your Windows 10/11 device, you can use this setting to pause Windows updates anywhere from 1 week to 5 weeks.
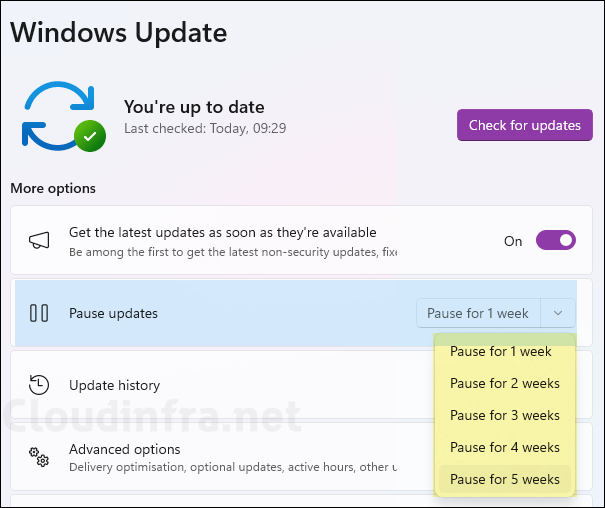
That means you can pause updates for up to 35 days. In this blog post, we will see how to disable a user’s ability to pause updates using a Settings Catalog policy Block Pause Updates ability.
Contents
Methods to Block Pause Updates Ability
- Use a Settings catalog policy called Block Pause Updates ability.
- Using GPO setting called Remove access to the Pause Updates feature.
- Using Local Group Policy Editor setting called Remove access to the Pause Updates feature.
- Using Registry Editor: Create a registry entry called SetDisablePauseUXAccess and set its value to 1.
1. Block Pause Update Ability Using Settings Catalog Policy
- Sign in to the Intune admin center > Devices > Configuration > Create > New Policy.
- Platform: Windows 10 and later.
- Profile type: Settings Catalog.
- Basics Tab: Provide a Name and Description of the policy and click Next.
- Configuration settings: Click on + Add settings and search for pause updates.
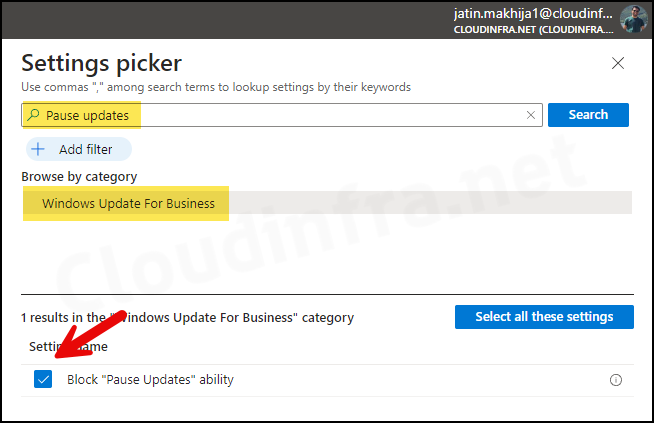
- Move the toggle switch to Block for Block Pause Updates ability setting.

- Scope tags (optional): A scope tag in Intune is an RBAC label you add to resources (policies, apps, devices) to limit which admins can see and manage them. For more Information, read: How to use Scope tags in Intune.
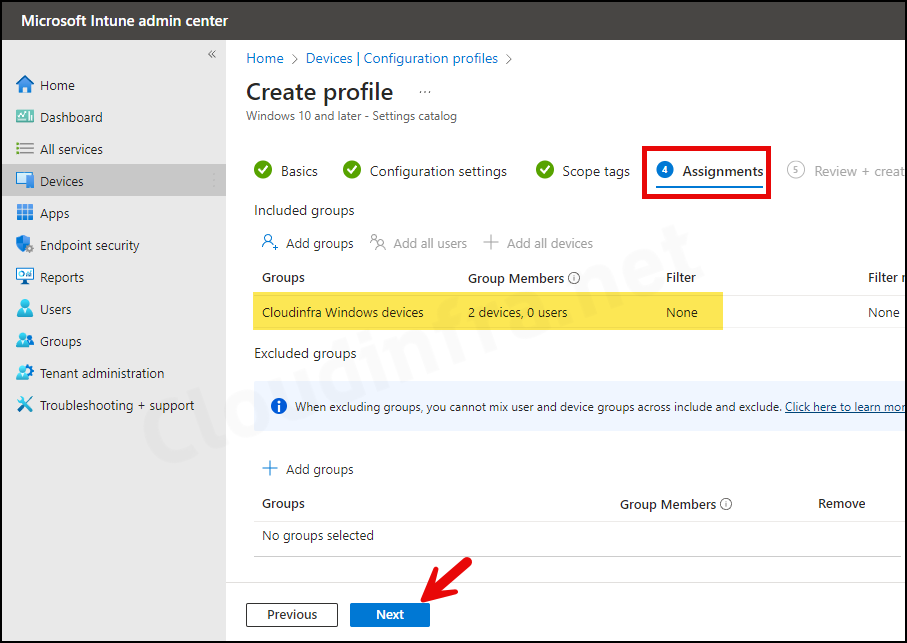
- Assignments: Assign the policy to Entra security groups that contain the target users or devices. As a best practice, pilot with a small set first; once validated, roll it out more broadly. For guidance on assignment strategy, see Intune assignments: User groups vs. Device groups.
- Review + create: Review the deployment summary and click Create.
Sync Intune Policies
The device check-in process might not begin immediately. If you’re testing this policy on a test device, you can manually kickstart Intune sync from the device itself or remotely through the Intune admin center.
Alternatively, you can use PowerShell to force the Intune sync on Windows devices. Restarting the device is another way to trigger the Intune device check-in process.
Monitoring Deployment Progress
- Sign in to the Intune admin center > Devices > Configuration.
- Choose the Device Configuration profile you want to work with, and at the top of the page, you’ll see a quick view of the Success, Failure, Conflict, Not Applicable, and In Progress status.
- Click on View report to access more detailed information.

End User Experience
- Press the Windows key + I to open the Settings App.
- Click on Windows Updates. On the right-hand side, you will find that the Pause updates option is greyed out. There will also be a message under it: This setting isn’t available due to your organization’s policy. That’s it; the user cannot Pause updates anymore.

2. Block Pause Update Ability by Creating a GPO
This method is for devices managed by On-premise Active Directory or Entra Hybrid join scenario. You can create a Group Policy object and configure the Remove access to Pause Updates feature setting. Let’s check the steps:
- Login to a Domain controller using Domain admin rights
- Press the Windows key + R to open the Run dialog box.
- Type gpmc.msc and press Enter to open the Group Policy Management console.
- Right-click on Group Policy Objects and click on New.
- Provide a Name of the GPO and press OK.
- Right-click on the new GPO you have created and click on Edit.
- Navigate to Computer Configuration\Policies\Administrative Templates\Windows Components\Windows Update and On the right-hand side you will find a policy setting: Remove access to Pause Updates feature. Edit this policy and set it to Enabled.
3. Block Pause Update Ability Using Local Group Policy Editor
- Local Group Policy Editor is available only on Windows 10 Pro and Enterprise editions. Therefore, if you are using a Windows 10 Home PC, you may need to use the next method which is using a Registry Editor.
- Press Windows Key + R key to open the Run dialog box.
- Type gpedit.msc and press Enter to open Local Group Policy Editor.
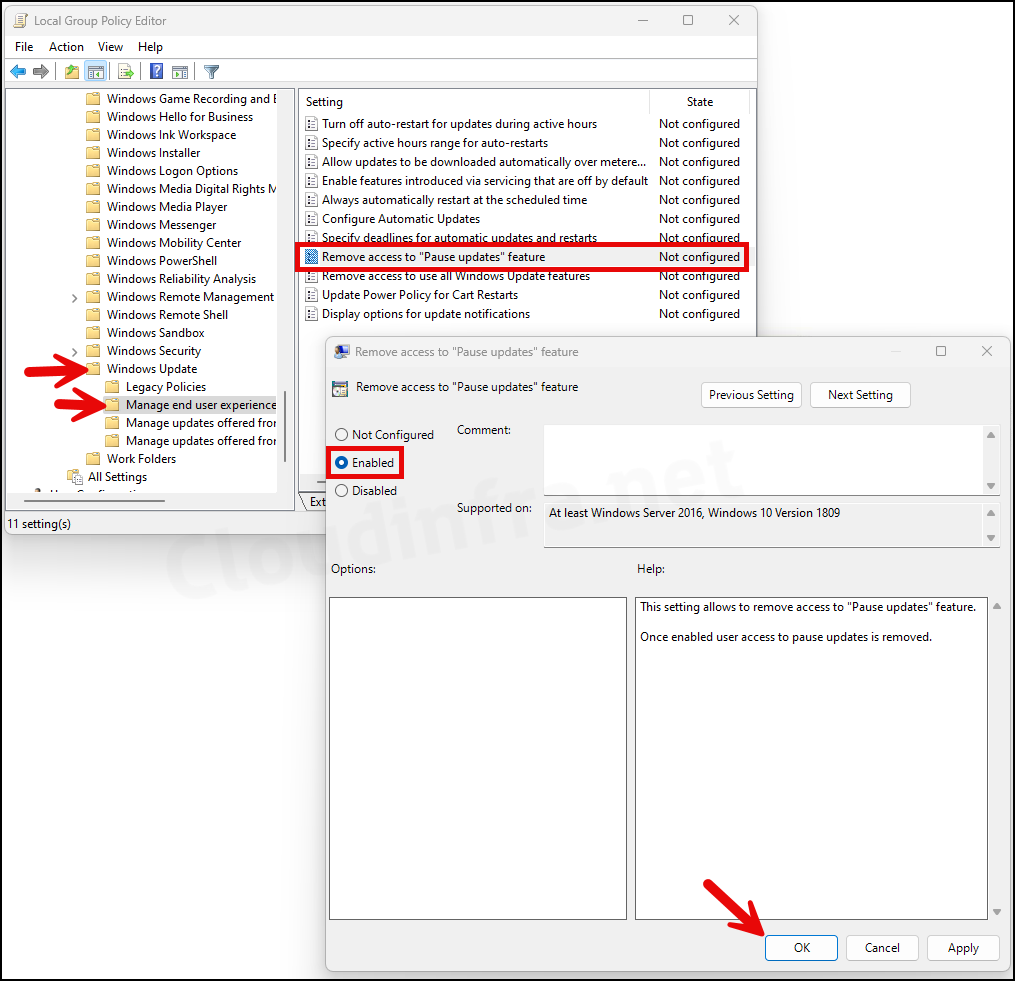
- Navigate to Computer Configuration\Policies\Administrative Templates\Windows Components\Windows Update\Manage end user experience.
- On the right-hand side, you will find a setting called Remove access to Pause Updates feature. Double-click on it to Edit and set it to Enabled.
4. Block Pause Update Ability using Registry Editor
If you are using a Windows 10/11 Home PC and do not have access to the Local group policy editor, you can easily create a Registry Entry to remove the user’s access to the Pause updates feature. Please note that you will require administrator rights to make changes in the registry editor. Let’s check the steps.
- Press the Windows key + R to open the Run dialog box.
- Type regedit and press Enter to open the Registry Editor.
- Navigate to HKEY_LOCAL_MACHINE\SOFTWARE\Policies\Microsoft\Windows\WindowsUpdate
- Right-click on the Windows Update Registry key folder and select DWORD (32-bit) Value.
- Provide a Name of the registry Entry as SetDisablePauseUXAccess and press Enter.
- Double-click on the created reg entry and set its value to 1.
