In this blog post, I’ll walk you through the steps to disable Windows Hello for Business (WHfB) post logon provisioning using Intune. A common practice in many organizations is to disable Windows Hello for Business tenant-wide, while allowing it for specific users or devices. This ensures that users won’t be prompted with the mandatory WHfB screen during the device enrollment/OOBE, allowing them to configure it when ready.
You can achieve this setup by following these two steps:
- Disable Windows Hello for Business: Go to Intune admin center > Devices > Windows > Enrollment, selecting Windows Hello for Business, and setting Configure Windows Hello for Business to Disabled.
- Enable Windows Hello for Business using a Settings catalog policy.
Enabling Windows Hello for Business through a Settings Catalog policy will prompt users to set it up the next time they sign in to their device after the policy is applied. The screens for setting up Windows hello will appear every time user will sign out and sign back in.
This can be inconvenient if you are not yet ready to set it up yet. You can disable these prompts by creating DisablePostLogonProvisioning registry key. This ensures users won’t see the Windows Hello for Business screen after signing in, but they’ll still have the option to manually configure it later through the Settings app.
This blog post explains how to address this using Intune Device Remediations. Keep in mind that Intune device remediations require an Enterprise license. If you don’t have the required license, you can still use the provided PowerShell scripts and deploy them through Devices > Scripts and remediations > Platform scripts in Intune.
Contents
Download PowerShell Scripts
- Download Detect-WHfB-reg.ps1 script: Detect-WHfB-reg.ps1.
- Download Remediate-WHfB-reg script: Remediate-WHfB-reg.ps1.
Create a Remediations Script Package
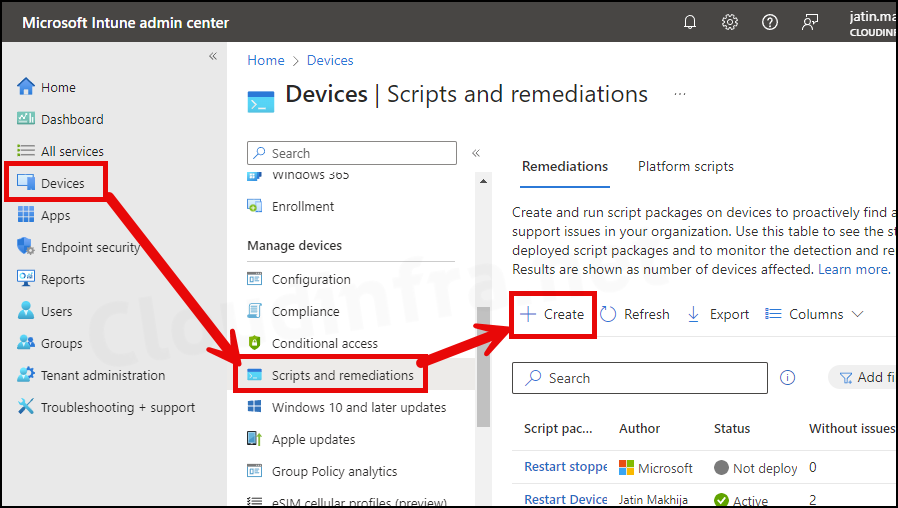
- Sign in to the Intune admin center > Devices > Scripts and remediations.
- Click on + Create.
- Basics Tab: Provide the Name and Description of the script package.

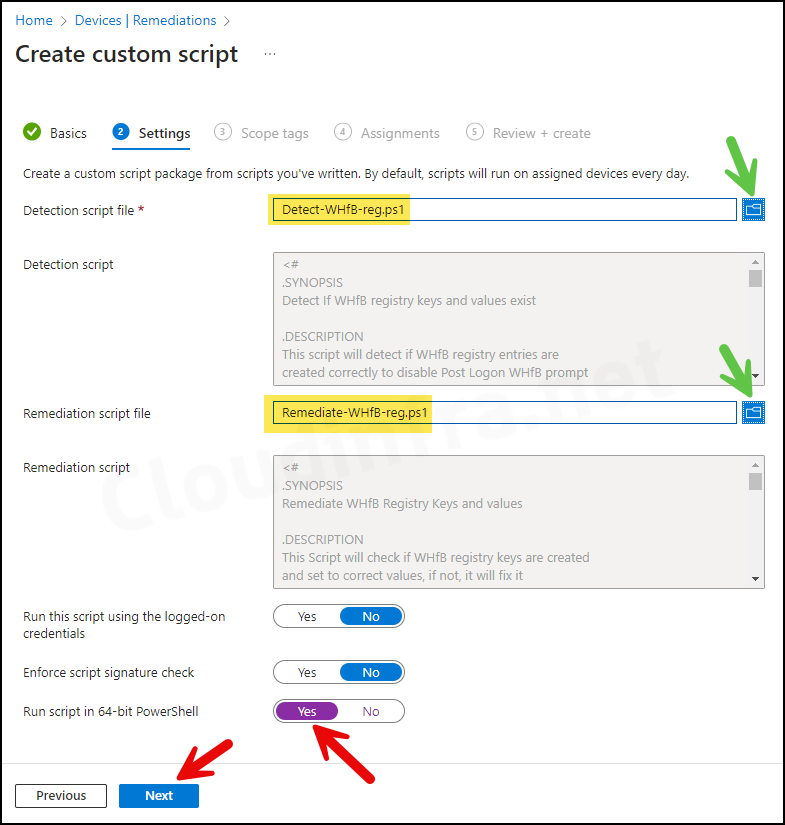
- Settings Tab
- Detection script file – Browse to the Detection script Detect-WHfB-reg.ps1.
- Remediation script file – Browse to the Remediation script file Remediate_WHfB-reg.ps1.
- Run this script using the logged-on credentials – No
- Enforce script signature check – No
- Run script in 64-bit Powershell – Yes
- Scope tags (optional): A scope tag in Intune is an RBAC label you add to resources (policies, apps, devices) to limit which admins can see and manage them. For more Information, read: How to use Scope tags in Intune.
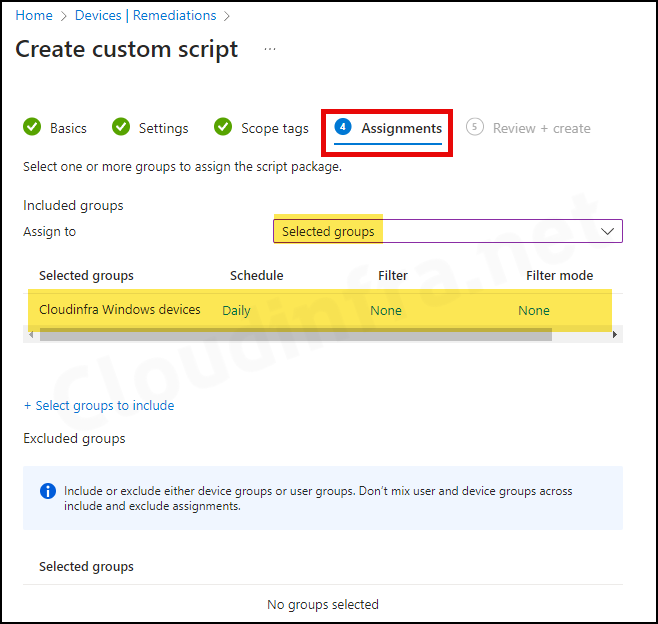
- Assignments: Click on Add group to add an Entra security group containing users or devices. You can also select the Schedule to run this script package. You have three options: Once, hourly, or Daily. For further guidance on assignment strategy, see Intune assignments: User groups vs. Device groups.
- Review + create: Review the deployment and click on Create.
Update Intune Policies
The device check-in process might not begin immediately. If you’re testing this policy on a test device, you can manually kickstart Intune sync from the device itself or remotely through the Intune admin center.
Alternatively, you can use PowerShell to force the Intune sync on Windows devices. Restarting the device is another way to trigger the Intune device check-in process.
Monitor the Script Package
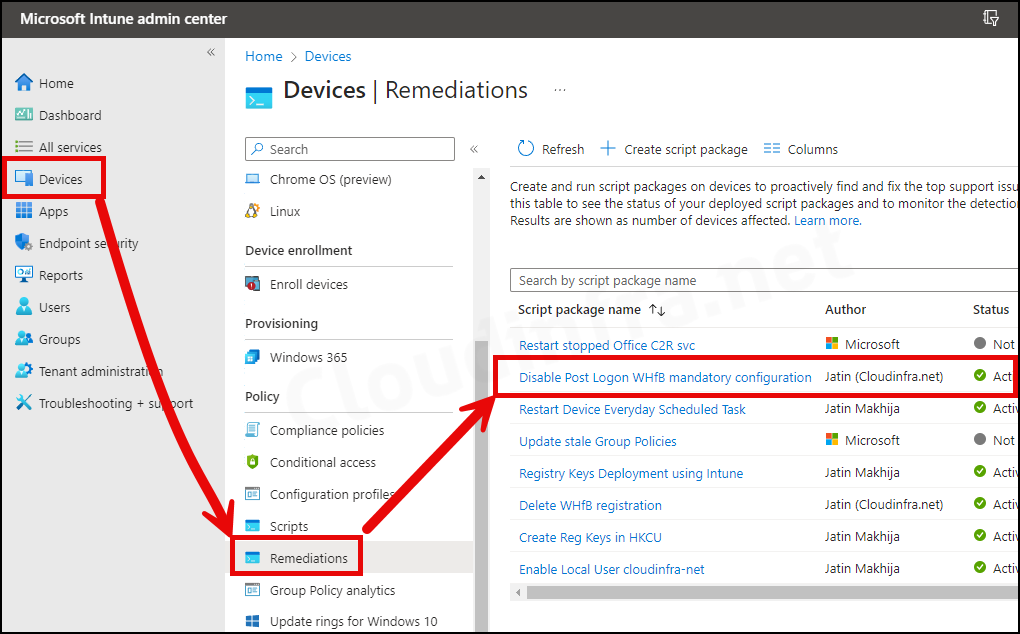
- Sign in to the Intune admin center > Devices > Scripts and remediations
- Click on the Remediation script package you want to monitor.
- Go to the Overview to find the deployment status of the script package.
End User Experience
After a successful deployment, you’ll observe that registry keys to disable WHfB post-logon provisioning have been created. To confirm this, follow the steps below:
- Press the Windows key + R to open the Run dialog box
- Type regedit and press Enter to open the Registry Editor.
- Navigate to HKEY_LOCAL_MACHINE\SOFTWARE\Policies\Microsoft, and you will find the PassportforWork registry key.
- Within the PassportforWork registry key, locate two entries named DisablePostLogonProvisioning and Enabled. Ensure that both entries are set to a value of 1.

Intune Device Remediation Logs
You can monitor Intune device remediation scripts using the Intune admin center. However, to verify the execution of detection and remediation scripts, you can review IntuneManagementExtension.log file. There are more ways to verify PowerShell script deployment, refer to this guide: Deploy a PowerShell Script using Intune.
- Browse to C:\ProgramData\Microsoft\IntuneManagementExtension\Logs and open the most recent IntuneManagementExtension.log log file. You can sort the files list using the Date modified column.
- Open the file and search for the Intune device remediation script package using its policy ID. You will find Detection and Remediation scripts with Exit codes, which confirm that the scripts are working fine.
Disable Post Logon Provisioning using OMA-URI
You can also create a custom device configuration profile using the OMA-URI settings to disable Windows Hello for Business Post logon provisioning.
- Sign in to Intune admin center > Devices > Windows > Configuration > Create > New Policy.
- Platform: Windows 10 and later, Profile type: Templates, Template name: Custom and add below settings.
- OMA-URI Setting:
- Name: Disable DisablePostLogonProvisioning
- Description: disabling DisablePostLogonProvisioning
- OMA-URI: ./Device/Vendor/MSFT/PassportForWork/{TenantId}/Policies/DisablePostLogonProvisioning
- Data type: Boolean
- Value: True

Conclusion
This post covered how to disable the post-login Windows Hello provisioning screens that appear when Windows Hello for Business is enabled. Alternatively, you can use an OMA-URI setting to turn off post-logon provisioning: ./Device/Vendor/MSFT/PassportForWork/{TenantId}/Policies/DisablePostLogonProvisioning. For more details on this OMA-URI setting, refer to the section #Create a custom policy using OMA-URI.
A simpler way to do this would be to just use a Configuration Profile with Custom CSP:
./Device/Vendor/MSFT/Policy/Config/WindowsLogon/OverrideShellProgram
(https://learn.microsoft.com/en-us/windows/client-management/mdm/passportforwork-csp#devicetenantidpoliciesdisablepostlogonprovisioning)
Life saver!
Hello
Iam trying to remove Pincode, Fingerprint and Face-ID from our company PC’s to force employees to use their actual password,
After completing these steps i can see the regedit keys but the pincode / fingerprint is not disabled on my test PC.
are there anything iam missing for it to disable the options for WHfB?
Mikkel Henriksen
Introduction
Windows Hello for Business is a private and secure identity verification method built into Windows 10. However, there may be instances where you need to delete your Windows Hello for Business registration. This article provides a step-by-step guide on how to do this.
Body
Step 1: Open Command Prompt
First, you need to open the Command Prompt as an administrator. To do this:
Press the Windows key + X and select Command Prompt (Admin) from the menu.
Step 2: Delete the WinBioDatabase
The next step is to delete the WinBioDatabase. This can be done by running the following command in the Command Prompt:
del /F /Q C:\Windows\System32\WinBioDatabase\*
This command deletes all files in the WinBioDatabase directory.
Step 3: Delete the Hello Container
Finally, you need to delete the Hello Container using the certutil.exe tool. Run the following command in the Command Prompt:
certutil.exe -DeleteHelloContainer
This command deletes the Hello Container, effectively removing your Windows Hello for Business registration.
🔗 Relevant links
Windows Hello for Business Overview
Certutil tasks for managing a certification authority
Command Prompt: frequently asked questions
if you have other Win-Hello configs set through Intune (such as min. PIN, cloudtrust, no cap/etc), doing it this way bypasses all the configs in Intune. It leaves everything at default.
I found this too. I changed the location to be the location that Intune uses and everything works.
HKEY_LOCAL_MACHINE\SOFTWARE\Microsoft\Policies\PassportForWork\{TENANT ID}\Device\Policies