In this blog post, I will show you the steps to disable Windows Hello for Business using Intune. Windows Hello for Business is a secure authentication method that utilizes biometrics (face/fingerprint) or a PIN for user authentication. It replaces passwords with robust two-factor authentication on devices.
Windows Hello for Business (WHfB) is enabled by default when you join a device to Microsoft Entra. However, not all organizations would use this feature and want to disable it altogether.
After following the steps in this post to disable Windows Hello for Business, you can optionally take it a step further by disabling WHfB post-provisioning and removing the existing WHfB registration from the device.
Contents
Disable Windows Hello for Business
There are several ways to configure Windows Hello for Business settings, including enabling or disabling the feature, so users don’t see the setup screens. If you want to prevent the Windows Hello for Business screen from appearing during OOBE, use the method described under During Device Enrollment/Autopilot OOBE. To disable it after device enrollment, use a Settings Catalog or OMA-URI policy.
During Device Enrollment/Autopilot OOBE
You can disable Windows Hello for Business by going to Intune admin center > Devices > Windows > Enrollment, selecting Windows Hello for Business, and setting Configure Windows Hello for Business to Disabled. This is a tenant-wide setting that applies only during device enrollment and does not affect devices already enrolled in Intune. It works for both Entra joined and Entra hybrid joined devices, and it cannot be scoped to specific groups.

After Device Enrollment
You can also create and deploy a policy to disable Windows Hello for Business after device enrollment. The changes will apply like any other Intune policy and will follow the standard device check-in intervals. Use any of the below options:
- A Settings catalog policy.
- Using a Custom OMA-URI. (PassportForWork CSP).
Best Way to Disable Windows Hello for Business
Start with a tenant-wide policy and ensure that the setting Configure Windows Hello for Business is set to Disabled. This ensures that Windows Hello setup screens do not appear during Autopilot OOBE or device provisioning, preventing users from being prompted to configure Windows Hello during enrollment.
Next, use any one of the policy types listed above and set Windows Hello for Business to Disabled (or false) to ensure it remains turned off even after device enrollment. If you’re using Windows Autopilot, using Enrollment Status Page (ESP) can further ensure that all the policies are applied before a user will get to the desktop screen.
Option 1: Create a Settings Catalog Policy
After you’ve updated the tenant-wide policy (as shown above) to disable Windows Hello for Business, you can create another policy to ensure it stays disabled after device enrollment.
- Sign in to the Intune admin center > Devices > Configuration > + Create > + New Policy.
- Platform: Windows 10 and later, Profile type: Settings Catalog.
- Basics tab: Provide a name and description of the policy.
- Configuration settings: Click + Add settings and use the Settings picker to search for Windows Hello for Business. Select the Windows Hello for Business category, then scroll down to find the setting Use Windows Hello for Business (User). You can also choose Use Windows Hello for Business (Device). The difference between the two is that the first one is user-scoped, while the second is device-scoped. If both are applied, the user-scoped setting takes precedence. For more information, see: #policy-scopes.
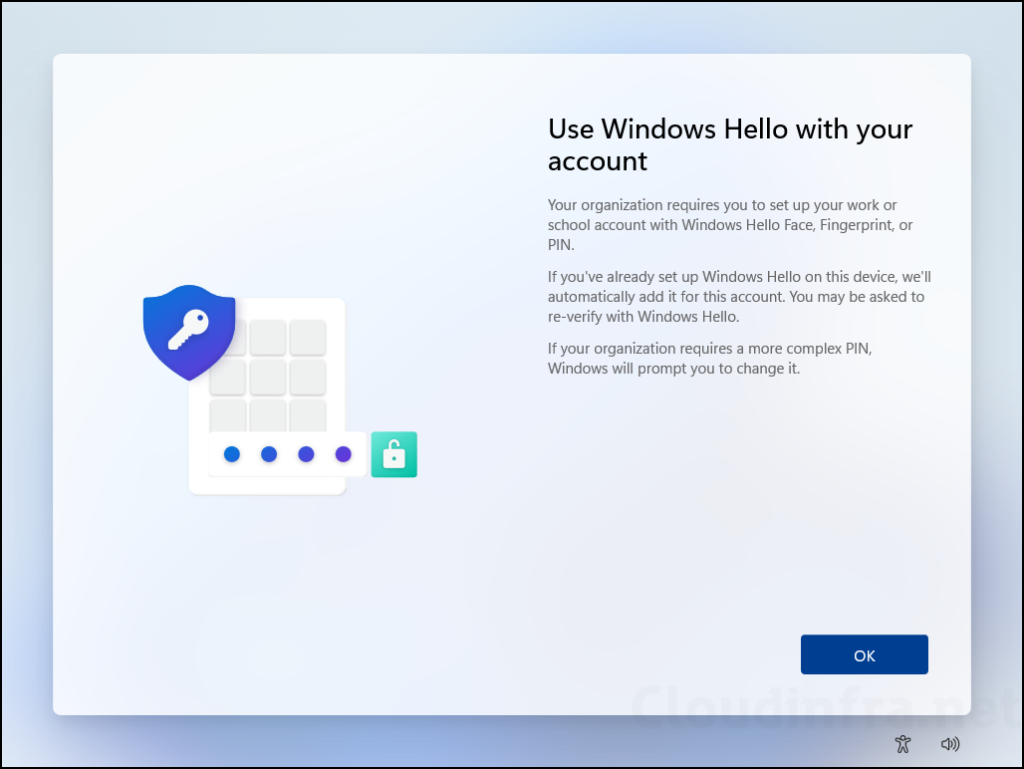
If you change this setting to True after it was previously set to False, users will be prompted to set up Windows Hello the next time they sign in to their device.

- Scope tags (optional): A scope tag in Intune is an RBAC label you add to resources (policies, apps, devices) to limit which admins can see and manage them. For more Information, read: How to use Scope tags in Intune.
- Assignments: Assign the policy to Entra security groups that contain the target users for user scoped setting and devices for device scoped setting. As a best practice, pilot with a small set first; once validated, roll it out more broadly. For guidance on assignment strategy, see Intune assignments: User groups vs. Device groups.

- Review + create: Review the deployment summary and click Create.
Option 2: Create a Custom Policy using OMA-URI
You can also create a custom device configuration profile using the OMA-URI settings to disable Windows Hello for Business. Use the setting ./Device/Vendor/MSFT/PassportForWork/{TenantId}/Policies/UsePassportForWork and set this to false. Replace the {TenantId} with your organization tenant ID.
- Sign in to Intune admin center > Devices > Windows > Configuration > Create > New Policy.
- Platform: Windows 10 and later, Profile type: Templates, Template name: Custom and add below settings.
- OMA-URI Setting:
- Name: Disable WHfB
- Description: disabling WHfB
- OMA-URI: ./Device/Vendor/MSFT/PassportForWork/{TenantId}/Policies/UsePassportForWork
- Data type: Boolean
- Value: False

[Optional] In addition to the above setting, If you get a post sign in Hello prompt, then add below OMA-URI setting to stop it. Replace the {TenantId} with the tenant ID of your organization. For more info, refer Disable WHfB Post Logon Provisioning.
- OMA-URI Setting:
- Name: Disable DisablePostLogonProvisioning
- Description: disabling DisablePostLogonProvisioning
- OMA-URI: ./Device/Vendor/MSFT/PassportForWork/{TenantId}/Policies/DisablePostLogonProvisioning
- Data type: Boolean
- Value: True

End User Experience
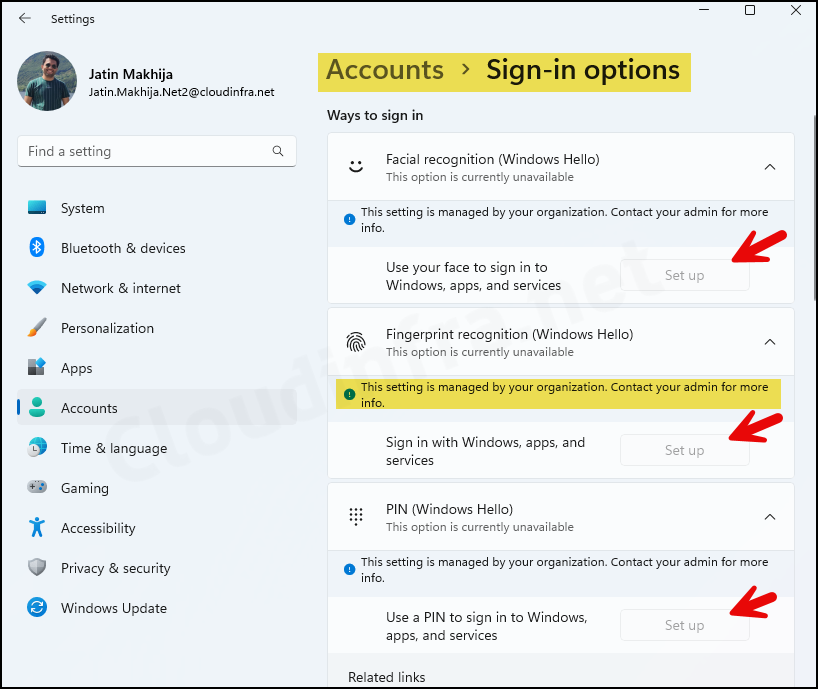
After disabling Windows Hello for Business using a tenant-wide setting and either a Settings Catalog or OMA-URI policy, users will no longer be prompted to set it up during or after device enrollment. If they open the Settings app and go to Sign-in options, the options to configure Windows Hello will also show as greyed out.
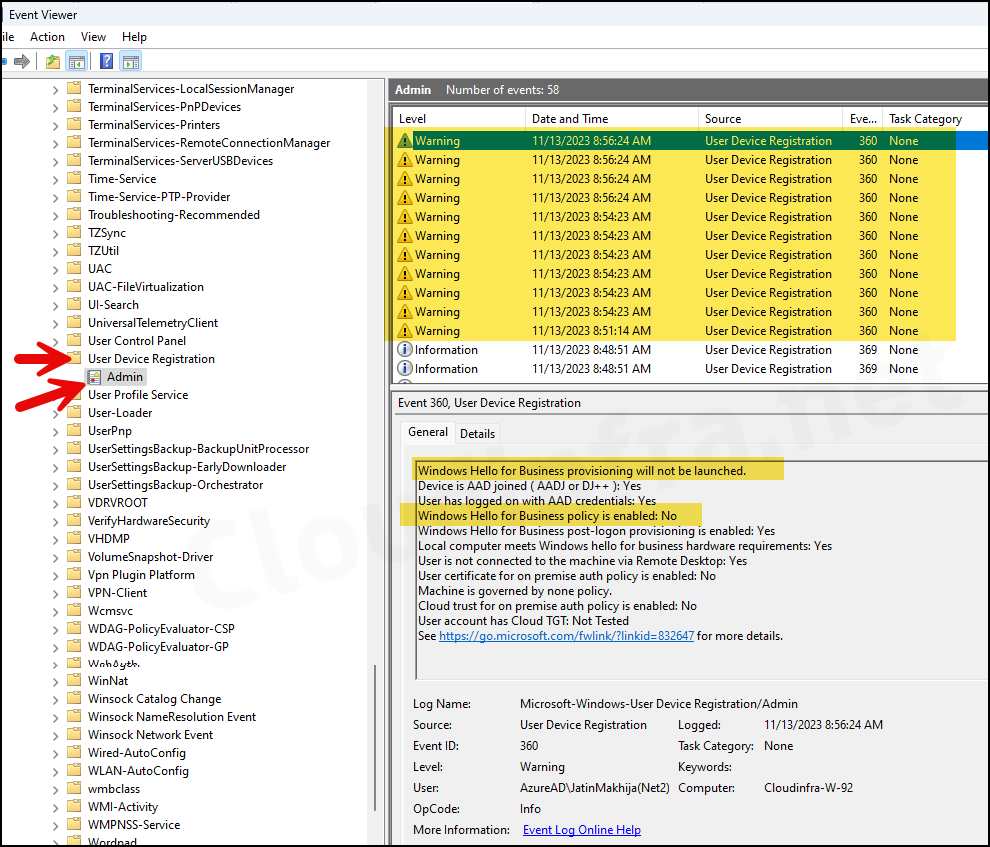
You can verify the policy via Event viewer as well. Use below steps to check and confirm:
- Press Windows Key + R to open the Run dialog box.
- Type eventvwr and press Enter to open Event viewer.
- Navigate to Application and Services Logs > Microsoft > Windows > User Device Registration > Admin.
- Look for Event ID 360, which is related to WHfB.
Delete Windows Hello for Business Registrations
If you want to completely remove Windows Hello for Business registrations from a Windows 10/11 devices, you can use certutil.exe -deleteHelloContainer command. For more information, refer to the link: Delete Windows Hello for Business registrations.
Great article
Well done on the article, best I have seen yet.
Question: My intune environment has Windows hello set to not configured. If i toggle it to disabled as demonstrated above, what will happen to end users that may have turned it on during enrollment?
Hello,
Have you ever got an answer on this question ?
@Reza83, sorry that it look some time to respond, this toggle doesn’t affect existing users. When the tenant-wide setting is set to Disabled, users won’t be prompted to set up Windows Hello during OOBE. However, they can still configure it later unless you also disable it using a Settings Catalog policy.