In this blog post, we will demonstrate the steps to elevate user to local admin on Windows 365 Cloud PC. When you provision a Cloud PC for a user, by default, user will not get administrator rights. However, you can create a User Settings policy on Intune admin center to elevate user rights to administrator.
There are other options for elevating user rights to admin rights, If you are using Windows 365 Enterprise, you can use Account Protection policy. For more information, refer to the link: Add a User to Local Admin group using Intune.
Contents
Important Points
- Enable local admin permission in Windows 365 applies at the User level.
- User settings can be applied before or after a Cloud PC is assigned.
- User must sign out and sign in again once to get the admin rights.
- User will have local admin privileges on all Cloud PCs assigned to them.
Elevate User to Local Admin on Windows 365 Cloud PC
- Sign in to the Intune admin center > Devices > Windows 365 > User settings.
- Click on Add.
Settings Tab
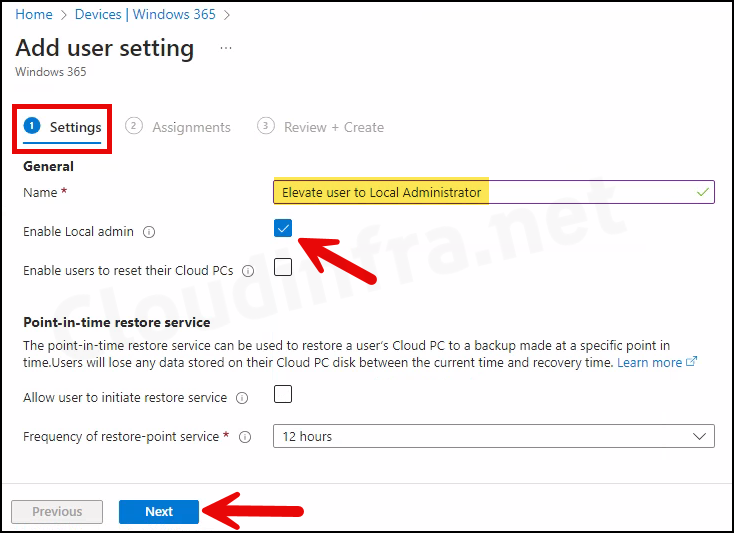
- Name: Provide a Name of the User settings policy.
- Enable Local admin: Check the box to enable it.
- Enable users to reset their Cloud PCs: Keep it unchecked (Default setting).
- Allow user to initiate restore service: Keep it unchecked (Default setting).
- Frequency of restore-point service: Keep default.

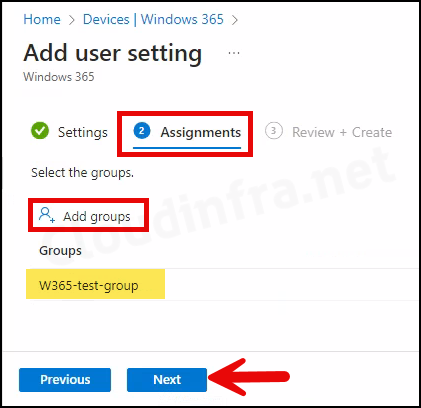
- Assignments Tab: Click Add groups to select an Entra security group that includes Users. Users in the assigned group will be granted Local Administrator privileges on their respective Cloud PCs.

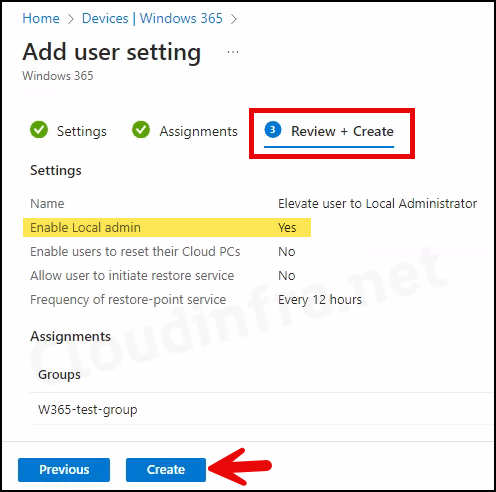
- Review + create: Review the policy and click on the Create button to proceed.


End User Experience
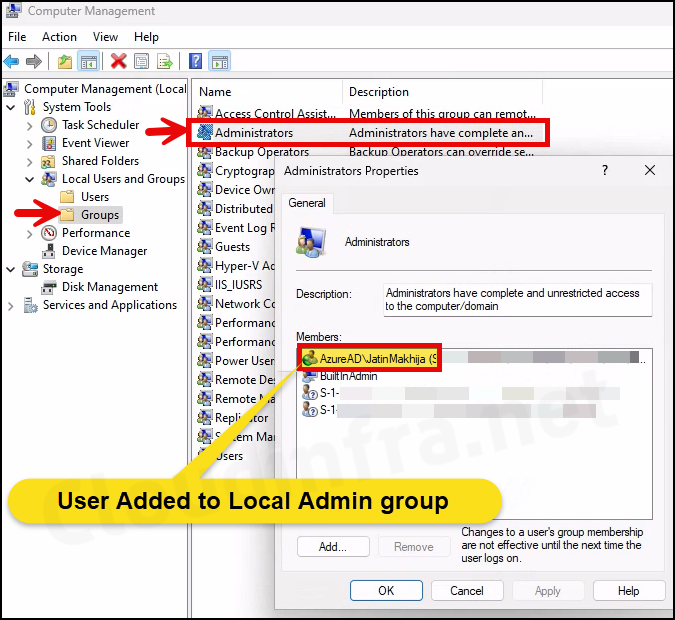
When the user will sign out and sign back on their Cloud PC, the policy will take effect, and the user will be added to the Local Administrators group. It took me only a few minutes to confirm that this change has been applied.
The screenshot below demonstrates that the user account AzureAD/JatinMakhija, a member of the W365-test-group, has been successfully added to the local administrators group on the Cloud PC.

