In this post, I will show you the steps to add a user to local admin group using Intune. You can add an Entra ID user or Entra security group to the local administrators group on Windows 10/11 devices.
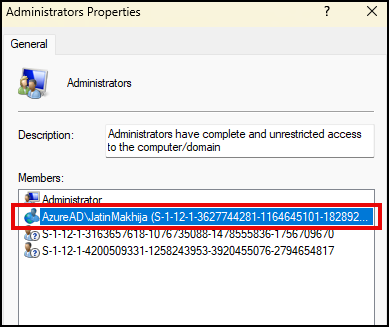
As an example, I will add an Entra ID user account called jatin.makhija@cloudinfra.net to the local administrator group on an Intune-managed Windows 11 device called CLOUDINFRA-W-25. You can also target multiple devices to add the account. Below screenshot shows local Administrators group after the policy has been applied.
Contents
Identify a User account
The first step is to identify a user account that you want to add to the local Administrator group on the target devices. Once you have a user account ready, proceed to the next step.
Create an Account Protection Policy
The next step is to create an Account protection policy, let’s check the steps:
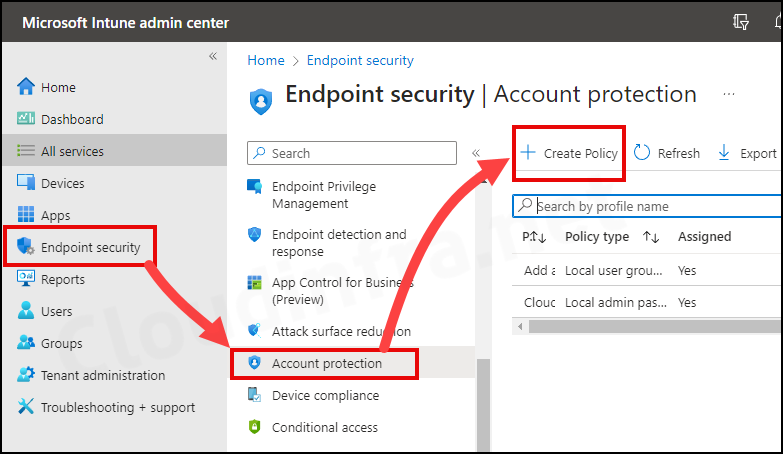
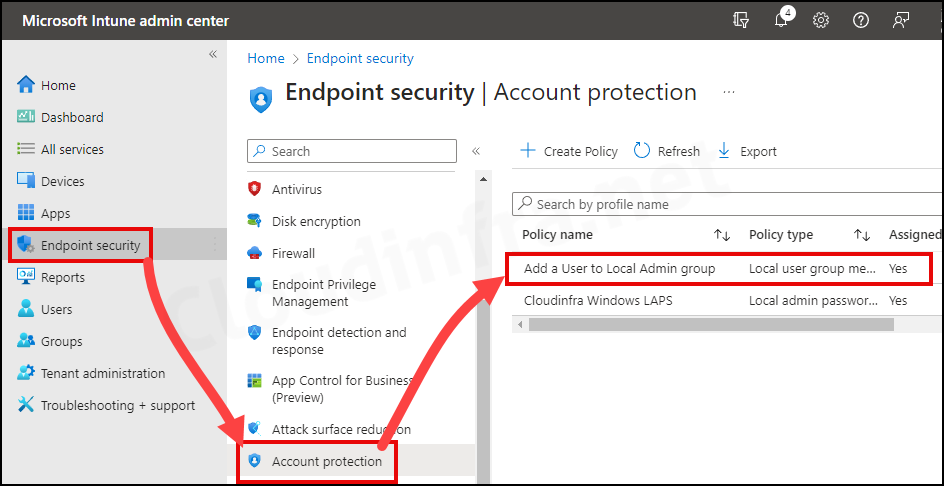
- Sign in to the Intune admin center > Endpoint Security > Account protection.
- Click on Create Policy.
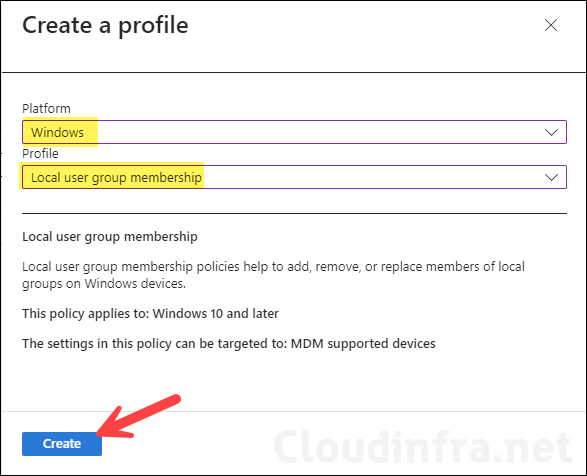
- Platform: Windows
- Profile: Local user group membership. Click on Create.
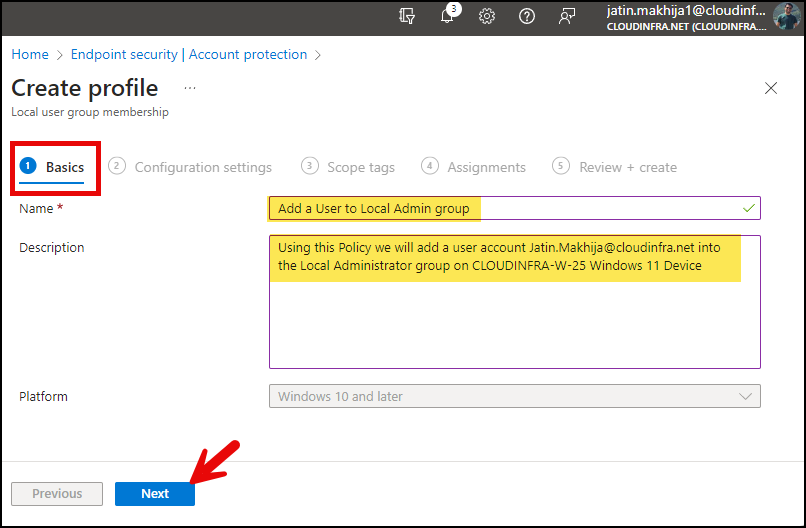
- Basics Tab: Provide a Name and Description of the Policy and click Next.
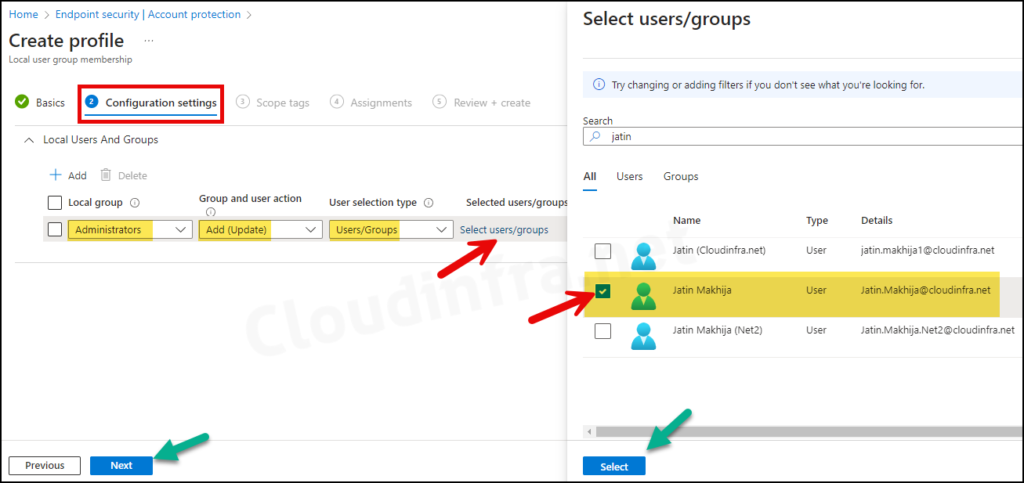
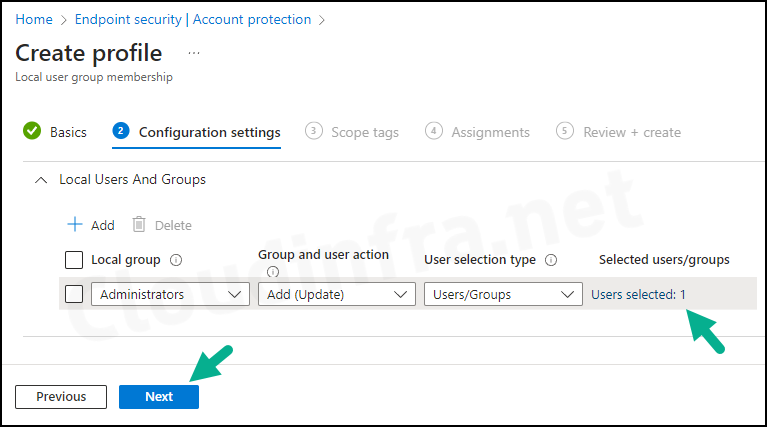
- Configuration settings:
- Local group: Administrators
- Group or user action: Add (Update)
- User selection type: Users/Groups
- Selected users/groups: Click on Select users/group and select the user you want to add to the Local admin group on the target device.
Add (Update): It will add selected members. When using Update, existing group members that are not specified in the policy remain untouched.
Add (Replace): When using Replace, existing group membership is replaced by the list of members specified in the add member section.
Remove (Update): Use it to remove any specific member from the local administrators group.
- Scope tags (optional): A scope tag in Intune is an RBAC label you add to resources (policies, apps, devices) to limit which admins can see and manage them. For more Information, read: How to use Scope tags in Intune.
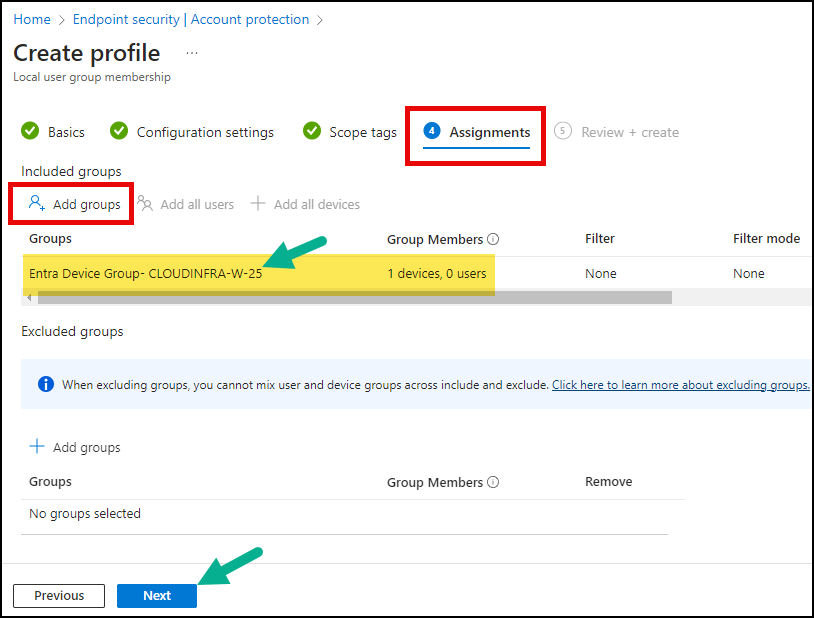
- Assignments: Assign the policy to Entra security groups that contain the target users or devices. As a best practice, pilot with a small set first; once validated, roll it out more broadly. For guidance on assignment strategy, see Intune assignments: User groups vs. Device groups.
- Review + create: Review the deployment summary and click on Create.
Sync Intune Policies
The device check-in process might not begin immediately. If you’re testing this policy on a test device, you can manually kickstart the Intune sync from the device itself or remotely through the Intune admin center.
Alternatively, you can use PowerShell to force the Intune sync on Windows devices. Restarting the device is another way to trigger the Intune device check-in process.
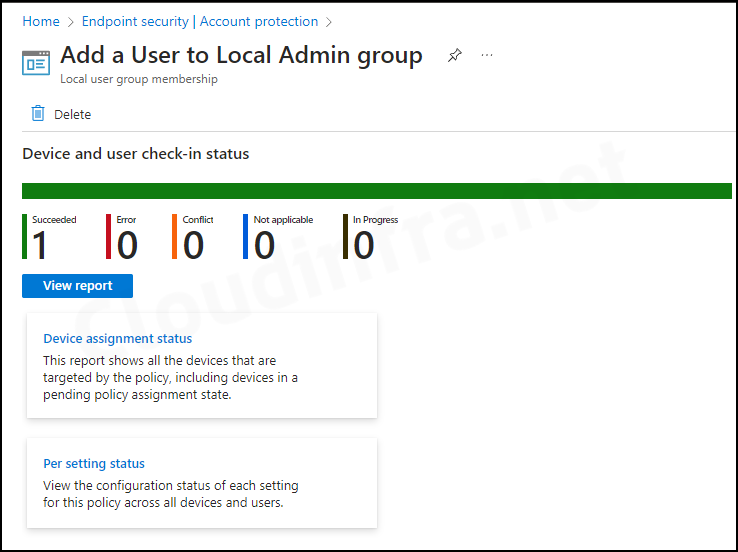
Monitoring Deployment Progress
- Sign in to the Intune admin center > Endpoint Security > Account Protection.
- Find the Account protection policy you created and click on it to open.
- Check under Device and user check-in status to find the deployment status. For more information, click on Device Assignment status and Per Setting status.
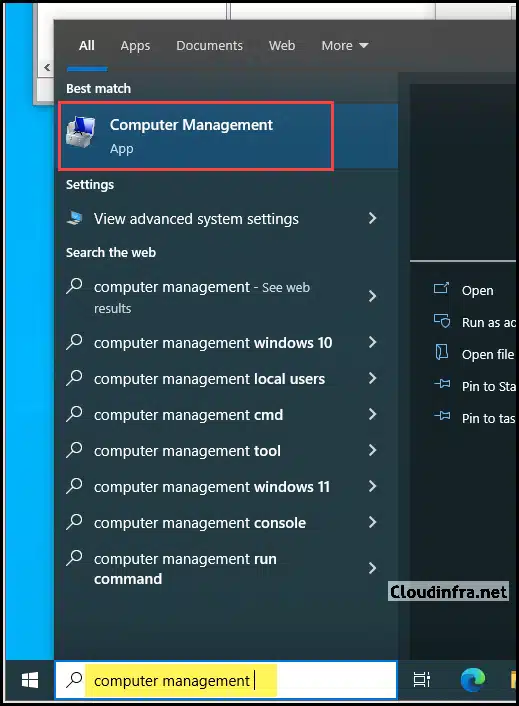
End User Experience
- Click on Start and search for Computer Management.
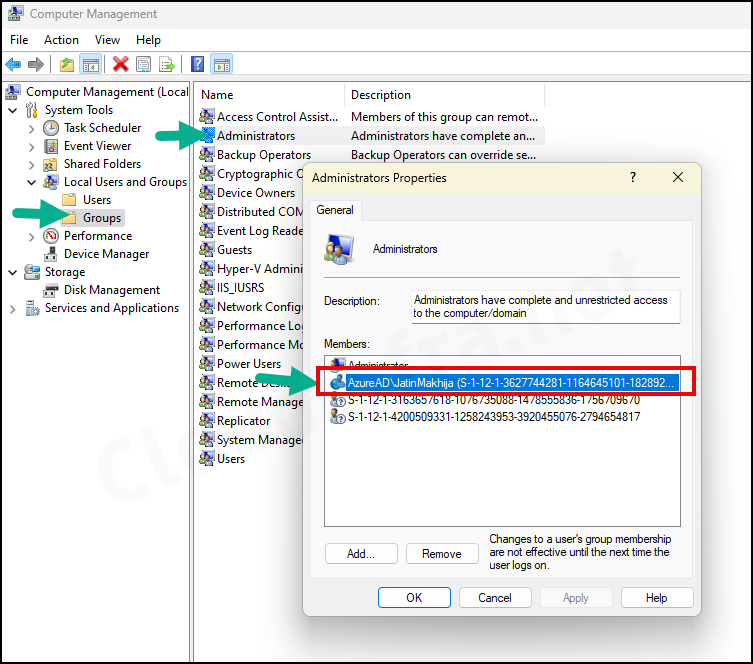
- Click on Local Users and Groups > Groups – Double-click on the Administrators group.
- You will find that the User account has been added to this group per the Policy we created.
please assist how to get users SID details (members of administrators there will be SID how to know user details)
Thank you for this.
This method applicable only for Azure AD Devices not hybrid
It worked for me in a hybrid environment.
Can this policy scenario be used to deploy to different departments with different users or will this not work?
Each department has a unique user / device.
I.e
IT Department: Laptop 1,2,3
User: Jim, Bob, Lee
Sales Department: Laptop 4,5,6
User: Hayley, Roger, Diane
Dev Department: 7,8,9
User: Helen, Dave, Curtis
Hi Zerka, You should be able to create this scenario. If I understood correctly, you want Jim, bob ad lee to be the administrator on Laptops 1, 2 and 3 and similarly Hayley, Roger, Diane to be the administrator on Laptop 4,5,6? If you want each user to be administrator on their own device only, then you can achieve this via Autopilot deployment profile as well.
Create three groups:
LocalAdmins-IT with members Jim, Bob, Lee
LocalAdmins-Sales with members Hayley, Roger, Diane
LocalAdmins-Dev with members Helen, Dave, Curtis
Create device groups per department:
IT-Laptops containing Laptop 1,2,3
Sales-Laptops containing Laptop 4,5,6
Dev-Laptops containing Laptop 7,8,9
Create one account protection policy per department (below is an example of IT laptops), you can create a similar policy for Sales and Dev as well.
Local group: Administrators
Action: Add (Update)
Selected users/groups: LocalAdmins-IT
Assign to: IT-Laptops