In this blog post, I will show you the steps to fix error this share requires obsolete SMB1 Protocol. SMB stands for Server Message Block, a network file-sharing protocol. It allows applications and computers to communicate and share files, printers, and various resources over a network.
Microsoft deprecated SMBv1 in 2014 and no longer installs it on Windows devices. It is not included by default, starting with Windows 10 Fall Creators Update and Windows Server 1709.
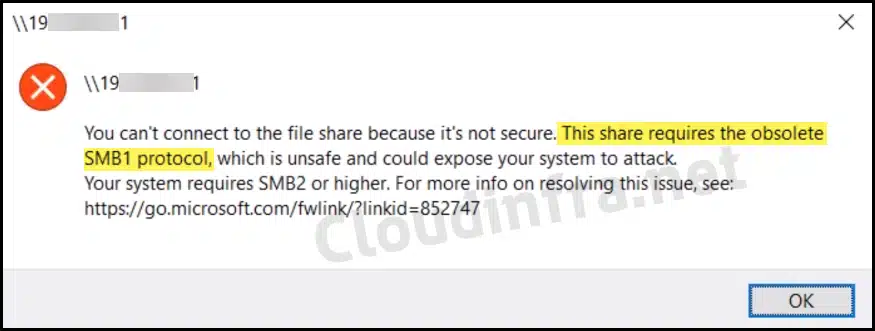
You might have stored important files on a file share or USB drive, still using legacy SMBv1 protocol. When you try to access the file share stored on this USB drive, you may get below error message:
You can’t connect to the file share because it’s not secure. This share requires the obsolete SMB1 protocol, which is unsafe and could expose your system to attack. Your system requires SMB2 or higher. For more info on resolving this issue, see: https://go.microsoft.com/fwlink/?linkid=852747
Error message
You may also find an error in the Windows event viewer, SMB1 negotiate response received from the remote device when the local computer cannot negotiate SMB1. You may find other related error messages as mentioned below:
- The specified network name is no longer available.
- Unspecified error 0x80004005
- System Error 64
- The specified server cannot perform the requested operation.
- Error 58
Contents
Reasons for Obsolete SMB1 Protocol Error
You’ve encountered this error because:
- Either you attempted to connect to a device that is only using or compatible with SMBv1 protocol or A device that relies on SMBv1 tried to connect to a newer version of Windows, where SMBv1 isn’t enabled by default.
SMBv1 is known to have significant security vulnerabilities and is susceptible to various types of attacks. Microsoft strongly recommends using SMBv2 or SMBv3 protocol instead of SMBv1.
Note
Fix Obsolete SMB1 Protocol Error
You can resolve the error by temporarily enabling SMBv1 on your Windows device to connect to the file share or USB drive to access the data. Once you copy all the data you require, it’s important to disable SMBv1 on the device promptly, as it’s a security risk to keep SMBv1 enabled.
- You can Enable SMBv1 using two methods.
- GUI method
- PowerShell script
Method 1: Enable SMBv1 on a Windows 10/11 device using GUI
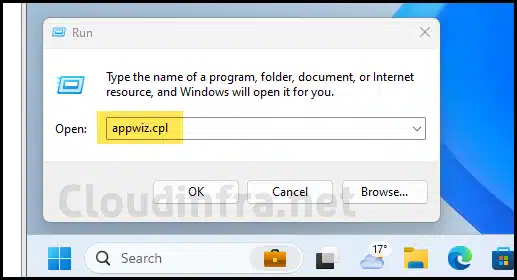
- Press Windows + R together to open the Run dialog box.
- Type
appwiz.cpl, Press Enter to open the Programs and Features window.
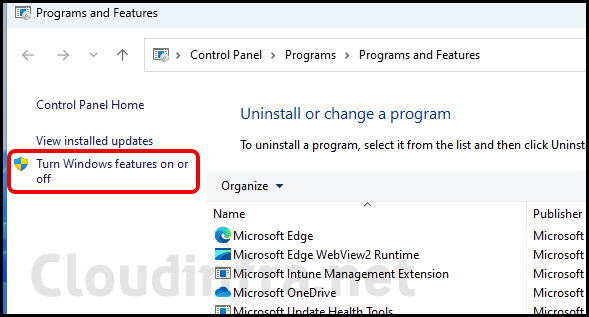
- On the Programs and Features window, find Turn Windows features on or off.
- Scroll down on the list of Features and select SMB 1.0/CIFS File Sharing Support.
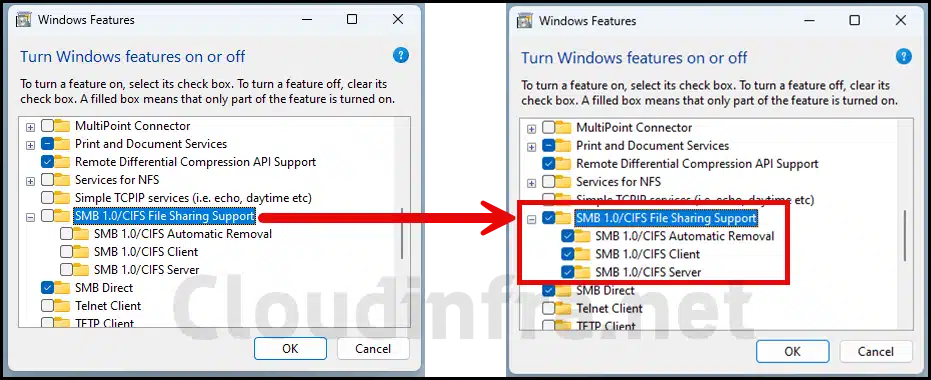
- Click the OK button to enable the SMBv1 protocol on your device. Windows will then search for the required files and enable this protocol.
- Click on Restart now button and restart your device to complete this process.
Once SMBv1 has been enabled on your device, you can try to access the share once again. This time, you should be able to access the shared folder.
After you’ve copied your files or completed your work, it’s recommended to uncheck the SMB 1.0/CIFS File Sharing Support option to disable SMBv1.
Method 2: Enable SMBv1 on a Windows 10/11 device using PowerShell
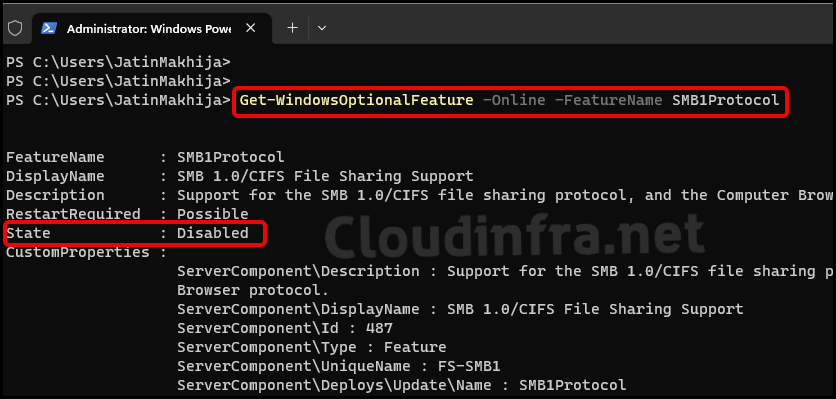
- Run the below PowerShell cmdlet to check the current status of the SMBv1 protocol on your computer. As you can see from the screenshot, SMBv1 is currently disabled on this computer.
Check the state of SMBv1 protocol
Get-WindowsOptionalFeature -Online -FeatureName SMB1Protocol
Another way to check the state of SMBv1 protocol
Get-SmbServerConfiguration | Select EnableSMB1Protocol
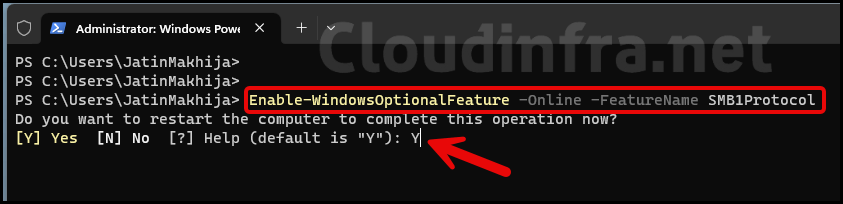
- You can enable SMBv1 on your device by running the below powershell command. Please note that you will be prompted to restart your computer to complete this operation. If you press Y and Enter, your device will be restarted immediately.
Enable SMBv1 Protocol
Enable-WindowsOptionalFeature -Online -FeatureName SMB1Protocol
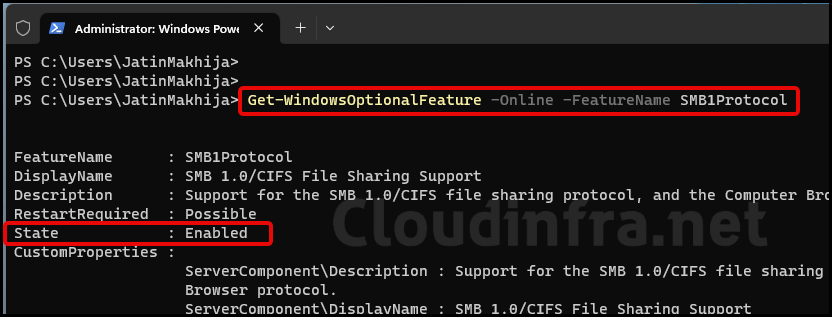
- Confirm if SMBv1 has been enabled on your device. Run the below command to confirm and look for the State parameter value, which should be set to Enabled.
Verify SMBv1 Protocol status
Get-WindowsOptionalFeature -Online -FeatureName SMB1Protocol
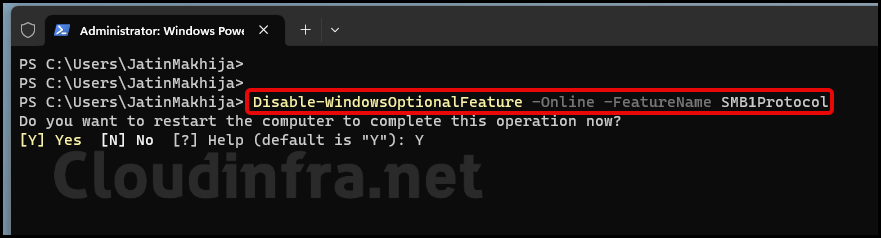
- After you have enabled SMBv1, you can test to see if you can connect to the file share now. Once your work is done, you should disable SMBv1. You can use the below command to disable SMBv1 on a Windows device:
Disable SMBv1 Protocol
Disable-WindowsOptionalFeature -Online -FeatureName SMB1Protocol
Please note that your system will restart Immediately after you type Y on the prompt and press Enter.
FAQs
How to Enable/Disable SMBv1 using Windows Registry
Run below command on the elevated Powershell console to enable the SMBv1 protocol. This will create an SMB1 DWORD registry entry and set its value to 1. To disable it, Set the SMB1 value to 0.
Set-ItemProperty -Path “HKLM:\SYSTEM\CurrentControlSet\Services\LanmanServer\Parameters” SMB1 -Type DWORD -Value 1 -Force
How to Enable/Disable SMBv1 using Group Policy?
Create a new GPO and go to Computer Configuration > Preferences > Registry and create a Registry Item using the following configuration:
Action: Update
Hive: HKEY_LOCAL_MACHINE
Key Path: SYSTEM\CurrentControlSet\Services\LanmanServer\Parameters
Value name: SMB1
Value type: REG_DWORD
Value data: 0