In this blog post, I will show you the steps to fix Windows update error 0x80248007. I recently got an error code 0x80248007 when upgrading my Windows 11 laptop. This happened during Windows update process, which failed, and this error code was shown on the screen. There are different options to resolve this error. Let’s take a look:
The error code could occur because of various reasons like:
- Lost communication with Windows update server.
- The patch download was not completed successfully enough to begin the installation process.
- Windows was restarted during the update process.
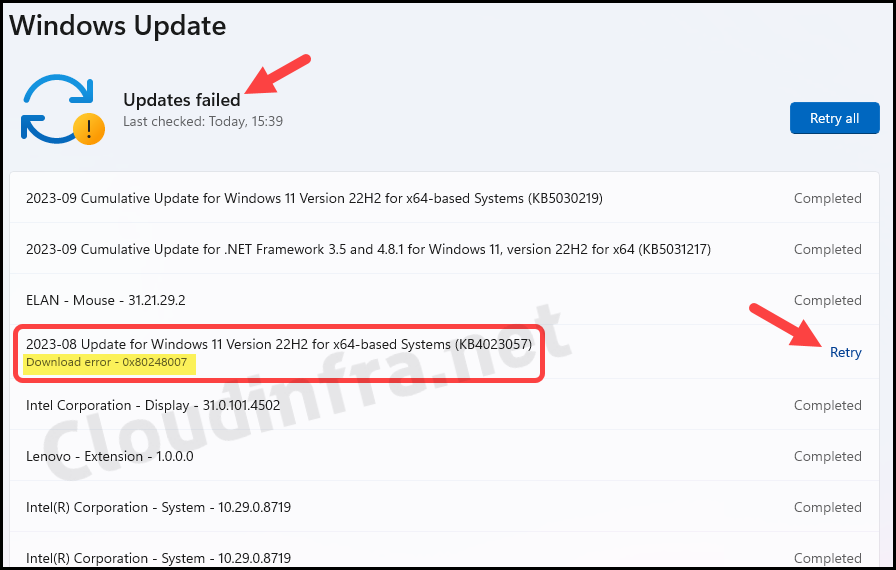
Below screenshot shows the error code 0x80248007 while downloading KB4023057. You can always click the Retry link to re-initiate the download and install process, but this might not work. I have provided several troubleshooting options that can help you fix this issue.
Contents
Fix Windows Update error 0x80248007
There is not a single solution which could fix this issue, as the root cause could be different in your case. Please follow below troubleshooting options which could fix this issue.
Option 1: Start/Restart Windows Installer service
Windows Installer Service is utilized during the Windows update process to efficiently manage and install updates to the Windows operating system and other Microsoft software components. Follow below steps to start/restart Windows 11 service:
- Press the Windows + R keys to open the Run dialog box.
- Type
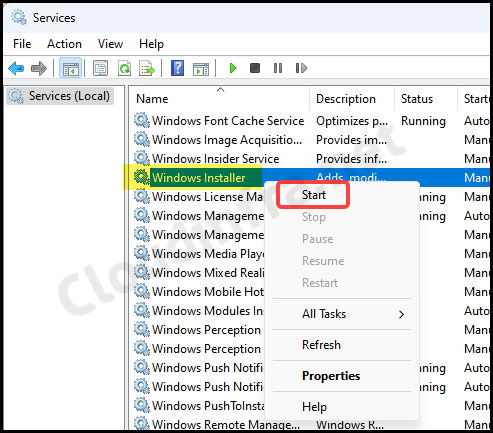
services.mscand enter. This will open the Services management console. - Search for Windows Installer service and right-click on it. Click on Start to start this service.
If you prefer the command line to Start the Windows Installer service, you can open a Command prompt as administrator and type net start MSIServer to start this service.
Please note, if this service is already have running status, you can right-click the service and click on Restart. This way the service will restart to clean state and any pending updates or Installation can resume.
Note
Option 2: Run Windows Update Troubleshooter
Windows 10/11 already has a built-in Windows update troubleshooter that can detect any Windows update-related issues and provide a fix for them. Launch Windows update troubleshooter using below steps:
- Press the Windows + I keys to open the Settings app.
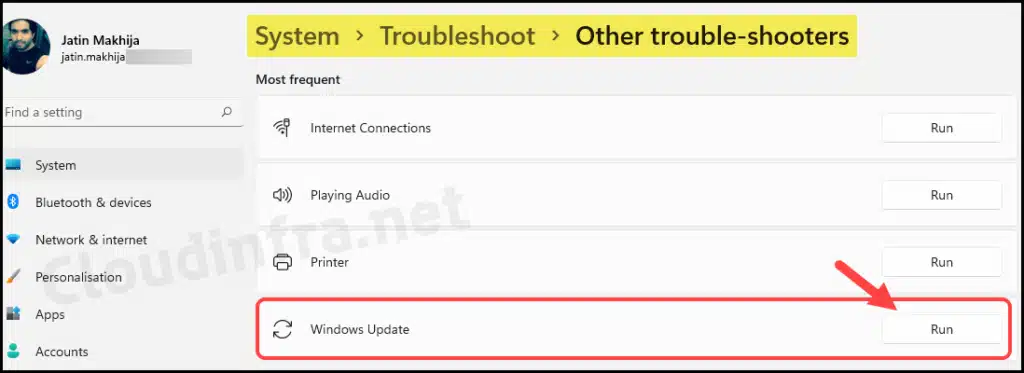
- Go to System > Troubleshoot > Other troubleshooters.
- Click on the Run button next to Windows update to launch it.
Using this troubleshooter, you can follow the Wizard to Identify Issues related to the Windows updates. This may help detect error code 0x80248007 and provide possible solutions.
Option 3: Stop Windows Update service > Delete Temp Files > Start the Service
If starting/restarting the Windows Installer service did not fix this issue for you, you can stop the Windows update service, delete temporary files, and try again. Windows update service is critical to ensuring that Windows updates are detected when a new update is released, downloaded on your computer, and Installed.
- Stop Windows update service:
- Press the Windows + R keys to open the Run dialog box.
- Type
services.mscand enter. This will open the Services management console. - Find the Windows update service from the list of services and right-click on it. Then click on Stop to stop the service.
- Find Background Intelligent Transfer Service, right-click on it, and click on Stop to stop this service.
If you prefer the command line to stop the Windows update service, you can open a Command prompt as administrator and type two commands below:
net stop wuauserv

net stop bits
- Delete Temporary Windows update files:
- When the Windows update service has been stopped, clear any Temporary Windows update files. Windows updates process uses a temporary cache folder called SoftwareDistribution to download Windows updates. It can be located at %systemroot%\SoftwareDistribution path.
SoftwareDistribution folder managed by Windows update agent (WUagent) plays an important role in the management and distribution of Windows Updates. It stores update files, manages their installation, and keeps track of update history and logs, helping to keep the Windows operating system secure and up to date. Occasionally, clearing or resetting this folder may be necessary to resolve corrupt update files and any other update-related issues.
Note
- Steps to clear the SoftwareDistribution folder
- Press Windows + R to open the Run dialog box.
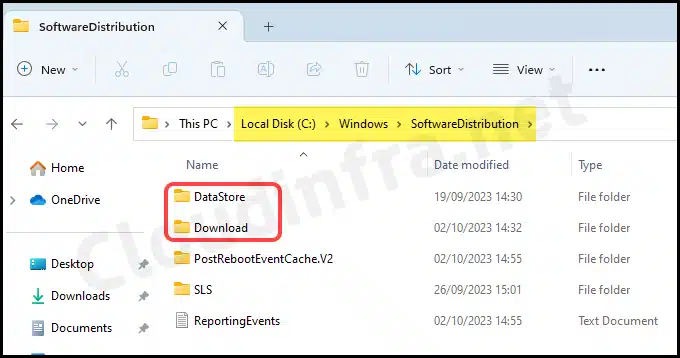
- Type %systemroot%\SoftwareDistribution and press enter to open this folder.
- Delete DataStore and Download folders inside the SoftwareDistribution folder.
- Restart your computer and check if the Windows update issue is resolved.
Please note, DataStore folder contains system update history information. If you delete this folder, you will also lose Windows update history information. Along with that, next time you will update your Windows device, it may take a bit longer due to re-building of cache.
If deleting DataStore and Download folders did not resolve your Issue, you can also delete all contents Inside SoftwareDistribution folder.
If you do not want to delete the contents of SoftwareDistribution folder, you can simply rename it as well, for example: SoftwareDistribution.old This will preserve old cached data for you to refer in the future. This folder will be automatically re-created on the next Windows update process.
If you prefer command line, you can open the command prompt as administrator and type below commands, renaming SoftwareDistribution folder to SoftwareDistribution.old. I will recommend restarting your device after renaming this folder.
net stop wuauserv

net stop bits

ren c:\windows\SoftwareDistribution SoftwareDistribution.old

net start wuauserv

net start bits
Option 4: Manually Download and Install Windows update
If none of the steps can resolve this issue, and you want to install this Windows update on your device, then you can also manually download it and install it on your device. Please follow the below steps to download a Windows update manually:
- Visit the Microsoft Update Catalog site.
- Search for the patch using KB ID. For example: KB5030310.
- Click the Download button to save the .msu (Microsoft update file).
- Once the file is saved on the device, you can double-click on it to start the Installation process.