In this blog post, I will show you step by step how to:
- Generate an SSH key pair on an Ubuntu server.
- Configure SSH to use key-based authentication.
- Convert the OpenSSH private key to PuTTY’s .ppk format.
- Connect to the Ubuntu server from Windows using PuTTY.
In my example, I am using a test Ubuntu server and initially connect using the root account with a password. In production, you should use a non-root user with sudo rights and restrict password logins later.
Contents
Step 1 – Generate SSH key pair on the Ubuntu server
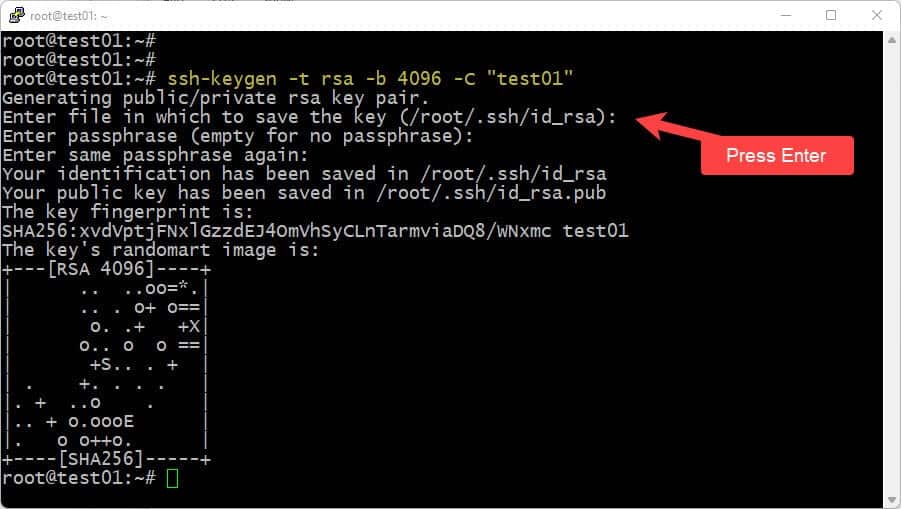
First, connect to your Ubuntu server with a username and password (in the example this is root, but a normal user account is recommended). Run the following command to generate an SSH key pair:
ssh-keygen -t rsa -b 4096 -C "test01"- -t rsa creates an RSA key pair.
- -b 4096 sets the key length to 4096 bits.
- -C “test01” adds a comment so you can identify this key later.
When prompted:
- Press Enter to accept the default file name (/root/.ssh/id_rsa for root).
- Optionally enter a passphrase to protect the private key, or press Enter again to leave it empty.
This creates two files in the .ssh directory:
- id_rsa.pub – public key.
- id_rsa – private key (keep this secret).
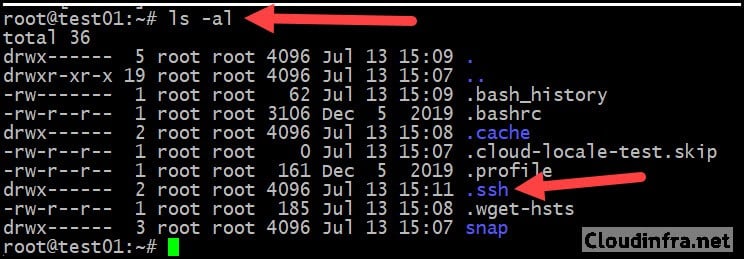
You can verify the files with:
ls -al ~/.ssh

or

ls -al
- If needed, change into the .ssh folder:
cd ~/.ssh

or

cd .ssh
ls -al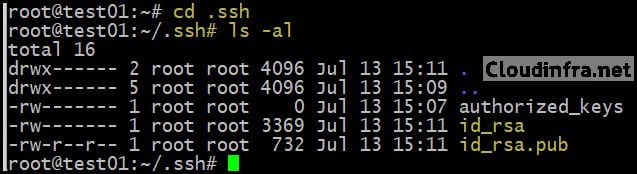
Step 2 – Add the public key to authorized_keys
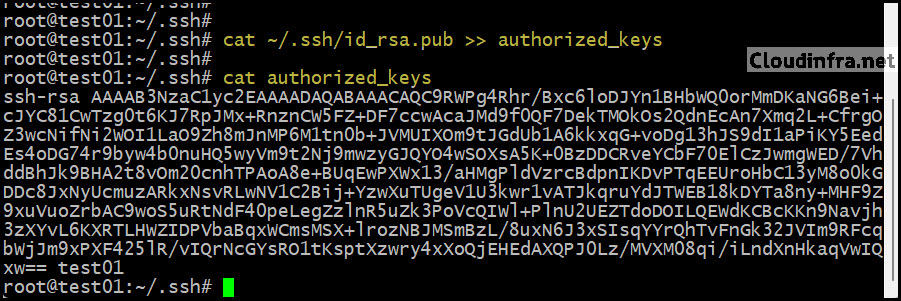
Next, copy the public key into the authorized_keys file. This ensures the server will trust this key pair when you connect. If authorized_keys does not exist, this command will create it and append the key:
cat ~/.ssh/id_rsa.pub >> ~/.ssh/authorized_keys


cat ~/.ssh/authorized_keys

or

cat authorized_keys
To avoid permission issues with SSH, set the recommended permissions:
chmod 700 ~/.ssh
chmod 600 ~/.ssh/authorized_keys
This is the standard permission model for ~/.ssh and authorized_keys on most Linux distributions so that the SSH server accepts the keys and does not complain about “too open” permissions.
You never put the private key (the file starting with
-----BEGIN RSA PRIVATE KEY-----) intoauthorized_keys. Only the public key (id_rsa.pub) belongs inauthorized_keys.
Step 3 – Download the Private key to Windows using PSCP
Now that the server is configured to trust the key, we need the private key on your Windows machine so that PuTTY can use it. Download the id_rsa file from the server using pscp.exe (PuTTY’s SCP client). First, create a folder on your Windows PC to store SSH keys, for example:
C:\temp\SSHKeys
Then run this command from a command prompt on Windows. Replace 137.184.218.96 with the public IP of your server, and root with your username if you are not using root.
pscp.exe root@137.184.218.96:/root/.ssh/id_rsa "C:\temp\SSHKeys"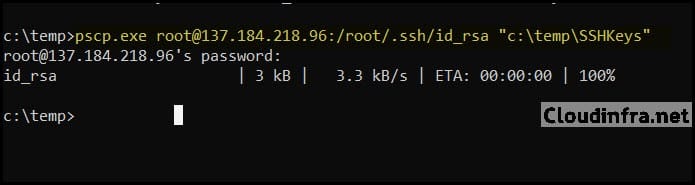
After this step:
- The file id_rsa downloaded on your Windows machine is your OpenSSH private key.
- Store it securely and do not share it.

Optionally, once you have confirmed you can connect via key, you can delete the copy of id_rsa from the server if the server itself does not need to initiate SSH connections.
Step 4 – Convert OpenSSH key to PuTTY .ppk using PuTTYgen
PuTTY uses its own key format .ppk. We now convert the OpenSSH private key id_rsa to .ppk using PuTTYgen.
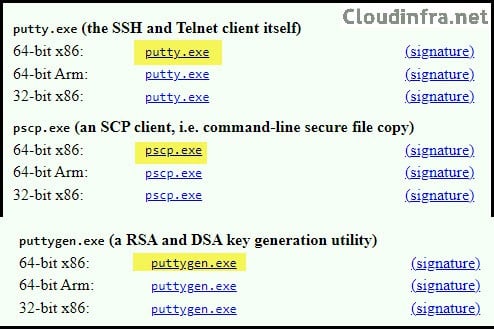
- Download PuTTY, PuTTYgen and PSCP from the official PuTTY site: Download PuTTY: latest release (0.83) if you have not already done so, and save them under C:\temp or another folder of your choice.
- Launch puttygen.exe (PuTTY Key Generator).
- In PuTTYgen, go to Conversions > Import key.
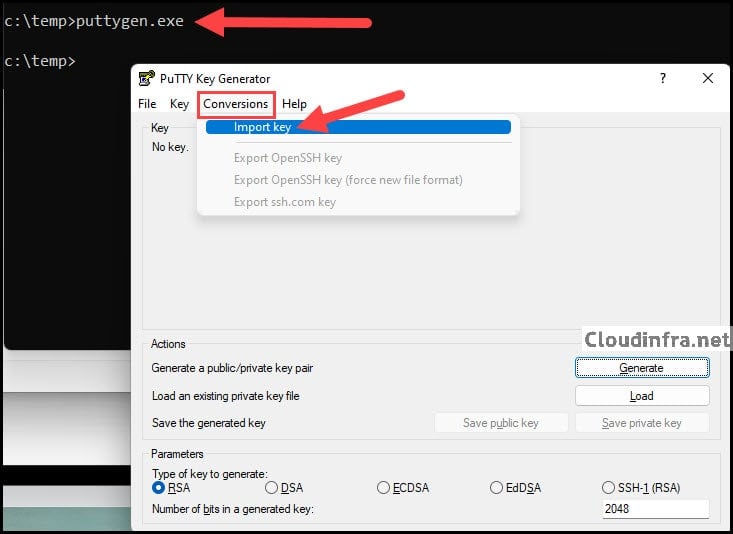
- Browse to C:\temp\SSHKeys\id_rsa and open it.
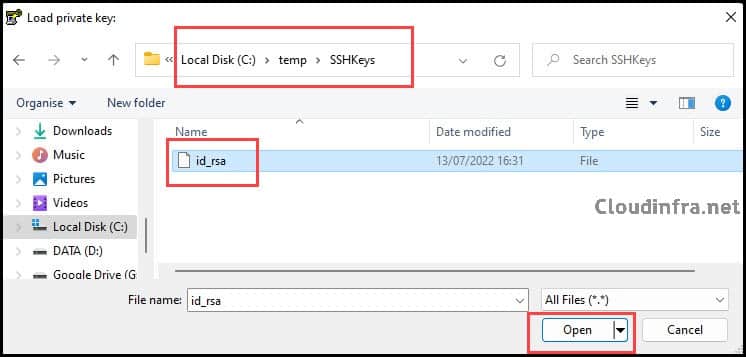
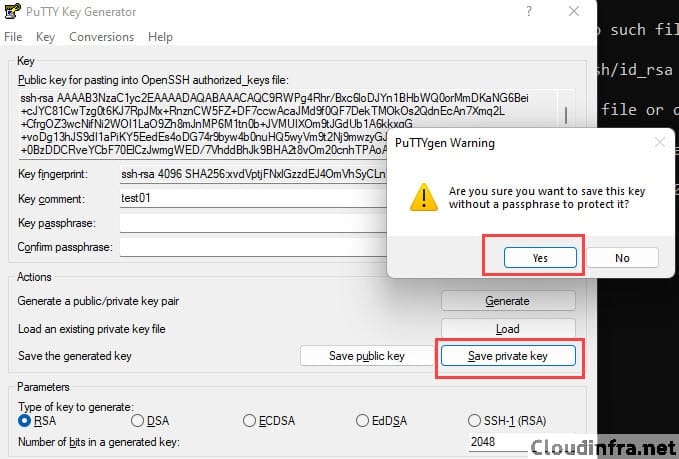
- After the key is loaded, click Save private key.
- You can choose to protect the key with a Key passphrase or save it without a passphrase (not recommended for production).
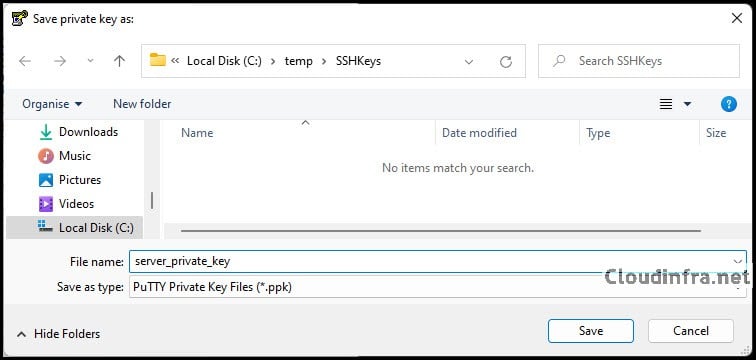
- Save the key as a .ppk file, for example:
C:\temp\SSHKeys\server_private_key.ppk
- You now have a PuTTY compatible private key file that you can use to connect to the server.
Step 5 – Configure PuTTY to Use the Private Key and Connect
Next, configure PuTTY to use your .ppk file for authentication.
- Start putty.exe.
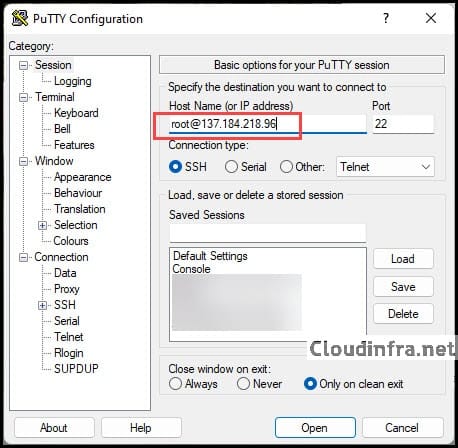
- In the Session category:
- In Host Name (or IP address), enter your SSH endpoint, for example:
root@137.184.218.96 or just 137.184.218.96 and set the username later. - Ensure Port is
22. - Connection type should be SSH.
- In Host Name (or IP address), enter your SSH endpoint, for example:
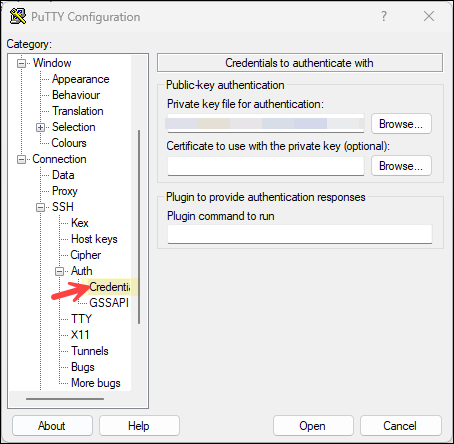
- In the left tree, go to Connection > SSH > Auth > Credentials (or Auth depending on PuTTY version).
- Under Private key file for authentication, click Browse and select C:\temp\SSHKeys\server_private_key.ppk. Then click Open to connect.
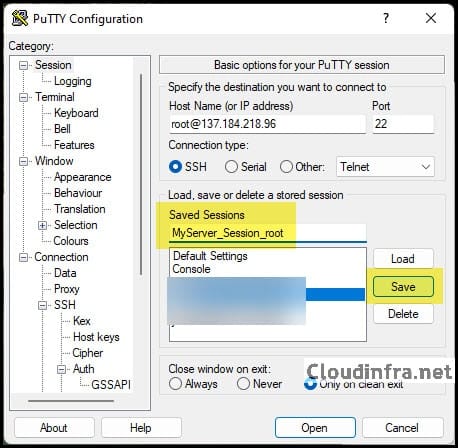
- (Optional) To avoid reconfiguring each time:
- Go back to the Session category.
- In Saved Sessions, enter a name such as MyServer_SSH_Key.
- Click Save.
- Click Load and then click Open to connect.
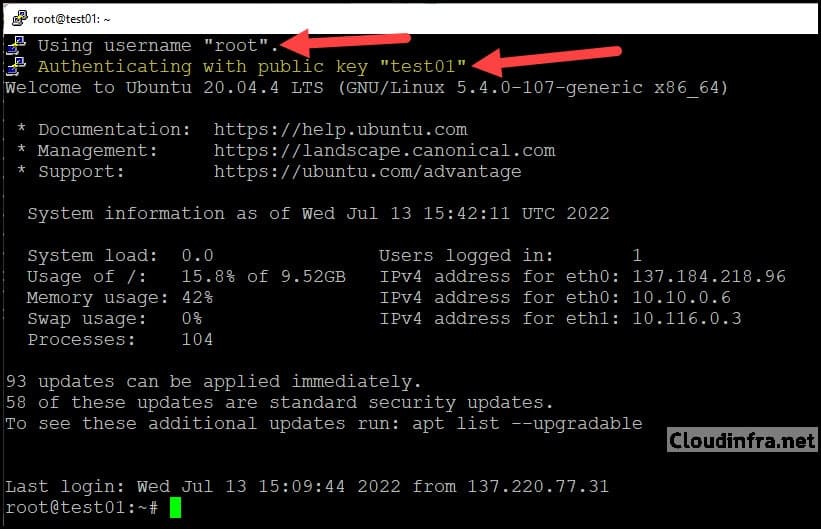
On first connect, you may see a PuTTY security alert asking you to trust the server’s host key. Review and accept if you recognize the server. You should now be logged in to the Ubuntu server, and in the PuTTY event log you will see that authentication was performed using a public key rather than a password.
Step 6 – (Optional) Disable password authentication
Once you have confirmed that key-based authentication is working reliably, you can tighten security by disabling password logins on the server.
On the Ubuntu server:
- Edit the SSH daemon configuration:
sudo nano /etc/ssh/sshd_config
- Locate or add the following lines:
PasswordAuthentication no
PubkeyAuthentication yes
- Save the file and restart SSH:
sudo systemctl restart sshd
Thereafter, only clients with a valid private key (such as your PuTTY .ppk) will be able to log in via SSH.
Conclusion & Alternative Approach
In this post we generated the SSH key pair on the Ubuntu server and then exported the private key to Windows. Many administrators prefer the opposite:
- Generate the key pair on the Windows client using PuTTYgen.
- Copy only the public key to the server and append it to ~/.ssh/authorized_keys.
Both approaches work. For learning purposes, the flow shown in this guide is simple and easy to follow. For production environments, generating keys on the client and keeping private keys local is generally considered better practice.