In this post, I will show you the steps to fix ads.txt not found issue when using Cloudflare. I recently encountered an issue on the Google AdSense portal. It showed that my site’s Ads.txt status was Not found. I confirmed that I had placed the ads.txt file correctly at my website’s root.
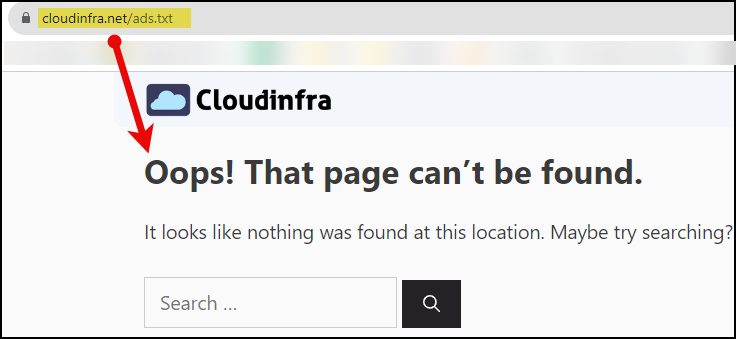
However, when I tried to access this file using a web browser via https://cloudinfra.net/ads.txt, it displayed an error message: Oops! That page can’t be found.
Contents
What is ads.txt file?
The ads.txt (Authorized Digital Sellers) file is a simple text file that publishers in the digital advertising ecosystem use to publicly declare the companies or entities authorized to sell their digital advertising inventory. This file is placed on a publisher’s website and is meant to combat fraud and domain spoofing in programmatic advertising.
ads.txt file must be placed in the root directory of your website. The root directory is your website’s top-level directory, storing all your files and folders.
Error message when ads.txt is not found
You might encounter an error message in the Google AdSense console that says, Earnings at risk – You need to resolve some issues with your ads.txt file to prevent a significant impact on your earnings. You’ll have two options: FIX NOW and LEARN MORE.
Locate Ads.txt file status on the Google AdSense portal:
- Sign in to the Google AdSense portal.
- On the left-hand side, click on Sites.
- This will open up the Manage Your Sites page, which shows all your sites integrated with Google AdSense.
- You can check your Site’s Approval Status and Ads.txt status as well.
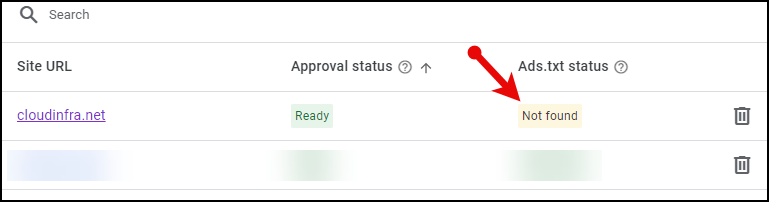
As you can see in the below screenshot, Ads.txt status column for my site cloudinfra.net shows as Not Found. We must fix this issue immediately and ensure Ads.txt status remains Authorized.
- You can click on your site’s name link in the Site URL column and then select Check for updates.
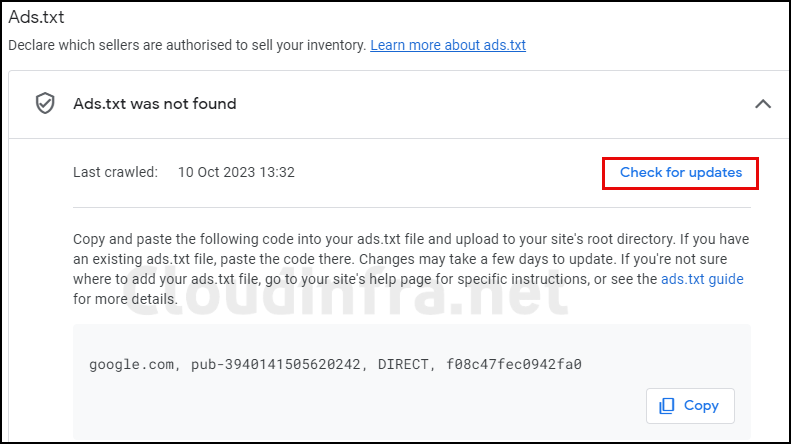
- If Google cannot access your site’s ads.txt file using this URL: https://<your site name>/ads.txt, you may receive the following error message:
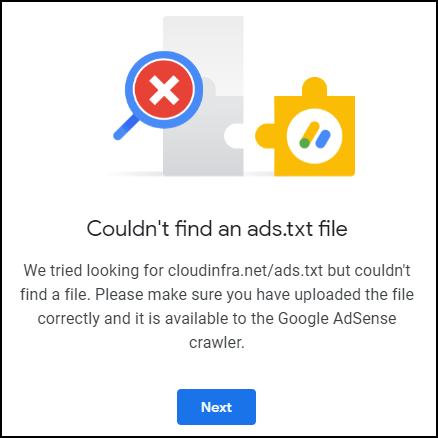
Couldn’t find an ads.txt file. We tried looking for cloudinfra.net/ads.txt but couldn’t find a file. Please make sure you have uploaded the file correctly and it is available to the Google Adsense crawler.
You may also find one of the following Ads.txt file status on your Google AdSense portal. We will be focusing on fixing Not found error.
- Not found: No ads.txt file was found when the site was last crawled.
- Authorised: Your publisher ID was found in the site’s ads.txt file.
- Unauthorised: Your publisher ID wasn’t found in the ads.txt file, and AdSense can’t show ads.
- Not applicable: Your publisher ID isn’t needed in the ads.txt file.
Steps to fix ads.txt not found Issue
I faced this problem when using Cloudflare as a Content Delivery Network (CDN) for my website. I’m not completely certain about the exact cause, but Cloudflare may restrict direct access to the files on my website as a security measure. However, I can show you the steps that helped resolve this issue.
- Sign in to your Cloudflare account, where you’ve added your websites.
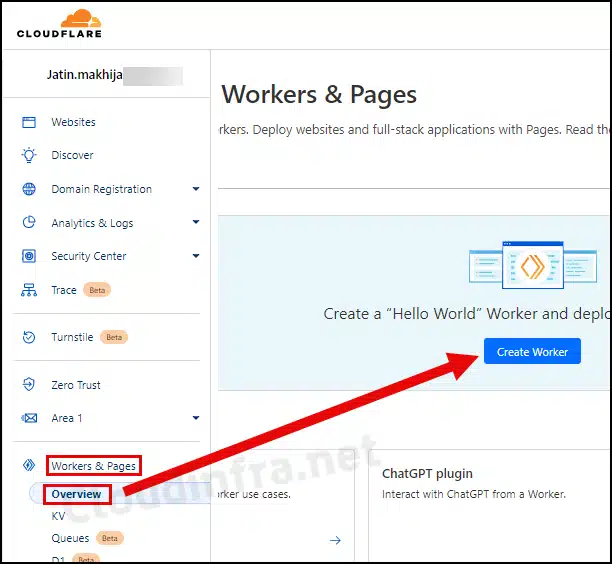
- Locate Workers & Pages from the home page. If you can’t find the home page, click on the Cloudflare logo.
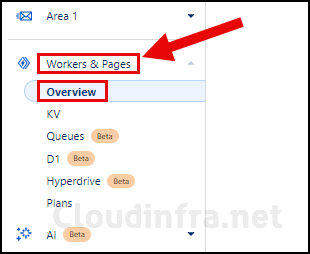
- Click on Overview and then select Create Worker.
- If you don’t see the Create Worker option on the Overview page, click Create application, and you’ll find it under the Create Worker option.
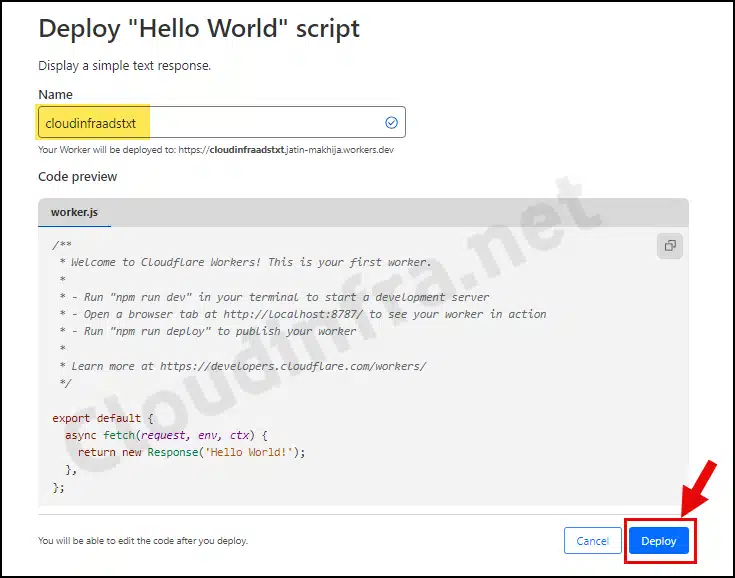
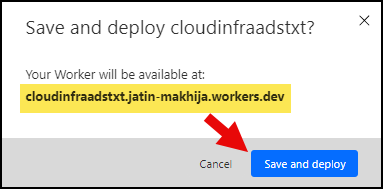
- Give the Worker a distinct name. For instance, I’ve used cloudinfraadstxt as the name. Then, click the Deploy button to initiate the deployment of the Worker.
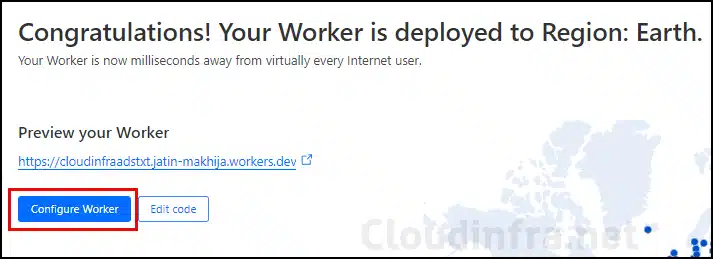
- As shown in the screenshot below, the Worker has been successfully deployed. Now, click on the Configure Worker button.
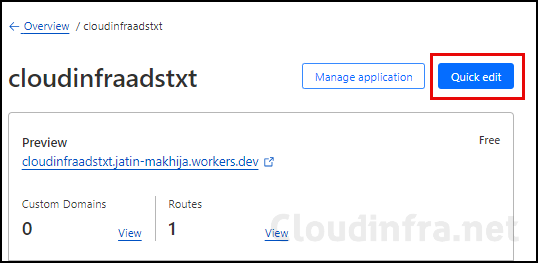
- After you’ve clicked on Configure Worker, proceed by clicking the Quick edit button.
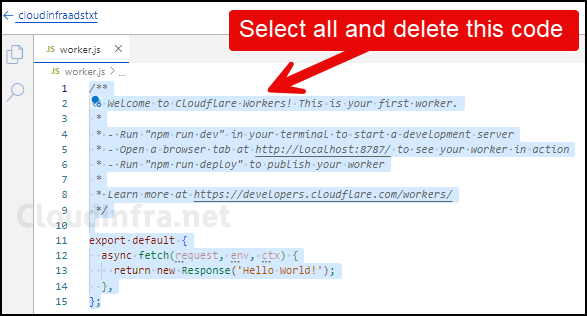
- Please start by selecting all the default code in the Worker.js file and deleting it. Then, replace that deleted code with the provided code below.
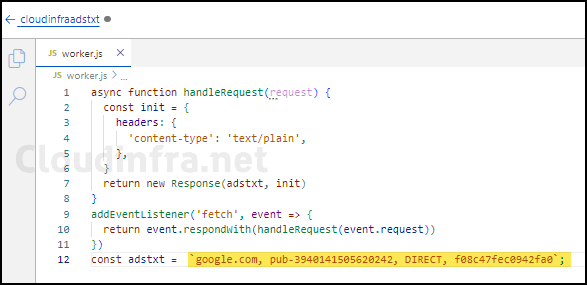
- Make sure to substitute Add your Google AdSense / third-party Publisher ID info with your actual Google AdSense Publisher ID.
async function handleRequest(request) {
  const init = {
    headers: {
      'content-type': 'text/plain',
    },
  }
  return new Response(adstxt, init)
}
addEventListener('fetch', event => {
  return event.respondWith(handleRequest(event.request))
})
const adstxt =  `Add your google adsense / third party Publisher ID info`;
- The code has been replaced, and I have added my site’s Google publisher ID Information between the quotes.
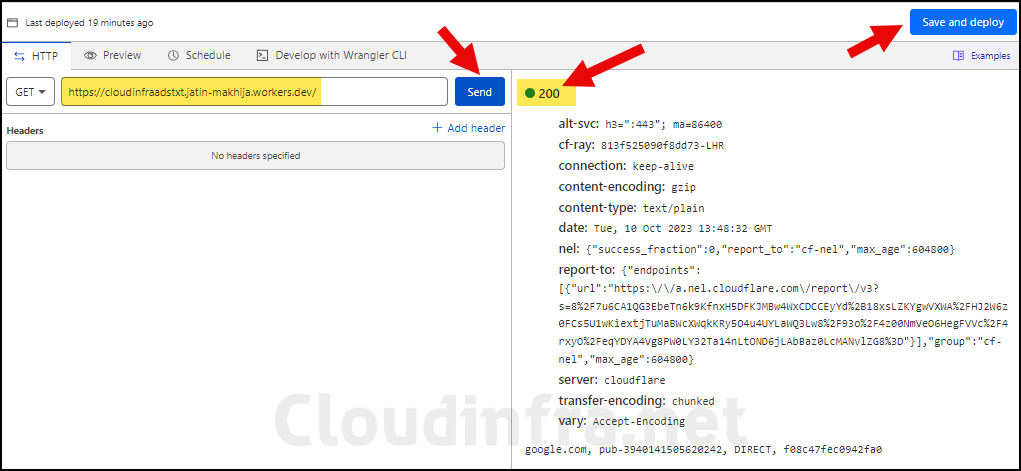
- Now, on the right-hand side, click the Send button. You should observe a status code of 200. Finally, click on Save and deploy to deploy this application.
- Click on the Save and Deploy button again.
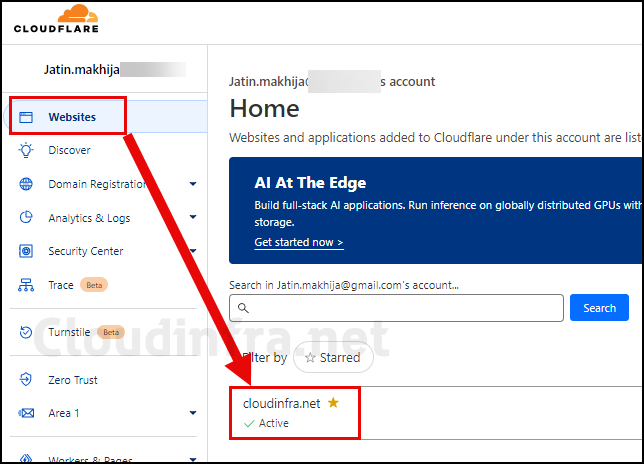
- On your Cloudflare dashboard, navigate to Websites, then click on your website’s name on the home page.
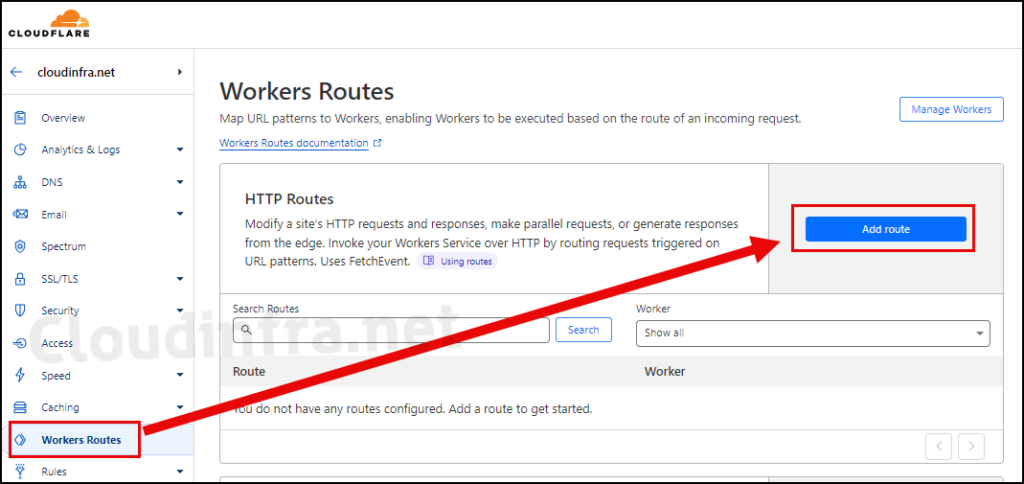
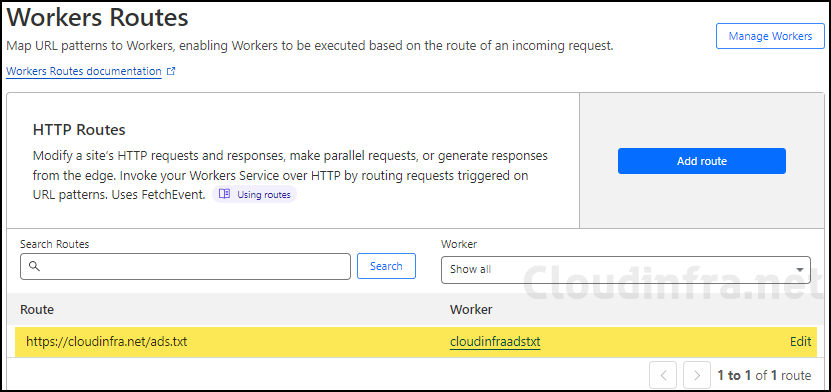
- On the left-hand side options, select Worker Routes, and then click on the Add route button from the Worker Routes page.
- In the Route option, enter the URL for the ads.txt file, for example: https://cloudinfra.net/ads.txt. You can replace cloudinfra.net with your site name in the path.
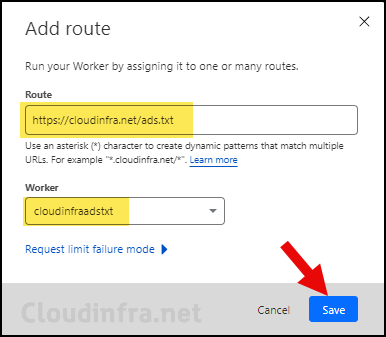
- Worker Route has been successfully added.
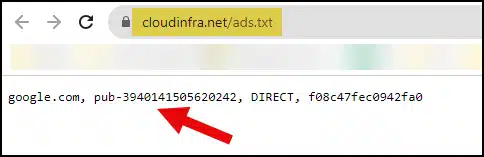
Checking ads.txt File Access via a Web Browser
You can now test whether you can access the ads.txt file using a web browser. As shown in the screenshot below, it is now accessible.
- Next, visit the Google AdSense portal and click Sites in the left-hand panel. The Manage your sites page lists your site as having an Ads.txt Status Issue. Click on the site to open a page to test for the ads.txt file.
- Click the Check for updates link to verify whether Google can access your site’s ads.txt file.
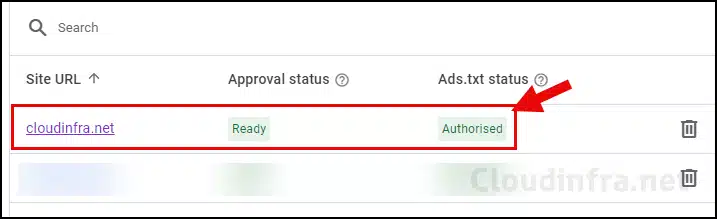
- As you can observe, Google has successfully located the Ads.txt file.

- Furthermore, if you go back to the Sites section and check the Ads.txt Status, it should now be listed as Authorized.
I tried everything you wrote in the blog and this does help with getting google adsense to work. I’m going to bookmark this page incase I find someone else with the same issue I had with getting the ads.txt on the website I have with cloudflare.