This error usually appears when you try to run Connect-ExchangeOnline with the Exchange Online PowerShell module v2 module on Windows 10 or Windows 11, and the local WinRM client is not configured the way Exchange Online expects. Since this behavior has changed with the Exchange Online PowerShell V3 module, there are two options to fix this isse:
- Recommended modern fix is to switch to Exchange Online PowerShell V3 module (EXO V3 module)—no WinRM Basic required.
- A legacy fix for older, RPS-based connections that still rely on WinRM Basic on the client.
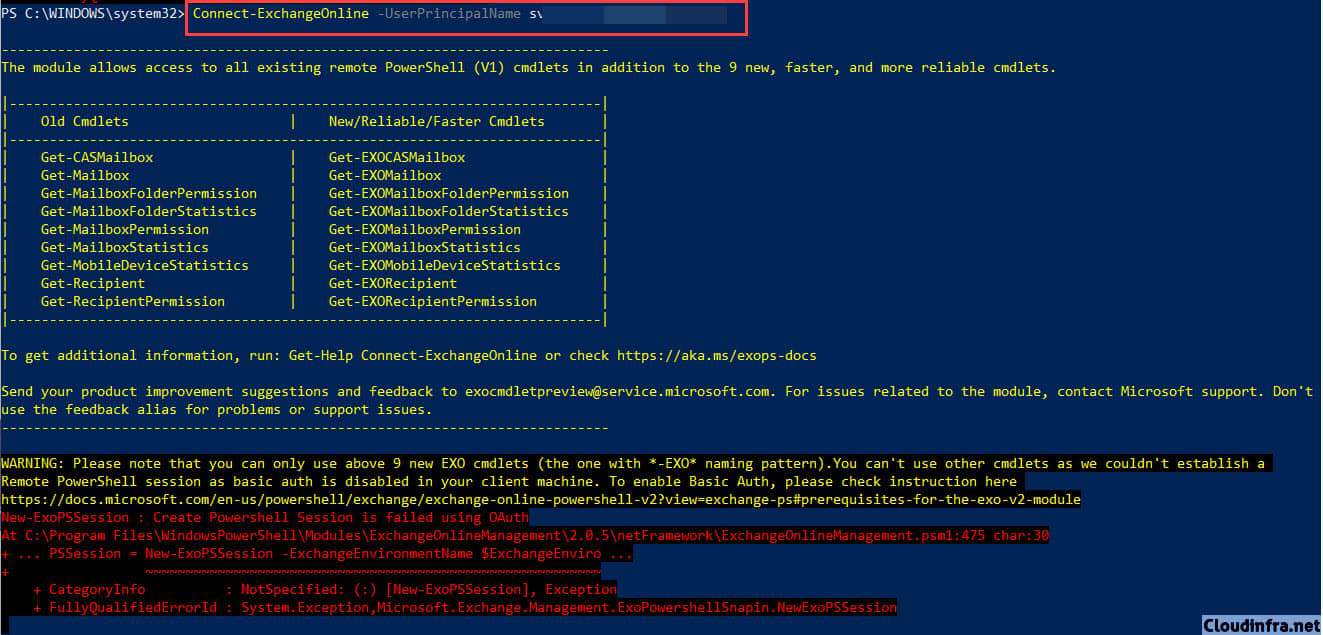
Below are the details of the error you may get after executing Connect-ExchangeOnline.
Connect-ExchangeOnline
Connect-ExchangeOnline -UserPrincipalName <Administrator User Account>
Error Details:
New-ExoPSSession : Create Powershell Session is failed using OAuth
At C:\Program Files\WindowsPowerShell\Modules\ExchangeOnlineManagement\2.0.5\netFramework\ExchangeOnlineManagement.psm1:475 char:30
… PSSession = New-ExoPSSession -ExchangeEnvironmentName $ExchangeEnviro …
~~~~~~~~~~~~~ CategoryInfo : NotSpecified: (:) [New-ExoPSSession], Exception
FullyQualifiedErrorId : System.Exception,Microsoft.Exchange.Management.ExoPowershellSnapin.NewExoPSSession
Contents
Reason for this Error
When you run Connect-ExchangeOnline with older versions of the Exchange Online module, the module internally uses New-ExoPSSession to create a Remote PowerShell (RPS) session to Exchange Online.
Historically, Microsoft required WinRM Basic authentication to be enabled on the client so that the WinRM stack could send the OAuth token in a Basic auth header, because the WinRM client did not natively understand OAuth.
- Basic auth was required on the local WinRM client, not to authenticate to Exchange Online.
- Exchange Online itself still used Modern Authentication (OAuth) for the session.
- If WinRM Basic was disabled (for example, by a security baseline or GPO),
New-ExoPSSessionfailed with Create PowerShell Session is failed using OAuth.
In modern tenants, Microsoft has moved Exchange Online PowerShell to REST backed cmdlets in the ExchangeOnlineManagement V3 module, which no longer depends on RPS or WinRM Basic.
Fix for PowerShell Session is failed using OAuth
For most environments, you should now stop relying on RPS and move to the current Exchange Online PowerShell module (V3):
- Use the latest Exchange Online PowerShell V3 module, which uses REST-backed cmdlets and does not require WinRM Basic auth at all.
- Remote PowerShell for Exchange Online has been fully retired, so anything that depends on
New-PSSessionor the old RPS-basedNew-ExoPSSessionpath is effectively dead or on borrowed time. - Enabling WinRM Basic on the client is still the underlying fix for this specific error if you are stuck on an older, RPS-based connection method. Microsoft explicitly documented that this did not mean Basic Auth was used against Exchange Online itself. But in modern environments you should avoid that path entirely and move to EXO V3.
Legacy Fix: Enable WinRM Basic on the Client (Older EXO V2/RPS Only)
Use this section only if you are forced to use an older, RPS-based connection method and you understand the security implications. For most tenants, you should prefer the V3 solution above.
If you are still using Exchange Online PowerShell Module v2 with RPS and you get: Create PowerShell Session is failed using OAuth, then the cause is usually that WinRM Basic authentication is disabled on the client. The classic workaround is to enable basic auth for the WinRM client, either using the registry or via policy.
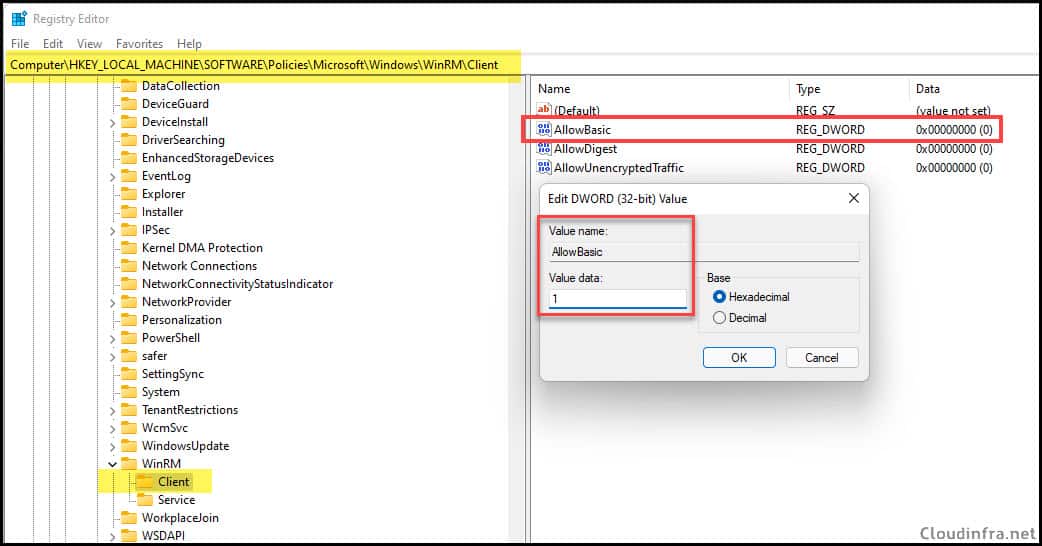
Option 1: Enable WinRM Basic Authentication via Registry Editor
- Open the Registry Editor on the client machine.
- Go to HKEY_LOCAL_MACHINE\SOFTWARE\Policies\Microsoft\Windows\WinRM\Client and locate the
AllowBasicDWORD registry entry. Set the value of AllowBasic to1. Close Registry Editor.
Important: Enabling basic auth in WinRM on an admin workstation can have security implications because other tools might also use that channel. Make sure your security team is aware of this change and restrict access to the machine accordingly.
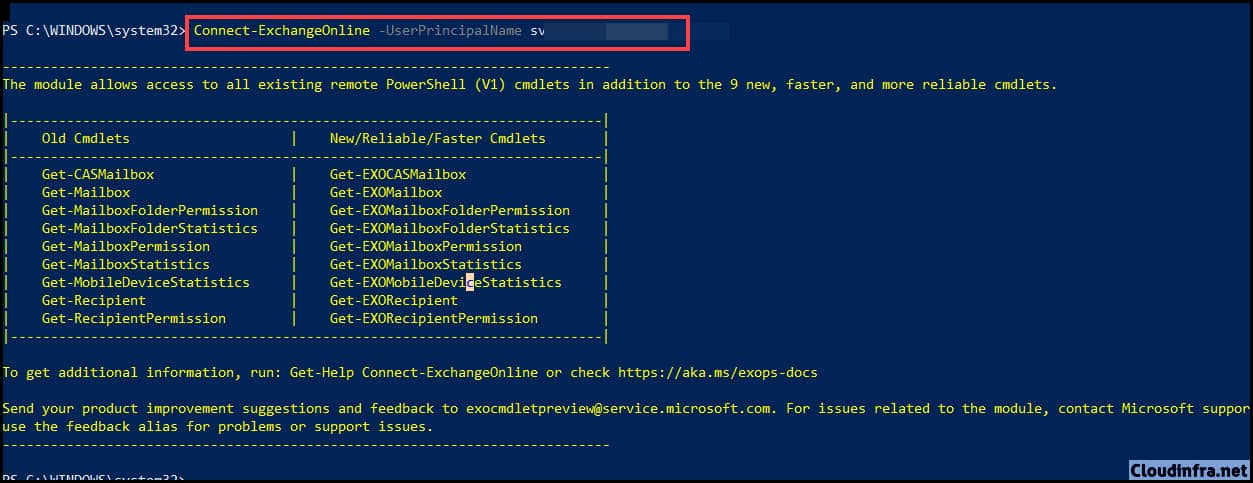
Let’s try again to see if it works fine this time. As you can see, no errors were reported, and the command was executed successfully. If the connection now works, you have confirmed that the problem was WinRM Basic being disabled.
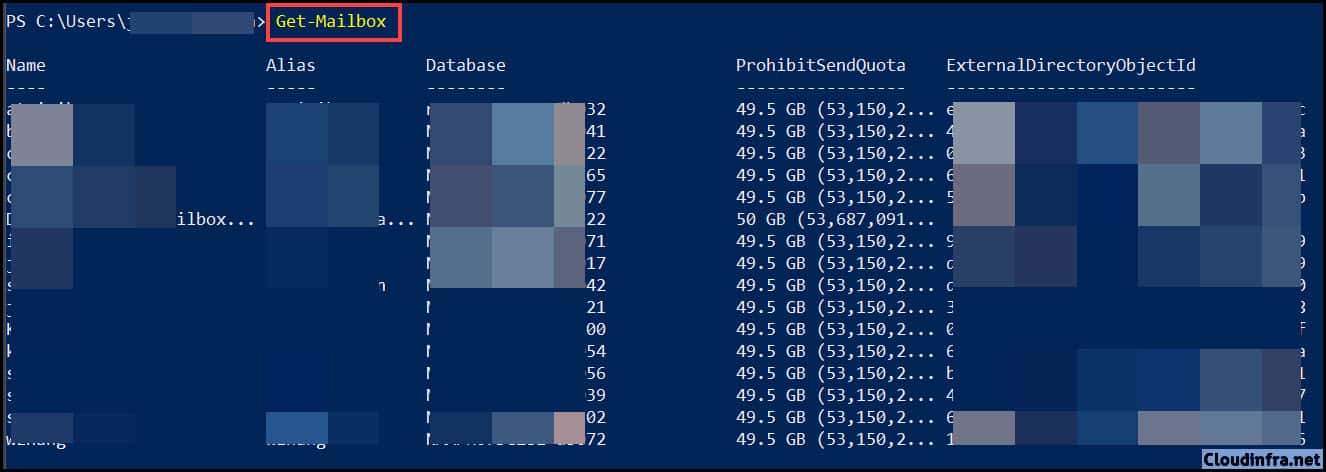
Next, try Get-Mailbox command to confirm that you are getting the results.
Option 2: Enable WinRM Basic Authentication via Command Line
You can also configure WinRM Basic using PowerShell. Below command has the same effect as setting AllowBasic to 1 in the registry.
winrm set winrm/config/client/auth @{Basic="true"}