In this post, we will learn to uninstall Windows updates using PowerShell. If you have recently performed a Windows update and facing issues due to one of the update. You may want to remove that update from the device to fix the problem.
Before we check the steps, we will need to find the KB update ID of the patch that is causing issues. Each update applied on your device has a unique KB ID number. You can find this information on your device update history or by using Microsoft update catalog site.
One way to remove the update is by using Settings app > Windows update > Update history > Uninstall updates. Find the update causing issues and uninstall it. The second option is to use PowerShell, which is what we are going to look into today. It’s a quick and easy method if you have local administrator rights on the device.
Not all the updates can be removed using PowerShell; specific updates are required to keep the OS updated; these are called Service stack updates. If you try to remove this kind of update, you may get an error: Your machine requires Servicing Stack update and cannot be uninstalled.
Servicing stack updates improves the reliability of the update process to mitigate potential issues while installing the latest quality updates and feature updates. If you don’t install the latest servicing stack update, there’s a risk that your device can’t be updated with the latest Microsoft security fixes.
About Service stack updates
Contents
Find Windows Update KB ID with PowerShell
To remove any specific update from your Windows device, the first step is to find the update KB ID number. To find the information, you can execute any of the following PowerShell commands on the PowerShell console.
List HotFixID
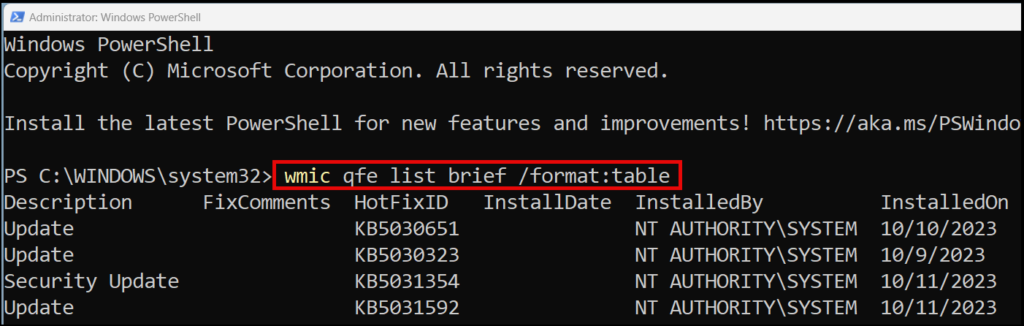
wmic qfe list brief /format:table
Once you run the command, you will get the list of updates installed on your device along with HotFixID, that is the KB ID number we are looking for. Copy the KB ID number of the patch which was recently installed and causing issues.
Get-CimInstance -ClassName Win32_QuickFixEngineering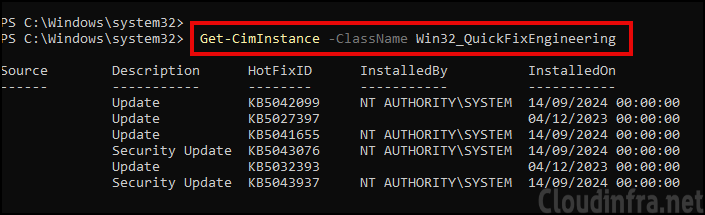
Get-HotFix | Select-Object HotFixID, InstalledOn, Description
Uninstall Windows Update using PowerShell
- Launch PowerShell as administrator.
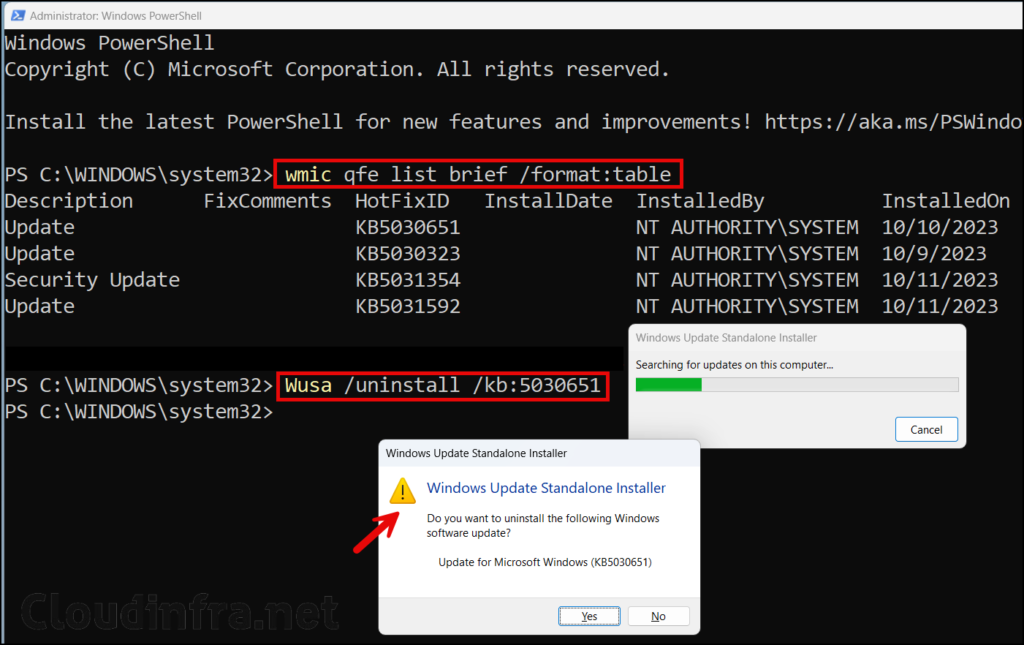
- Run a command on PowerShell console Wusa /uninstall /kb:<HotfixIDnumber> (HotfixIDnumber of the update ID number without the letters KB).
Powershell command to remove an update
wusa /uninstall /kb:5030651
After you run this command, a Windows Update Standalone Installer warning pop-up shows. Click on Yes to confirm the removal of this update.
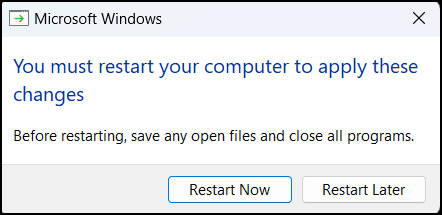
- Restart your device when prompted to complete this process.
There could be cases when you find that the update is not removed from the device and fails. Therefore, please make sure you are not removing a system update that cannot be removed. Using PowerShell, you can remove a normal Windows update and security updates.
After restarting the device, you can launch PowerShell once again and run wmic qfe list brief /format:table to confirm if the Windows update, which was causing issues, has been removed successfully.