Contents
In this blog post, we will explore the process to Ingest Zoom ADMX and manage Zoom settings Using Intune. Recently, I received a request to manage Zoom settings using Microsoft Intune. The most specific setting requested is How to configure the AutoUpdate setting of Zoom desktop client using Intune.
There are three options for managing the settings of Zoom Desktop Client.
- You can use an MSI Installer and deploy using pre-configured settings.
- You can configure ADMX template files using Intune OMA-URI settings.
- You can manually configure each device by using a registry editor.
This blog post will configure common Zoom settings using ADMX Template files and via OMA-URI settings.
[There is a newer way of Importing Zoom ADMX files and configuring Zoom App settings using Intune. To know more details, please refer to the guide: How to Import ADMX templates into Intune, which provides details on How to download and Import Zoom ADMX files into Intune]
[Methods discussed in this blog post for Importing Zoom ADMX files into Intune utilize OMA-URI settings for Importing ADMX files and managing Zoom settings using OMA-URI]
[The below method still works fine to Import Zoom ADMX files into Intune; you will find that Import Zoom ADMX using the newer approach is easier]
There are two parts to managing Zoom App settings using Intune.
- Deploy Zoom ADMX Template File to all the devices you want to manage by using Device Configuration Profile.
- Create a Device Configuration Profile to configure specific settings using OMA-URI.
| [Update] |
|---|
| Another newer way to import Zoom ADMX template files is using Intune. It’s a bit easier than this method of Ingesting Zoom ADMX files into Intune. You can refer to my other blog post, which provides step-by-step instructions on importing ADMX templates into Intune. |
Step 1: Download Zoom ADMX Template File
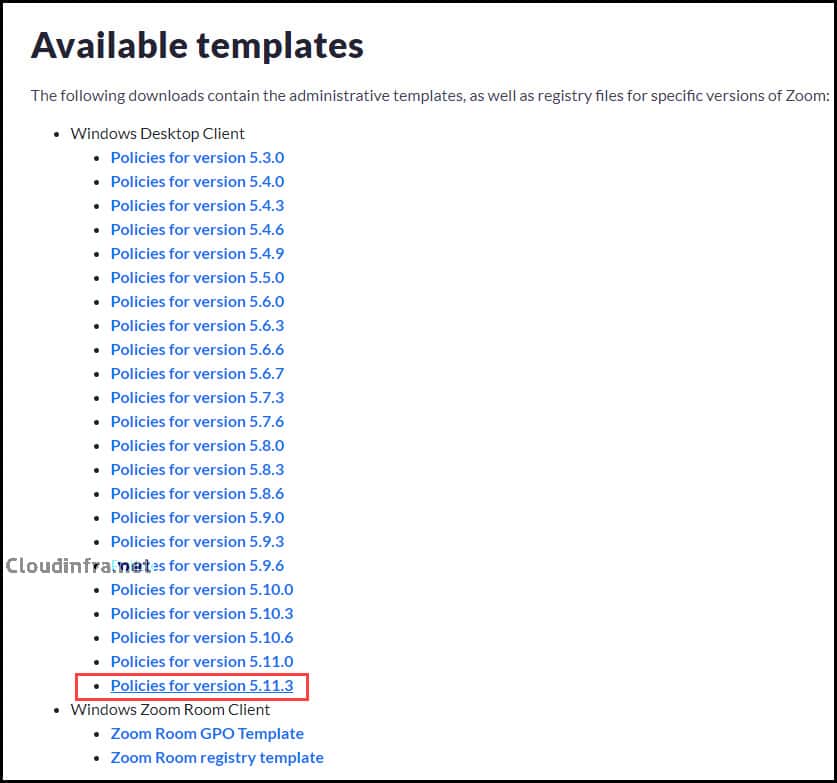
First, download the Zoom ADMX template file using this link: Mass-deploying with Group Policy Objects. Search for the Section Available templates and click on Policies for version 5.11.3 or whichever latest version is available.
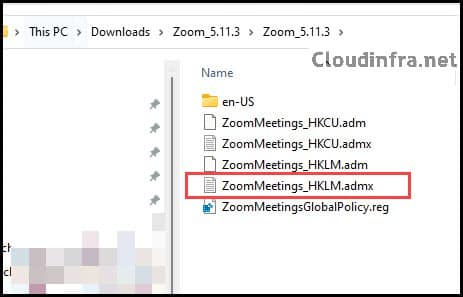
- Extract the zip file’s contents to a folder and locate the .admx file. Two versions of Zoom Meeting ADMX files are available: one for User-based policies (named HKCU) and the other for Machine-based Zoom meeting policies (named HKLM).
- We will use the HKLM version of the policies, which are Machine-based policies, with the file name ZoomMeetings_HKLM.admx.
Step 2: Ingest Zoom ADMX Template file In Intune
Once you have downloaded the Zoom ADMX Template File, you must Ingest it into Intune and assign it to all managed devices. Please follow the below steps to Ingest the Zoom ADMX file in Intune.
| There is also a new way to Import ADMX files in Intune. Please refer to the article How To Import ADMX Files In Intune for more detailed information and a step-by-step guide. |
- Sign in to the Intune admin Center > Devices > Configuration.
- Create > New Policy.
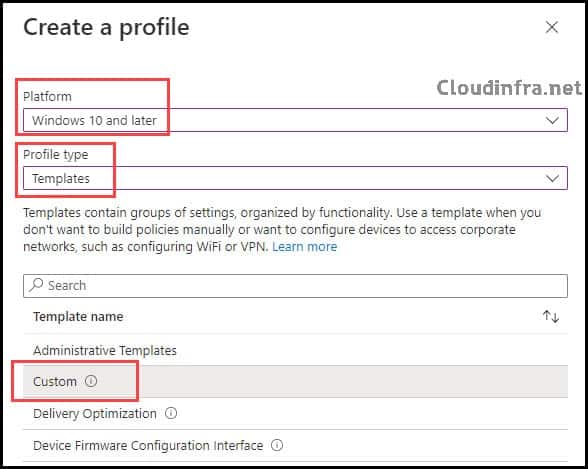
- Select Platform as Windows 10 and later
- Profile Type: Templates
- Template Name: Custom
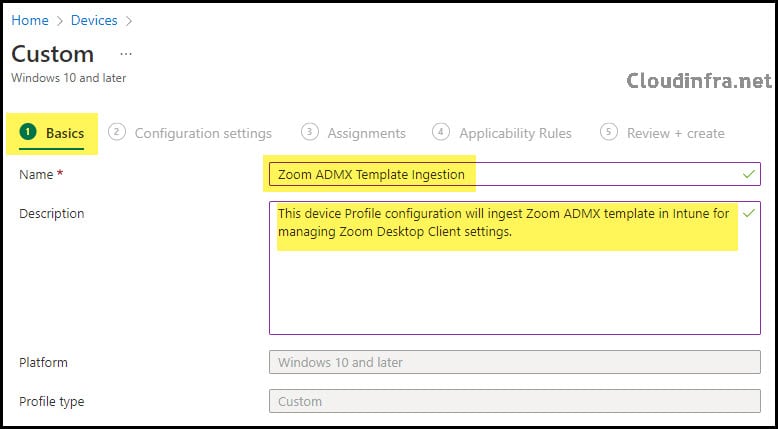
Basics
- Name: Zoom ADMX Template Ingestion
- Description: This device Profile configuration will ingest the Zoom ADMX template in Intune to manage Zoom App settings.
Configuration settings
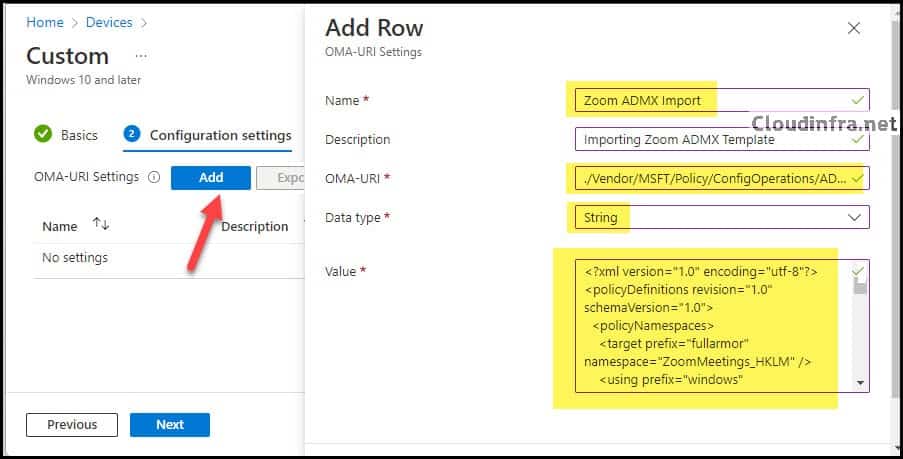
Click on Add to add OMA-URI Settings as per below. Click on Save once you have added all the below settings.
| Name | Zoom ADMX Import |
| Description | Importing Zoom ADMX Template |
| OMA-URI | ./Vendor/MSFT/Policy/ConfigOperations/ADMXInstall/zoom/Policy/zoom |
| Data type | String |
| Value | Open the ADMX file ZoomMeetings_HKLM.admx, copy all the file contents, and paste them into the Value field. |
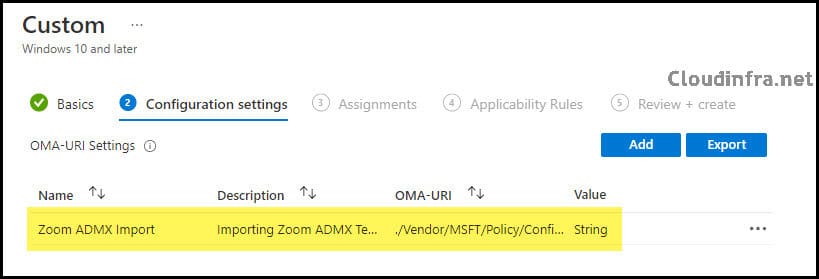
After you click Save, you can verify the OMA-URI Settings and click Next to Proceed.
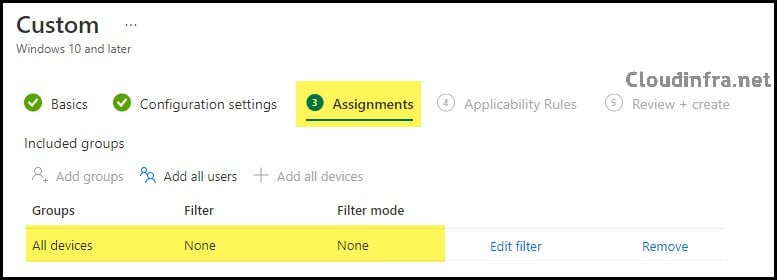
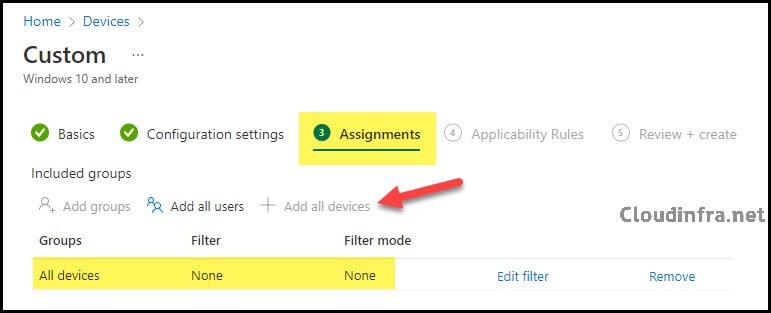
Assignments
If you want to manage Zoom app settings on all organization devices, then its best to deploy the ADMX template settings on all devices. You also have the option to add an Entra security group which contains limited number of devices to first test and confirm if the policy is working fine.
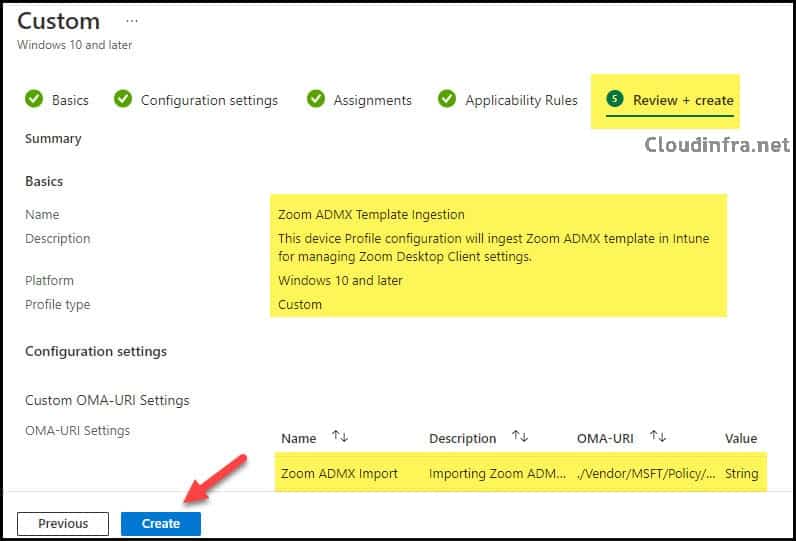
Review + Create
Review the device configuration profile settings and click the Create button to create this policy.
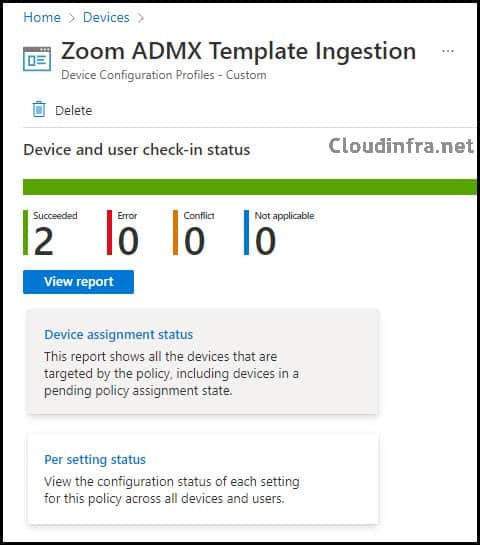
Once the policy has been created successfully, it will take time to deploy on target machines. You can click on the Device Configuration profile created and check the status from the Device and user check-in status. As you can see from the screenshot below, the admx file has been ingested into two machines successfully.
Step 3: Verify Zoom ADMX Template Ingestion on End User Device
We have confirmed that the Zoom ADMX Template deployment has been successfully deployed on 2 devices via Intune admin center. You can also confirm this from the target device as well. There are two registry keys we need to check, AdmxInstalled and AdmxDefault.
- Go to Start > Search for Registry Editor. Click on Registry Editor to Open.
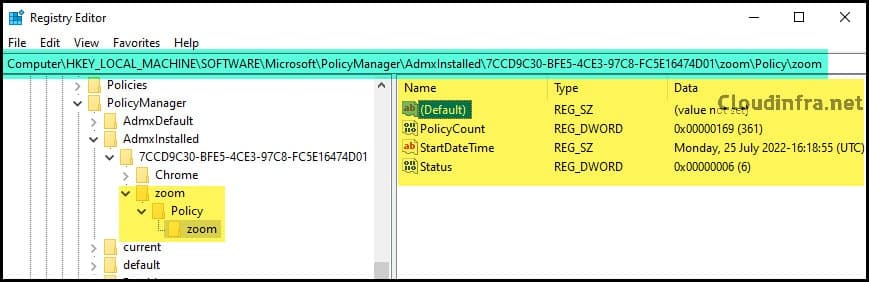
- Find HKEY_LOCAL_MACHINE\SOFTWARE\Microsoft\PolicyManager\AdmxInstalled Registry Key.
- Expand the GUID and then Expand zoom > Policy > zoom to verify the ADMX template Installation.
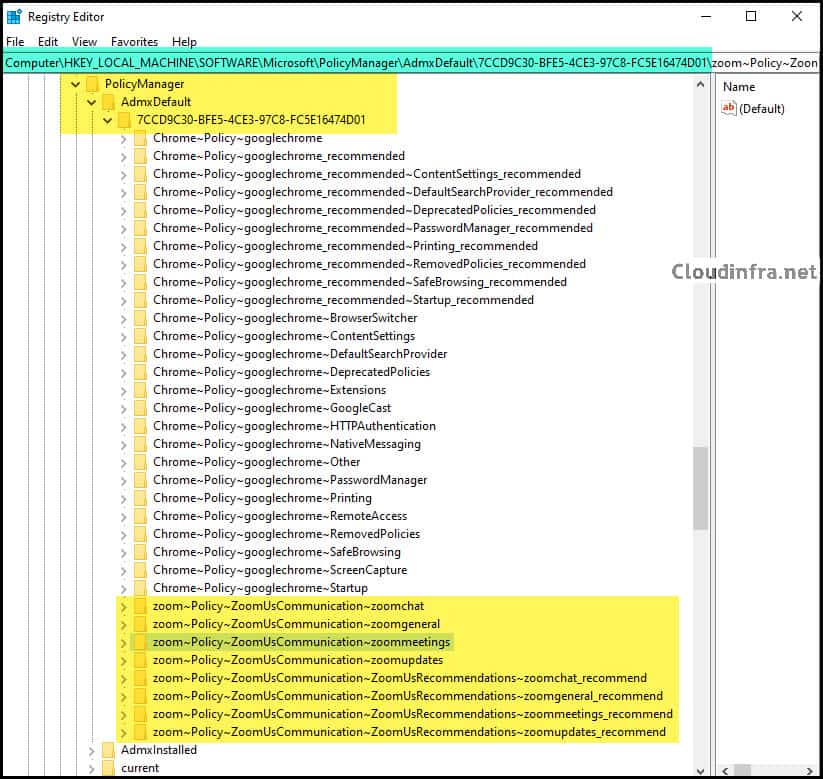
- Go to the registry Key: HKEY_LOCAL_MACHINE\SOFTWARE\Microsoft\PolicyManager\AdmxDefault and Expand the GUID, and you can see that the registry keys created for zoom configuration, which confirms that the template has been ingested successfully on the device.
If you have deployed the Zoom ADMX template to hundreds of devices, you don’t need to verify it on every device. You can monitor the device configuration profile for Zoom ADMX Ingestion from the Intune admin center.
Note
Step 4: Manage Zoom Settings using OMA-URI
Now that we have deployed the ADMX template to all our devices, we can manage Zoom desktop client settings via a custom device configuration profile using the OMA-URI path. Let’s look at how to create an OMA-URI Path for each setting.
How to build an OMA-URI
To build an OMA-URI path for any setting, we need to refer to the ZoomMeetings_HKLM.admx file, which was downloaded earlier.
I will provide an example of an OMA-URI path, which we will use to configure the Zoom AutoUpdate setting, and we will then deconstruct the path to understand how it was created.
| Zoom AutoUpdate OMA-URI Setting |
|---|
| ./Device/Vendor/MSFT/Policy/Config/zoom~Policy~ZoomUsCommunication~zoomupdates/AU2_EnableAutoUpdate_Policy |
./<scope>/Vendor/MSFT/Policy/Config/AreaName/PolicyName
The first part is ./<scope>,, which can be Device or User. As we are configuring a Device based policy, we will use the Device keyword for our scope.
./Device/Vendor/MSFT/Policy/Config/
The Second Part is /Vendor/MSFT/Policy/Config/ > This will remain the same for each setting you configure.
./<scope>/Vendor/MSFT/Policy/Config/AreaName/PolicyName
The third part is /AreaName/PolicyName. We need to construct this according to the setting we want to configure. Open ZoomMeetings_HKLM.admx file and search for the policy you want to configure.
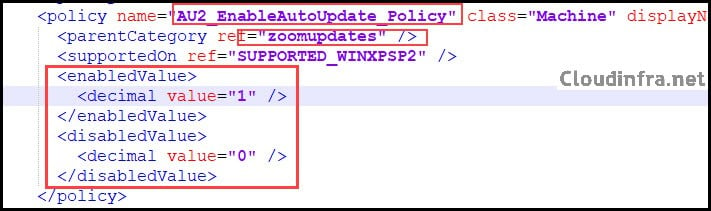
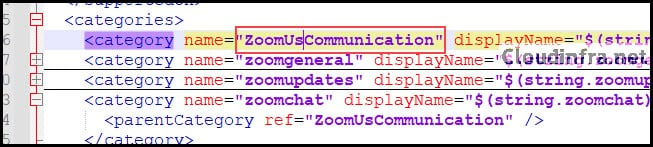
For example, we want to configure the Zoom AutoUpdate Policy. Search for AU2_EnableAutoUpdate_Policy. As you can see in the below screenshot, the Policy Name is AU2_EnableAutoUpdate_Policy, and its Parent Category is zoomupdates.
ZoomUsCommunication is the parent category of Zoomupdates. The Policy supports two values: Enabled or Disabled. Let’s create our OMA-URI path based on the values we got from the Zoom admx file.
./Device/Vendor/MSFT/Policy/Config/zoom~Policy~ZoomUsCommunication~zoomupdates
The last part of the OMA-URI is the name of the policy setting we want to configure. As we know, the name of the Policy setting is AU2_EnableAutoUpdate_Policy. We will use it for the PolicyName part of OMA-URI.
./Device/Vendor/MSFT/Policy/Config/zoom~Policy~ZoomUsCommunication~zoomupdates/AU2_EnableAutoUpdate_Policy
| Tip |
|---|
| You can also refer to HKEY_LOCAL_MACHINE\SOFTWARE\Microsoft\PolicyManager\AdmxDefault registry location to find the AreaName part of the Policy instead of searching through admx to find parentcategory. |
Step 5: Manage Zoom AutoUpdate Setting using Intune
We are not familiar with creation of OMA-URI path, now you can use the same concept to create OMA-URI path for any other zoom app setting as well. We already created an OMA-URI path for Zoom Autoupdate setting in the previous section. Let’s use that to configure it via a Device configuration profile.
- Sign in to the Intune admin center > Devices > Configuration > Create > New Policy.
- Select Platform as Windows 10 and later
- Profile Type: Templates
- Template Name: Custom
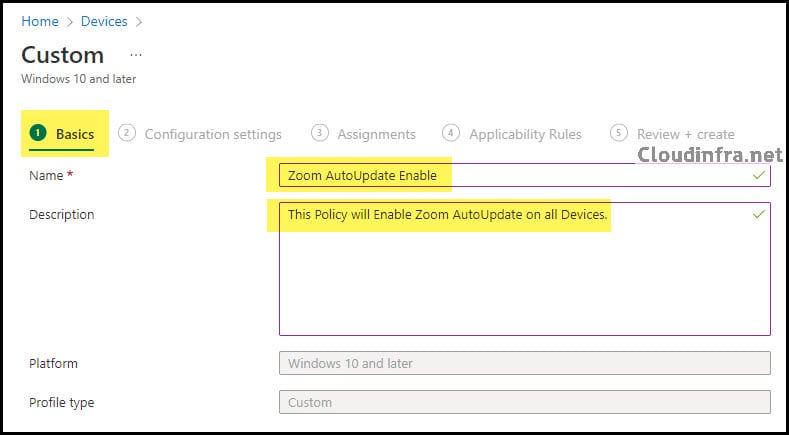
On Basics tab – Provide a Name and Description of the policy.
Configuration settings
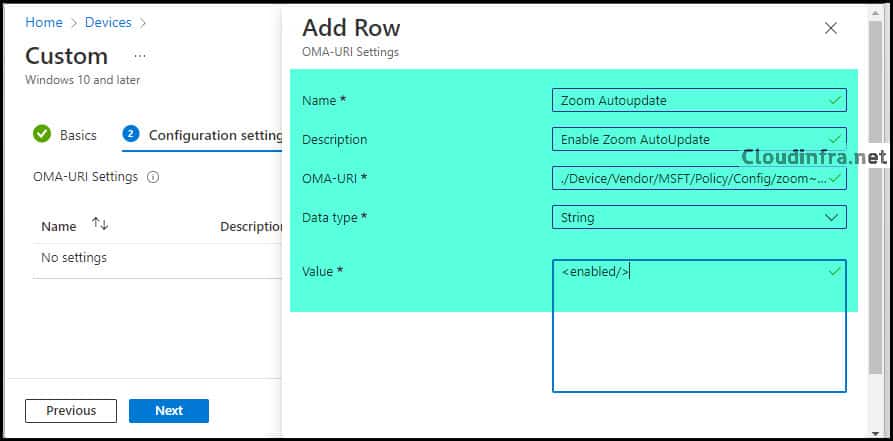
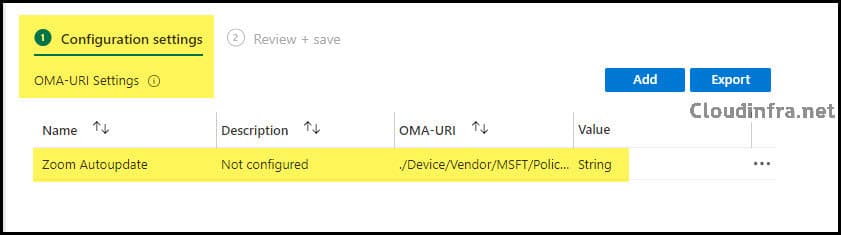
- Click on Add to add OMA-URI Settings as per below information. Click on Save.
| Name | Zoom Autoupdate |
| Description | Enable Zoom AutoUpdate |
| OMA-URI | ./Device/Vendor/MSFT/Policy/Config/zoom~Policy~ZoomUsCommunication~zoomupdates/AU2_EnableAutoUpdate_Policy |
| Data type | String |
| Value | <enabled/> |
Assignments
Assign this device configuration profile to Entra security group containing Windows 10/11 devices. You can also click on All devices to apply this change on all Intune-managed devices.
Review + create
Review the Profile configuration and then create this device configuration policy.
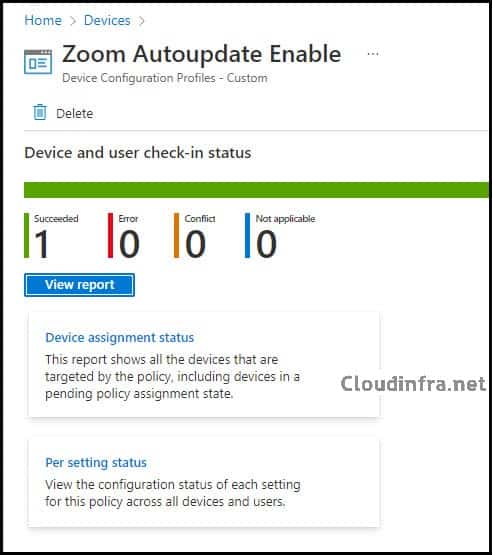
Monitoring
To check if the Device Configuration Profile has been deployed successfully. Please follow below steps:
- Intune admin center > Devices > Configuration.
- Search for Zoom Autoupdate Enable device configuration profile.
- In the Overview section, you can check the deployment status.
Verify Zoom AutoUpdate setting on Target device
Let’s check the steps to verify if Zoom AutoUpdate is set on target devices.
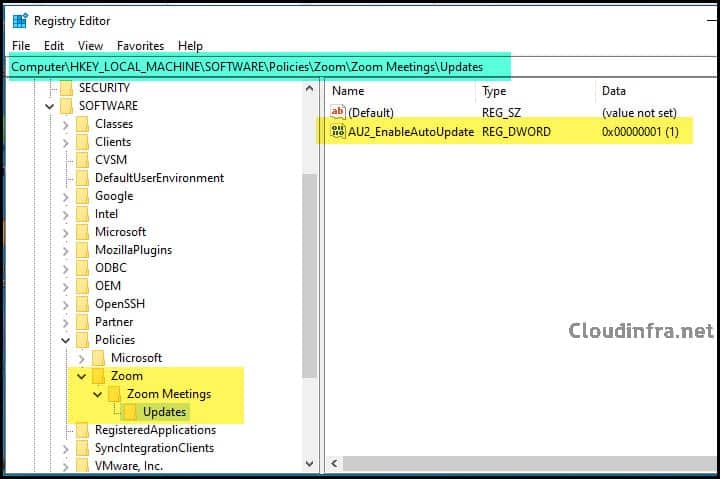
Verify Zoom AutoUpdate setting using Registry Editor
Follow below steps to verify the Zoom Desktop Client AutoUpdate setting:
- Go to Start > Type Regedit and click on Registry Editor.
- Find the Key HKEY_LOCAL_MACHINE\SOFTWARE\Policies\Zoom\Zoom Meetings\Updates.
- You can check the registry entry on the right-hand side: AU2_EnableAutoUpdate, now set to 1.
Please note that this setting is configured using Intune. The User will not be able to change it, as it’s a global setting on the device. The Auto Update checkbox in the Zoom Application will be checked and greyed out. It will only be managed using Intune.
Verify AutoUpdate setting using Zoom Desktop Client
You can also verify this setting from the Zoom Desktop Client application. Please follow the below steps to do so.
- Login on the Zoom Meeting app.
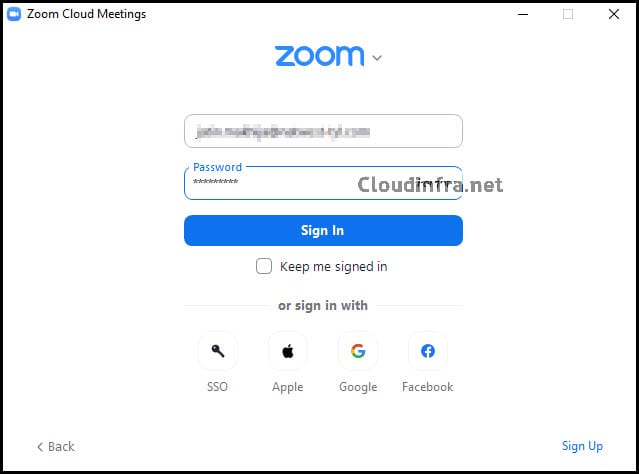
- Click on Settings Icon.
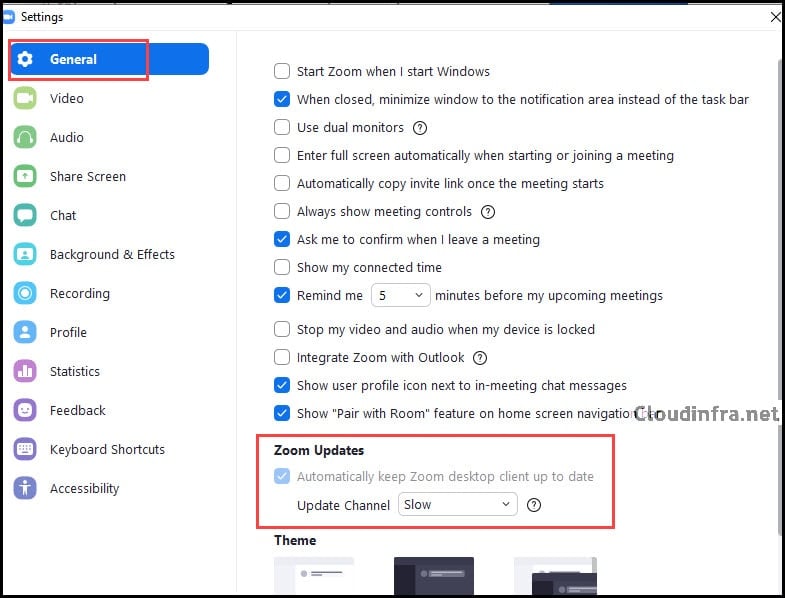
- Click on General. Scroll down on the general settings page to find the Zoom Updates setting. As you can see, it’s currently enabled and cannot be changed by the user as Intune manages it.
Conclusion
In this blog post, we have seen how to Ingest Zoom admx file into Intune, construct an OMA-URI Path for any Admx setting, and configure Zoom AutoUpdate using Intune OMA-URI path. You can manage all other Zoom Settings via Intune, not only AutoUpdate settings. You can construct an OMA-URI path for each setting by referring to the Admx file and then using it to configure the setting on the device for the Zoom Application.
Hi There,
For “Ingest Zoom ADMX Template file In Intune” > Does it install the Zoom Client on a machine?
For “Manage Zoom AutoUpdate Setting using Intune” > Does it automatically updates the Zoom Client or would the user have to click on “Check for updates”
If you would be able to answer these questions within this week, I would save my job, seriously !!
1. No Zoom MSI needs to be deployed separately. Zoom ADMX is just to manage Zoom Settings via Intune.
2. User would get a pop-up message and an update button. User can click on Update to update Zoom.
Hi Jatin,
Is there no way to silently update Zoom, without end-users input?