This error occurs when the ADMX you are uploading references the Microsoft.Policies.Windows namespace, but the corresponding prerequisite template (Windows.admx) is not present in your tenant’s imported ADMX store. There are some third-party ADMX files that require Windows.admx as a dependency and must be imported in the correct order.
As a best practice, do not import Windows built-in ADMX templates in Intune to configure Windows settings. Use Settings catalog or a Policy CSP instead. Only import Windows.admx if it is required as a parent namespace dependency for another ADMX template and if the setting is not available in the Settings catalog or Policy CSP.
Contents
ADMX Upload Failed Error in Intune
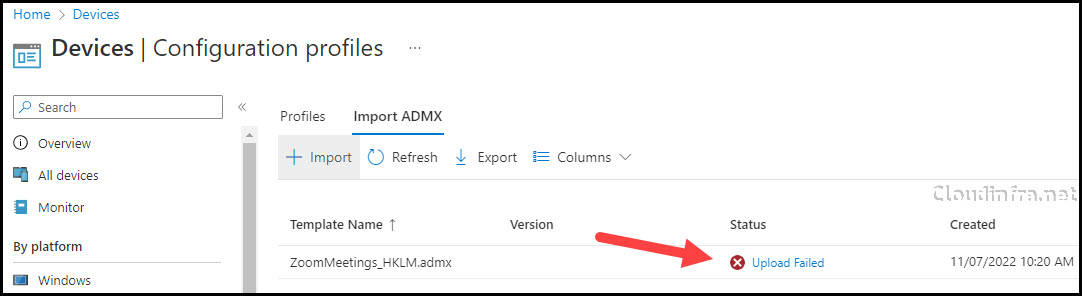
First, let’s understand at which stage this error occurs when uploading ADMX files in Intune. For demonstration purposes, I will import ZoomMeetings_HKLM.admx and ZoomMeetings_HKLM.adml template files, which results in the following error message: ❌Upload Failed. If you click on the Upload failed link, it will show you below details about the error:
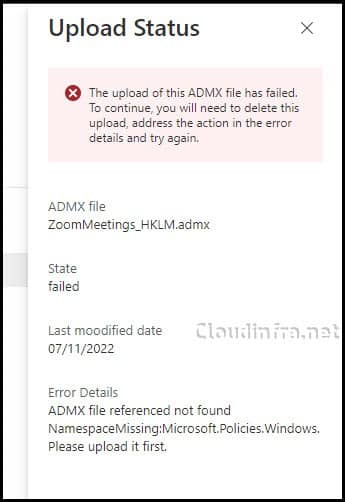
Error details
The upload to this ADMX file has failed. To continue, you will need to delete this upload, address the action in the error details, and try again.

ADMX file referenced not found. NamespaceMissing: Microsoft.Policies.Windows. Please upload it first.
Fix NamespaceMissing Microsoft Policies Windows in Intune
Some ADMX template files depend on other ADMX templates. This is an important check to ensure the templates upload successfully into Intune. If you do not import the dependent ADMX template file first, the ADMX upload will fail and display the following error: NamespaceMissing: Microsoft.Policies.Windows. Please upload it first. Follow below steps to resolve this issue:
Step 1: Check if ADMX has a dependency prerequisite
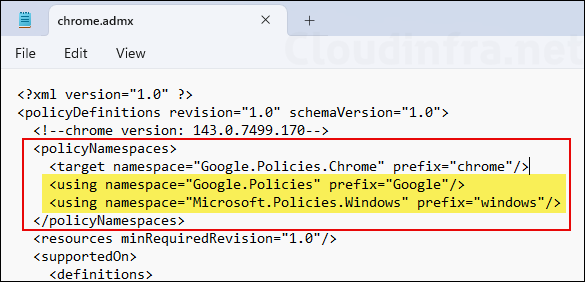
To determine whether an ADMX template depends on another ADMX template, open the ADMX template file in Notepad and review the <policyNamespaces> section. Under this section, look for the <using prefix=””> tag, which indicates a dependent namespace.
Below screenshot shows ZoomMeetings_HKLM.admx template file opened in Notepad. It depends on Microsoft.Policies.Windows namespace with the prefix windows. This means you must first upload the windows.admx template file into Intune, followed by ZoomMeetings_HKLM.admx or ZoomMeetings_HKCU.admx.
Because windows.admx is a common dependency for many ADMX templates, Microsoft has stated that it may be included natively in Intune in the future, eliminating the need for manual import. However, there is currently no ETA on when this will be available. For now, you can download the latest version of windows.admx from the link: Download Windows 11 Administrative Templates.

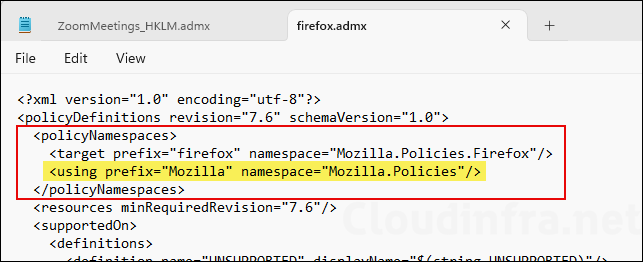
Let’s take another example of Mozilla firefox browser. You can download Mozilla Firefox policy templates from here and import it in Intune. Before importing firefox.admx, open the file to check whether there are any dependency prerequisites.
As shown in below screenshot, firefox.admx depends on Mozilla.Policies namespace, with the prefix defined as Mozilla. This means you must first upload the mozilla.admx and mozilla.adml template files into Intune and only then upload the firefox.admx and firefox.adml files; otherwise, the upload will fail.
Similarly, when you want to import the Google Chrome ADMX templates into Intune, you will find that chrome.admx depends on both windows.admx and google.admx. Therefore, you must upload these two ADMX template files first before importing chrome.admx into Intune.
Step 2: Download Latest ADMX Template Files for Windows 11
Now that you understand the dependency of the ADMX template you are importing into Intune, download the required prerequisite ADMX template and import it first. In this example, the Zoom ADMX templates depend on the Windows ADMX templates. Follow the steps below to download the Windows 11 ADMX files.
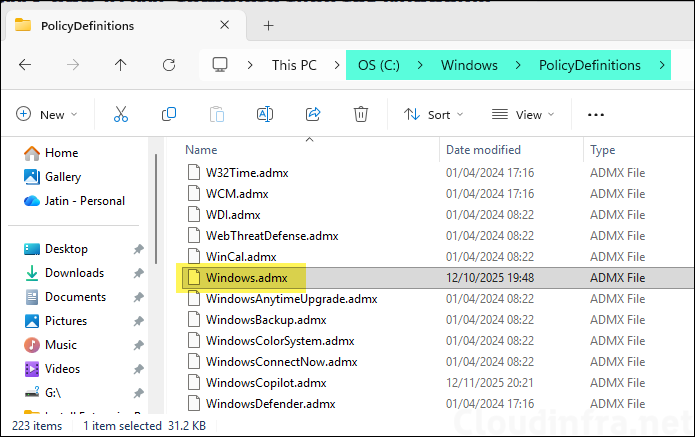
- Download the latest Windows 11 Administrative Templates, which are provided as an .MSI installer, and install them on your device.
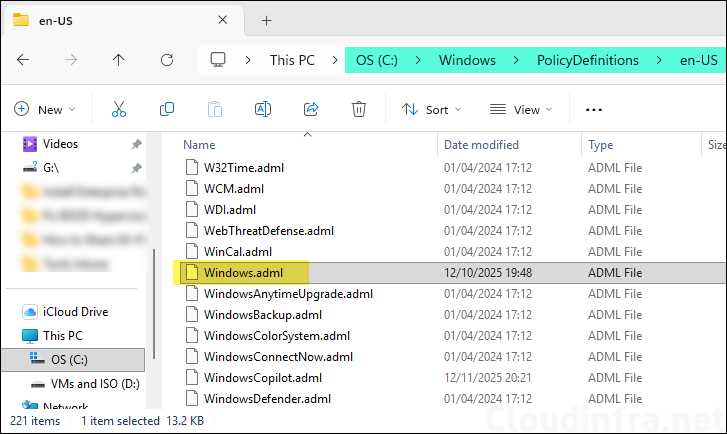
- Windows ADMX template MSI will typically install the files under C:\Windows\PolicyDefinitions (for windows.admx) and C:\Windows\PolicyDefinitions\en-US (for windows.adml).
Step 3: Import Windows.admx and Windows.adml Template Files
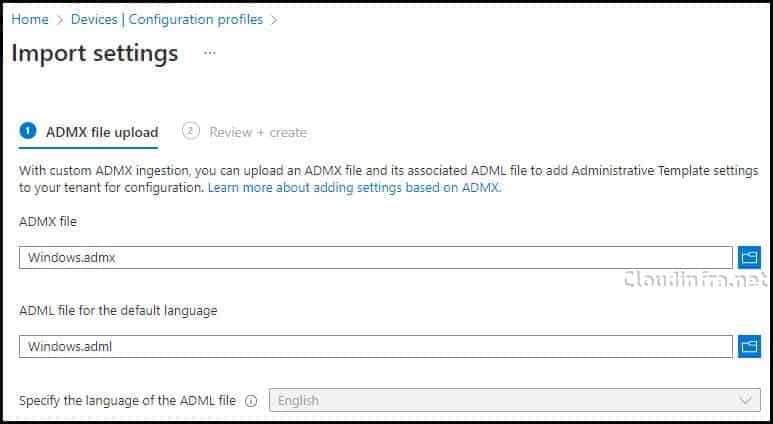
Import Windows.admx and Windows.adml files in Intune. Sign in to the Intune admin center > Devices > Configuration. Click on Import ADMX. Click on +Import. Browse to windows.admx and windows.adml files. Click on Next and then click on Create.
Step 4: Import Zoom ADMX Template Files in Intune
Now that the Zoom ADMX template dependency (windows.admx) has been successfully uploaded into Intune, we can proceed with uploading the Zoom ADMX template files.
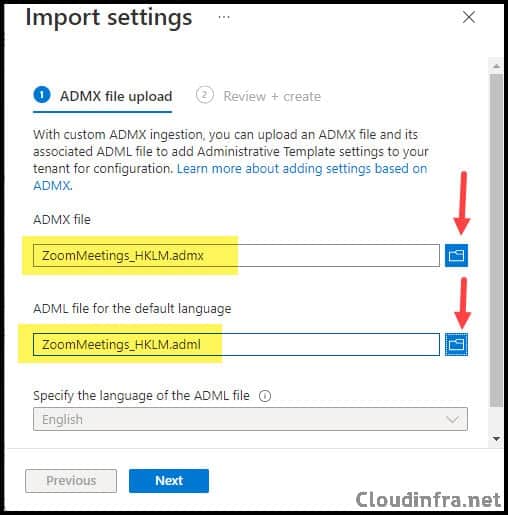
- Go to Intune admin center > Devices > Configuration. Under the Import ADMX tab, click + Import.
- Browse to ZoomMeetings_HKLM.admx and ZoomMeetings_HKLM.adml files. Click Next.
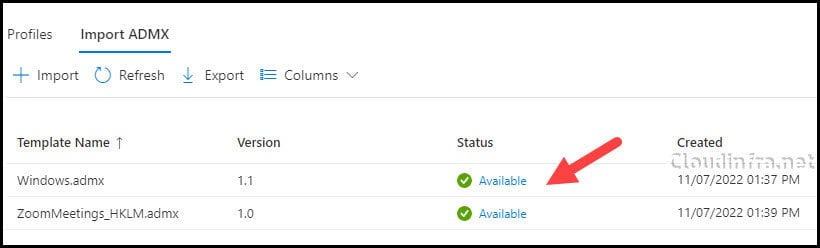
- Below screenshot shows Windows.admx and ZoomMeetings_HKLM.admx files imported successfully.