In this post, I will show you the steps for onboarding devices to Microsoft 365 Apps admin center. The Inventory feature in the Microsoft 365 Apps admin center (config.office.com) provides visibility into Microsoft 365 Apps installations across your tenant, including Office build/channel, add-ins, macro usage indicators, device hardware details, and last signed-in user. This is also a foundational requirement for some Microsoft 365 Apps admin center capabilities, such as update management experiences that depend on inventory onboarding.
Inventory onboarding is designed to be low-touch: once you enable Inventory in the portal, devices that meet the requirements onboard automatically through Microsoft’s auto-provisioning flow when users launch Office apps.
Contents
Prerequisites
- Supported admin roles: You must have one of the below roles to access Microsoft 365 Apps admin center. Office Apps Administrator is the recommended role for managing Office cloud services in this portal.
- Office Apps Administrator (Recommended)
- Security Administrator
- Global Administrator
- Global Reader (limited capability)
- License requirements: Refer to the link: #licensing-requirements.
- Network requirements: Refer to the link: #network-requirements.
Device Information Synced to M365 Apps Admin Center
Below information is synced from devices to the Microsoft 365 Apps admin center. You may see additional details apart from what is listed here. This list is intended to provide a high-level overview of the data that is synced to the portal.
| Category | Information Synced |
|---|---|
| Office Details | Version Build Update Channel Add-ins (you can get more details about Add-ins by clicking on a particular Add-in) Macros (Yes/No) Release date Office Apps |
| Device Details | Device Name Architecture (x64 or x86). Manufacturer Model Family Model Total RAM OS Family OS Version (for example, 25H2) OS build (for example, 10.0.1.19044.1889 (X64)) Free storage Total Storage |
| User Details | Last User name Last User Email |
Now that we understand the inventory service and the information it synchronizes with the portal, let’s proceed with device onboarding steps:
1. Enable Inventory Service
Inventory is not enabled by default. Enabling it is a one-time tenant action.
- Sign in to Microsoft 365 Apps admin center using a Global Administrator, Security Administrator, or Office Apps Administrator account.
- Select Inventory from the left navigation.
- Click on Get Started to start the enrollment process.

2. Verify Device Onboarding
Device enrollment into the M365 apps admin center happens automatically, and once the device is registered successfully, it will show up on the portal along with all details. That in itself confirms the enrollment is completed successfully.
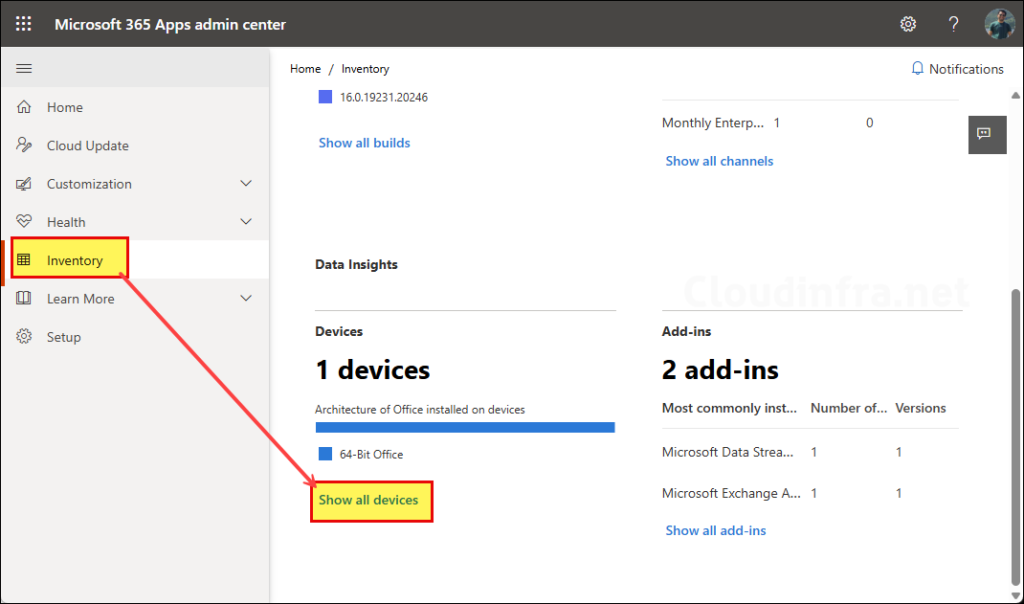
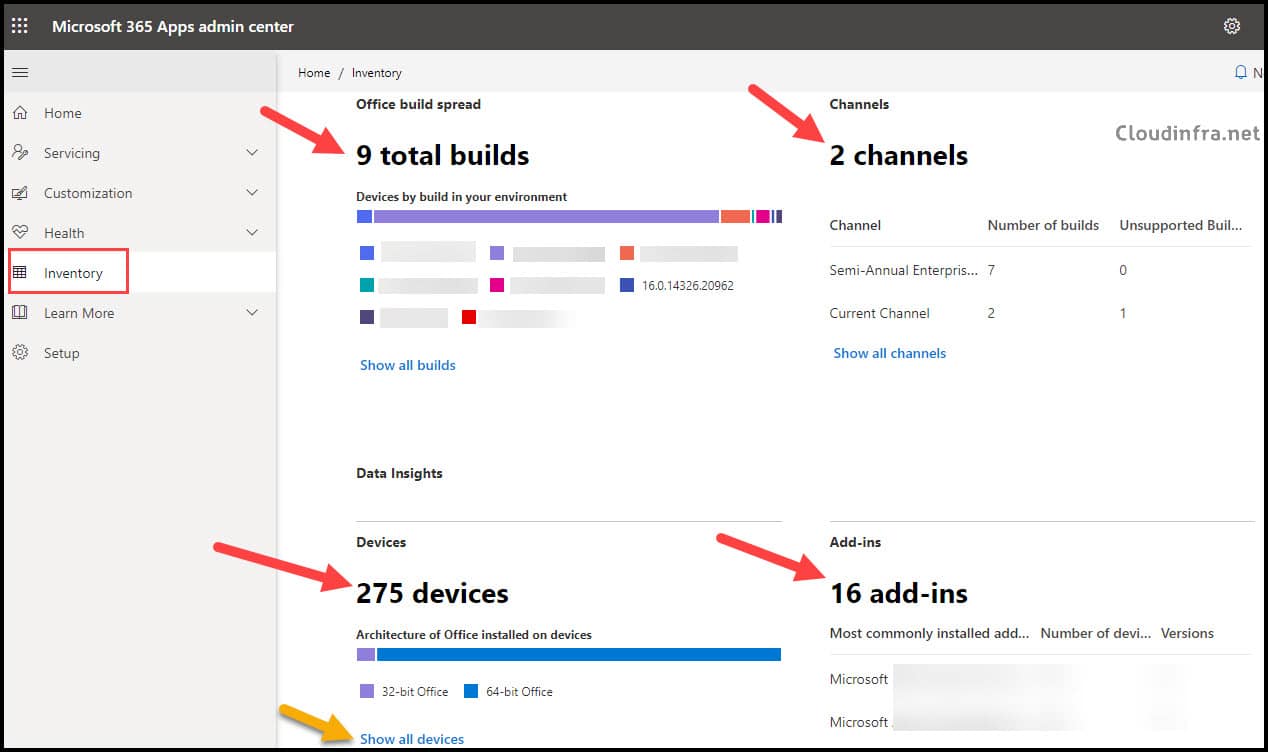
- In Inventory, open the Insights dashboard.
- Select Show all devices under Devices.
- Confirm devices are populating and that last contact is updating.
Verify Onboarding (Troubleshooting)
If devices are not showing up, validate the most common device-side indicators, such as tenantassociationkey, Office Serviceability Manager check-in, or COM+ health.
TenantAssociationKey
The tenant association key (TAK) is used to associate devices to your tenant during onboarding and can be checked via registry query. As per Microsoft, TAK may be removed after prolonged inactivity and retrieved again when Office runs. To create TAK:
- Sign in to one of the managed device.
- Launch any of the Microsoft 365 apps, for example, Microsoft Word, Microsoft Excel, or Microsoft Outlook.
That’s it. The Tenant Association Key (TAK) is automatically created on the device. You can verify it by checking the TenantAssociationKey at the following registry location:
HKEY_LOCAL_MACHINE\SOFTWARE\Policies\Microsoft\cloud\office\16.0\Common\officesvcmanager. TAK is a unique token associated with your tenant or organization and enables devices to sync data with the Microsoft 365 Apps service.
The Tenant Association Key is automatically deleted if Office app usage is paused for 14 days or longer. It is recreated the next time a user launches any Microsoft 365 application.
If you cannot find the TenantAssociationKey at this registry location, try signing out of a Microsoft 365 app such as Word or Excel and then signing in again using your organizational account. If your environment uses an alternate policy path, you may also see references to the Microsoft\office\16.0 path instead of Microsoft\cloud\office\16.0\. If the cloud path is missing, check both locations.
PowerShell to query TenantAssociationKey
reg query "HKEY_LOCAL_MACHINE\SOFTWARE\Policies\Microsoft\cloud\office\16.0\Common\officesvcmanager" /v TenantAssociationKey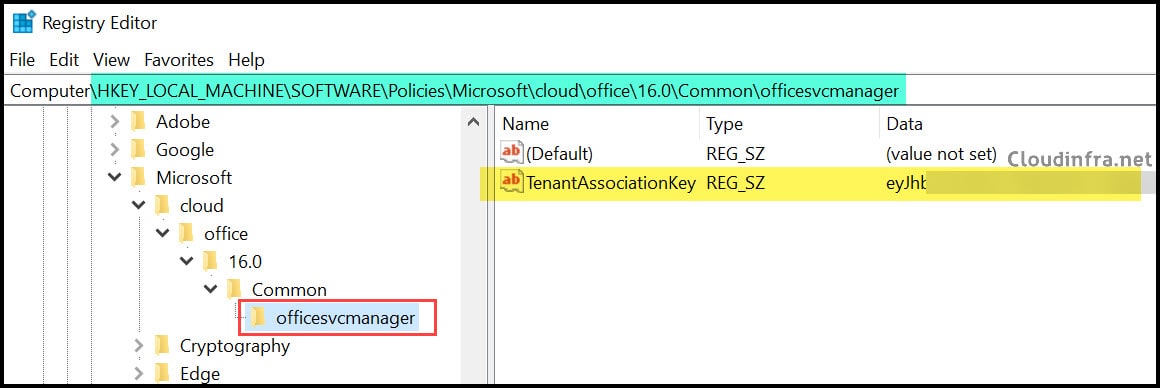
Validate Office Serviceability Manager check-in
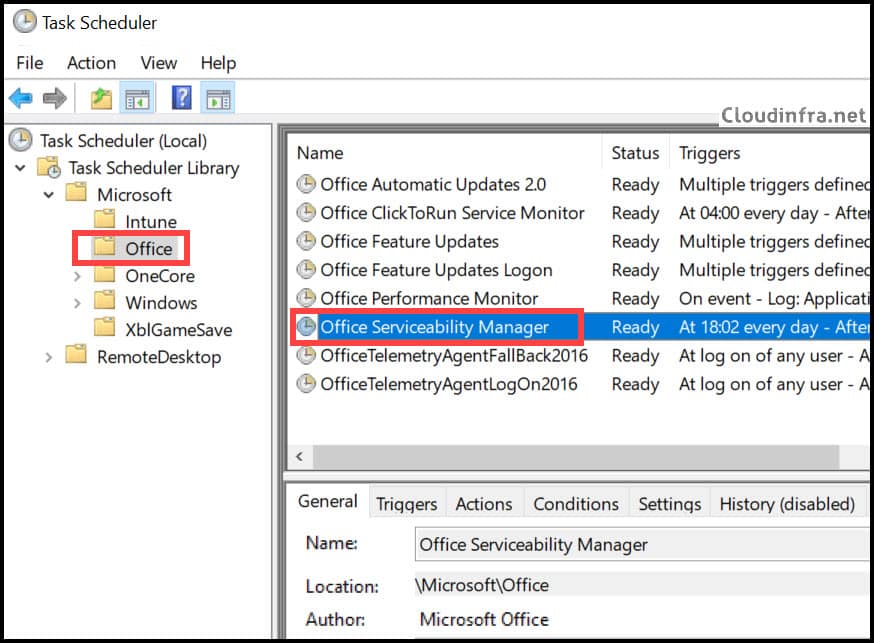
Inventory onboarding and ongoing reporting use check-in behavior. A scheduled task is setup on the target device to manage the check-in and enrollment process. This task is configured to execute a file named officesvcmgr.exe with the /checkin parameter. It runs regularly on the device to ensure data remains current and synchronized with the Microsoft 365 Apps Admin Center.
- This task can be located in the Task Scheduler > Task Scheduler Library > Microsoft > Office folder.
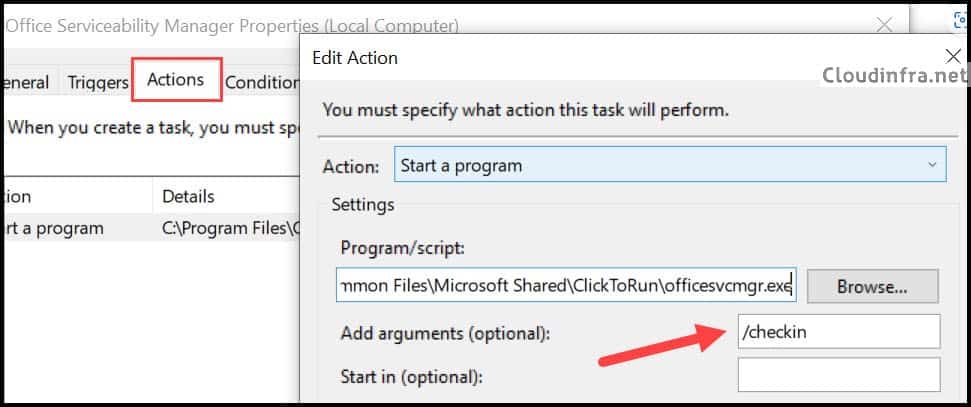
- Within the Action tab, you can verify the execution of the specified executable file along with the /checkin parameter. This parameter initiates the device check-in process with the portal.
Scheduled task action
& "C:\Program Files\Common Files\microsoft shared\ClickToRun\officesvcmgr.exe" /checkin
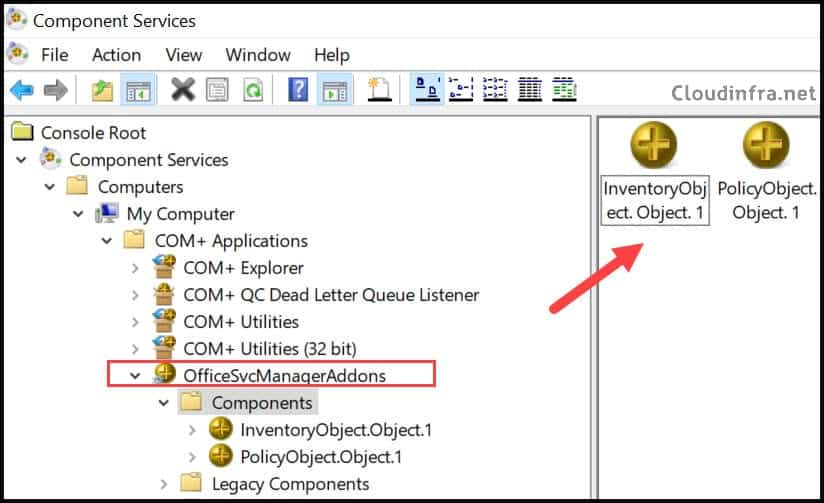
COM+ health
COM+ is leveraged locally to orchestrate communication with the cloud service and provides steps to validate COM+ applications/components such as OfficeSvcManagerAddons, including objects like InventoryObject.Object.1 and PolicyObject.Object.1.
Export Device Inventory to CSV
Gathering information from all devices can take some time, especially when dealing with many devices in your environment. Typically, you should start seeing devices populate within the first 30 minutes to an hour. However, the list will gradually grow as more users open Microsoft Office apps.
If you’ve enabled this service during a holiday, such as Christmas, it might take longer for devices to complete their check-in. This is because users need to launch Microsoft Office apps to initiate the check-in process, and app usage might be less frequent during holidays.
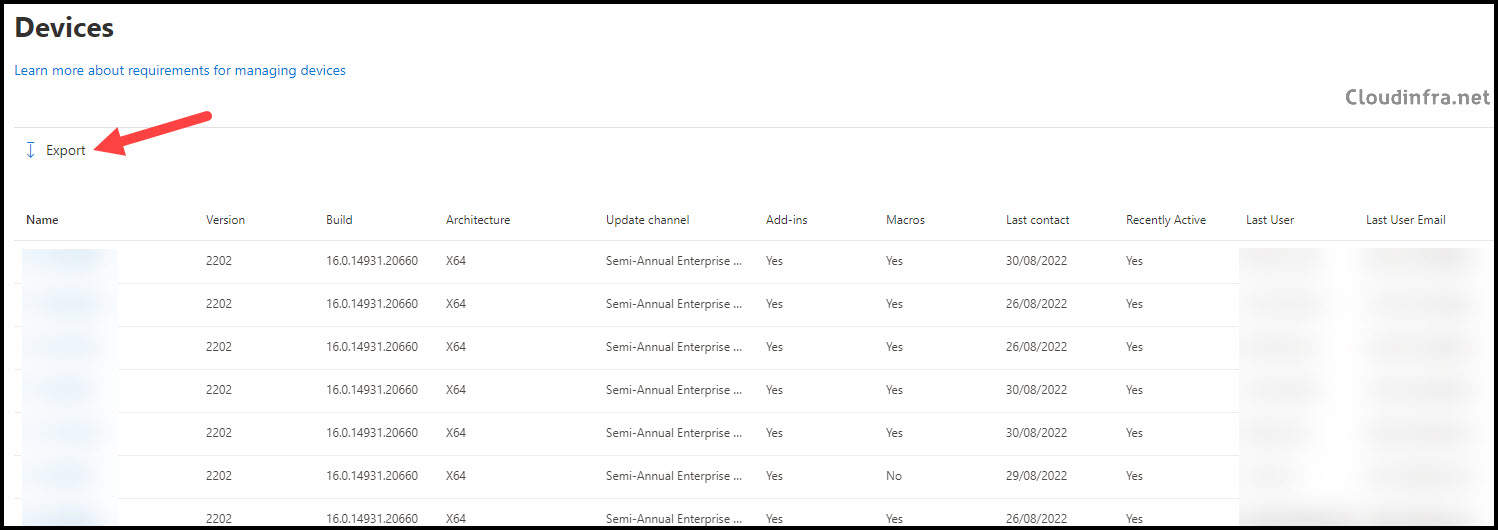
After waiting a couple of days to allow the service to enroll devices automatically, you can check the inventory service to see the number of devices being added. You can click Show all devices to display a list of all registered devices.
Once you click on Show all devices link from the Inventory dashboard, you’ll be presented with a list of all devices, including the synced device information. From there, you can click Export to generate an inventory report in CSV format.
This report is particularly valuable as it offers insights into the devices and Office versions installed, providing a comprehensive view of your organization’s environment.
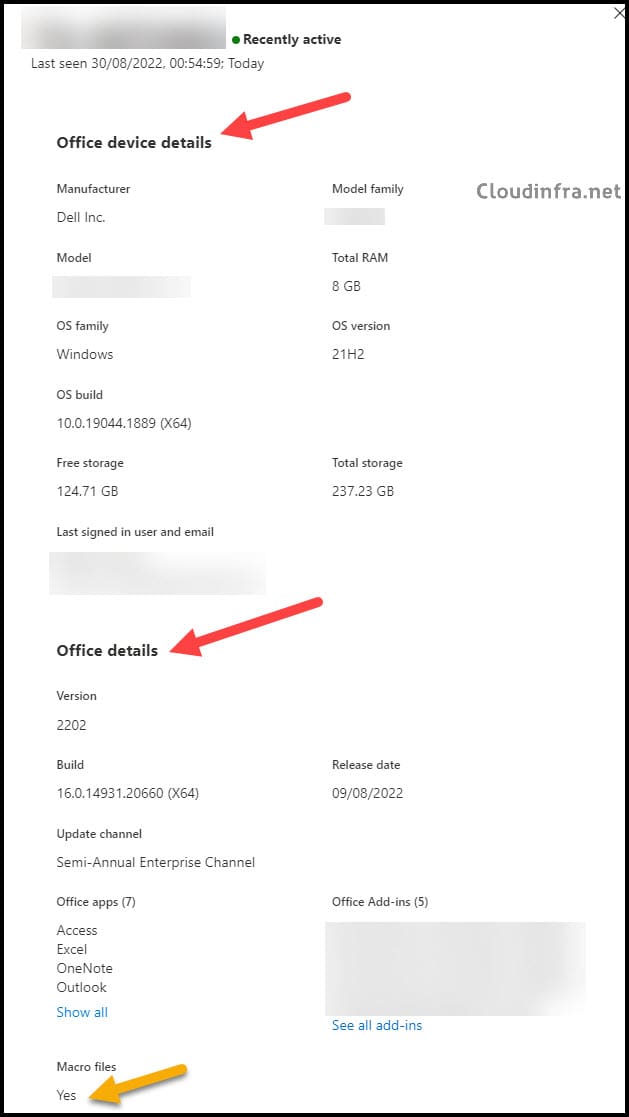
When you click on a specific device, you’ll also have access to more detailed insights about that device. This information may include the manufacturer, model, total RAM, OS family, OS version, and other relevant specifics about the device.
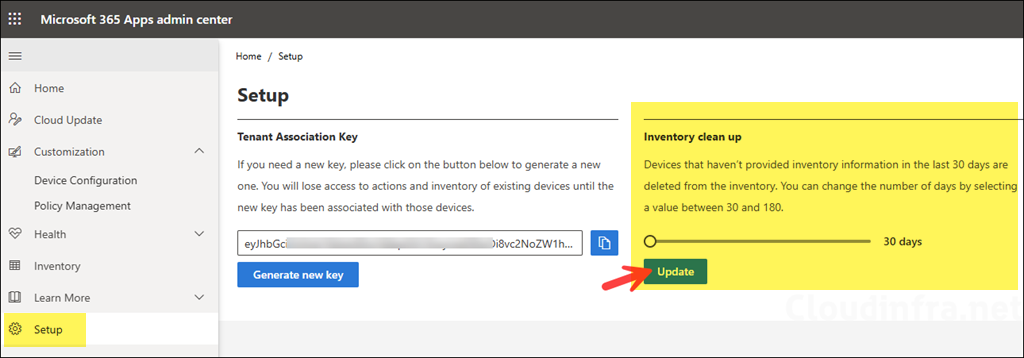
Device Inventory Cleanup
Inventory uses a daily heartbeat. If a device does not send a heartbeat for 30 days, it is removed from inventory by default and is re-added if it comes back online and sends a heartbeat again. You can extend the 30-day setting up to 180-days from Microsoft 365 apps admin center > Setup > Inventory clean up.
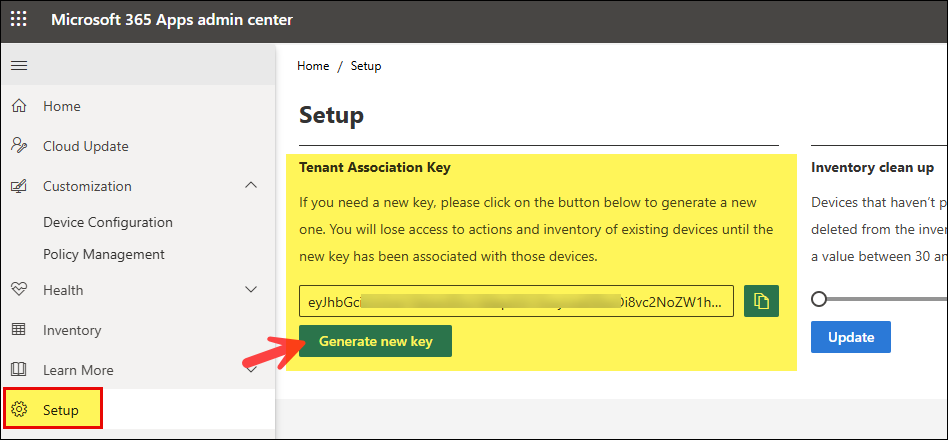
Generate a New Tenant Association Key (TAK)
To generate a new Tenant Association Key (TAK), first ensure the device can reach the required Microsoft 365 Apps admin center endpoints, then trigger an Office inventory check-in by signing in to Microsoft 365 Apps and launching an Office app, or run officesvcmgr.exe /checkin; the service will request and write a fresh TAK for the tenant automatically. You may need a new TAK if the existing key is missing, corrupted, tied to the wrong tenant (for example, after re-enrollment, tenant migration, or imaging), or removed after prolonged inactivity, which can prevent the device from appearing in Inventory.
The COM objects are no longer required for the inventory to work.
We’ve previously used SCCM/GPO to manage O365 updates, but several months ago we switched to Intune. We now have Intune configuration profiles that set the update channel and target version. Until now, we’ve been doing Semi-Annual Enterprise Channel. However, we want to move to Monthly Enterprise Channel and using “Cloud Update” in the M365 Apps Admin Center, getting rid of the Intune setting for target version altogether.
However… There seems to be little/no information available on which management systems/methods override others, especially with this new “Cloud Update” in the M365 Apps Admin Center. Ideally, I want ALL of my workstations managed only by the M365 Apps Admin Center. To do that, do I need to undo the configuration profiles in Intune? How about the setting in the similarly-named portal, “Microsoft 365 Admin Center” (not “apps” admin center)? That one we still have set to Semi-Annual, but I don’t know if it matters or not. What takes precedence?