In this blog post, we will explore the steps to remove download and delete option in Sharepoint online. Recently, I was given a task to create a new Sharepoint online site that does not allow member users to download or share documents from the document library. Users can edit and upload documents, but must not be able to delete any documents from the document library.
Contents
Step 1: Activate SharePoint Server Enterprise Site Collection features
First step is to activate the SharePoint server enterprise site collection features setting under the Site Collection features, which also enables the view-only permission level. View-only permission level is required to create a custom permission level to meet our requirements of blocking downloads and delete permissions on all documents stored in the document library.
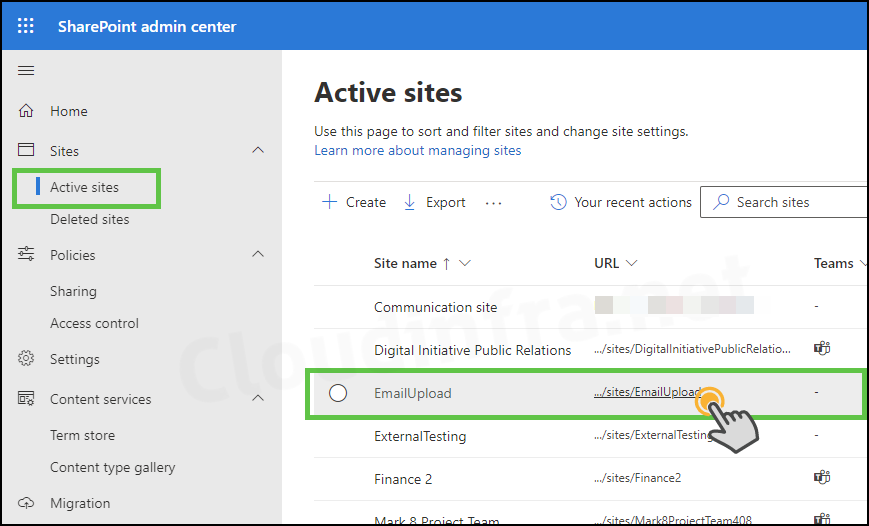
- Identify the SharePoint site you want to manage and restrict permissions.
- You can access the Sharepoint site with admin-level permissions by going to the Sharepoint online admin center and clicking on the URL to open the site.
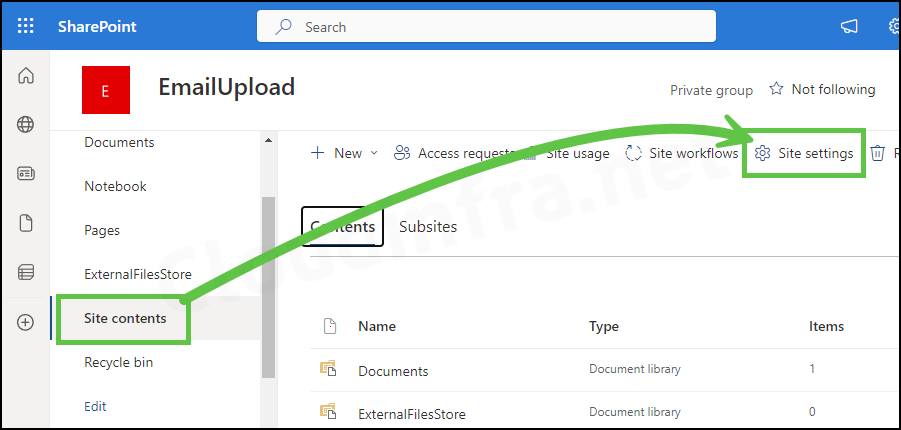
- On the left-hand side, Click on Site contents > Site settings.
- Click on Site collection features.
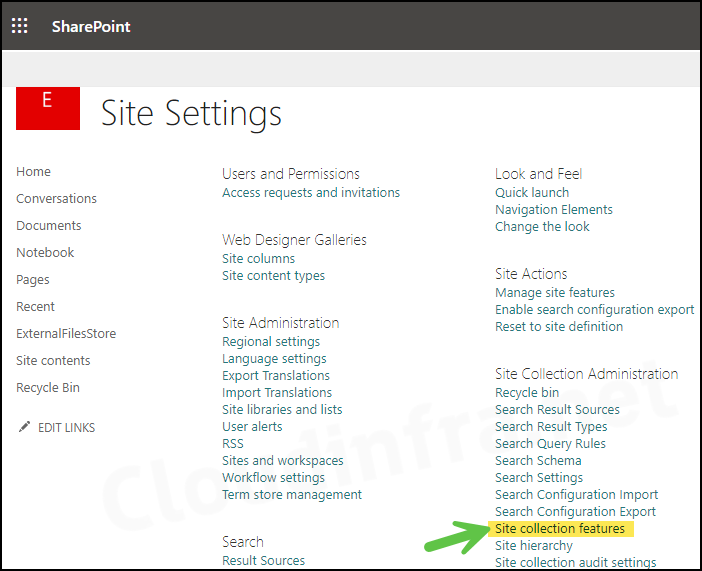
- Scroll down to find SharePoint Server Enterprise Site Collection features and click the Activate button.
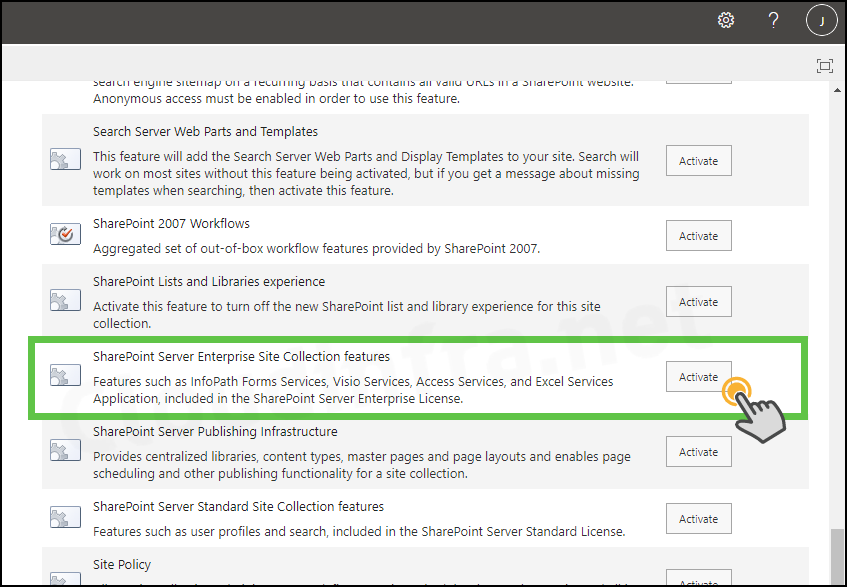
Step 2: Create a Custom Permission Level from View-Only Permission
In this step, we will duplicate the View-only permission and create a new permission called Block Download and Delete.
- Go to the SharePoint site and click Settings Icon > Site Permissions.
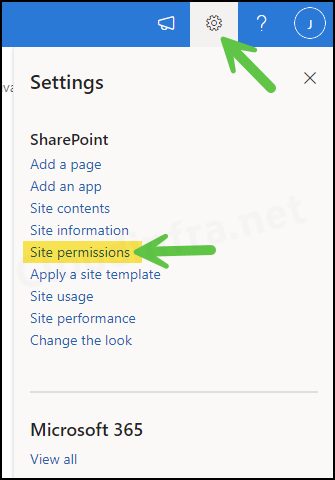
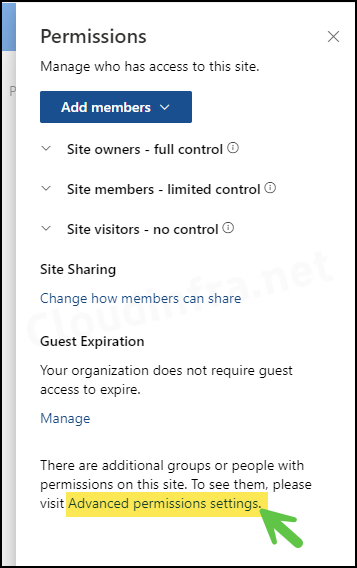
- Click on Advanced permissions settings.
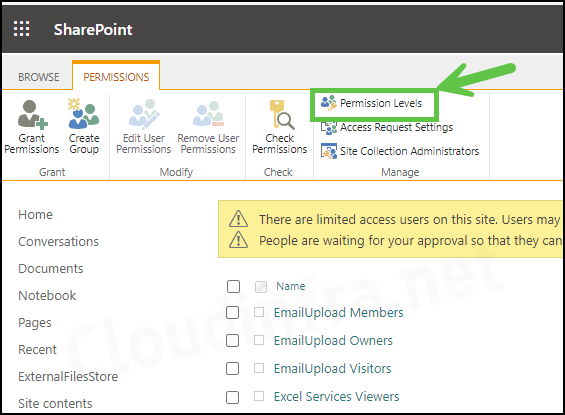
- Then click on Permission Levels.
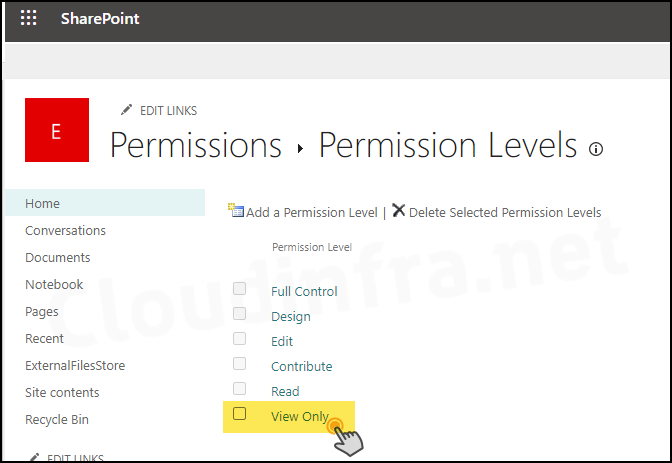
- Click on View Only permission level.
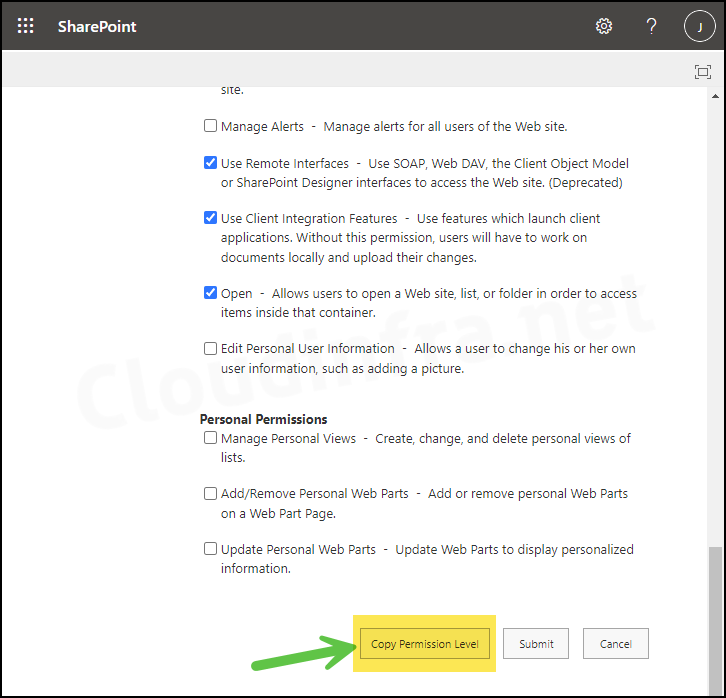
- Scroll down on the View Only permission settings page and Copy Permission Level.
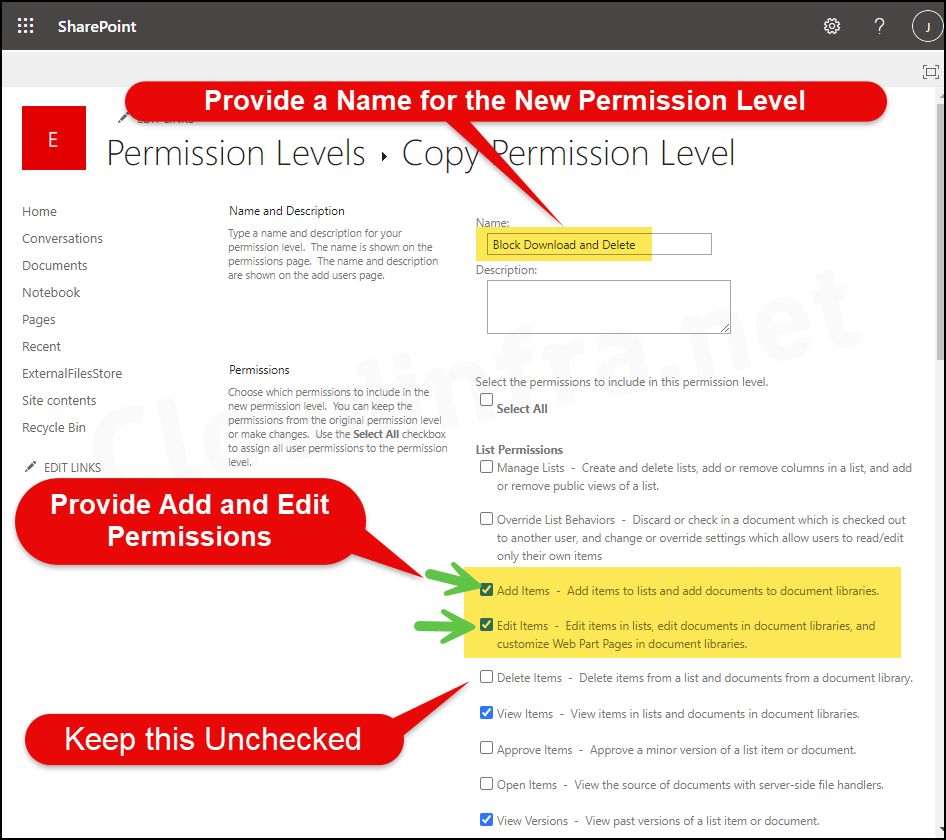
- Provide the name and description of the new permission level, for example, Block Download and Delete, and select the checkboxes to Add items and Edit items. This allows the users to Upload and Edit documents in the document library. If you want to restrict the users from uploading documents to this Sharepoint library, you can keep Add Items unchecked.
- Keep Delete Items unchecked; this will prevent users from deleting documents from the library. Finally, click the Create button to create this permission level.
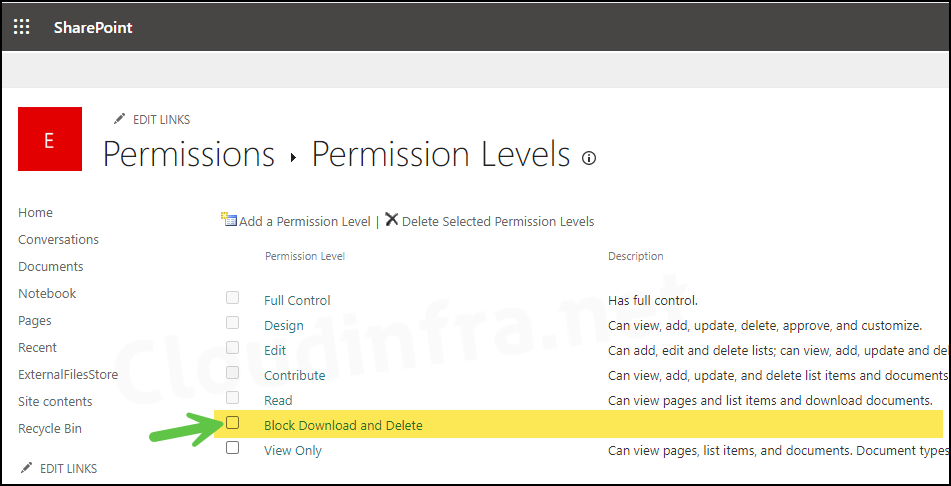
- Block Download and Delete permission has been created successfully and is showing under the Permissions Levels. This permission is ready to be assigned to the End users.
Step 3: Assign New Permission level to Users
Now that we have successfully created the Block Download and Delete Permission level, we can assign it to an Entra security group or directly to end-users. For easier management, I would prefer to create an Entra security group and assign this new permission level; this way, if any other user requests the same level of access, they can be granted access by adding them to the group.
I have already created an Entra security group called Block Download and Delete Permission. I will use this group and assign it to the Block Download and Delete permission level.
We can Grant Permissions using the Advanced Permission settings page we saw in the previous section of the post. Let’s review the steps again.
- Go to the SharePoint site and click Settings Icon > Site Permissions.
- Click on Advanced permissions settings.
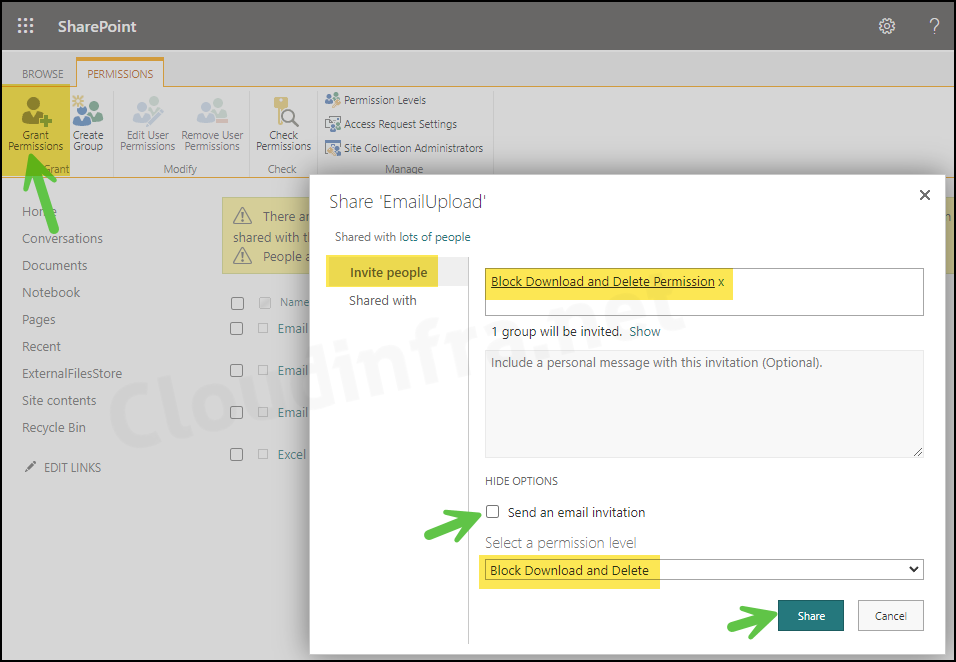
- Click on Grant Permissions.
- Under the Invite People tab, provide the name of the Entra security group or a user account and click on Show options. Uncheck the Send an email invitation checkbox to disable email notifications to the end users.
- Select a permission level: Select Block Download and Delete permission levels we created in the previous steps using the drop-down.
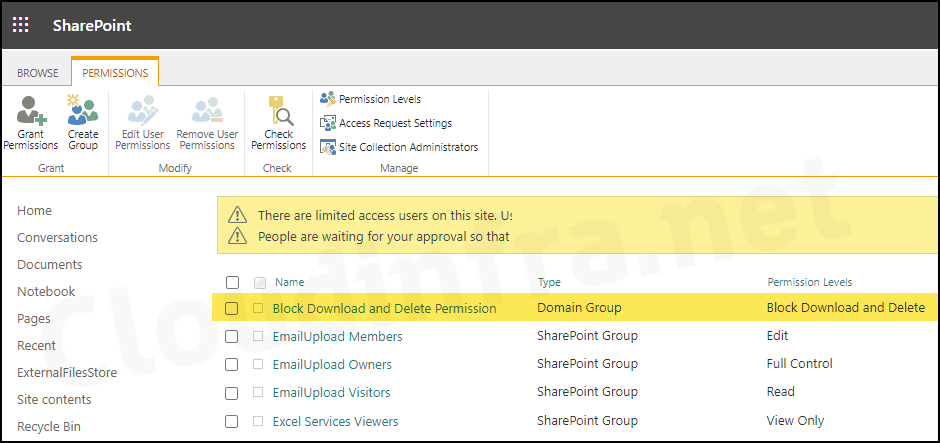
- A new permission level is assigned and will appear on the Advanced Permissions settings page.
Check Permissions assigned to the User
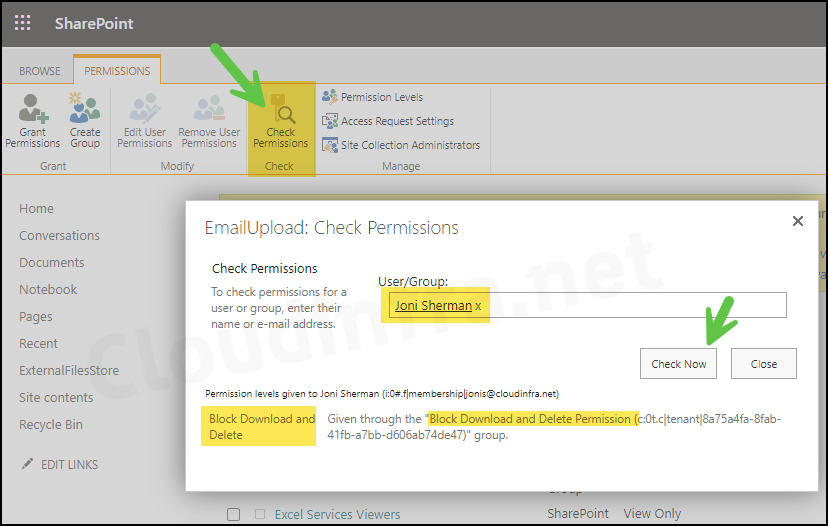
After assigning permissions to users, you can verify their permissions using the Check Permissions option. Let’s check the steps:
- Go to the SharePoint site and click Settings Icon > Site Permissions.
- Click on Advanced permissions settings.
- Click on Check Permissions from the menu.
- Provide the name of a user or group and click on Check now.
End User Experience
After setting up the permission levels and assigning them to an Entra security group, we can add users and check if the permissions are applied successfully.
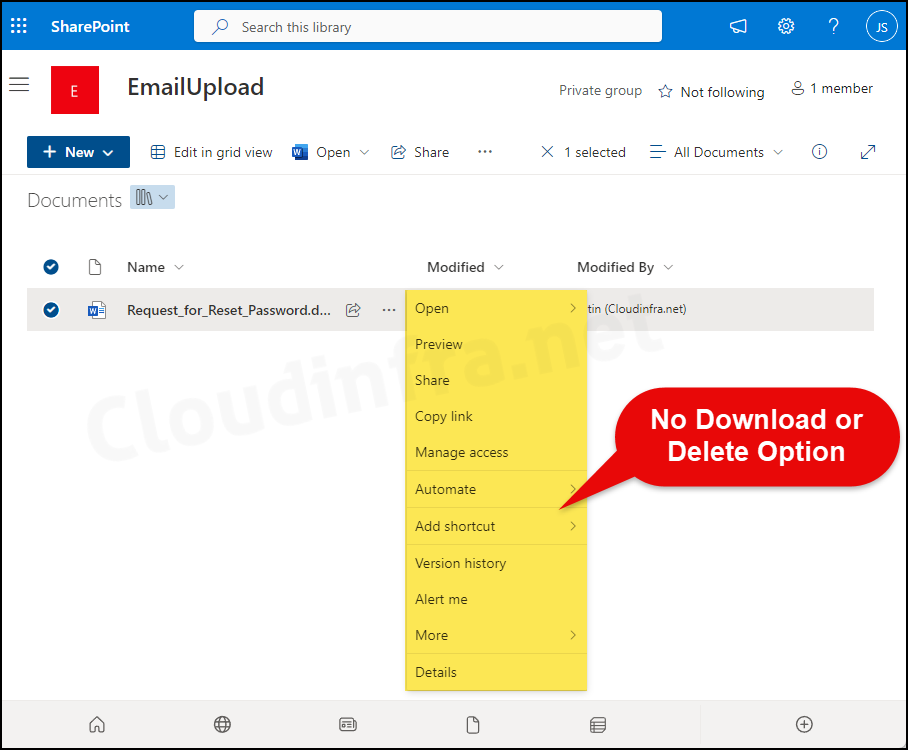
For testing, I have assigned a user called Joni Sherman (JoniS@cloudinfra.net) to the Entra group Block Download and Delete Permission. Then, I accessed the SharePoint site as Joni Sherman; I could confirm that the Download and Delete options were unavailable.
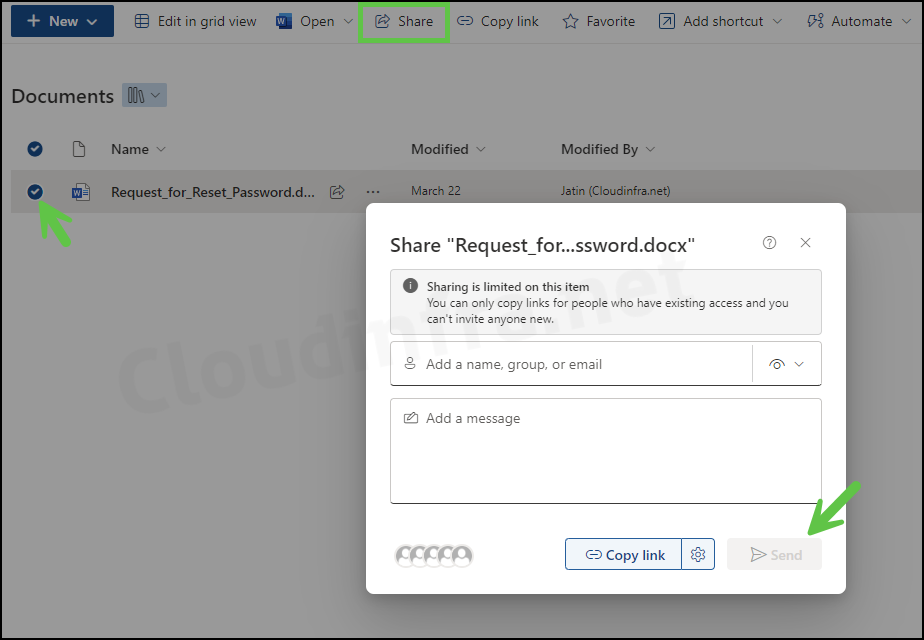
However, the screenshot below shows that share permissions are still available. In the next section of this blog post, we will also see how to limit sharing options.
Disable Share Permissions in Document Library for Users
If you have a requirement to block or disable share permissions from the document library for specific users, then you can follow the below steps:
- Open the Sharepoint Site and click on Settings Icon > Site permissions.

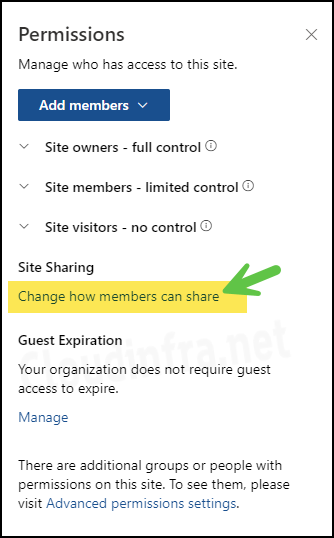
- Click on Change how members can share.
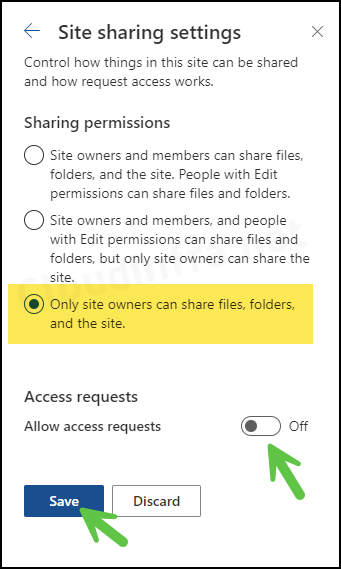
- Select the radio button Only site owners can share files, folders, and the site. Toggle off the Access requests setting. This way, only site owners can share SharePoint site items, not the members. Click on Save.
End User Experience
As a user, I refreshed the site, selected a document, and clicked on the Share. The Send button was greyed out, and Sharing was limited to only using the Copy link option.
