In this blog post, we will create a provisioning policy for Windows 365 Cloud PCs. It’s a part of the overall setup for Windows 365. For details information about all the steps for setting up Windows 365, refer the link: Windows 365 Setup Guide [Step-by-Step].
Contents
About Provisioning Policy
After creating and assigning a provisioning policy to the users, Windows 365 service will perform below checks:
- Checks for appropriate licensing for each user: Windows 365 service will check if a valid license has been assigned to the user for provisioning a Cloud PC. If not, Cloud PC will not be provisioned.
- Configures the Cloud PCs: Configuration of the Cloud PC aligns with the assigned provisioning policy for the user. This includes whether to perform an Entra Join or Entra Hybrid Join. It’s important to note that if multiple provisioning policies are assigned to a user, only the first one assigned will be used for the provisioning process.
After provisioning a Cloud PC, any changes to the provisioning policy will not impact existing Cloud PCs. Only newly provisioned Cloud PCs will receive the updated provisioning policy settings. To apply provisioning policy changes to an existing Cloud PC, you can reprovision/reset it.
Impact of Provisioning Policy Changes
Create a Windows 365 Provisioning Policy
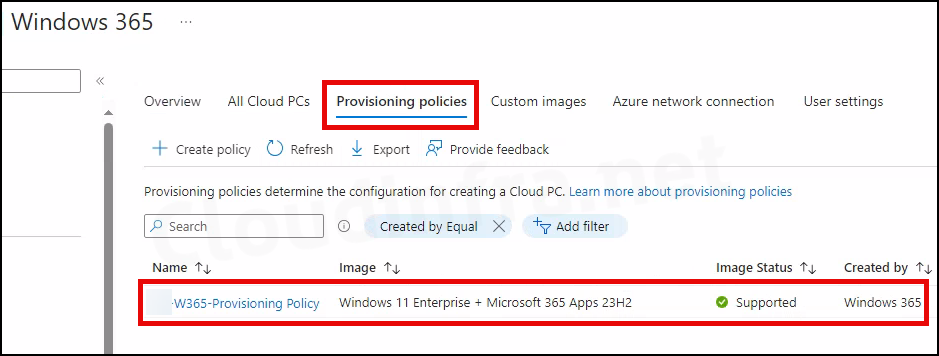
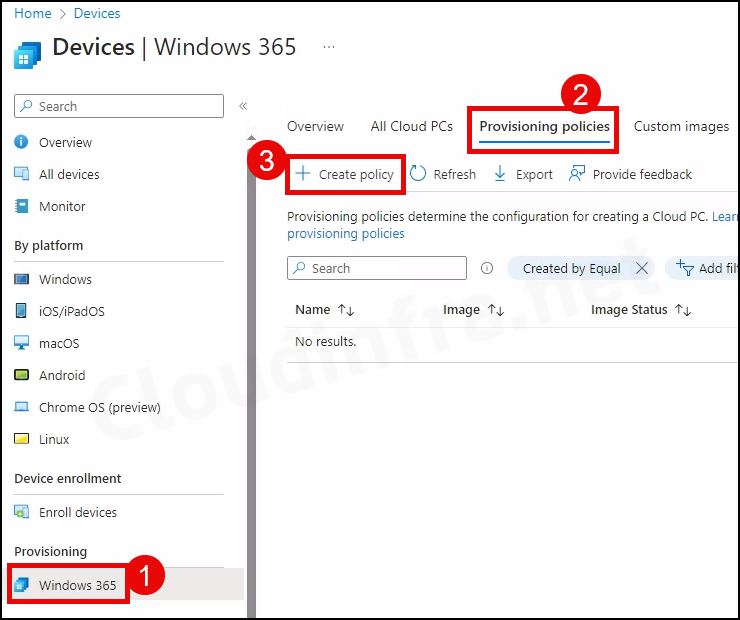
- Sign in to the Intune admin center > Devices > Windows 365 > Provisioning policies.
- Click on Create Policy.
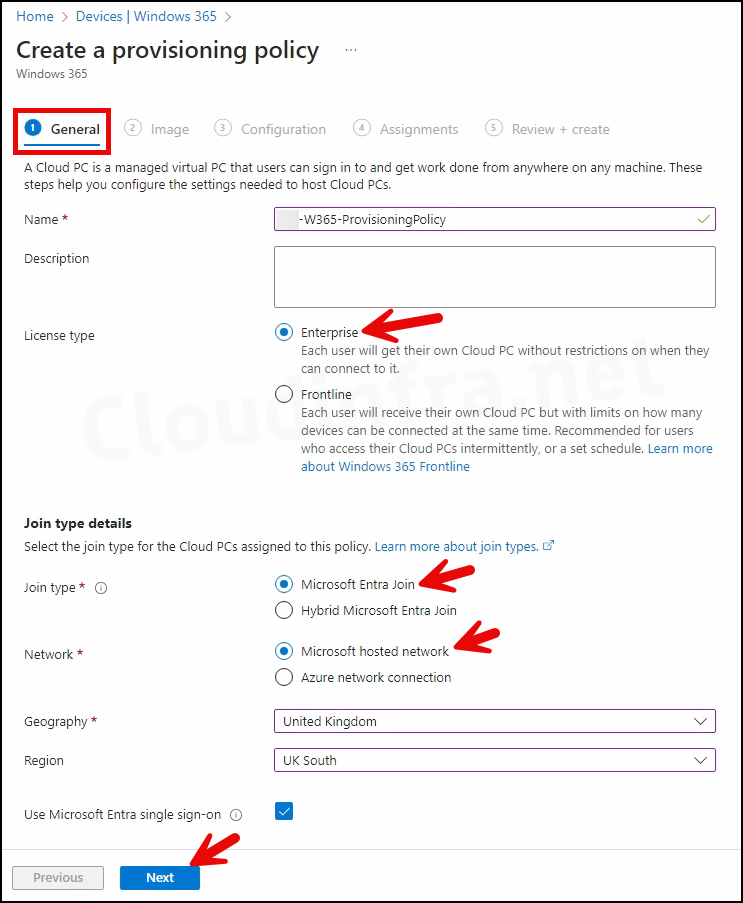
General Tab
- Name: Specify the name of the provisioning policy.
- Description: Describe the policy.
- License type: Choose Enterprise or Frontline based on the Windows 365 license assigned to end users. If a user is assigned a Windows 365 Enterprise license, select the License Type as Enterprise.
- Join type: Select either Microsoft Entra Join or Hybrid Microsoft Entra Join. If you are a full cloud organization with no connection to Active Directory Infrastructure, go with Microsoft Entra Join.
- Network: Select the network your Cloud PC will be plugged into:
- Microsoft hosted network: Microsoft managed network with outbound Internet connectivity only. As a security measure, there will not be any inbound connectivity to the cloud PC.
- Azure network connection: You can plug your Cloud PC into an existing Vnet/Subnet in your Azure subscription. If you have created an Azure network connection in Windows 365, you can select this option and select the connection created from the drop-down.
- Geography: Choose the geography for PC provisioning, then select the region. You can explicitly choose a region (e.g., UK South) or opt for Automatic (Recommended), allowing the Windows 365 service to select the region for the Cloud PC automatically.
- Use Microsoft Entra single sign-on: Windows 365 offers single sign-on, which provides a Single authentication prompt that can satisfy Windows 365 service and Cloud PC authentication.
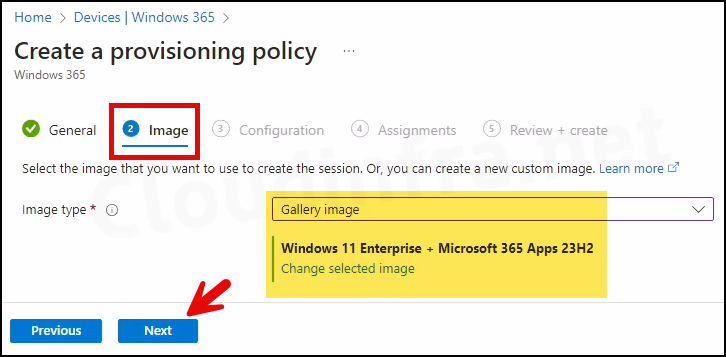
Image
Select the Windows Image to create your assigned Cloud PC. You can use one of the Gallery images, or if you are on Windows 365 Enterprise, you can also go with a Custom Windows Image.
One advantage of using an Image from the Gallery is that Microsoft automatically updates the image with the latest patches. So, when provisioning your Cloud PCs, users will get the OS with the latest Quality and feature updates.
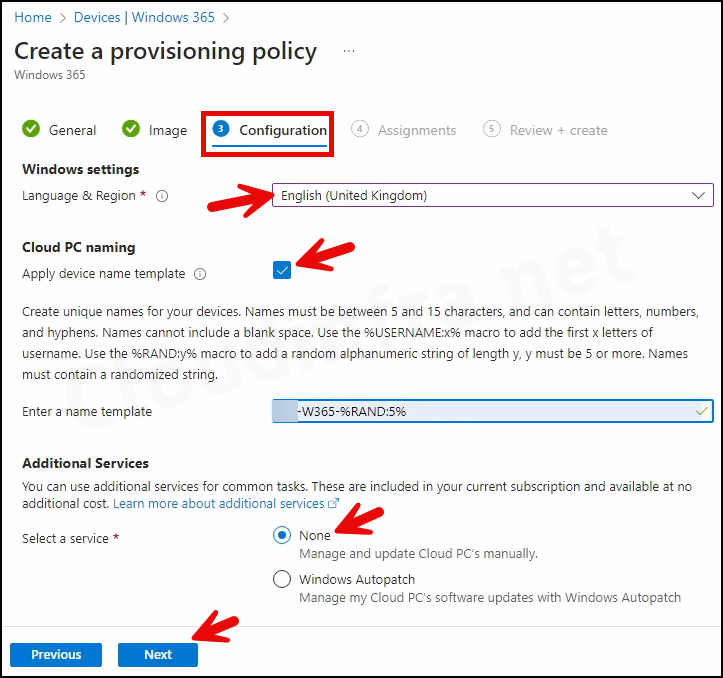
Configuration Tab
- Windows settings
- Language & Region: Select the language. I will go with English (United Kingdom).
- Cloud PC naming
- Apply device name template: If you want to assign the name of the Cloud PC based on the device name template, then you can select the checkbox and provide the value here. For example, I am using a device name template as
Xyz-W365-%RAND:5%.
- Apply device name template: If you want to assign the name of the Cloud PC based on the device name template, then you can select the checkbox and provide the value here. For example, I am using a device name template as
- Additional Services
- Select a service: These services are available at no extra cost, including Windows Autopatch. You can also select None to manage the quality and feature updates yourself.
- Assignments: Click Add groups and choose the Entra security group name containing the users to whom you want to assign Cloud PCs.
- Review + create: Review the provisioning policy summary and click on Create to create the policy. You can find the policies you created under the Provisioning policies tab.