In this blog post, we will learn how to allow Windows 365 users to reset their Cloud PC. Standard users cannot reset their Cloud PCs by default. You can enable a setting for users so that they can reset their devices themselves.
The ability to allow users to reset/reprovision their Cloud PCs was introduced in July 2023 with Windows 365 Service Release 2307. Using a User Settings policy, you can enable users to reset their Cloud PCs.
Contents
Enable Cloud PC Reset Option
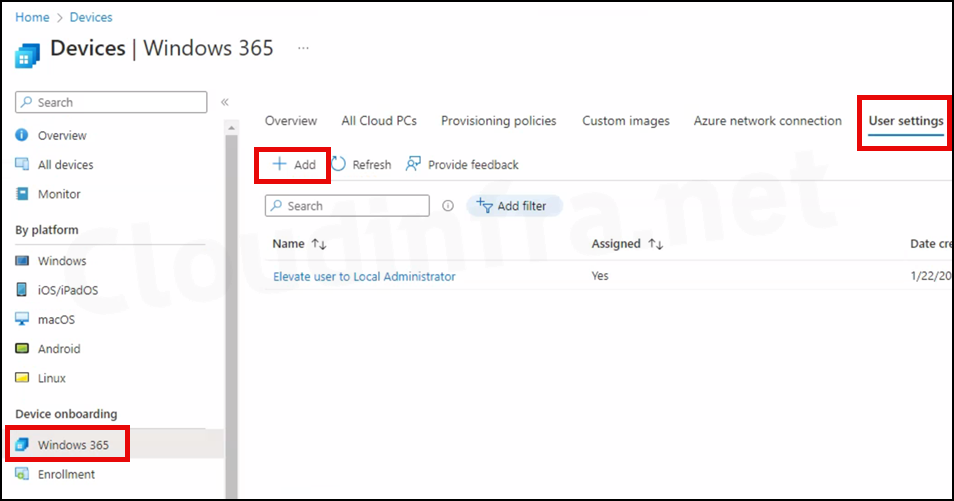
- Sign in to the Intune admin center > Devices > Windows 365 > User settings.
- Click on Add.
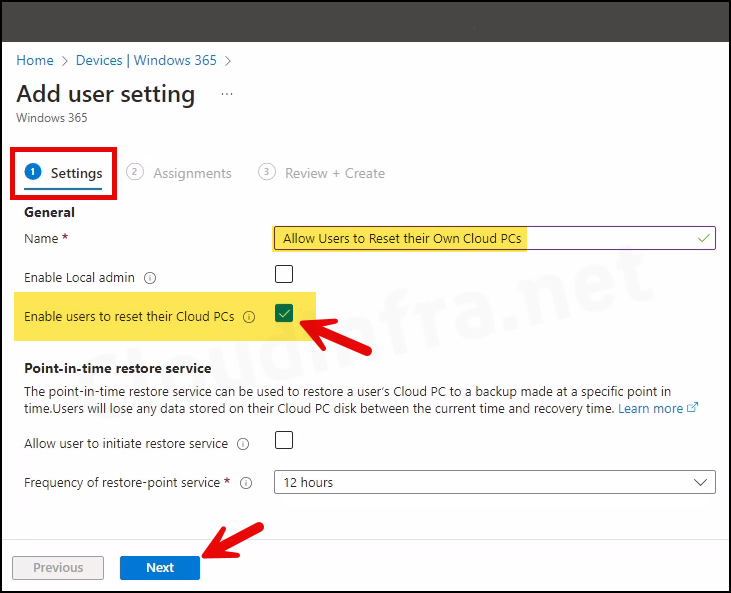
Settings Tab
General
- Name: Provide the name of the User setting policy, such as Allow Users to Reset their Own Cloud PCs.
- Enable Local admin: Leave this box unchecked, as this provides local administrator rights to Windows 365 users on their respective Cloud PCs. For more information, please refer to the blog post: Elevate User to Local Admin on Windows 365 Cloud PC.
- Enable Users to reset their Cloud PCs: Check the box to Enable Cloud PC reset option for users. Enabling this setting allows targeted users to reset/reprovision their Cloud PC when they connect from Windows app or Windows 365 web client.
Point-in-time restore service
- Allow users to initiate restore service: Keep it unchecked (Default state).
- Frequency of restore-point service: Keep default.
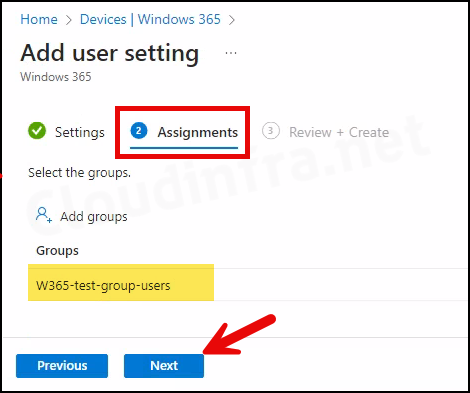
Assignments Tab
Click Add groups to choose an Entra security group that includes end-user accounts. Each user within the assigned groups will be granted Cloud PC reset (reprovision) permission on their own Cloud PCs. I’ve selected a security group in Entra called W365-test-group-users.
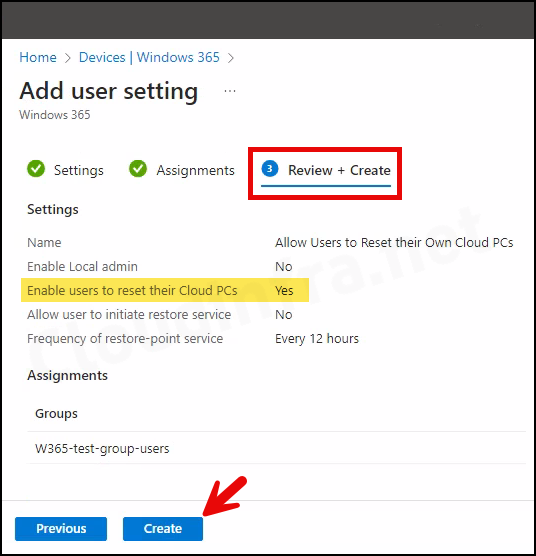
Review + Create
Review the policy and click on the Create button to proceed.
User settings are typically applied to Entra ID users. You can create multiple policies under user settings, and there might be cases where one user has multiple policies targeted. In the event of a settings conflict, the most recently created policy takes precedence, and other policies are ignored. The last updated date on the policy does not affect this order; conflicts in settings are resolved based on the creation date of the user settings policy.
Important Note
End User Experience
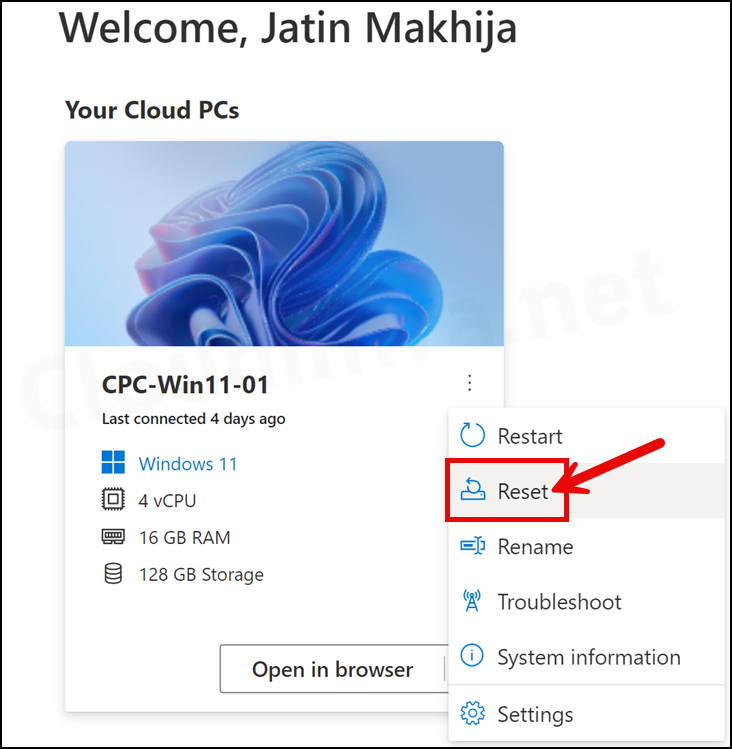
After User settings policy is applied to the targeted Windows 365 Cloud PC users, they can see the Reset option when managing their Cloud PCs from both the Windows App and the Windows 365 Web client. To check and confirm if the Reset option is enabled for you, follow below steps:
- Sign in to the Windows 365 web client.
- Click on three vertical dots. You will find the Reset option. Clicking on it will not immediately start the reset process; you will get a confirmation pop-up message.
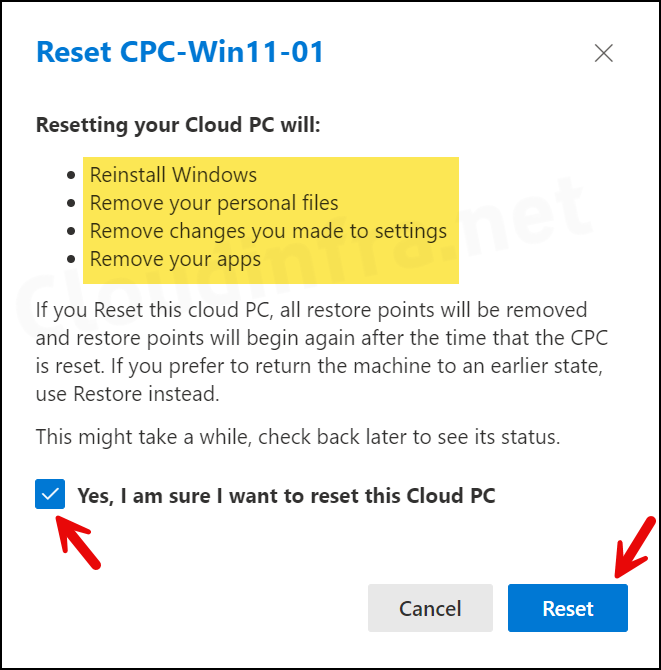
- Check the box for Yes, I am sure I want to reset this Cloud PC and click on the Reset button to begin reprovisioning your Cloud PC. Please note, this action will:
- Reinstall Windows
- Remove your personal files
- Remove changes you made to the settings
- Remove your apps
Additionally, all restore points will be removed, and new restore points will begin after the Cloud PC is reset. If you prefer to return the machine to an earlier state, use the Restore feature instead.
Note
What happens after initiating a Reset of a Cloud PC?
After initiating a reset (reprovisioning) of your Windows 365 Cloud PCs, all data, customizations, and apps will be removed, and Windows will be reinstalled. If you have applied any device naming template via the provisioning policy, device will be renamed accordingly.
New device name will appear in Intune and Entra ID admin center. If you have not applied a device name template, the device will be named according to the default settings, keeping the device’s name the same as before. For more information on the Windows 365 reset process, please refer to the step-by-step guide: How to Reprovision a Windows 365 Cloud PC.
