In a Microsoft 365 organization, user accounts may require deactivation for various reasons, including employee departures or security considerations.
Determining when a user account was disabled can be a challenging task. This blog post will explore how to audit disabled user accounts in Microsoft 365. This audit process provides valuable information for auditing and troubleshooting purposes.
More specifically, We will find the answers to the below questions:
- Who disabled a user account in Microsoft 365?
- When was a user account disabled in Microsoft 365 [Date/Time Stamp]?
Your security team may require you to identify Who disabled a user account in Microsoft 365 and When this action occurred. To access this information, you must review the Unified Audit logs in the Microsoft Purview Portal. These logs contain the data necessary for tracking user account deactivation.
User and administrative activities within various Microsoft 365 services are documented and stored in the unified audit log. These records can be queried and extracted into Excel files for in-depth analysis. Auditing is typically enabled by default in Microsoft 365. However, the duration of audit logs retention depends on whether you have an Audit (Standard) or Audit (Premium) license.
To verify whether auditing is enabled for your organization, you can use the PowerShell cmdlet Get-AdminAuditLogConfig | Format-List UnifiedAuditLogIngestionEnabled.
If auditing is enabled, and you have the necessary permissions to create an audit search, you can proceed to the Search Audit logs on Microsoft Purview portal section.
If auditing is disabled in your organization, I have also included steps to enable auditing in later sections of this blog post. This will help you set up auditing for your organization and capture data for various user and admin activities.
Enable Auditing steps
Table of Contents
Step 1: Search Audit logs on Microsoft Purview portal
To initiate a search in the Audit logs from the Microsoft Purview portal, let’s go through the following steps:
- Sign in to the Microsoft Purview portal.
- Click on Audit under Solutions.
- Start a New Search by providing the Date range and filter criteria.
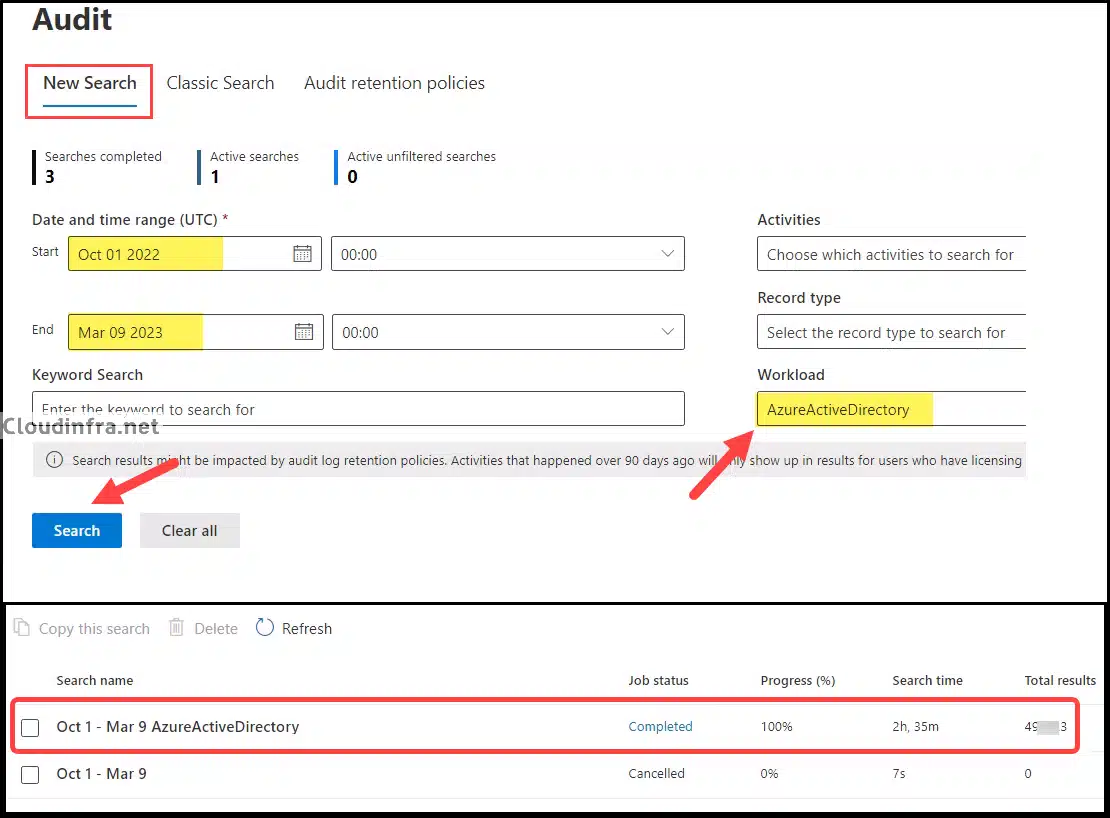
- Keep an eye on the job status, and you can review its progress, search duration, and the total results it has returned. In my case, it took approximately 2 hours and 35 minutes to complete. When the job is finished, click Search to access the search results.
- You can click on the Export button to export the report.
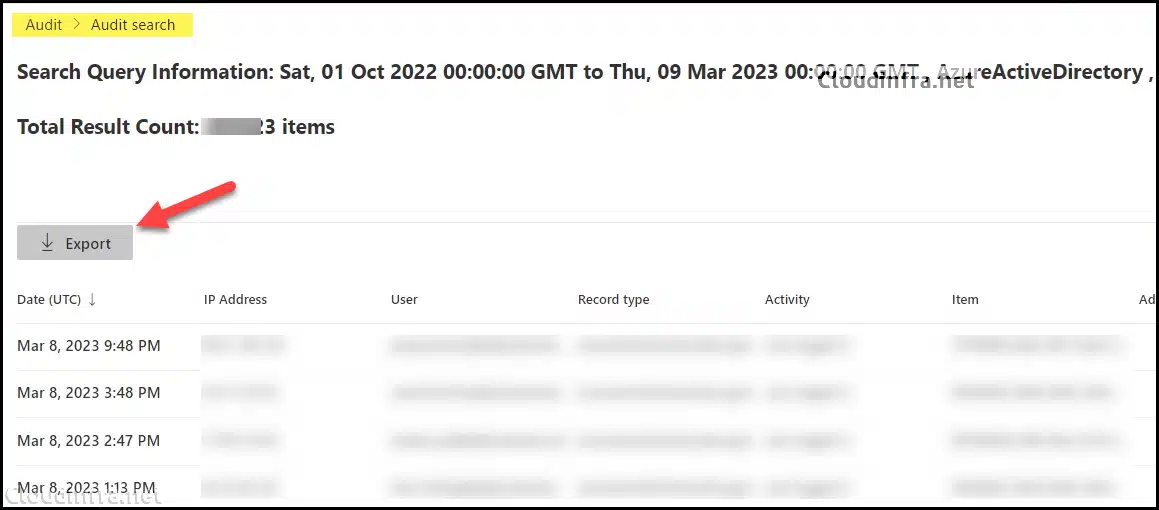
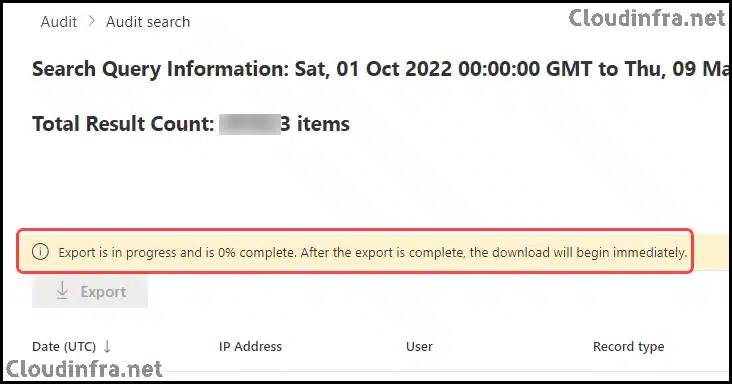
- The Export job will initiate, and you can download the results after some time.

- You can monitor the progress of the export job from the Audit Search Job itself.
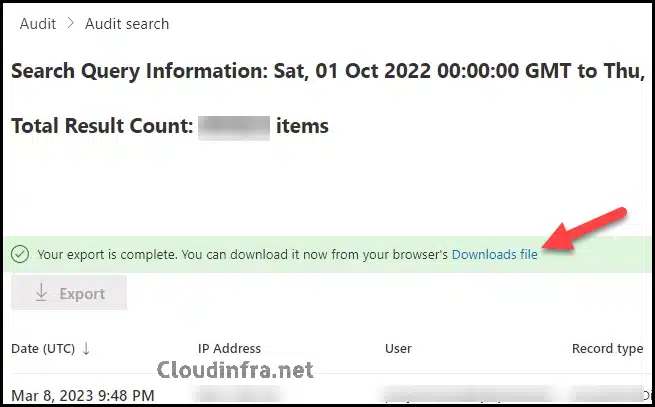
- After the Export Job is finished, You will get a message that Your export is complete. You can download it now from your browser’s Downloads File. Click on the Downloads file link to export the data in a CSV file.
Step 2: Filter Search Results to find Disabled User Account AuditData
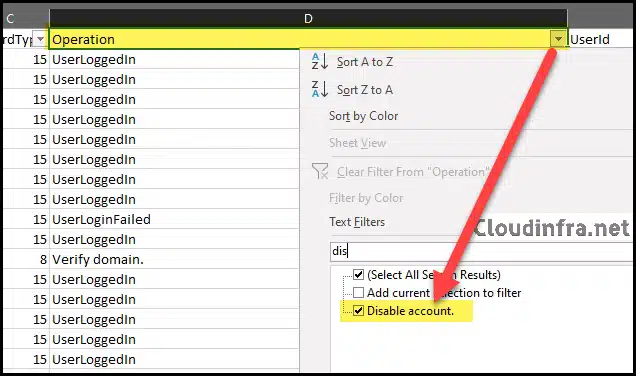
After downloading the export in a CSV file, you can apply filters to the top column and filter the Operation column to search for Disable Account entries.
Step 3: Who Disabled a Microsoft 365 User Account and When?
After filtering the Operations column for Disable Account entries and searching for the user account you want to audit, check the AuditData column to find details about the disablement of that Microsoft 365 user account. You can also refer to the corresponding UserId column to identify who disabled the user account.
The AuditData column contains comprehensive details about the operation, including the timestamp for when a user account was disabled. You can copy the AuditData record to a notepad for further analysis to gather more information about the operation.
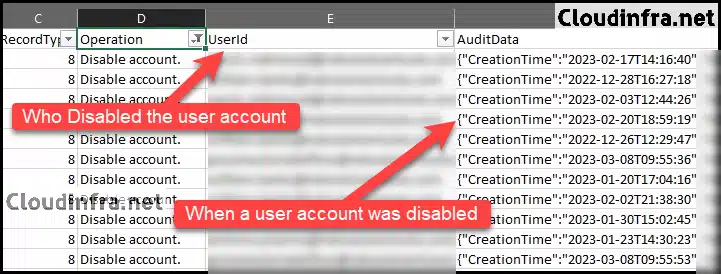
- After copying the AuditData record to a notepad, you’ll discover various details about the operation, including the following:
- TimeStamp of when a user account was disabled in Microsoft 365.
- Which Operation was performed on the user account
- The User’s ObjectID / account which was disabled.
- Who disabled a Microsoft 365 user account?

FAQs
What kind of license is required to Audit user and admin activities?
Audit (Standard) and Audit (Premium) licenses are bundled with various Microsoft 365 subscription packages. Here are some of the common licenses that include these features. Please visit the License Requirements link for a comprehensive Audit Standard or Audit Premium licenses list.
To verify the services covered by the Unified Audit Log, you can refer to the list of Microsoft 365 services that support auditing.
- Audit (Standard) license: Included in Microsoft 365 Enterprise E3, Microsoft 365 Business Premium.
- Audit (Premium) license: Included in Microsoft 365 Enterprise E5 subscription, Microsoft 365 Enterprise E3 subscription + the Microsoft 365 E5 Compliance add-on.
What is the retention duration for the audit log for user and admin activities?
The retention period for audit logs depends on your Microsoft 365 license subscription. You will have Audit (Standard) or Audit (Premium) features based on your subscription. Here are the retention periods for each license:
- Audit (Standard) License: 90 days
- Audit (Premium) License: 365 days. [Can be extended up to 10 years with an add-on license].
What permissions are required to search the audit log?
To search the audit log, you must have either the View-Only Audit Logs or Audit Logs role assigned in Exchange Online. Typically, these roles are assigned to the Compliance Management and Organization Management role groups within the Exchange admin center’s Permissions page.
It’s worth noting that global Office 365 and Microsoft 365 administrators are automatically included in the Organization Management role group in Exchange Online.
Auditing is not enabled in my organization
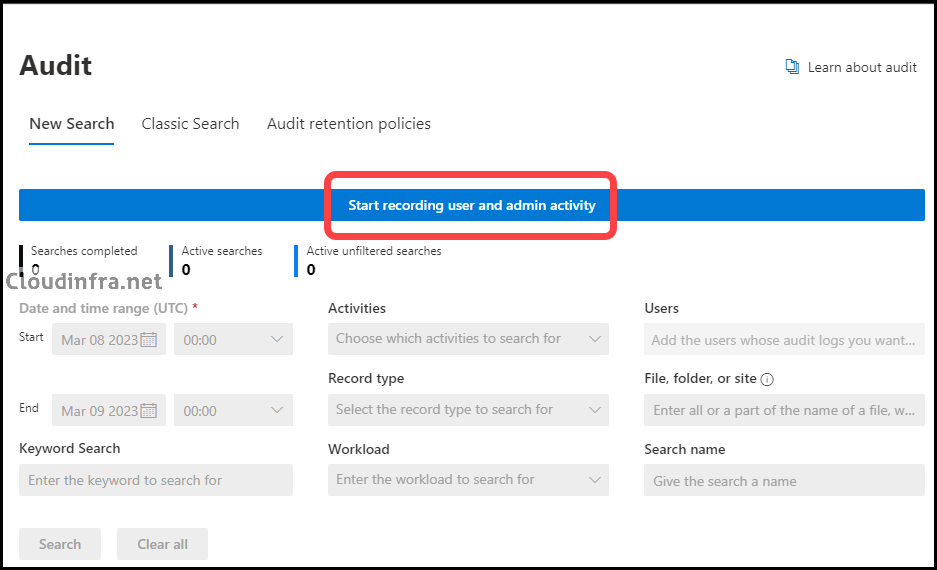
If you don’t find the option to start searching the audit logs, it’s possible that your organization does not enable auditing of user and admin activities.
In such cases, you may see a button to Start recording user and admin activity to enable auditing; you can either click on this button or use PowerShell cmdlets to enable it [refer to the next section]
How to check if Auditing is enabled for Microsoft 365 using PowerShell
You can also use PowerShell cmdlets to check the auditing capability. If you discover that auditing is not enabled for your organization, you can enable it using the following steps:
Install the Exchange Online PowerShell module
Install-module ExchangeOnlineManagement
Connect to Security and Compliance and Exchange Online
Connect-IPPSSession
Connect-ExchangeOnline
Check if Unified Auditing is Enabled
Get-AdminAuditLogConfig | Format-List UnifiedAuditLogIngestionEnabled

Enable Unified Auditing using Set-AdminAuditLogConfig
Set-AdminAuditLogConfig -UnifiedAuditLogIngestionEnabled $true

If you encounter an error when running the Set-AdminAuditLogConfig Before running the Set-AdminAuditLogConfig cmdlet, it’s essential to ensure you are connected to Exchange Online using the Connect-ExchangeOnline cmdlet. This will establish the necessary connection to perform administrative tasks related to audit log configuration. Once connected, you can run the Set-AdminAuditLogConfig cmdlet without issues.
| Error while running Set-AdminAuditLogConfig |
|---|
| PS C:\Users\Jatin> Set-AdminAuditLogConfig -UnifiedAuditLogIngestionEnabled $true Set-AdminAuditLogConfig : The term ‘Set-AdminAuditLogConfig’ is not recognized as the name of a cmdlet, function, script file, or operable program. Check the spelling of the name, or if a path was included, verify that the path is correct and try again. At line:1 char:1 Set-AdminAuditLogConfig -UnifiedAuditLogIngestionEnabled $true FullyQualifiedErrorId: CommandNotFoundException |
Conclusion
In this blog post, we have audited disabled user account data. You can also filter the Entra ID Audit export to explore further and find information related to other user and admin activities, which we did not cover in this blog post.
For example, you can audit data related to group membership changes, user account deletions, user login history, last user updates, and more. This additional auditing can provide valuable insights into your organization’s activities.

Thanks for this, Jatin. I will add, though, that the “Disable account” operation is not the only way User disablement is logged. In my experience, even more often, the disablement is shown as an “Update user” operation. As such, I find that filtering the AuditData field using the text string “ModifiedProperties”:[{“Name”:”AccountEnabled”,”NewValue”:”[\r\n false\r\n]”,”OldValue”:”[\r\n true\r\n]” will give you a more complete and accurate answer. I don’t know why some of those records are labeled “Disable account” and others are labeled “Update user,” but I suspect it could be related to which interface you use to disable the User in the first place (Microsoft 365 Admin console v. Entra ID console).