In this blog post, I will show you the steps to delete Windows Autopilot devices from Intune and Entra ID. With the Intune service release 2307, Microsoft has streamlined the process of managing Windows Autopilot devices. Administrators can now remove Autopilot device registrations directly from the Intune admin center without affecting its status in Intune or Entra ID.
This new one-step removal feature allows devices to remain in a managed and enrolled state within Intune, ensuring they continue to appear under All devices section in the Intune admin center. This enhancement simplifies device management by providing you the ability to cleanup the stale Autopilot registrations.
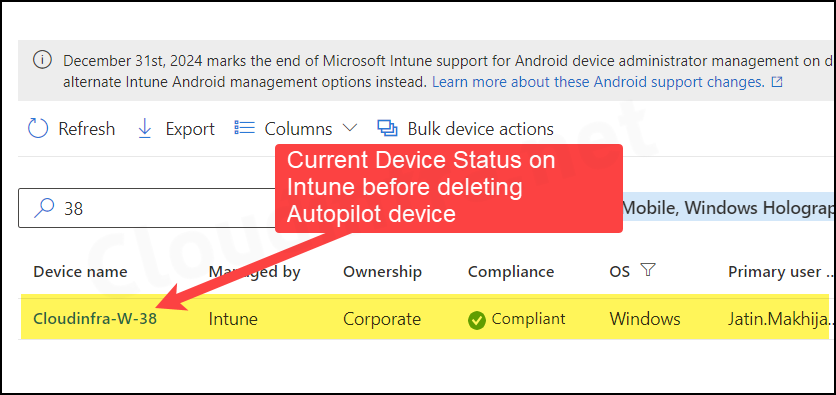
Before we delete the device from Autopilot, let’s capture the current state of the devices from Intune admin center and Entra ID. The device that we will be removing from Autopilot is Cloudinfra-W-38.
Contents
Current Device Status on Intune admin center
As you can see from the screenshot below, the device Cloudinfra-W-38 is currently managed by Intune and is in a compliant state.
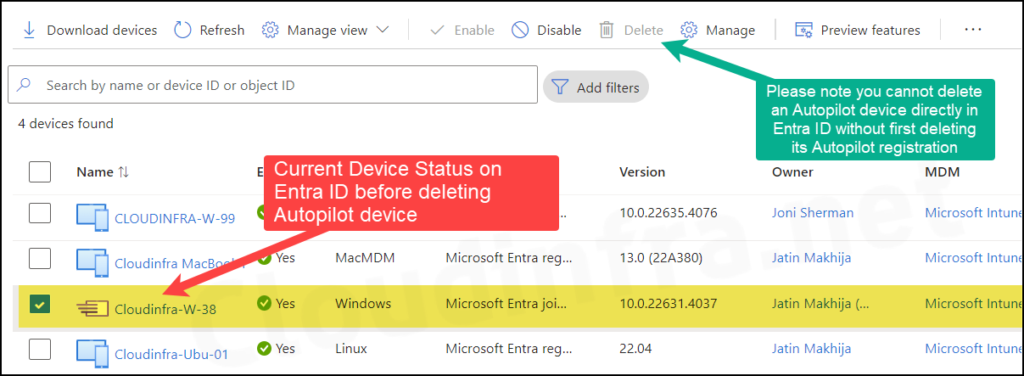
Current Device Status on Entra admin center
The screenshot below is from the Entra admin center, showing the state of the device Cloudinfra-W-38. The device is showing as managed by MDM: Microsoft Intune and Its Microsoft Entra joined.
Please note that when you select a device in the Entra admin center, the Delete option is greyed out. As indicated by the device icon, it is an Autopilot device, with its serial number and hardware hash registered in Autopilot. Therefore, you must first remove the device’s registration from Autopilot before you can delete it from Entra ID.
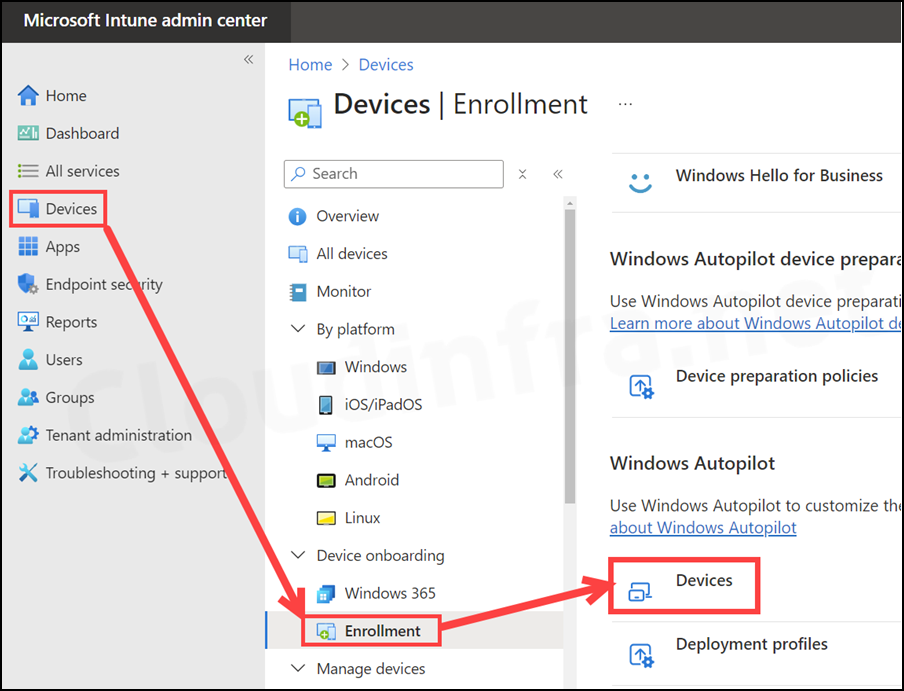
Delete Autopilot Device registration
- Sign in to Intune admin center > Devices > Enrollment > Devices.
- On the Windows Autopilot devices page, you will find all the devices that have been imported into Autopilot. This is normally done by exporting the hardware hash of the device and importing it on this page.
- If you want to find the device name corresponding to the serial number, you can click on the serial number. A pane will open on the right-hand side where you can find the device name. Check and confirm the device name to ensures that you are deleting the correct device.
- Simply select the Autopilot device and click on Delete. You will be prompted with a warning confirming that selected devices will be removed from Windows Autopilot only. If any of the devices are currently enrolled, they will continue to be managed by Intune. Click Yes to proceed with the removal.
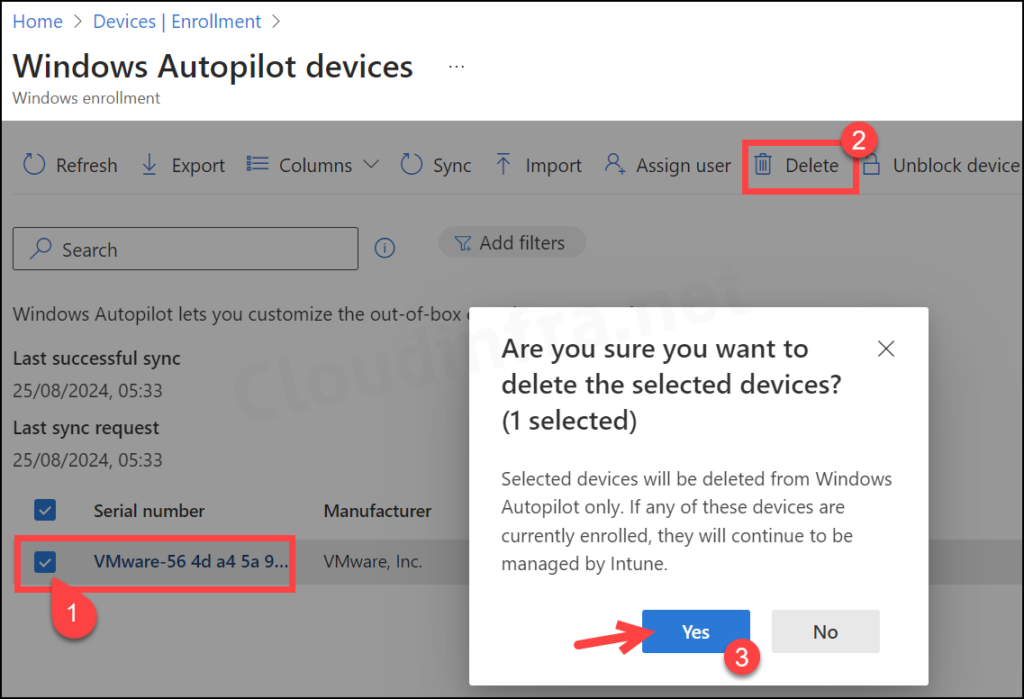
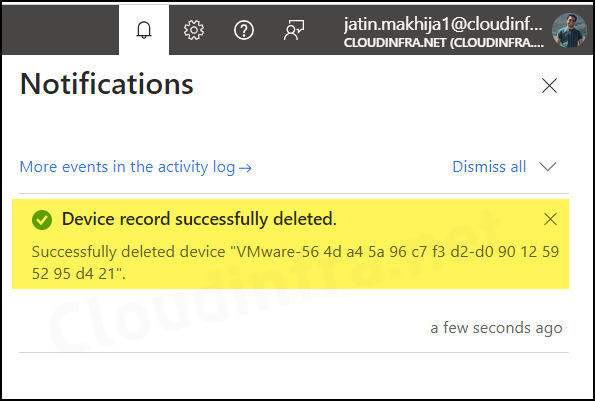
- You can find the status of record deletion in the notification center.
After the Autopilot device is Deleted
Let’s check the status of the device after it has been removed from Autopilot. We will first check on Intune admin center and then from Entra admin center.
Status of the Device on Intune admin center
After the device is removed from Autopilot, there will be no changes in the Intune admin center regarding the device. As previously noted, the device will remain Managed and Compliant.
Status of the Device on Entra admin center
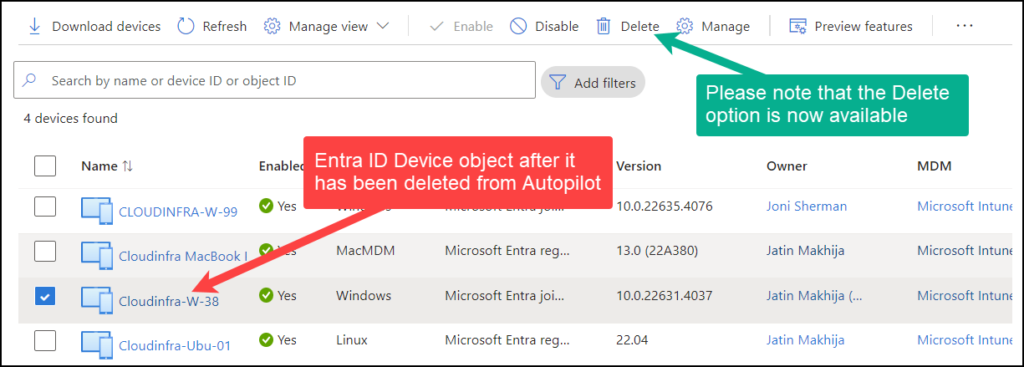
On Entra admin center, You will notice that the device icon has changed to a standard icon, replacing the Autopilot icon seen in the previous screenshot. Also, the Delete option is now available since the device is no longer managed by Autopilot.
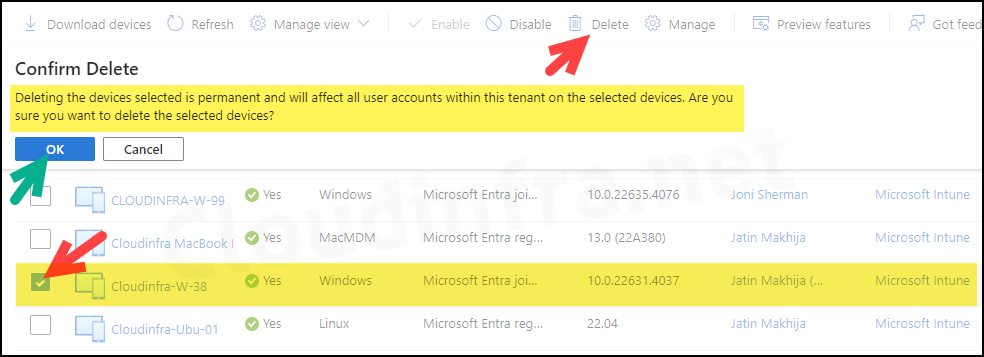
At this point, if you wish, you can delete the device object from Entra ID as well. Select the device and click the Delete button. You will be prompted to confirm the deletion.
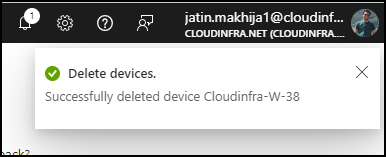
Device successfully deleted from Entra ID
Once the device has been removed from the Entra admin center, you will need to rejoin it to Entra ID to recreate its device object if you want to add it back.
Disable Autopilot devices from Entra admin center
Even if you are unable to delete an Autopilot device because the Delete button is greyed out, you will notice that the Disable option is still available. If you want to temporarily disable access for users on the device, you can select the Disable option.
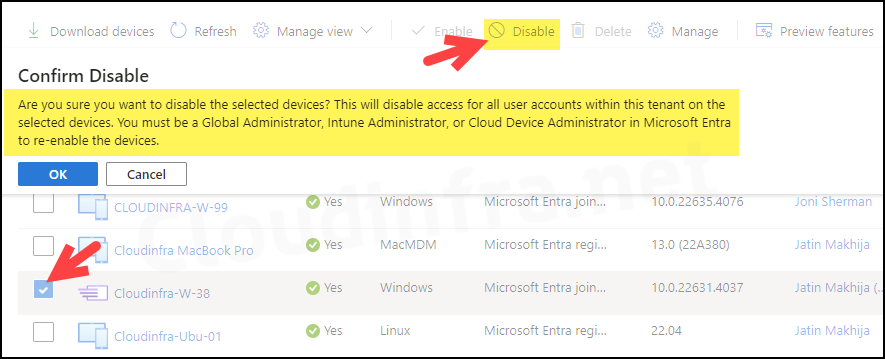
- Sign in to the Entra admin center > Devices > All Devices
- Search for the device you want to disable.
- Click on Disable option.
- You will be prompted for confirmation. Click on Ok to proceed.
You will find below warning message when you try to disable a device in Entra ID:
Are you sure you want to disable the selected devices? This will disable access to all user accounts within this tenant on the selected devices. You must be Global administrator, Intune administrator or Cloud administrator in Microsoft Entra to re-enable the devices.
More Information
- Overview of Windows Autopilot | Microsoft Learn
- Windows Autopilot FAQ | Microsoft Learn
- Windows Autopilot troubleshooting FAQ | Microsoft Learn